Deleting Records
In this article, we will go over how you can delete records from the Builder and in the Live App.
You have the option to delete records from your app using either the Knack Builder or directly from your Live App. Within the Builder, you have the flexibility to manually select specific records for deletion, perform a batch delete, or clear all records from the table.
Additionally, you have the option to empower your users by allowing them to delete individual records. This can be achieved by incorporating delete links into the views of your Live App.
Deleting Records in the Live App
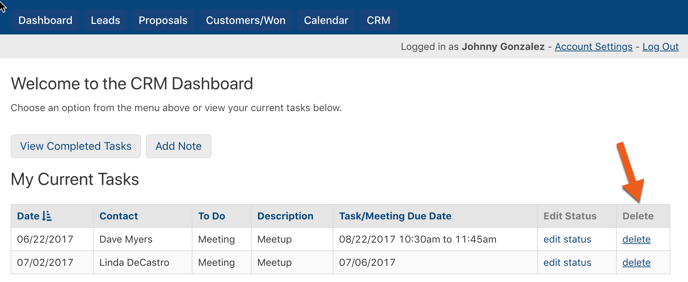
As you build your app's pages in the Builder, you have the ability to give your users the power to delete records directly from any view that displays records. By simply adding a delete link, users can delete individual records from the interface, one at a time.
Grid, Search, List, and Details Views
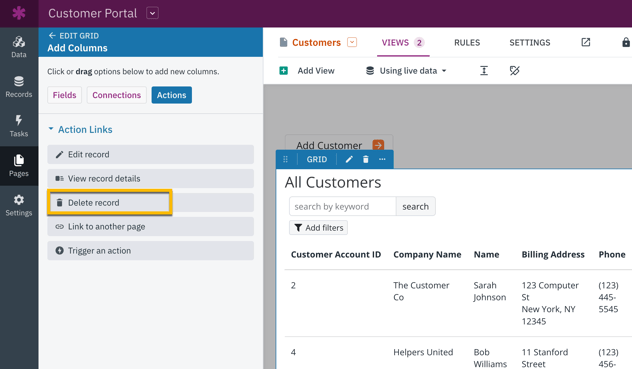
To include a delete link in a grid, search, list, or details view, simply click on the "pen" icon in the page preview to access the toolbox for editing the view. From there, select the "Add Column" option and then click on the "Actions" button to display the available action links that can be added to your view.
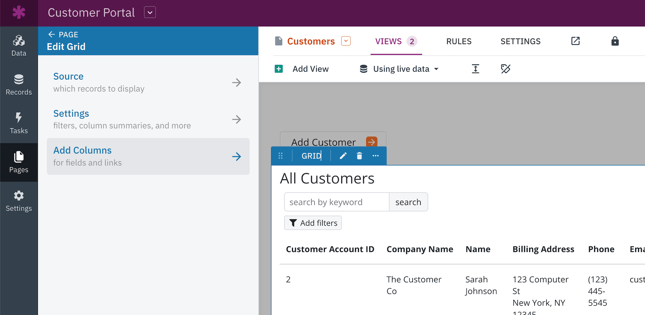
While you're in the "Actions" section, go ahead and select the "Delete record" option. By doing this, a new link will be added to your view, giving your users the ability to easily delete individual records.
Map Views
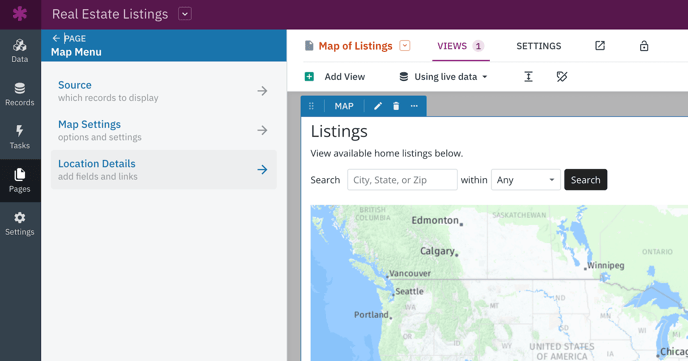
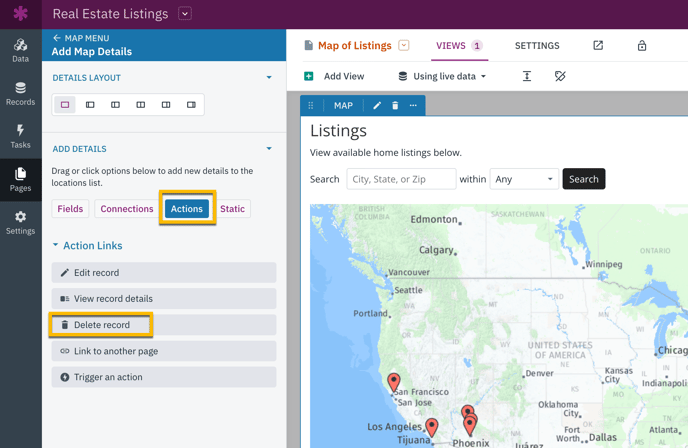
To incorporate delete links into a Map view's Location Details, simply open the toolbox to edit the view by clicking the pen icon on the view in the page preview. Within the toolbox, select the "Location List" option and then click on the "Actions" button.
This will allow you to add a delete link to the map location details in your Live App.
Calendar Views
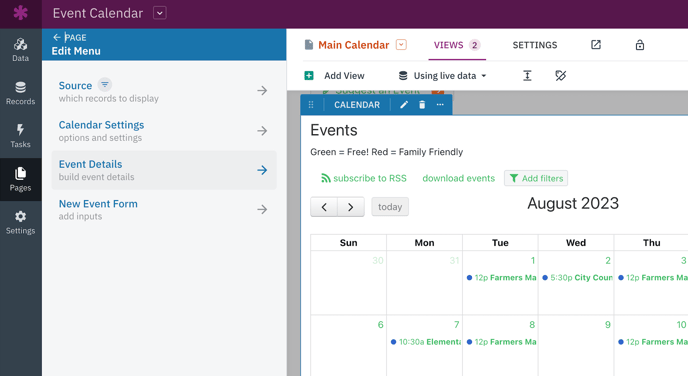
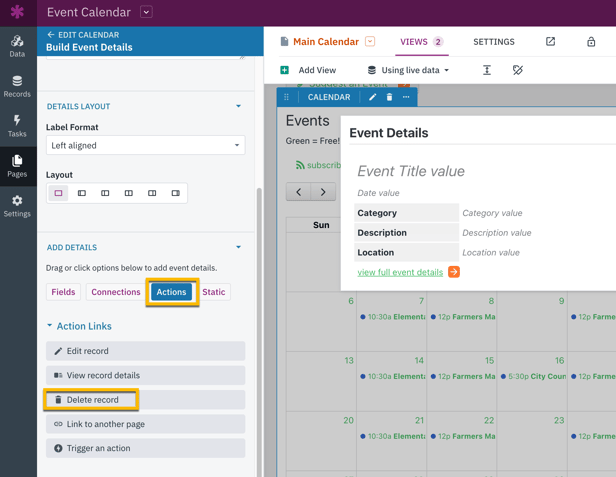
To make it easy for your users to delete individual event details on a calendar view, you can add delete links. To add a delete link to a calendar view, simply open the toolbox to edit the calendar view by clicking the pen icon on the view in the page preview.
In the toolbox, select the "Event Details" option and then click on the "Actions" button to add a delete link to individual event details in your Live App.
Deleting Records in the Builder
Within the Builder, you have the flexibility to delete records in three different ways. You can manually select specific records using checkboxes, perform a batch delete with filters, or clear all records from the table.
You'll find all three delete options when you view records for a specific table in the Records section of the Builder.
Deleting Selected Records
When you're looking at the records for a specific table in the Records section of the Builder, you have the option to delete a group of records by using the checkboxes next to each individual record.
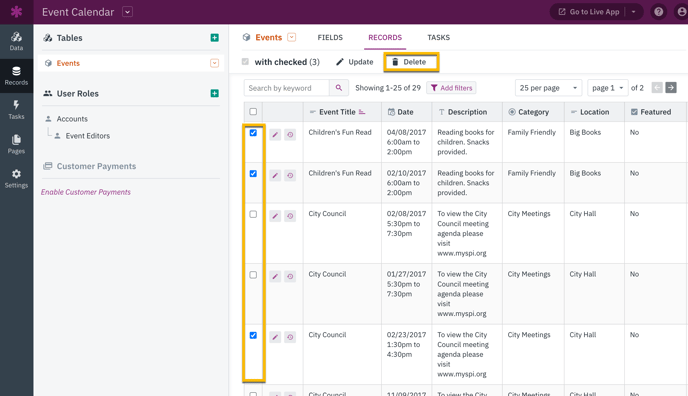
After selecting your records, simply click on the "Delete" button in the top navigation. This will prompt a confirmation modal where you can verify your intention to permanently delete these records.
Caution: After confirming the deletion, all the selected records will be automatically deleted.
Batch Deleting Records
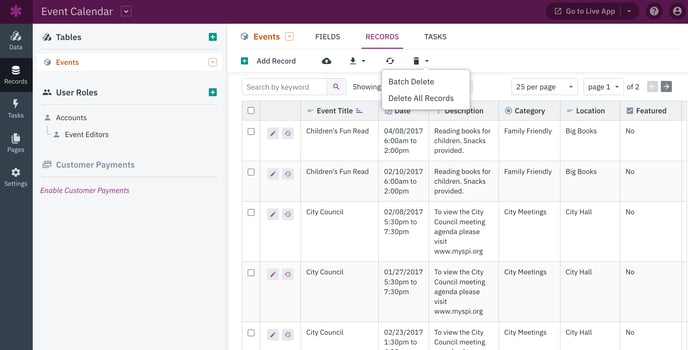
You also have the option to delete records in batches based on specific criteria. To do this, simply click on the Delete option in the Records view and select the Batch Delete option from the dropdown menu:
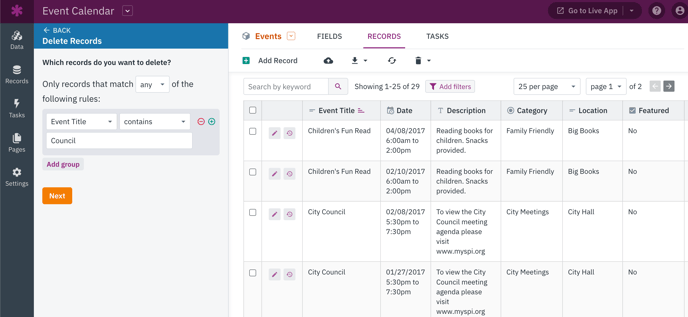
When deleting records in batches, you have the ability to add filters that will precisely determine which records will be deleted.
Clearing All Records
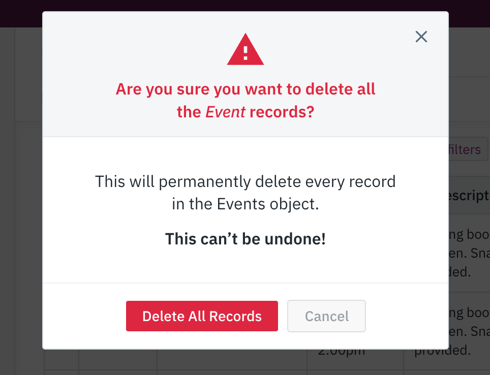
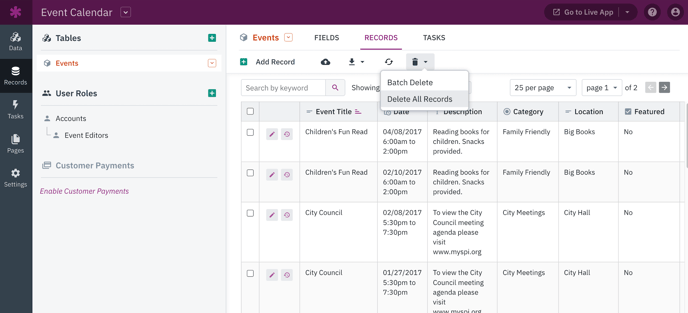
If you want to delete all records from a table in the Records section of the Builder, simply click on the "Delete" button and then select "Delete All Records" from the dropdown menu.
Caution: Once you click on "Clear Records", all records for this table will be permanently deleted. Please note that this action cannot be undone.
