Use Case
If your application includes forms for creating and updating records, you may have a requirement to track when these records are created and updated.
For this example use case, we will utilize the Event Calendar sample app. You can install this app to follow along with the steps outlined below if you are not yet prepared to incorporate it into your own applications.
Steps
1. Add a Date/Time Field to Store When the Record Was Created
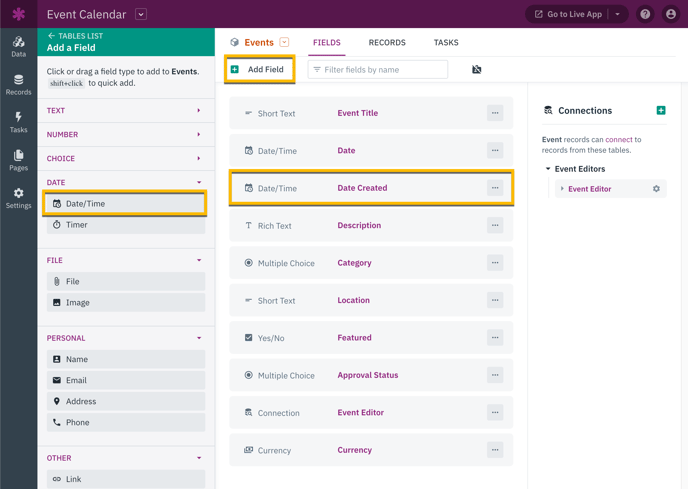
Choose the table in the Data section of the Builder that you want to track for record creation and updates. In this example, we have selected the Events table as seen in the image below.
Add a new Date/Time field using the field menu; we’ll name this field “Date Created”:
When configuring your Date/Time field, take note that this field automatically defaults to the "Current Date":
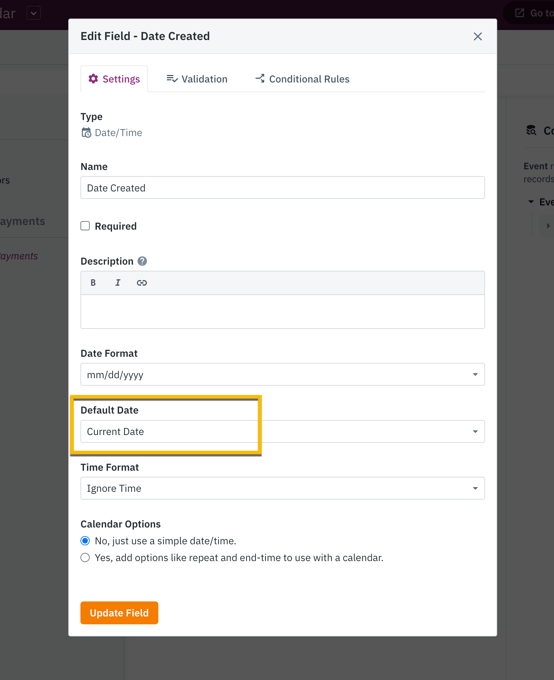
The default value is used in two ways:
-
Any form inputs will default to this value for forms that are adding new records.
-
When a new record is created, this default value will be used if a value is not provided.
When a new record is created, the value for this field will automatically default to the current date. It is important to note that this default behavior only applies if you do not include this field as an input in your forms.
Since the default value only works for new records, it ensures that the date the record was created is always stored accurately.
If you also want to track the time, select a time format in the field's settings, then select "Current Time" as the default time option.
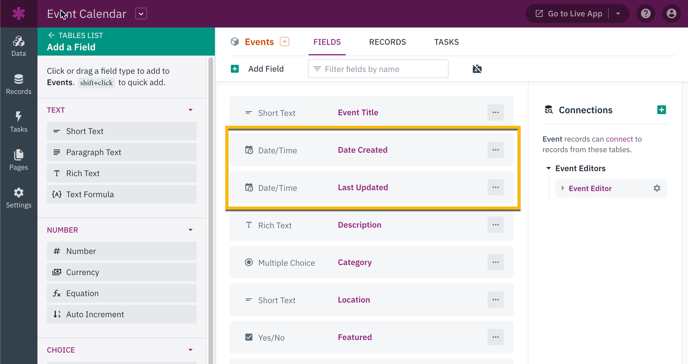
2. Add a Second Date/Time Field to Store When the Record Was Last Updated
To continue, follow the same steps as before to add another field named "Last Updated." Make sure to select the Date/Time field type and configure the settings as mentioned earlier.
3. Add a Record Rule to Set the Last Updated Value From Your Form
Thanks to the default values, the "Date Created" field will always be set on its own whenever a new record is added. Since the default is only applied on creation, however, we need to add a record rule in any form that allows a record to be edited.
Navigate to the "Pages" section in your builder and choose a page that includes a form for editing your record. Click on the form in the page view, and then access the "Rules" through the left-hand panel.
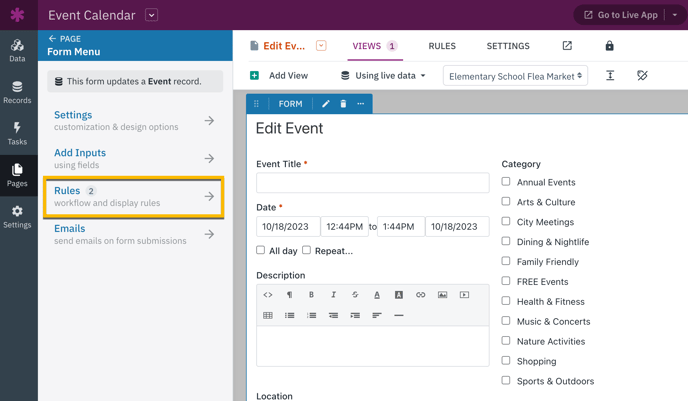
Locate the "Record Rules" tab at the bottom and proceed to add a new rule by clicking on the "Add Rule" button. This rule will be responsible for updating the record and setting the value of the "Last Updated Date" to the current date with every form submission.
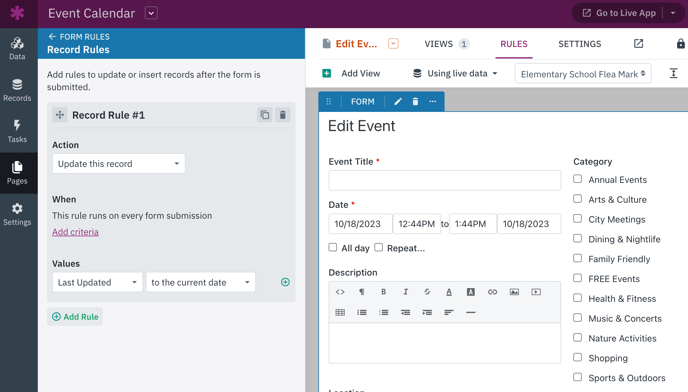
The record rule should have the following properties:
-
Action: Update this record.
-
When: Every form submission
-
Values: Set "Last Updated" to the current date
This rule will automatically update the "Last Updated" value to reflect the current date each time the form is submitted. As a result, it guarantees that the most recent date of record update is always stored.
And that concludes the process! By following these steps, you have successfully established a workflow that allows you to track the creation and last update dates of your records.
Notes:
Ensure that you follow these steps and incorporate record rules into any other edit forms where you intend to track the date of record updates.
Please note that this feature is currently limited to forms and cannot be used for making changes through inline editing on a grid.