Zapier is a service that allows you to connect third-party software to your Knack account for the purpose of automating the transfer of records between these services.
Scenario
In this example, we will insert Invoice records connected to Customer Users allowing visualization of Invoices linked to a specific Customer.
For the purposes of this example, we will use Zapier to connect Google Sheets and Knack to create our "Zap."
This “Zap” will trigger when we add a new Invoice record (a row) to a Google Sheet. Zapier will then insert this record into your Knack database, specifically the Invoice table, and connect it to a Customer User.
Requirements
-
A Customer User Role and an Invoice Table
-
A one-to-many connection between Customer and Invoice where the Customer is the parent table (one) and the Invoice is the child table (many)
-
A Zapier account
Steps
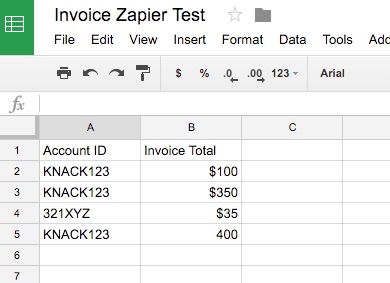
Setup Google Sheets
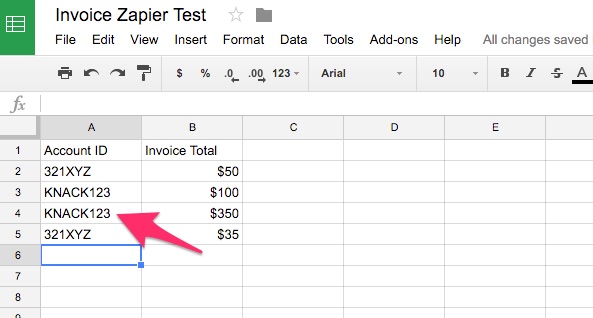
You will need a minimum of two fields (columns). An Account ID field and an Invoice Total field.
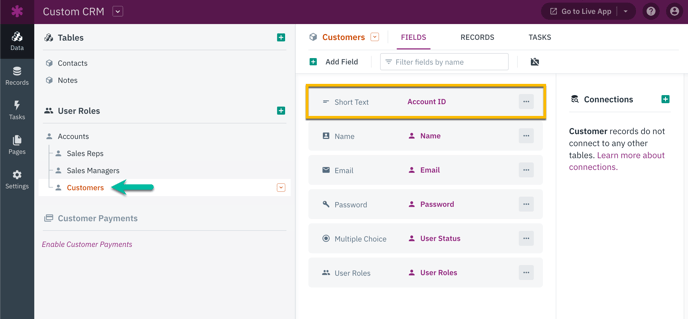
Setup Customer User Role
A short text field with an Account ID will be the easiest way to ensure records from Google Sheets will be connected to the Customer User record. Any unique field will work. However, the name field will not work.
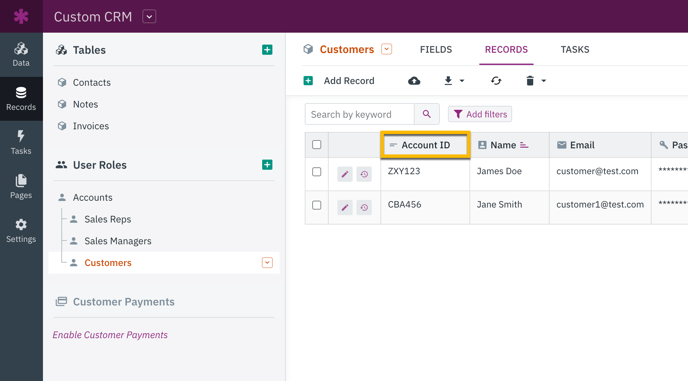
Add a short text field and name it "Account ID".
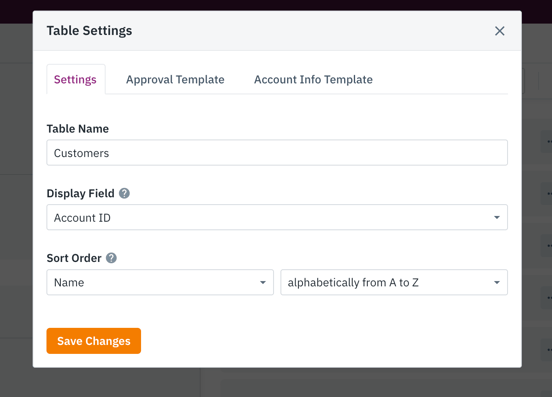
Make sure to select Account ID in the display field setting. This step is essential for establishing the connection between the Invoice records and the corresponding Customer.
To access the display field setting, navigate to the Customer's table settings:
Assign Unique IDs
In the Records tab, you will need to assign a unique Account ID number to each customer. It is crucial to ensure that the Account ID you assign matches the Account ID in your invoice records that you will be entering in the Google Sheet.
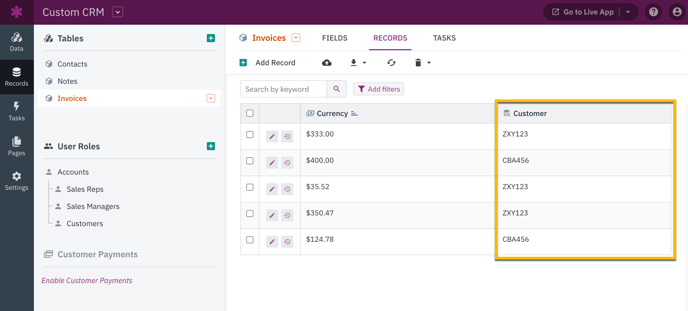
Check your Invoice table to be sure you have your connection established. The Account ID will appear in this connection field as your records are inserted from Zapier.
Setting Up Your First Zap
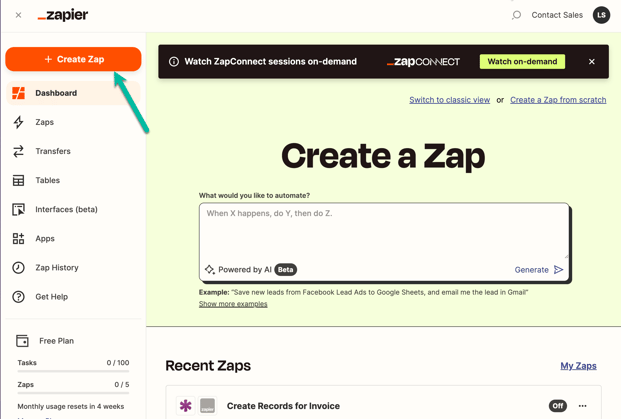
Once you have created an account at www.zapier.com, you can create your first “Zap.” In your dashboard, click “Create Zap”.
Choose Trigger App
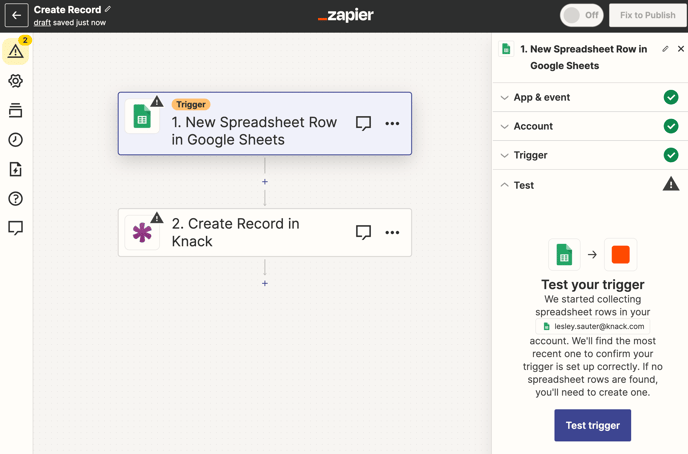
Follow the prompt to choose a trigger app. In this case for our, it will Google Sheets.
Zapier will provide step-by-step instructions to help you sign into Google Sheets, choose the correct sheet, and perform a test to ensure it functions properly.
Choose Action App
In this step, you'll be selecting Knack as the action app. Don't worry, there are just a few standard steps to follow, like selecting the action and choosing your Knack app.
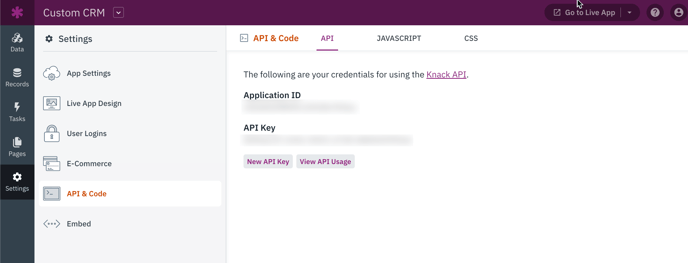
You will need your Application ID and API Key from your Knack app. This is found in the API & Code tab of the main app settings menu:
Next, you will choose “Edit Template,” in which you will choose your table. In our example, we want to choose the Invoice table.
After your selection is made, you will assign the fields from Google Sheets to match or “map” to your fields in your Knack table.
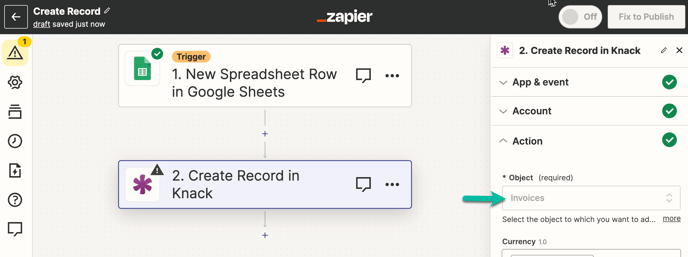
Note: The term "Object" used in the Zapier screenshot above refers to the table in your Knack app where you want the Action to add a record.
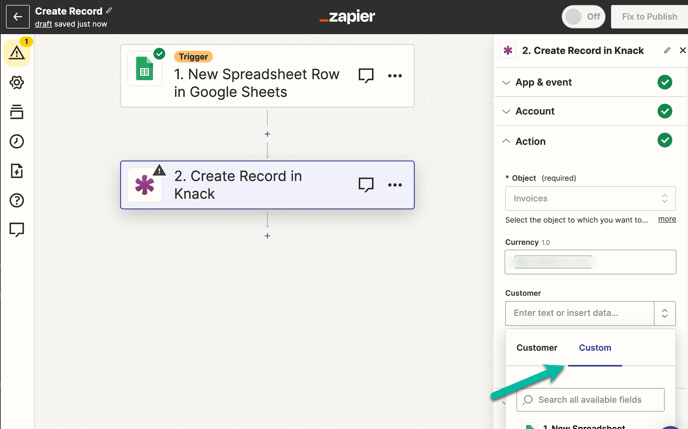
To map the Invoice field, you will need to assign the customer field. As this will be linked to a connection field in Knack, a two-step process is required.
First, in the Customer Field, set it to “Custom”. This will automatically have you select the custom row in your spreadsheet that you would like to connect to.
In the selector, choose the field for your Account ID:
After completing the setup, Zapier will guide you through a test to ensure that everything is functioning correctly. Once the test is successful, you will be able to easily add new records to Google Sheets.
Note: You should be able to see the test record in the records of your Knack table.
Confirm in Your App
Finally, you can view the Customer Details and the connected Invoice records in the app.
Notes & Troubleshooting
-
Time-out Errors: Zapier searches Knack for approximately 1 minute when (a) making a connection upon a Zap setup and (b) in downloading details from a record when running a Zap.
-
If your app is complex enough (many connections between tables and many records in those connected tables), the Zap will try to search all of these records and connection fields to make the "link" in the Zap and may not be able to do that in the time allotted.
In this case, the only workaround is to reduce the record count and/or the app complexity with connection fields so that all of this searching can be done within that time.
-
This may not be a workable option for your app. If not, using the Knack API to retrieve and insert records may be a better solution for your workflow.
-
-
-
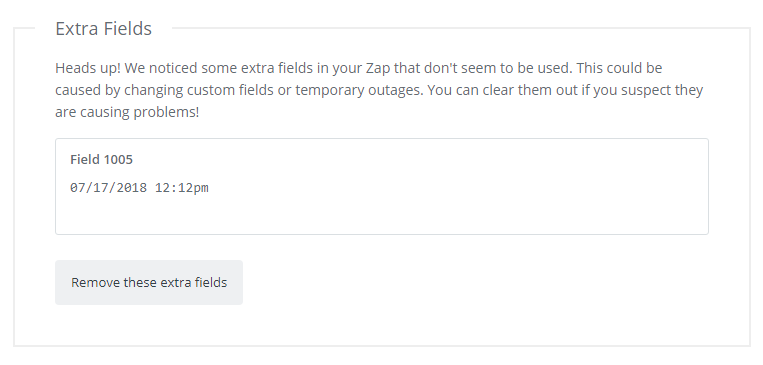
Changes to Knack Builder: If you make any changes in Knack to fields (deleting fields and re-adding them under new names, changing field types, etc.), make sure to select "Refresh fields" in your Zap so that these fields can be reconnected properly. You may find that you get a message such as the one below that will help clear up any data corruption issues when importing into Knack.