Requirements
For this example, we will be using a Purchase Order app, however, you can apply this to any app use case.
For this scenario, you will need these three fields in the same table:
-
An auto increment field
-
An equation field
Tip: You can learn more on adding and managing fields here.
Use Case
You want to begin the count in an auto increment field from a number other than 1.
Knack users often already have record ID numbers stored in an existing database or spreadsheet and would like to use the next ID number in sequence.
In this example, we want to add new Purchase Order IDs in sequence from the last number we have on file. We’ll use 3500 in this example.
Steps
Confirm that You Have an Auto Increment Field in Your Table
Before we set up our other field, we need to have an auto increment field in your table. Double-check that you have an auto increment field in the Data section of the Builder while viewing your table.
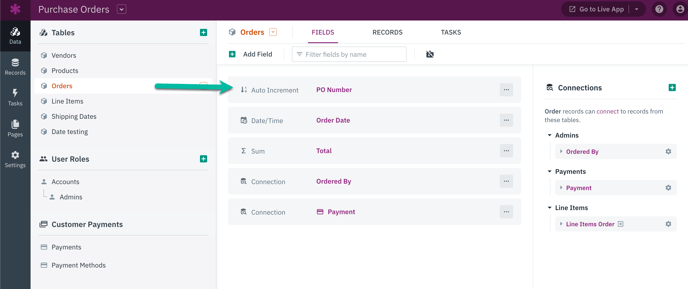
If you don't have one yet, use the "Add Field" button to add a new auto increment field.
Set Up Your Equation Field
Now that you have an auto increment field in your table, you can set up your equation field.
While viewing your table in the Data section of the Builder, click on the equation field to open the field settings.
In the Equation Editor, add the number you want to start your auto increment field at, in this case, we want to start at 3500. Then, add a "+" and from the field's dropdown, select the auto increment field. In this case, our auto increment field is named "Auto Increment".
Your equation will look like this:
3500 + {Name of Auto Increment Field}
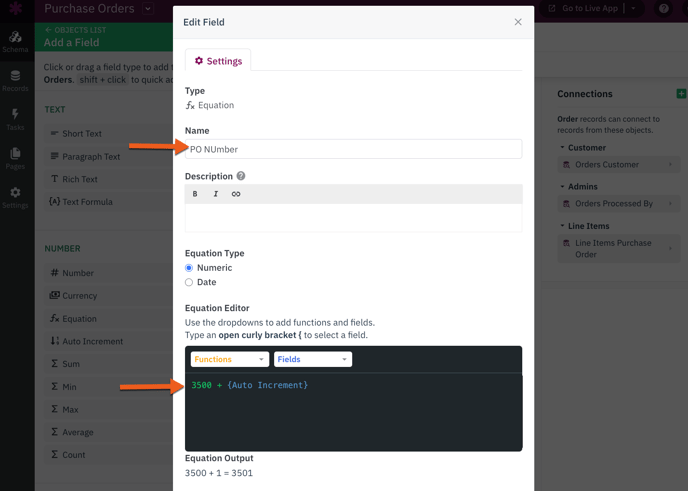
Next, name the equation field "PO Number" and click the "Update Field" button to save the equation field changes.
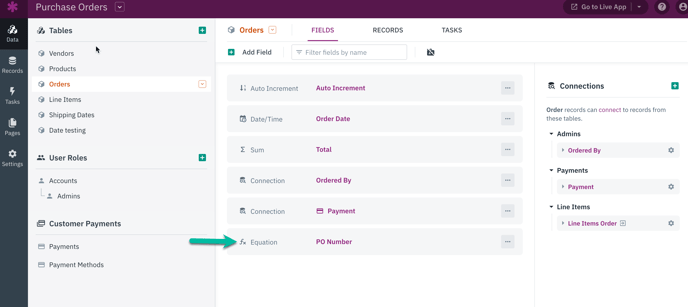
Update Views to Use the Equation Field
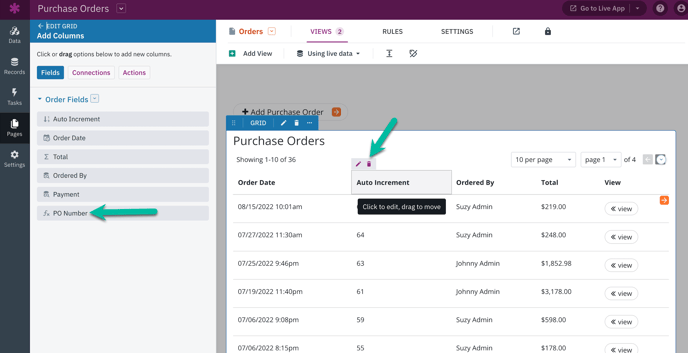
Once you’ve added and updated the equation field, this will be the field you use to display your ID number throughout your app. You will need to update your views to display your new equation field rather than your auto increment field:
Verify the Equation Field in Records
After you have added your equation field, you can verify new Purchase Order records in the Records tab of your Purchase Order table.
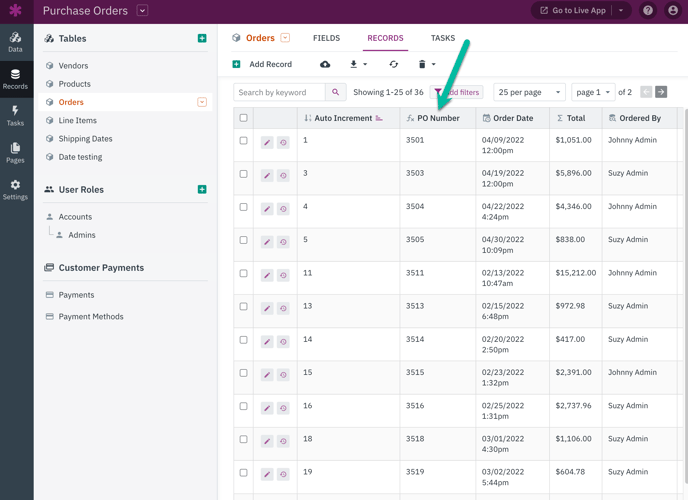
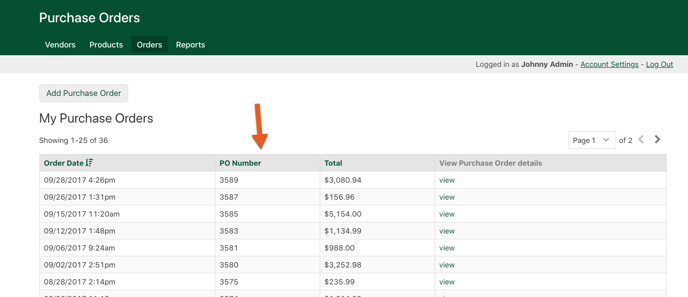
You can also view the new PO Number values in your app:
Notes
What if I need to add a prefix to my auto increment or ID fields
If you need to add a prefix to your auto increment field or ID field, this is possible using text formula fields.
Text formula fields are used to concatenate other field values and/or custom values. For example, a text formula adding a prefix may look like:
PO: {Auto increment field name}
This would insert "PO" before the values in the auto increment field producing an output like:
PO: 3500.
Tip: You can learn more about using text formulas here.