This article covers the following topics:
What are field types?
Fields are used to define specific attributes of a table. Knack offers a wide variety of field types each with its own unique behavior and options.
Becoming familiar with the types of fields at your disposal will enable you to get the most out of Knack. For example, storing multi-part data like a date or a full name in a field of its own type will let you sort that data or extract individual parts of it (via equations or text formulas) down the road.
Text Fields
Short Text
Short Text fields are used for text characters and do not require any special formatting. They are used for titles, names of places or things, and other information which only requires a few words.
/Field%20Types/fieldtypes1.png?hsLang=en)
Settings:
-
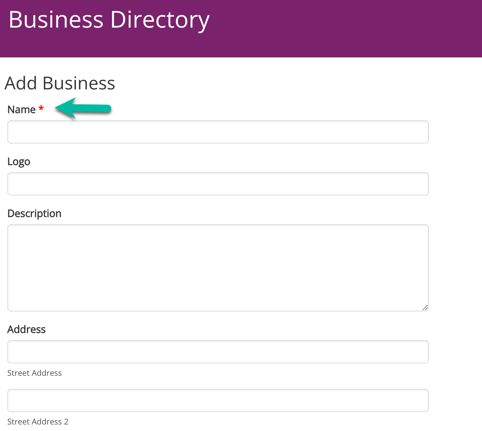
Required: If checked, this field must have a value before a record can be added or updated. Fields set to "Required" will have a red asterisk next to it:
-
Must be unique: Setting to "Yes" means the value for this field must be unique; no other records can have the same value.
-
Default Value: This value will be used by default if no value is entered. This value will also be used to populate any forms used to add a new record.
-
Description: This allows you to input a description for the field. Descriptions will show up as tooltips in record columns and when adding fields.
Note: Short Text fields do not have a character limit.
Paragraph Text
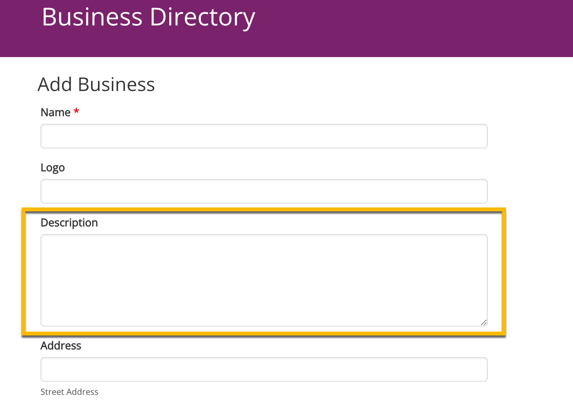
Paragraph Text fields are used for longer text that might need multiple sentences and paragraphs.
Note: Paragraph text fields do not have a character limit.
Settings:
The same settings as Short Text and Rich Text field types apply to Paragraph Text fields.
/Field%20Types/fieldstypes2.png?hsLang=en)
Example:
Tip: When Paragraph Text fields are used in a Grid view, options to truncate the text displayed at a character limit you set is available.
Rich Text
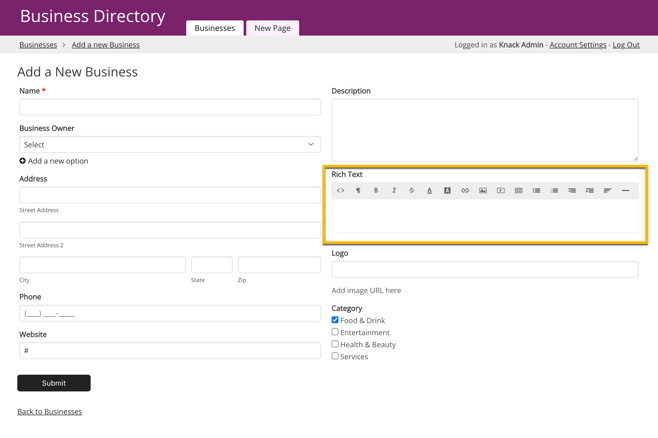
Rich Text fields are used when you need to add more rich formatting and HTML to text. When edited, a rich text field will have a WYSIWYG interface for formatting the text with styles like bold, bullets, and more.
Settings:
The same settings as Short Text and Paragraph Text field types apply to Rich Text fields.
/Field%20Types/fieldtypes3.png?hsLang=en)
Example:
Additional Information:
-
Rich Text fields have a limitation of just over 30,000 bytes of information.
-
Bytes roughly convert 1:1 to character count with the exception of character-based languages.
-
Character-based language characters must be converted with UTF-8 encoding and this conversion uses anywhere from 2-4 bytes. Inserting more information than this limitation will result in an "undefined" error when trying to add or update the record.
Text Formula
Text formulas are used to combine data from multiple fields and to extract data from individual fields.
Tip: See the Text Formulas article for more information.
Number Fields
Number
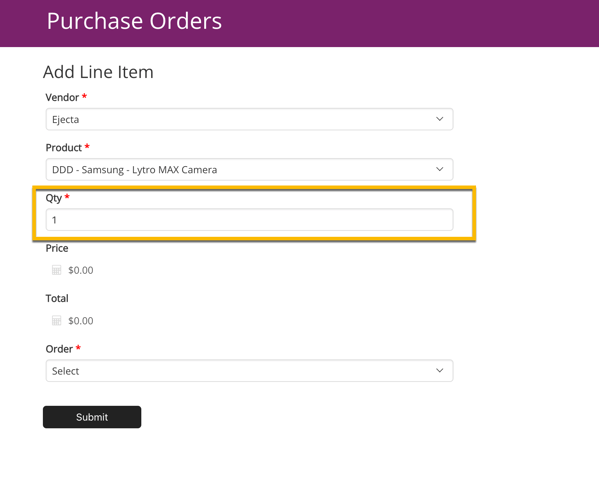
Number fields are used for values that are added, counted, or measured. Values can include (or not include) decimal places and formatting of your choosing.
Settings:
/Field%20Types/fieldtypes4.png?hsLang=en)
-
Decimal places: A number of decimal places to include when displaying the number. This does not affect how the numbers are stored in the database - only how they are displayed. If the stored number has more decimal places than this option, the displayed number will be rounded.
-
Thousands: You can choose none, comma, period, or space to separate thousands in large numbers. For example, if you choose "comma", "80000" would display as "80,000".
Note: Currently, if you set the Thousands Delimiter to "Period", you also must set the Decimals to "Comma" even if your field does not have decimals. The decimal places will equal zero in this setup.
-
Format: Whether to format your number with currency letters or your own custom before and after the text.
-
Default Value: This value will be used by default if no value is entered. This value will also be used to populate any forms used to add a new record.
Tip: A number field "allows" non-digit characters to be entered, but converts them to zeros upon submission. If you need to add validation to avoid this scenario, you can see our conversation in this forum post.
Example:
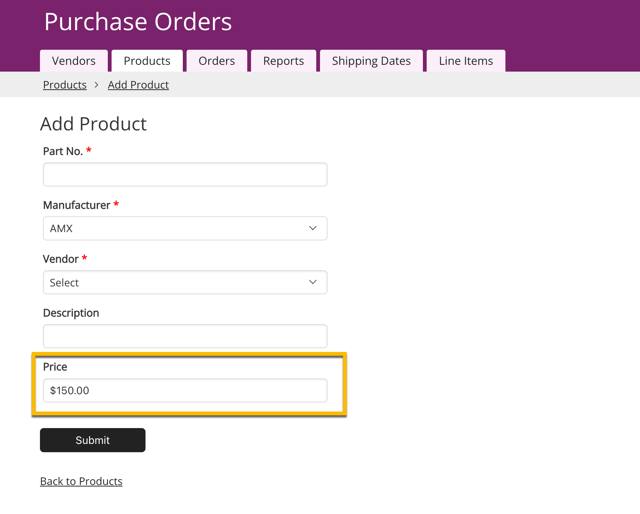
Currency
Currency fields are like Number fields, but with a currency symbol and formats for decimals and commas automatically included.
Settings:
/Field%20Types/fieldtypes5.png?hsLang=en)
-
Format: The type of currency used to format each number. If you need to use a custom currency symbol, use a Number field instead (see above).
-
Default Value: This value will be used by default if no value is entered. This value will also be used to populate any forms used to add a new record.
Example:
Equations
Equation fields are used to perform calculations with your data.
Tip: See our article on equations for more information.
Formulas
Formula fields are used to run calculations on connected records and store the total of that calculation. With Formula fields, you can calculate the sum, min, max, average, and count.
Examples:
-
Order Total: An Order record sums the prices of all the Item records connected to that Order.
-
Average Sale: A Salesperson record averages the total of all the Sales records connected to that Salesperson.
-
Employee Count: A Company record counts all the Employee records connected to that Company.
Note: See our article on formulas for more information.
Auto Increment
Auto increment fields are used to give each record a unique ID by starting at one (1) and adding one for each new record. If you'd like to start with a number different than "1", check out the How To Start an Auto Increment Field from Any Number article.
Notes:
Auto increment fields are unique, ascending, and immutable. The number may not be sequential.
For example, if three records have the IDs of “1”, “2”, and “3”, and the record with the value of “3” is deleted, the next record created is expected to have the ID of “4”. The ID of “3” will not be reused.
Settings:
There are no settings for an auto increment field except for the Description:
/Field%20Types/fieldtypes6.png?hsLang=en)
Note: Auto increment numbers can not be manually edited, and therefore, cannot be added to forms.
To reset an auto increment field, you need to use the "Delete All Records" option in the Records section:
/Field%20Types/fieldtypes7.png?hsLang=en)
Caution: Deleting all records will permanently delete all of the records in the table.
Choice Fields
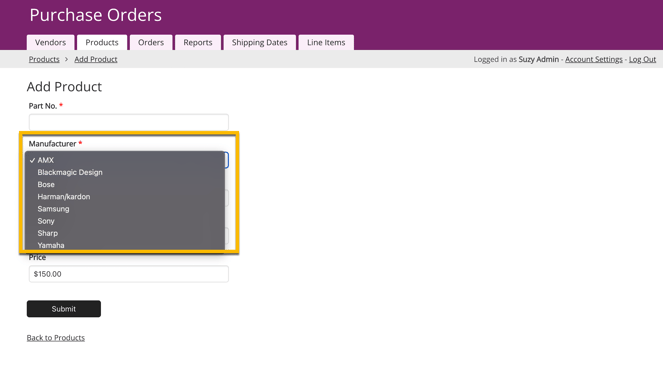
Multiple Choice
Multiple Choice fields are used when you want to present a group of options to select from.
Settings:
/Field%20Types/fieldtypes8.png?hsLang=en)
-
Options: This lists all choices available to be selected. Use the "x" and "+" icons to remove or add options.
-
-
Click and drag options to rearrange the order in which they appear. The "quick edit" link allows you to add many multiple-choice options through typing or cut and paste.
-
Notes:
- Dropdown fields will display in the order listed in this field setup. Some views, such as pivot table columns, do not allow for the reordering of these columns outside of alphanumeric.
- Updating an existing multiple choice option will not update records to the new value. If you need to update an existing value that's already being used, it's best to add the new value independently and run a batch update to update the old values to the new values.
-
Default Option: The choice which will be selected by default on your forms.
-
Sort: This option will define how the multiple choice field will be sorted.
-
Alphabetically will sort the multiple choice options in alphabetical order.
-
Custom will allow you to customize the sort order by dragging and dropping the different options in the Options section of the field settings.
-
-
Blank Text: The text your users see when they need to select a value on a form (if your forms show this field as a dropdown).
-
Layout: Determines how the choices will be presented in a form. The Dropdown - One Selection and Radio Buttons options only allow for a single selection, while Dropdown - Multiple Selections and Check Boxes allow for multiple options to be selected.
Tip: When using filters in Multiple Choice fields with special characters in your options such as (), [], etc., a "contains" filter will not return results. In this case, you'll need to use an "is" filter instead.
Example:
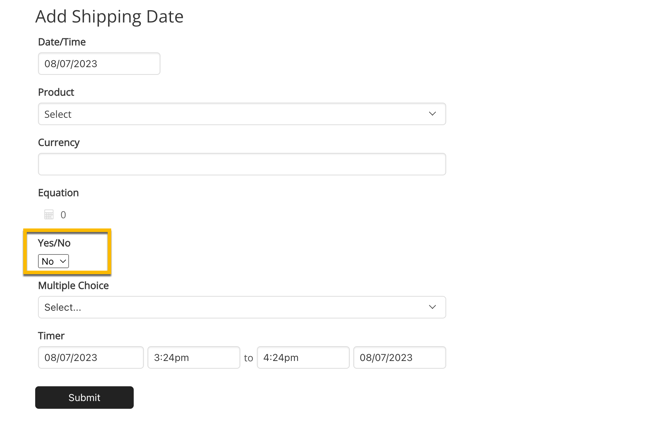
Yes/No
Yes/No field are used for fields where you simply want to differentiate between a true or false value.
Settings:
/Field%20Types/fieldtypes9.png?hsLang=en)
-
Labels: Other options for "Yes" and “No” labels, such as, “On/Off” and "True/False”.
-
Default: The default value for either "Yes" or "No".
-
Require Yes: Forms including this field cannot be submitted until the value is "Yes" (or “True” or “On”).
-
Input: How this field will appear on forms.
Example:
Tip: If you have a default set on a Yes/No field, and you add a conditional rule, you still must add a "every record rule" that matches your default. Otherwise, the value will always match the conditional rule (and never be set to the default).
Date/Time Fields
Date/Time
Date/Time fields are used for storing dates, times, or both.
Settings:
/Field%20Types/fieldtypes10.png?hsLang=en)
-
Date Format: this determines how dates will be formatted. Here are examples for the date of July 4th, 2013:
-
mm/dd/yyyy: 07/04/2013
-
M D, yyyy: July 4th, 2013
-
dd/mm/yyyy: 04/07/2013
-
Ignore Date: no date will be displayed
-
-
Time Format: How times are formatted
-
Calendar Options: This will enable advanced calendar options like "All Day" events and repeating events.
-
Default Date (Time): The default date/time with which your forms are pre-populated (and when adding records via any other method, such as, adding them manually in the Builder):
-
None: Blank
-
Current Date (Time): The current date/time
-
Specific Date (Time): A date/time of your choosing
-
Example: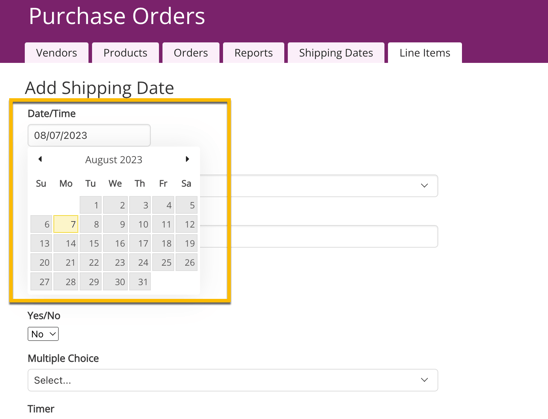
Tips:
- If you'd like to provide detailed filters by time, you can choose "Ignore Date" on your Date/Time field. Then, on both the Builder and Live App, additional time filter options will be available.
- Using an Equation field (found under the Number field category), you can perform Date Equations to calculate additional dates from the original.
Additional Information:
- If you're filtering by Date/Time fields, these phrases are defined by the following:
- "is during the current week": Sunday, 12:00am - Saturday, 11:59pm, of the week where the defined date falls.
- "is during the previous week": Sunday, 12:00am - Saturday, 11:59pm, of the week prior to where the defined date falls.
Similar logic can be applied to "is during the current day", "is during the current month", or "is during the current year".
- Date/Time input fields (both in the Builder and the Live App) are set to reflect the local time zone of the user by default. After the date/time value is submitted to our servers, it is then interpreted according to the time zone of the application (in the settings of the app).
- For instance, if you are located in the Eastern Time (ET) zone, but your application is configured to Pacific Time (PT), and the current time is 9:30 AM ET / 6:30 AM PT, when you create a new record (either in the Builder or Live App), the input field will default to 9:30 AM. This value will be stored in the database as 9:30 AM PT, reflecting a difference of three hours ahead.
Timer
Timer fields are used to track a time duration, most often for tracking hours.
Settings:
/Field%20Types/fieldtypes11.png?hsLang=en)
Date Format: This setting will be for how dates will be formatted. Here are examples for the date of July 4th, 2017:
-
-
mm/dd/yyyy: 06/04/2017
-
M D, yyyy: July 4th, 2017
-
dd/mm/yyyy: 04/06/2017
-
Ignore Date: no date will be displayed
-
-
Time Format: How times will be formatted
-
Minutes Format: is to set how many minutes by which to separate each option for the time. This only applies to the dropdown options shown. It does not round the time to these increments, nor does it restrict the time entered to these increments.
-
Total Format: is to set what the total time will be calculated as when used in Equations and Formulas. Available formats are:
-
From-To (presents a range)
-
Seconds
-
Minutes
-
Hours
-
Days
-
Weeks
-
Example:
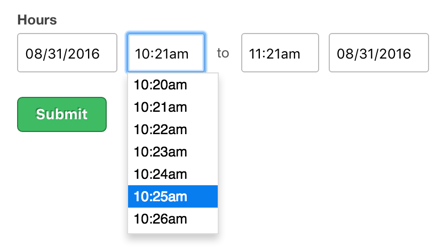
Note: The default Start time is the current date/time, and the default End time is current date/+1 hour. JavaScript code could be used to edit these defaults.
File Fields
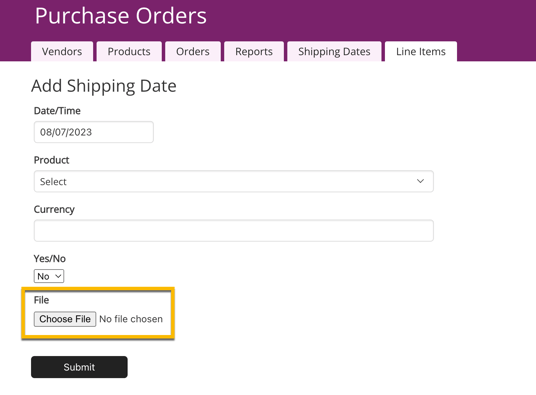
Files fields are used to add files and attachments through forms that can then be downloaded by your users.
Settings
/Field%20Types/fieldtypes12.png?hsLang=en)
-
Secure Setting
This setting uses private, temporary links instead of public URLs to provide better protection against unauthorized access.
How it works:
- Secured Files: When a file is downloaded, a private, temporary link is created that expires automatically
- Non-Secured Files: When a file is downloaded, the link created is a predictable, permanent URL that anyone can access if they know or guess the link
Security benefits of Secured Files:
- Not publicly accessible: Files won't be hosted on public servers or indexed by search engines
- Harder to guess: Links use complex, unpredictable URLs instead of predictable patterns
- Automatic expiration: Links expire automatically, limiting long-term exposure
- No login required: Recipients can still access files via email without logging into the Live App, but only through the secure link
When changing this setting:
- Turning OFF Secured Files: Files will become publicly accessible using standard URLs that don't expire
- Turning ON Secured Files: Files will use private, temporary links for better security
- Important: Changing this setting generates new file download links and permanently breaks all existing links that have been shared. The files themselves remain unchanged.
When Secure Files is set to No:
- Files become publicly accessible and may be indexed by search engines, or used as training data for AI models which scrape the internet
- Anyone who guesses or finds your file URLs can access them
- Links never expire, creating permanent access points
- Files may be easier to discover accidentally
Recommendation: Enable Secure setting for better file security while maintaining easy sharing via email.
-
Secure: Setting this option to "Yes" is highly recommended as it provides protection for your files, and any future enhancements to File fields will respect the secure setting.
Note: Files uploaded to a field with the secure setting set to yes allow the file to be shared via a link in emails without requiring someone to log into the Live App.
Example:
Notes:
- There is a file size limit of 250MB per uploaded file. If you're running into any difficulty uploading a file, first check if your file size is larger than this.
-
Asset uploads should only ever be connected to individual fields.
Knack does not support the same asset file (representing one file upload) to be connected to more than one field. It is okay to have the same file/image for different fields/records but these will be different copies of the same asset file.
If you wish to upload the same file and connect it to multiple fields, you must re-upload the file for each field you wish to connect the file to.
Image
Image fields are used to upload and display images. You can also create thumbnail versions of the image to display where needed.
Settings:
/Field%20Types/fieldtypes13.png?hsLang=en)
-
Image Source: Determines where the image files are stored.
-
Upload image files: Users will upload image files, and they will be stored on your Knack account and count toward your asset storage limit. The uploaded image will be given a URL that can be accessed externally of Knack. As such, it is not recommended to upload images with any sensitive information to an image field.
-
Load images from external URL: The user will add a link (URL) to where the image is already uploaded and stored. These images will not count toward your asset storage limit. The source image of this URL can be updated without being updated in Knack.
-
-
Resize Image: If checked, this will automatically resize images on upload.
-
Web friendly: resizes the image to a web-friendly size with a maximum width and height of 1500px
-
Custom: allows you to define a custom width and height
-
-
Thumbnails: Thumbnails, smaller versions of an image, can be generated automatically for you to display throughout your apps. After clicking Add Thumbnail, you can use the "+ " and "-" buttons to add or remove further thumbnails. There are three types of thumbnails:
-
Resize by percentage: The thumbnail will be resized by the percentage and maintain its ratio.
-
Resize by pixel: The thumbnail will be resized based on the max width or the max height, whichever applies first to the image. The other dimension will then scale to maintain the correct ratio.
-
Resize to square: The thumbnail will be resized to a square. If the original image is not a square ratio, then the larger dimension will be cropped to create a square.
-
Additional Information:
-
To display a Google Drive image, ensure that the URL follows this format:
-
https://drive.google.com/thumbnail?id=YourFileID
-
-
Images must be resized using a thumbnail in order to display as a smaller size in your app. CSS code could be used to edit this as well.
-
Image Indexing: If you include images in a Live App page where there is not a login required, the images can be found and indexed by Search Engines. To prevent unwanted exposure, make sure that your images are only displayed on pages that require a login.
-
If you choose the "Load images from an external URL" for your image type, these images do not store an actual thumbnail image. These thumbnails are dynamically generated on the page load where the image thumbnail is displayed. This means that if this option is chosen, thumbnail images downloaded or accessed with an API call will be returned in full size.
-
Images uploaded to an Image field will be accessible outside of Knack. Following a direct link to an image will not require any authentication to view the image.
Note: It is recommended to use a File field, set as secure, to upload images to if your images will contain sensitive information.
Personal Fields
Person
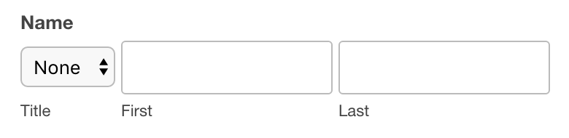
Person fields are used to combine name elements like Title, First Name, and Last Name into one convenient field for entering and displaying names.
Settings:
/Field%20Types/fieldtypesfourteen.png?hsLang=en)
-
Display Format: Names can be formatted with various options which can include a title.
Example:
Notes:
Person fields are sorted alphabetically only by the last name. For example, if the format of "Last, First" is chosen, it only sorts by last name and first names are displayed in random order after the alphabetical last names.
If you need to sort alphabetically by the first name as well, you could extract the first name with a text formula field, or create a short text field separately for first and last names.
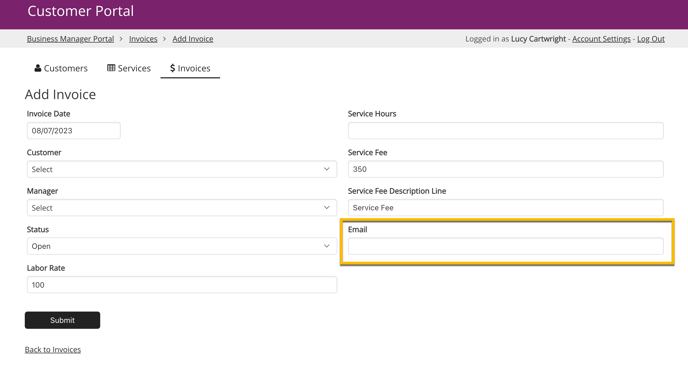
Email fields are used to store email addresses. A link will automatically be created to send an email.
Settings:
/Field%20Types/fieldtypes15.png?hsLang=en)
-
Email Text Format: The text that will be clicked to open the link to send an email to this address:
-
Use this email address: The full email address will display as a link.
-
Use the same text for all emails: Use the same text that every record will use as the email address.
-
Use unique text for each email: Add unique text for each record to use as the email.
-
Example:
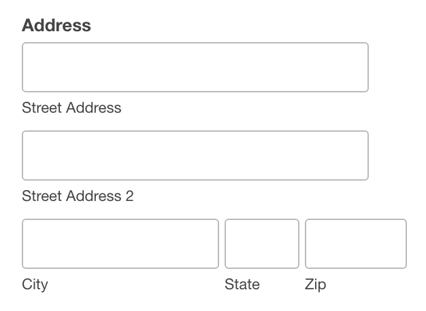
Address
Address fields are used to combine fields like Street and City into one convenient field for entering and displaying address data.
Settings:
/Field%20Types/fieldstypes16.png?hsLang=en)
-
Address Autocomplete: Address Autocomplete uses Google’s autocomplete functionality to provide suggested addresses nearest to you as you type. To enable this feature, check the “Address Autocomplete” checkbox from the address field’s settings.
-
This feature is available on Pro and above plans. Once enabled, this is available when adding or editing records in the Builder or the Live App, and on the search on a Map view.
-
Note: If you're using Google as your map provider, you will need to enable the "Places API" module under your Google Maps setup, and be responsible for any usage charges.
-
Geospatial Options: The "Geocode Records" setting allows an Address field's record value to be geocoded for display on a Map view or to be searched with the “is near (a zip code)” filter. Geocoding takes the description of a place, such as, a location's latitude/longitude coordinates or its address, and maps it to a real location on the earth's surface.
-
Format:
-
U.S.: U.S. format of City, State, Zip.
-
International: International format of city, province/region, and postal code.
-
International with country: Same as above for international, but with the country as well.
-
Input: Add address data either with full addresses or with latitude/longitude coordinates.
Additional Information:
-
-
Address Autocomplete is available for U.S., international, and international (with country) formats. It is not available with the latitude/longitude Input type.
-
Address autocompletion completes the address, city, province/region, and postal code if available.
-
If you're using Google as your map provider, you will need to enable the "Places API" module under your Google Maps setup, and be responsible for any usage charges. You can learn more about this in the App Settings: Map Provider article.
-
When using the latitude/longitude coordinates input, that location will display as the nearest street address on a map view rather than the exact coordinates.
- In the Builder and Live App, we are investigating an issue where address fields using address auto-complete and with the format of "International (with country)", are not populating the province/region field correctly for some addresses located in New Zealand, Australia, Belgium, Taiwan, and Spain.
- Address fields with lat/long format and geo-coding enabled may contain coordinates without a land address (e.g., ocean locations). These values are stored but not displayed in the UI. "Is blank" filter includes these fields. To view stored lat/long values, disable geo-coding.
Example:
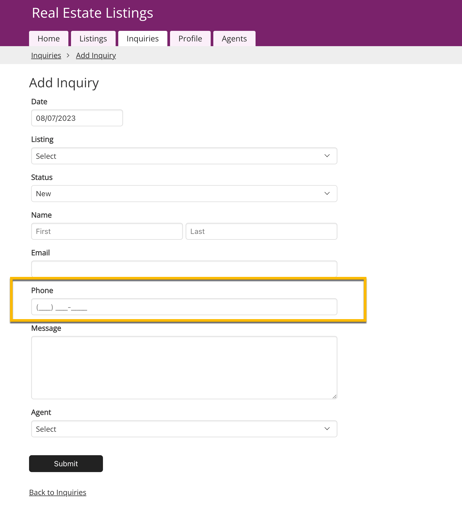
Phone
Phone fields are used to display numbers in phone formats and a link will automatically be created to call the number in mobile devices wherever field data is displayed.
Settings:
/Field%20Types/fieldtypes23.png?hsLang=en)
-
Format: Choose from various U.S and international options including the "Any" option that supports any other format not included.
-
Include extension: Allow users to include extensions when adding or editing phone numbers.
Example:
Other Fields
Link
Link fields are used to display URLs that link to any website.
Settings:
/Field%20Types/fieldtypes18.png?hsLang=en)
-
Default value: This value will be used by default if no value is entered. This value will also be used to populate any forms used to add a new record.
-
Link Text Format: Controls the text that will be clicked on to open the link:
-
Use the URL: The full URL will display as the link.
-
Use the same text for all links: Add the same text that every record will use as the link.
-
Use unique text for each link: Add unique text for each record to use as the link.
-
-
Open in new window: Use this setting if you would like all links to open in a new window.
Example: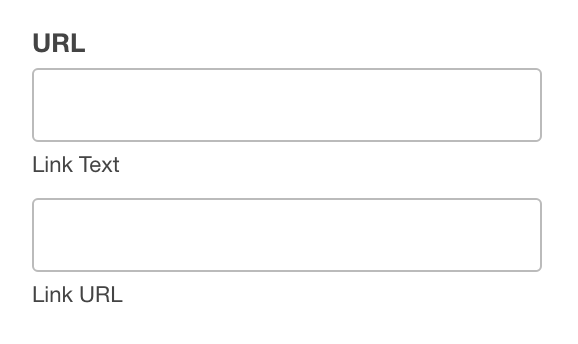
Signature
The Signature field enables users to add their signature with their finger or mouse.
Settings:
/Field%20Types/fieldtypes22.png?hsLang=en)
Signature fields only have the common "Required" and "Description" settings that are available in other field types and do not have any unique settings.
Example:
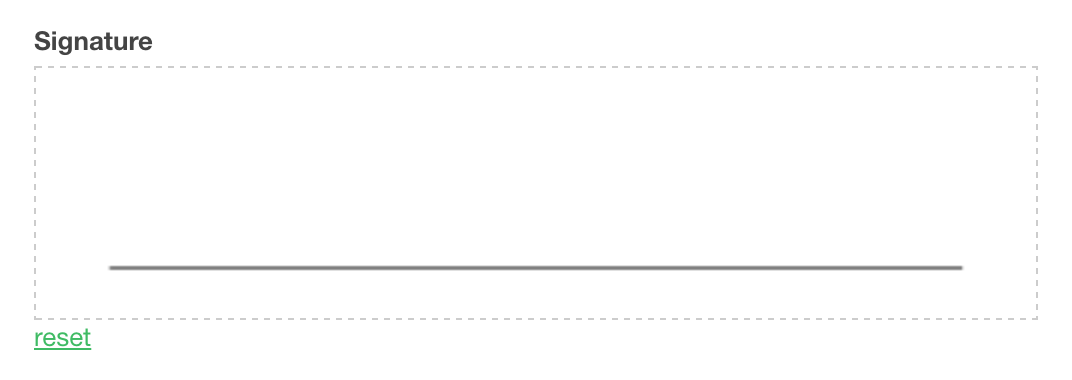
Note: Certain email clients do not display signature fields in the form notification email even if a placeholder for the field is placed in the email. Microsoft Email Exchange and Gmail are email clients that we know do not play nice with signature fields.
Rating
Rating fields are used to add ratings using a star system.
Settings:
/Field%20Types/fieldtypes20.png?hsLang=en)
- Allow half stars: Determines whether the user can add ratings in half-star increments.
- Number of stars: Set the maximum number of stars that can be used for a rating.
Example:

Note: When updating a Rating field in the Builder or Live App, you will see a "Cancel" icon to the left of the stars. This cancels the entire rating and this icon does not appear in the form editor.
Connection
Connection fields allow you to connect to records in other tables. This unlocks the ability to show relationships in your app, like a user's assigned tasks or a customer's order.
Tip: You can learn more on using connections in your app here.