This article covers the following topics:
What is a connection?
Many apps require multiple tables. In such cases, these tables are often related or connected to each other.
Here are a few instances where connections can be utilized:
-
Many Contacts can be connected to one Company
-
One Order can be connected to many Products
-
Many Managers can be connected to many Projects
Knack establishes these relationships using connections. By adding a connection, you can link records from one table to records in another table.
These connections offer extensive functionality that can be utilized across your app to enhance its capabilities.
Tip: To use connections, you will need to have at least two tables. If you want to learn more about how to use a table, you can learn more here.
Connection Example
In the Contact Directory sample app, we have two tables: Companies and Contacts. Each contact record is connected to a company record.
This means we can view a company record and add a view to show all the contact records connected to that company record.
The same app also has a Notes table, where each note record is connected to a contact record. This enables us to show notes records connected to each contact record.
Tip: To see more examples of how connections can be used in Knack, see this guide.
Managing Connections
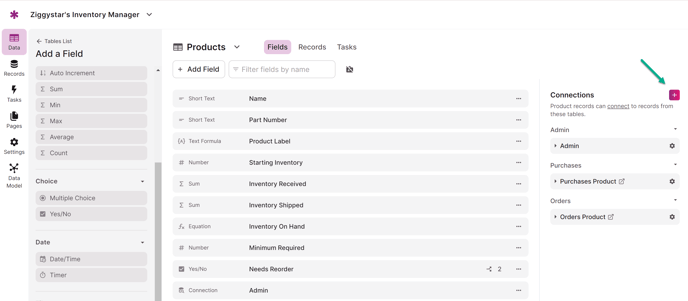
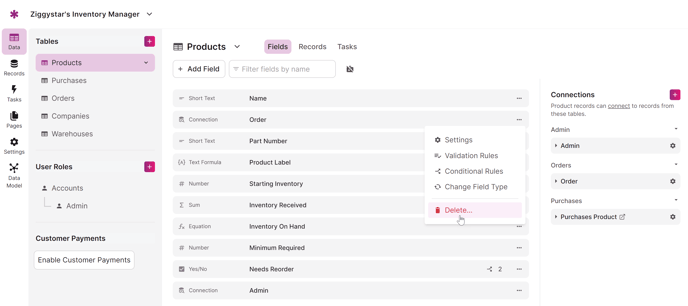
Within the Data section of the Builder, when you are viewing the fields of a table, you will notice a Connections section located on the right side. In this section, you have the ability to add new connections to the table and also view any existing connection fields.
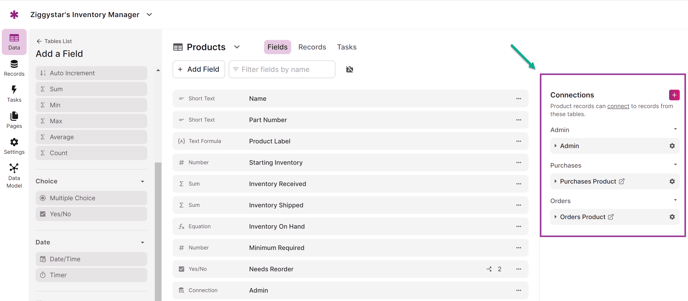
Adding a Connection
To include a connection field, navigate to the Data section of the Builder and select the desired table to access its fields list. Once there, simply click on the "+" button located in the right column to add a new connection field.
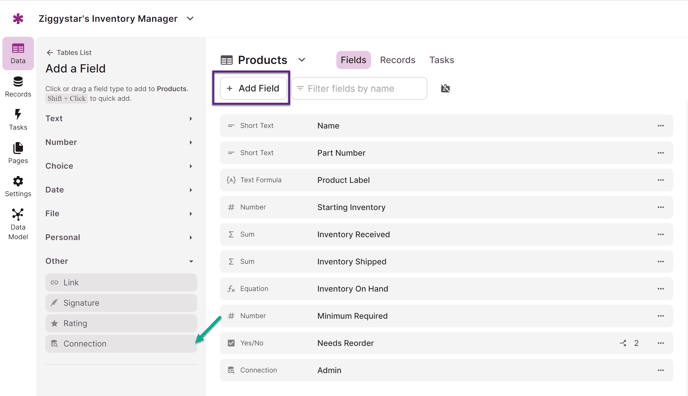
You can also add a connection field by selecting "Add Field" and selecting the Connection option that lives under the "Other" section:
A new window will appear where you can select the table that you want the connection to be linked to.

After selecting the table for your connection, you can then proceed to define how the connection will operate. This involves choosing from three main connection types: one-to-one, one-to-many, and many-to-many.
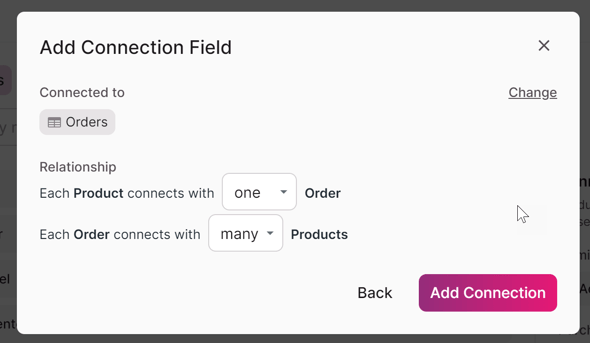
For example, here are what these connection types would look like when using the tables Products and Orders.
-
One-to-One: A connection where each Product record connects to one Order record and each Order record connects to one Product record.
-
One-to-Many: A connection where each Product record connects to one Order record and each Order record connects to many Product records.
-
Many-to-Many: A connection where each Product record connects to many Order records and each Order record connects to many Product records.

Note: These connection fields can be used like any other field throughout your app. If you add a connection field to a form, it will operate like a lookup, so you can select a specific record from the connected table to connect to.
Learn more about our connection types in our article here.
Tip: If you're looking for information on how to connect your records after creating a connection field, see our article here.
Which Table to Add Your Connection to
To create a connection between two tables, you only need to add one connection field. Now, the question arises, which table should you add that field to?
For one-to-one and many-to-many relationships, we suggest placing the connection field on whichever table will be used or edited more frequently. This will affect where the connection field lookup will appear and make it easier to edit with a form view.
In a one-to-many relationship, in most cases, it is best practice to add the connection to the table with many connections. Or to put it another way, in a parent-child relationship, it works best to add the connection to the child table.
For example, in our Job Listings example app, one Job can connect with many Applications, so it will work best to add the connection to the Application table. This way, when we're editing or viewing an Application record, we can easily see which Job it’s connected to.
Here's what that connection will look like in a form when it's added to the Application table (or the child table). The connection field to the Job table will appear as a lookup field:
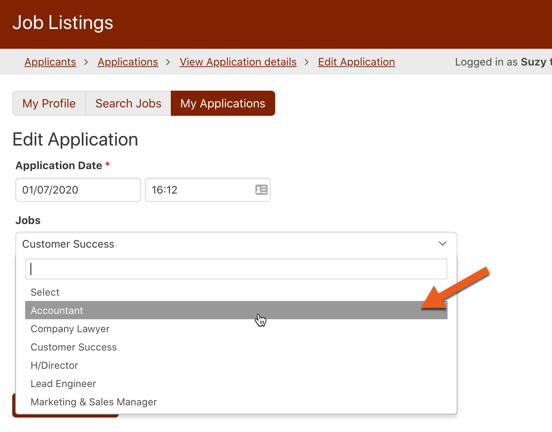
In this example, the application is connected to the "Lead Engineer" Job. You can change which Job it is connected to with the lookup/dropdown field.
Next, here's what it would look like if the connection field was added to the Job table (or the parent table). Instead of connecting to one record, it would need to connect to many or all the Application records:

Another reason the child table generally works best, is that you'll typically create the parent records first. When adding a child record, you'll have some parent records already created that you can connect to.
Editing a Connection
To modify an existing connection field, go to the Data section of the Builder and find the connection in the table's fields. Click on the "..." icon for more options and select the field settings.
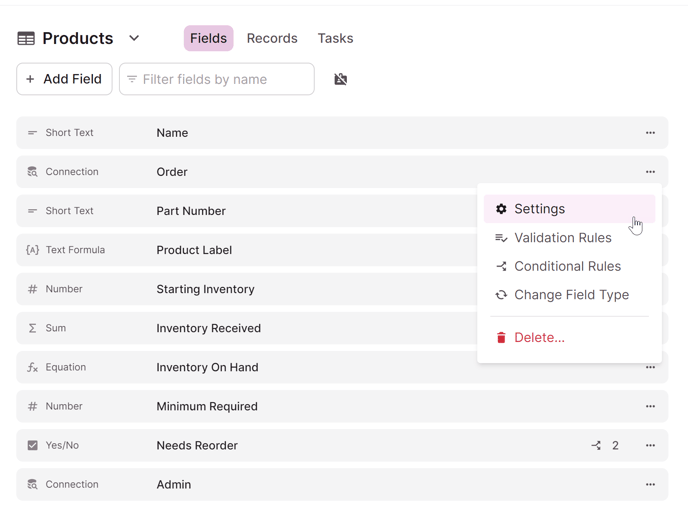
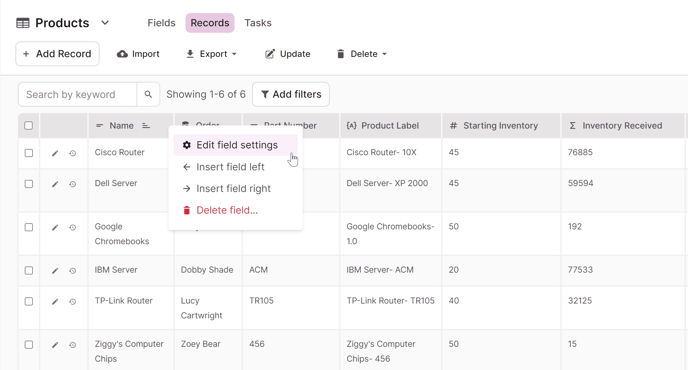
Alternatively, you can access the field options and choose the "Edit field settings" option when you are viewing the records in the Records section of the Builder.
Afterwards, a pop-up window will appear displaying the options for the connection field.

In this section, you have the ability to modify the connection type and make adjustments to other fundamental field settings:
-
Name: This changes the name of the field in your Builder.
-
Description: This is a description which can be used to describe the field internally. These will show up as tooltips when viewing records in the Records section of the Builder.
-
Required: This makes the field a required field.
-
Default: Choose the default option that will display in your connection field when live.
-
Relationship: Change the connection type.
-
Format: Choose between connection values displaying in a searchable dropdown or as radio buttons in your Live App.
Caution: Please exercise caution when editing a connection field, as it has the potential to disrupt existing connections between tables and views that rely on this connection.
Deleting a Connection
It is important to exercise caution when deleting connections as they serve as the fundamental building blocks for your app's foundation.
If you need to delete a connection, navigate to the Data section of the Builder and locate the connection you would like to delete from the table's fields. On the connection field, click the "..." more options icon, then click "Delete".
This will remove the connection field from the app.
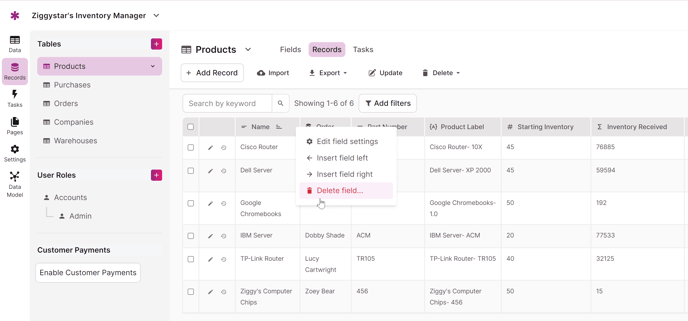
You also have the option to access the field options and choose the "Delete field" option while viewing the records in the Records section of the Builder.
Caution: Please exercise caution when deleting connections as they are an integral part of the app's structure. Deleting connections will result in records no longer being linked together, potentially causing pages or views that rely on these connections to malfunction.
Using Connections in Your App
There are so many super powerful ways to use connections in your app. So many in fact, that this information needs its own article: Use Connections in Your App.
Notes & Troubleshooting
-
Only one connection field is needed to link two tables. However, there are rare cases when using two connection fields between two tables is needed.
-
When adding connection fields, it is best to place the connection field on the "many" table.
-
For one-to-many connections, place the connection on the table which will have many records connected.
-
For many-to-many connections, place the connection field on whichever table is used most often.
-
-
If you have a connection field but connected records are not showing, double check the connection to make sure there is a value in the field. You can learn more about troubleshooting connections here.