How to Add Connection Links to Views
In this article, we will go over how to add Connection Links to views in your Knack app to enhance your users' experience.
Use Case
Users may become frustrated and use your app less if they have to navigate through multiple pages to find the information they need. They prefer a seamless and effortless experience to quickly access what they require and get on with their day.
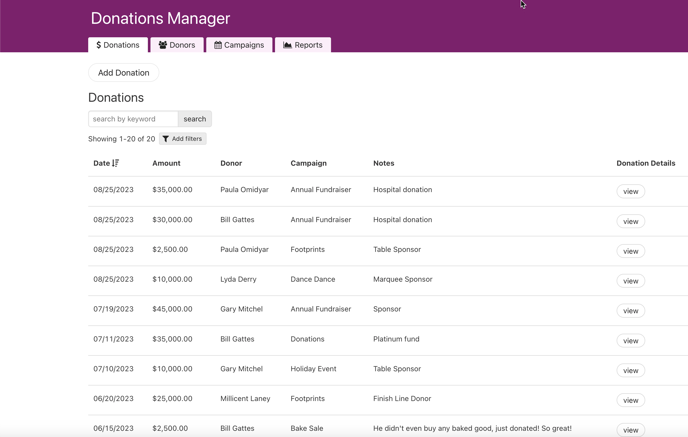
For example, we have a Donations page that includes the name of the donor that made the donation:
Our users would be delighted if they could simply click on the donor's name in the grid to instantly access more information about a specific donor. Otherwise, they would have to navigate to the Donors page and then search for the donor, which can be a bit of a hassle.
Although it may not seem like a significant number of extra steps, having to do this daily can quickly become frustrating.
To enhance user experience, we will utilize Connection Links to enable users to simply click on the donor's name and access detailed information about a specific donor. This eliminates the need for users to navigate to the Donors page and search for the donor, saving them valuable time and frustration.
Requirements
If this your first time creating an app, you'll need to know some basics about adding tables, fields, pages, and views. You can start by reading our Builder Basics section.
Other good resources can be found in our About Your Database and Working With Pages sections of the knowledge base.
Steps
Select the Page with the View
To add connection links, navigate to the Pages section of the Builder and select the page containing the Grid, List, or Details view you want to enhance.
Open the Grid Editor
Click on the view on that page to open the view's editor.
Open Edit Column
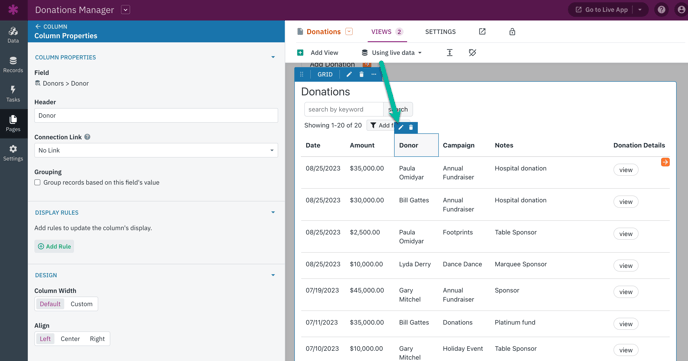
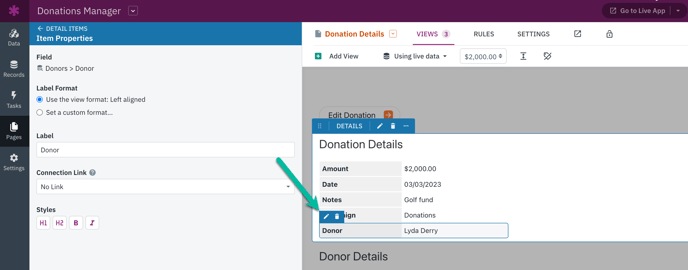
To modify the Column (on a Grid view) or edit the field (on a List or Details view), simply hover over it and click the pen icon:
Grid view:
Details view:
Create a Connection Link
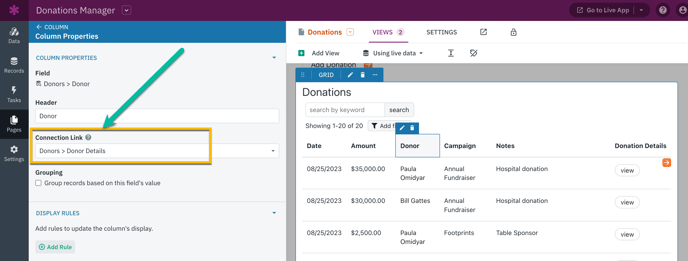
Choose the desired page for the field to link to from the Connection Link dropdown:
To add a connection link to your connection field, you need to make sure that there is a page in your app that uses the same source table as your connection field. Only the existing pages associated with this field will be available to select from the Connection Link option.
In this example, the Donor field is a connection field in the Donations table. As there is already a page in the app that displays detailed information for each donor, you have the option to add a connection link to the Donor field.
This connection link will link to the details page, providing users with easy access to more information about a specific donor.
That's it! Now, when users see that view, they will see a clickable link for that field that will take them to the page you have selected.


