This article covers the following topics:
What are pages?
Knack utilizes pages and views to construct your live app. A view serves as a visual component, such as a form, grid, or search, that interacts with records in your database. On the other hand, a page is responsible for consolidating multiple views into a single page.
Your Live App has the ability to include multiple pages that can be easily navigated by your users through menus and links.

Where do I access pages?
To access your pages in the Builder, simply click on the Pages tab located in the left column of the page. Your pages are conveniently listed in the page tree on the left side of the page.
By clicking on any page in the list, you can easily view existing views, add new views, and update the settings for both the page and the views listed on the page.
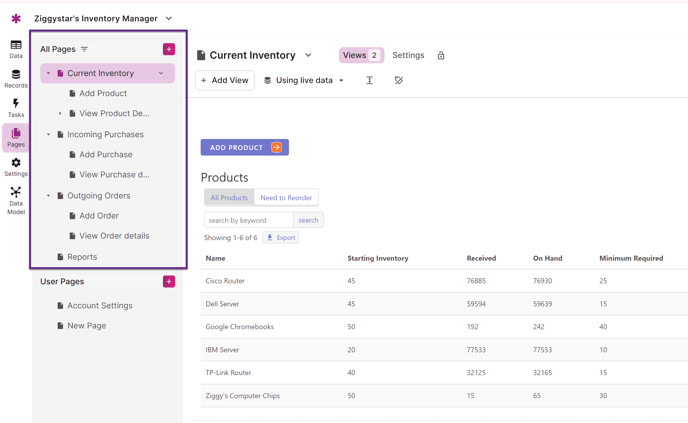
Here is an example page tree from the Inventory Manager sample app:
Page Types
There are various page types, each with its unique capabilities and applications.
-
Start Page: A starting point into your app. A start page can be either a parent page or a standalone page.
-
Parent Page: A page that has other pages (child pages) that it links to.
-
Child Page: A child page is linked to another page and cannot exist on its own.
-
Login Page: A page with a login view that password protects its child pages by requiring users to log in for secure access.
-
Details Page: This page is designed to display detailed information about a single record in your app. It is commonly linked to by grid, list, and search views.
-
Single Record Page: A child page is capable of displaying details Views, edit forms, or connected records when it has knowledge about a single record.
-
Utility Page: A utility page is specifically designed to manage administrative user tasks. Unlike other pages, utility pages are not included in the page menu.
-
Utility Pages have their own dedicated user menu. For additional information on utility pages, see our article here.
-
Managing Pages
Adding Pages
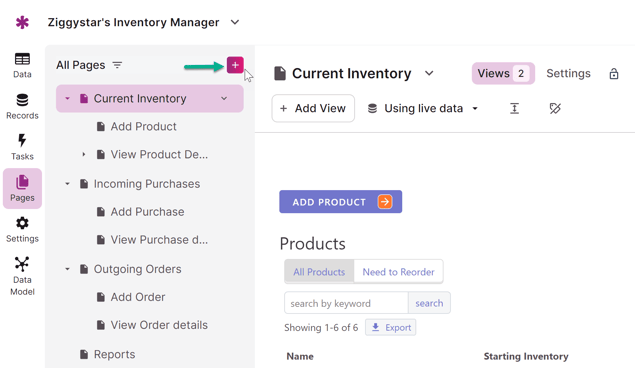
To add a page, simply click on the "+" button located next to the "All Pages" label on the left side of the page.
Editing Pages
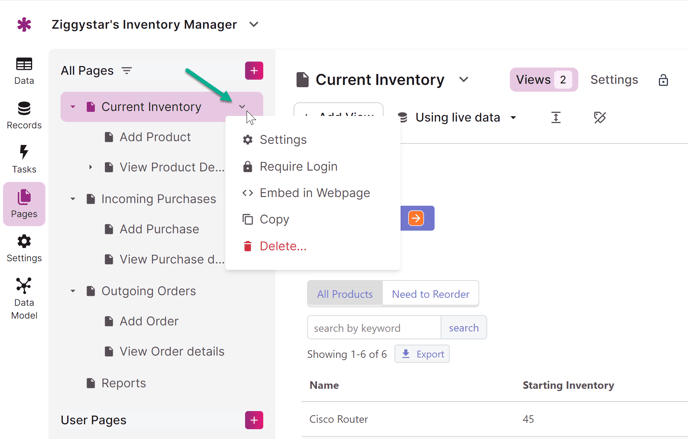
To edit a page, simply click on the down arrow icon next to the page's name and choose "Settings" from the dropdown menu.
Copying and Linking to an Existing Page
If you find yourself managing numerous pages in your Live App, you can efficiently save time by duplicating pages or reusing existing pages by incorporating links.
Copying Pages
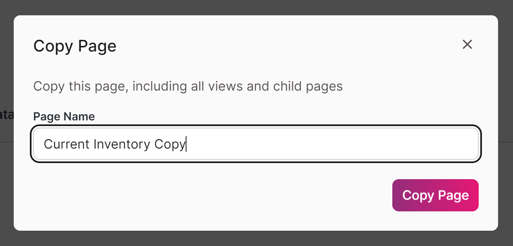
To copy any of the start pages in your page tree, locate the desired start page and click on the downward arrow icon to access the "Copy" option.
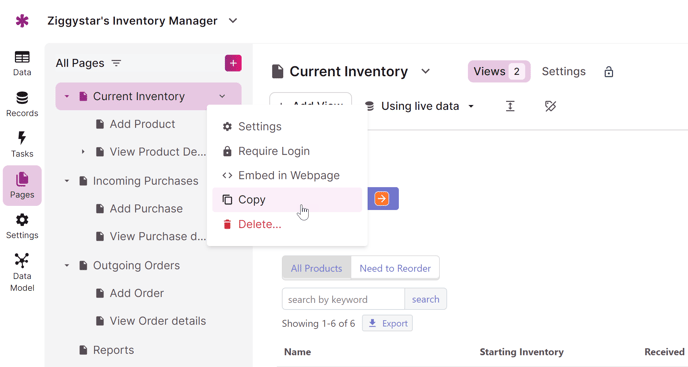
When you click on "Copy," a prompt will appear asking you to enter a name for the copied page. After selecting "Copy Page," the page will be added to the page tree and the Live App.
This will include all associated views and child pages from the copied start page.
Note: Copying pages is only possible for Start, Login, and User start pages. See this section above for details on page types.
Linking to an Existing Page
Reusing child pages can be a valuable tool when working with complex detail layouts or forms within your app. By linking existing pages to views that display records from the same grid, you can easily avoid the need to set up these layouts or forms from scratch.
This saves time and effort while maintaining the functionality and design of your app.
As an example, when you want to add new columns to a grid, you have the option to click on the “Actions” tab and then select "Link to another page." From there, you can choose any other child pages to connect to:
/Working%20with%20Pages/workingwithpages7.png?hsLang=en)
When you add a link to the grid or other views, a new link will be created that directs users to an existing page in your app. It's important to note that adding these links does not create copies of the pages, but rather establishes connections to them.
If you make any edits to the original page that is linked, it will impact all views that are linked to that page.
Note: If you're unable to find a specific page you want to link to, it's important to note that only pages displaying records from the same table are eligible for linking.
For instance, in a Contacts grid, you can only link to an existing Contacts child page and any grandchild page created from that child page.
Tip: To learn more about using Action Links, see our article here.
Collapsing/Expanding Pages
If your page tree becomes too large to fit neatly on your screen, the start pages will collapse and only display the currently selected page. To view all the child pages listed beneath a start page, simply click on the small arrows to the left of the collapsed start page's name.
Deleting Pages
To delete a page, simply click on the down arrow icon next to the page's name and choose the "Delete" option from the dropdown menu. A confirmation prompt will appear, asking you to confirm the deletion:
/Working%20with%20Pages/workingwithpages9.png?hsLang=en)
/Working%20with%20Pages/workingwithpages10.png?hsLang=en)
Building Pages
Adding Start Pages
Every Live App must have at least one start page.
In the example below, the Live App includes three start pages: one for Current Inventory, one for Incoming Purchases, and one for Outgoing Orders:
/Working%20with%20Pages/workingwithpages11.png?hsLang=en)
The first time you visit the Pages section, you'll be prompted to create your first start page:
/Working%20with%20Pages/workingwithpages12.png?hsLang=en)
You can add as many additional start pages as you need by clicking the “+" button in the left column:
/Working%20with%20Pages/workingwithpages13.png?hsLang=en)
This brings up a new window that will guide you through adding your page.
Start pages are independent of any other page in your app. This means that when adding a view using the view menu on a start page, you'll be able to add a view for any of the tables in your database.
Start pages can add links to the page menu and can also be embedded as independent apps.
Tip: The page menu is the navigation menu your users see in the Live App. See our article here for more on the page menu.
Adding Child Pages
A child page is generated from a link on a parent page. It cannot exist as an independent page.
Users have the ability to navigate to various child pages by clicking on links and menus within each view. For instance:
-
a Menu can display links to one or more child pages.
-
a Grid or List can link to a child page to show more details about each record displayed.
-
a Details view can link to a child page to edit the same record or insert child records.
You can view child pages by clicking on the page in the page tree or from the links that you can add to each view:
/Working%20with%20Pages/workingwithpages14.png?hsLang=en)
In this example, the View Purchase details page is a child of the Incoming Purchases page.
You'll often add child pages automatically when adding pages and views through the left toolbox. For example, if you are adding a grid view, you'll have options for adding child pages:
/Working%20with%20Pages/workingwithpages15.png?width=688&height=274&name=workingwithpages15.png)
Note: Child pages are created only when they are generated from a link on a parent page. For instance, when setting up a menu view on a parent page, you have the option to include a new link to a new page. This action will result in the creation of a child page beneath the parent page where the menu view is located.
For another example, in the screenshot above when adding a grid view, you have the option to link to an edit form in a child page or select a details page link that will display a detailed view of the single record from the grid view.
Page Settings
To learn about page settings, see our article here.
Pages & User Logins
To manage login access for different roles in your Live App, you have the ability to control access to each page individually. By adding a user login to a page, users will be required to log in before they can view any of the views on that page.
Tip: See our article here for more information on adding or managing login access for pages.
Page Rules
Page rules are a powerful tool that allows you to automate actions based on specific conditions as soon as a user accesses a page. For instance, imagine you have an event registration form with limited availability.
With page rules, you can easily hide the registration form when the availability reaches zero, ensuring a seamless user experience.
Tip: See our article here for more information on setting up page rules.