Use Case
This method is ideal for situations where you need to limit data access for various app users without the need to add them as users to your app.
As an example, a city offers gas, water, and electric services to its residents. They aim to create a convenient portal for residents to effortlessly view and pay their bills.
To simplify the process and avoid the need for user logins, the city can establish a portal where residents can access their bills by simply using their bill or account number.
We will use a search view to allow app users to look up their records without logging in.
Note: Tables cannot be converted to user roles. In the majority of cases, we recommend creating user roles for your users.
If you're not sure whether to use this method shared in this article or true user logins, please open a ticket with our support team.
You will be using a search view in this scenario.
You will also need to create a unique ID field. See our articles on text formulas and how to set a random ID for more information.
Steps
1. Adding a Table and Necessary Fields
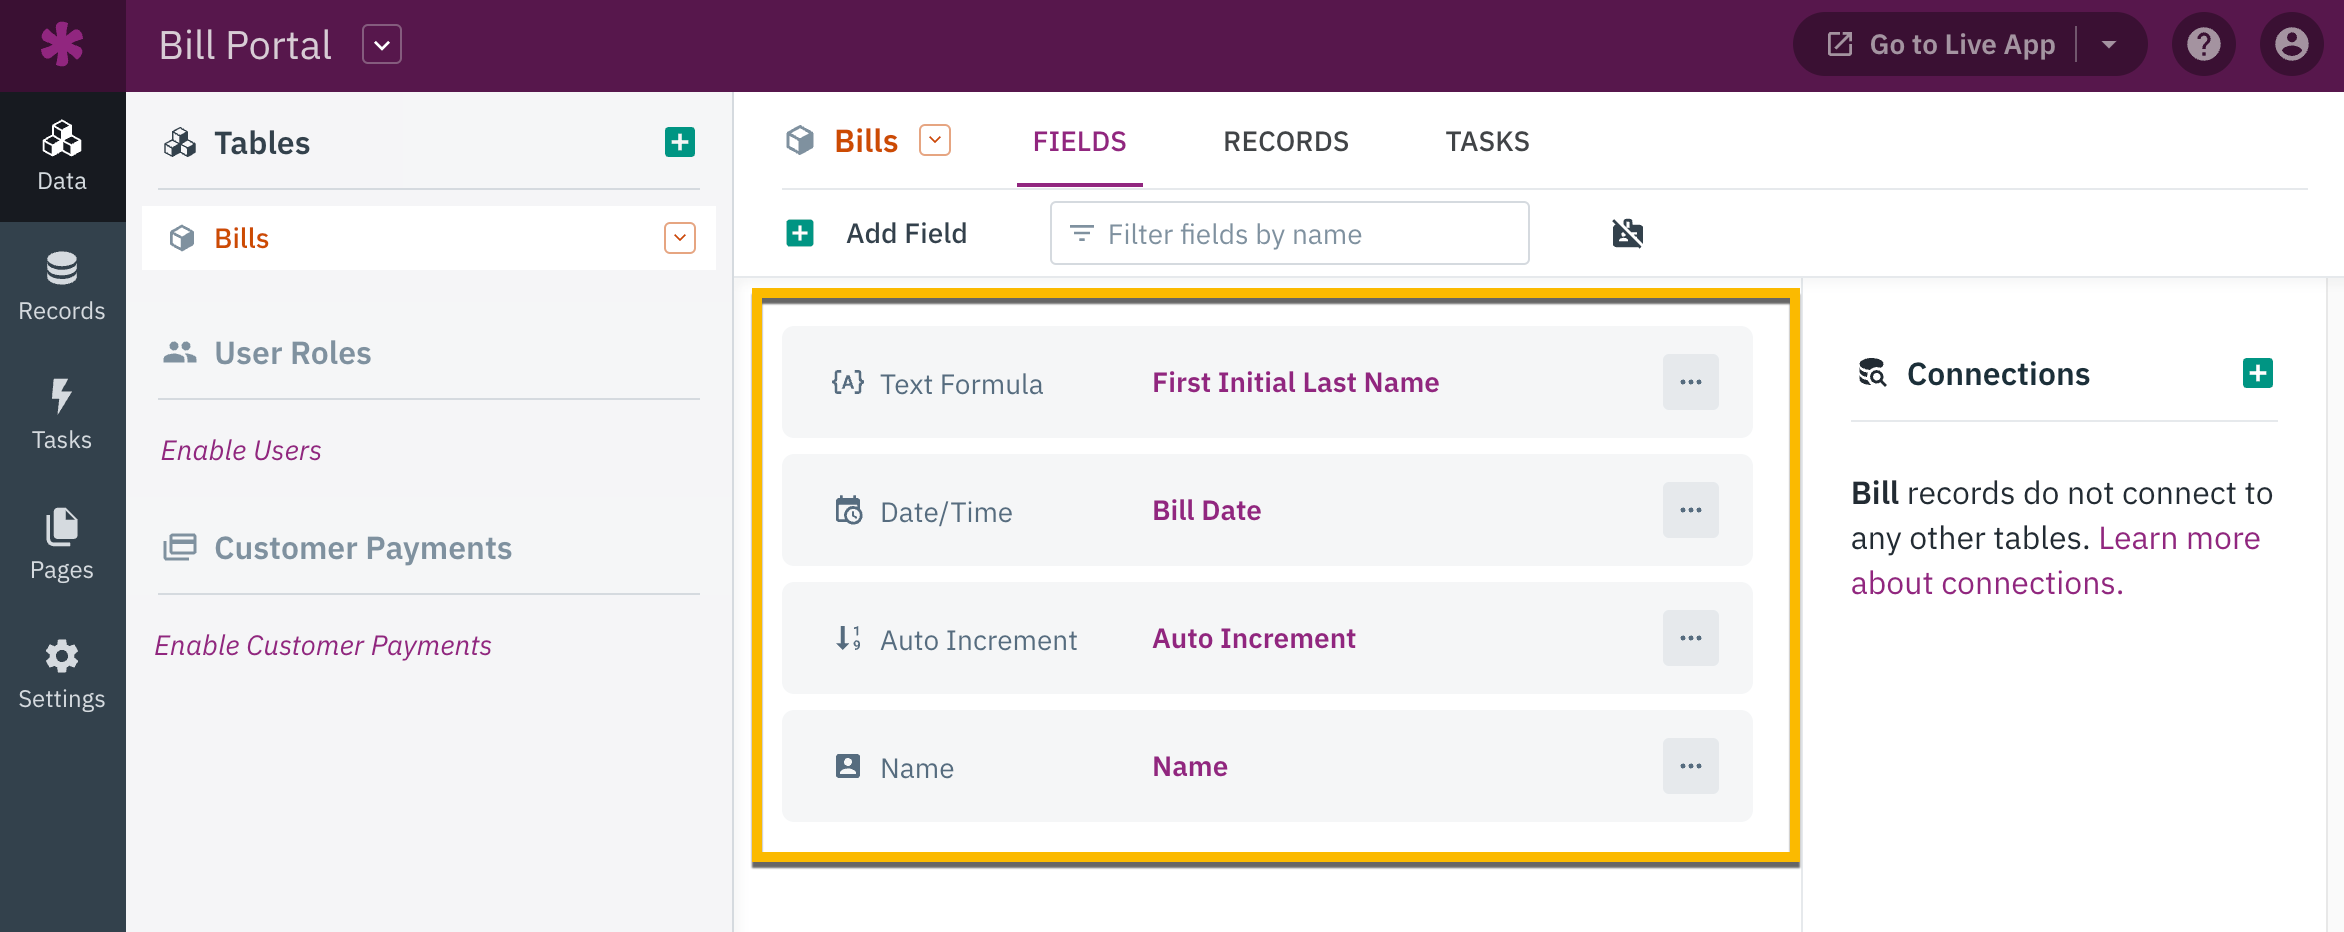
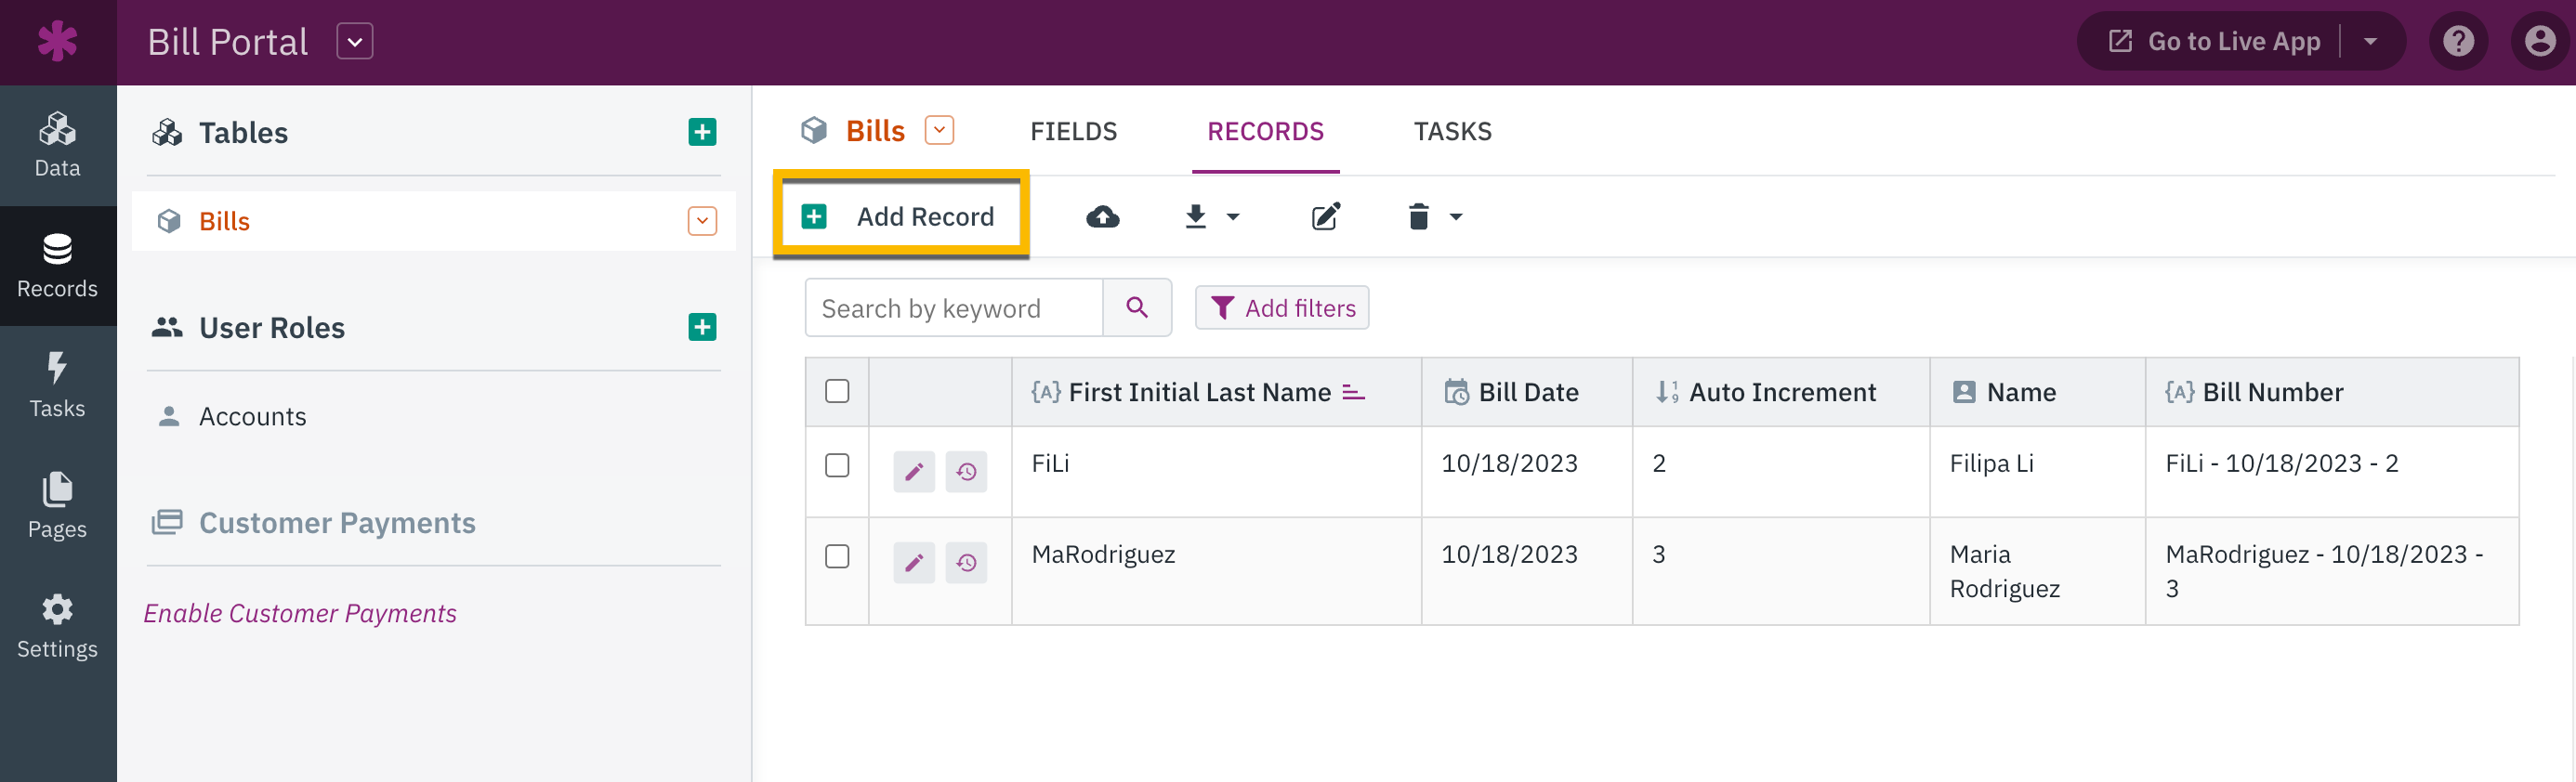
To get started, you'll need to create a main table in the Data section of the Builder. In this case, let's create a table named "Bills".
To ensure data uniqueness, we need to incorporate a unique field in this table. With Knack, you have the option to utilize existing fields to generate unique IDs.
In this scenario, we will opt for the former method. However, there is also an alternative option available where you can generate random numbers using text formulas. (See links in the above section.)
In this case, we will utilize a text formula that combines the initials of the bill recipient, the date of the bill, and an auto-increment field. To achieve this, you will need to add the following fields:
-
Name: Name field for the recipient's name
-
First Initial Last Name: Text formula to extract the first initial and last name from the name field
-
Bill Date: Date field
-
Auto Increment: Auto increment field
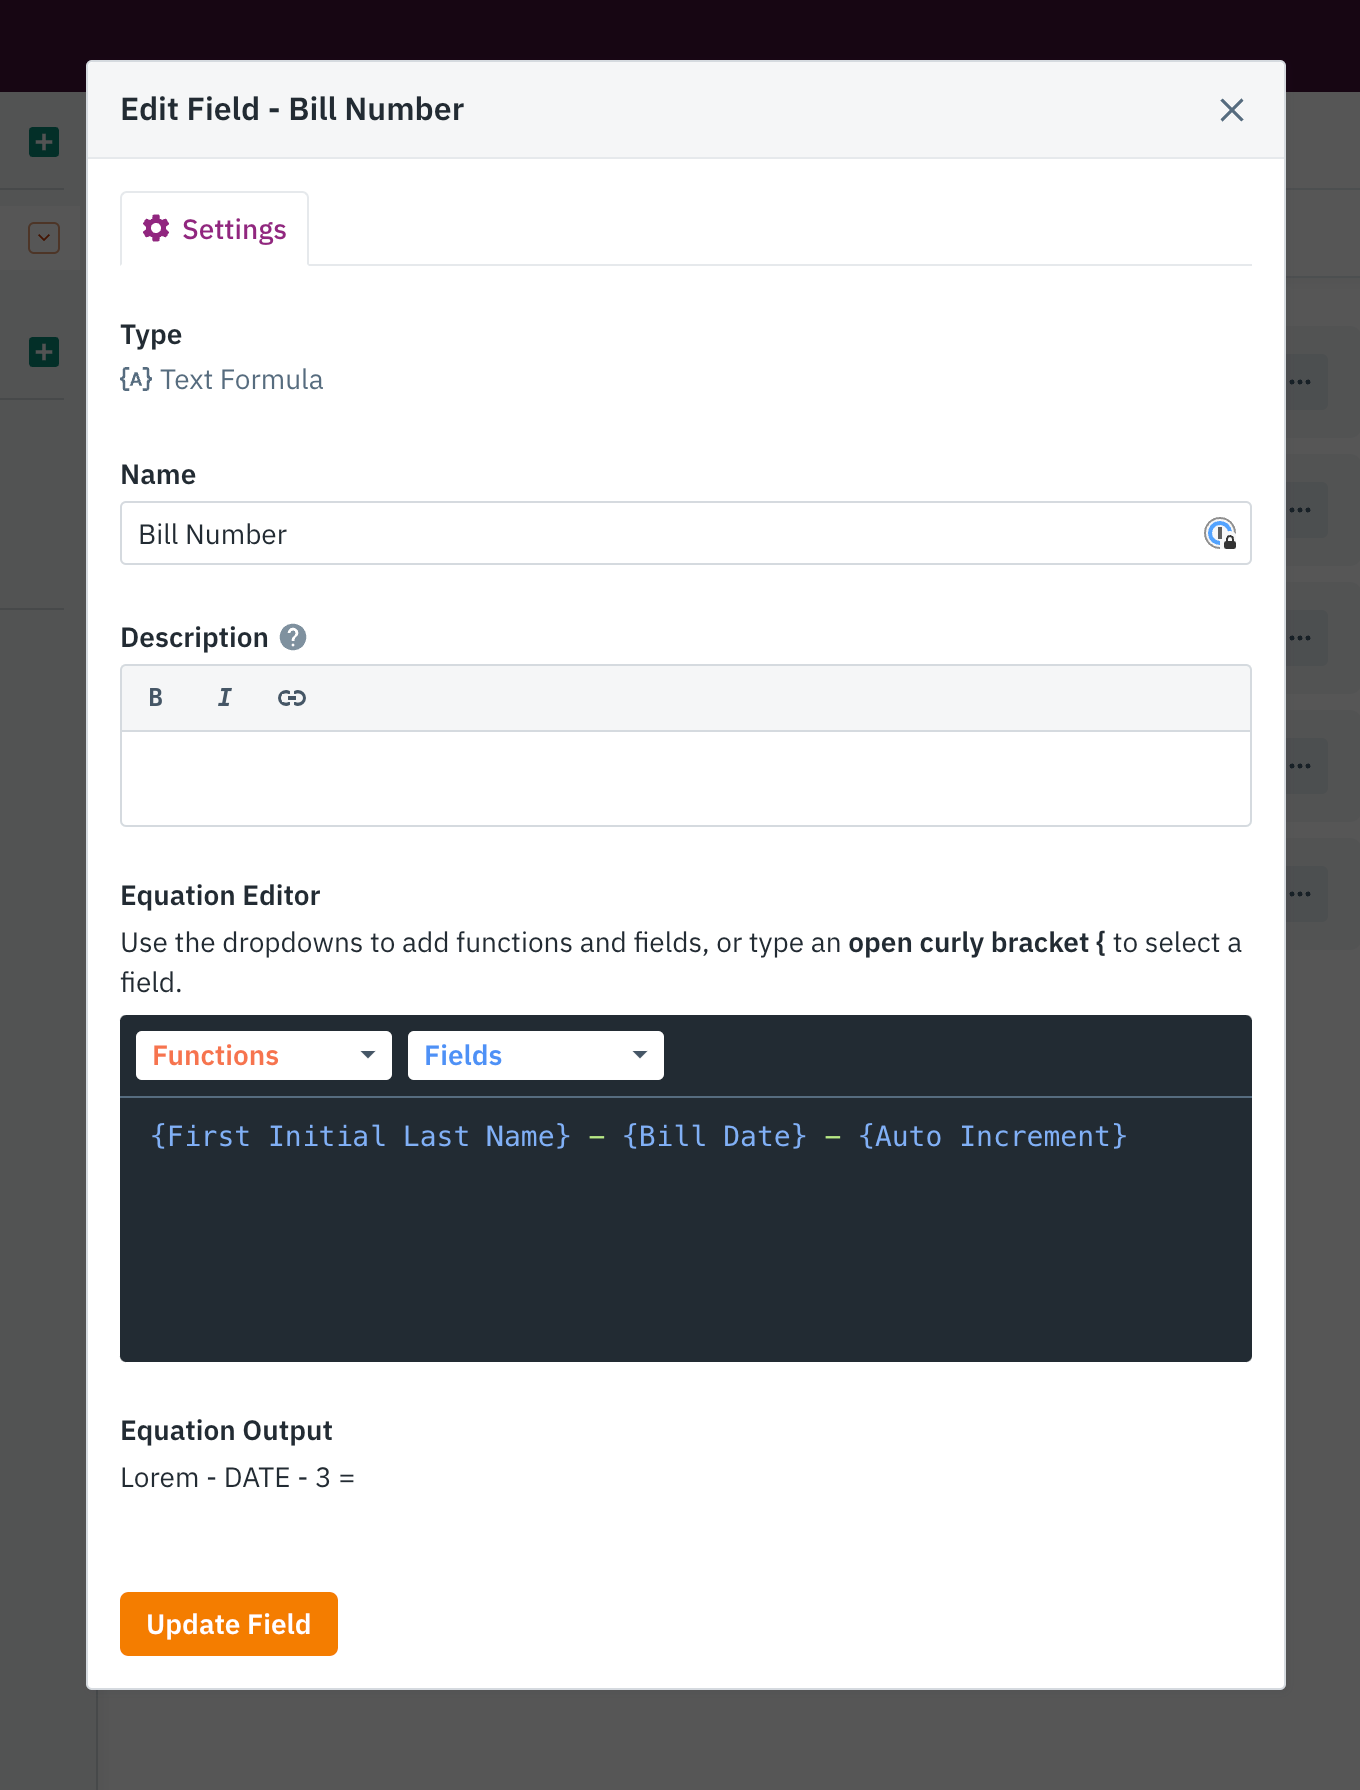
To create the "First Initial Last Name" text formula field, you will need to enter the following formula into the Equation Editor:
left({Name}, 2)getNameLast({Name})
Next, we will add the text formula to combine three of these fields into one “Bill Number” field.
In this case, the text formula is:
{First Initial Last Name} - {Bill Date} - {Auto Increment}
2. Adding a New Page with a Search View
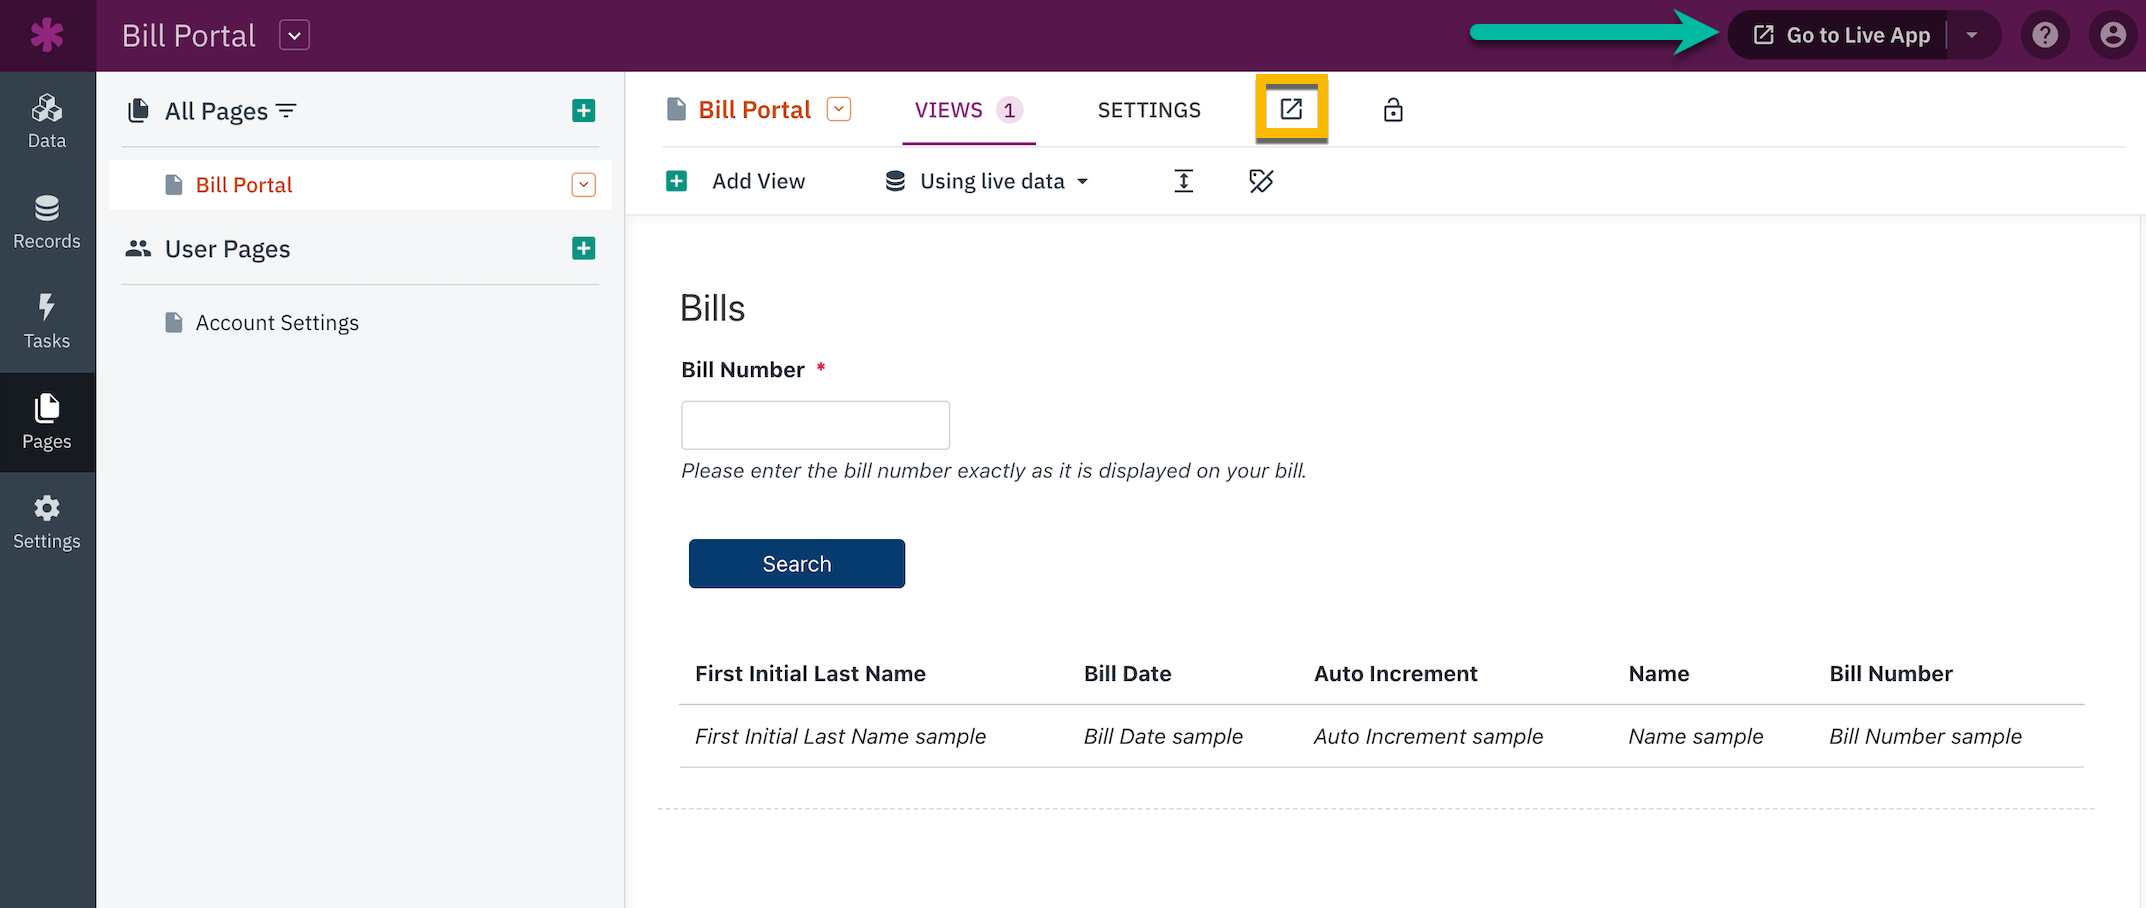
In the Pages section of the Builder, add a new page. Once you've added your new page, you should be given the option to add a view to the new page.
In the "Add a View" prompt, go to the Records View section and select the Search View option:
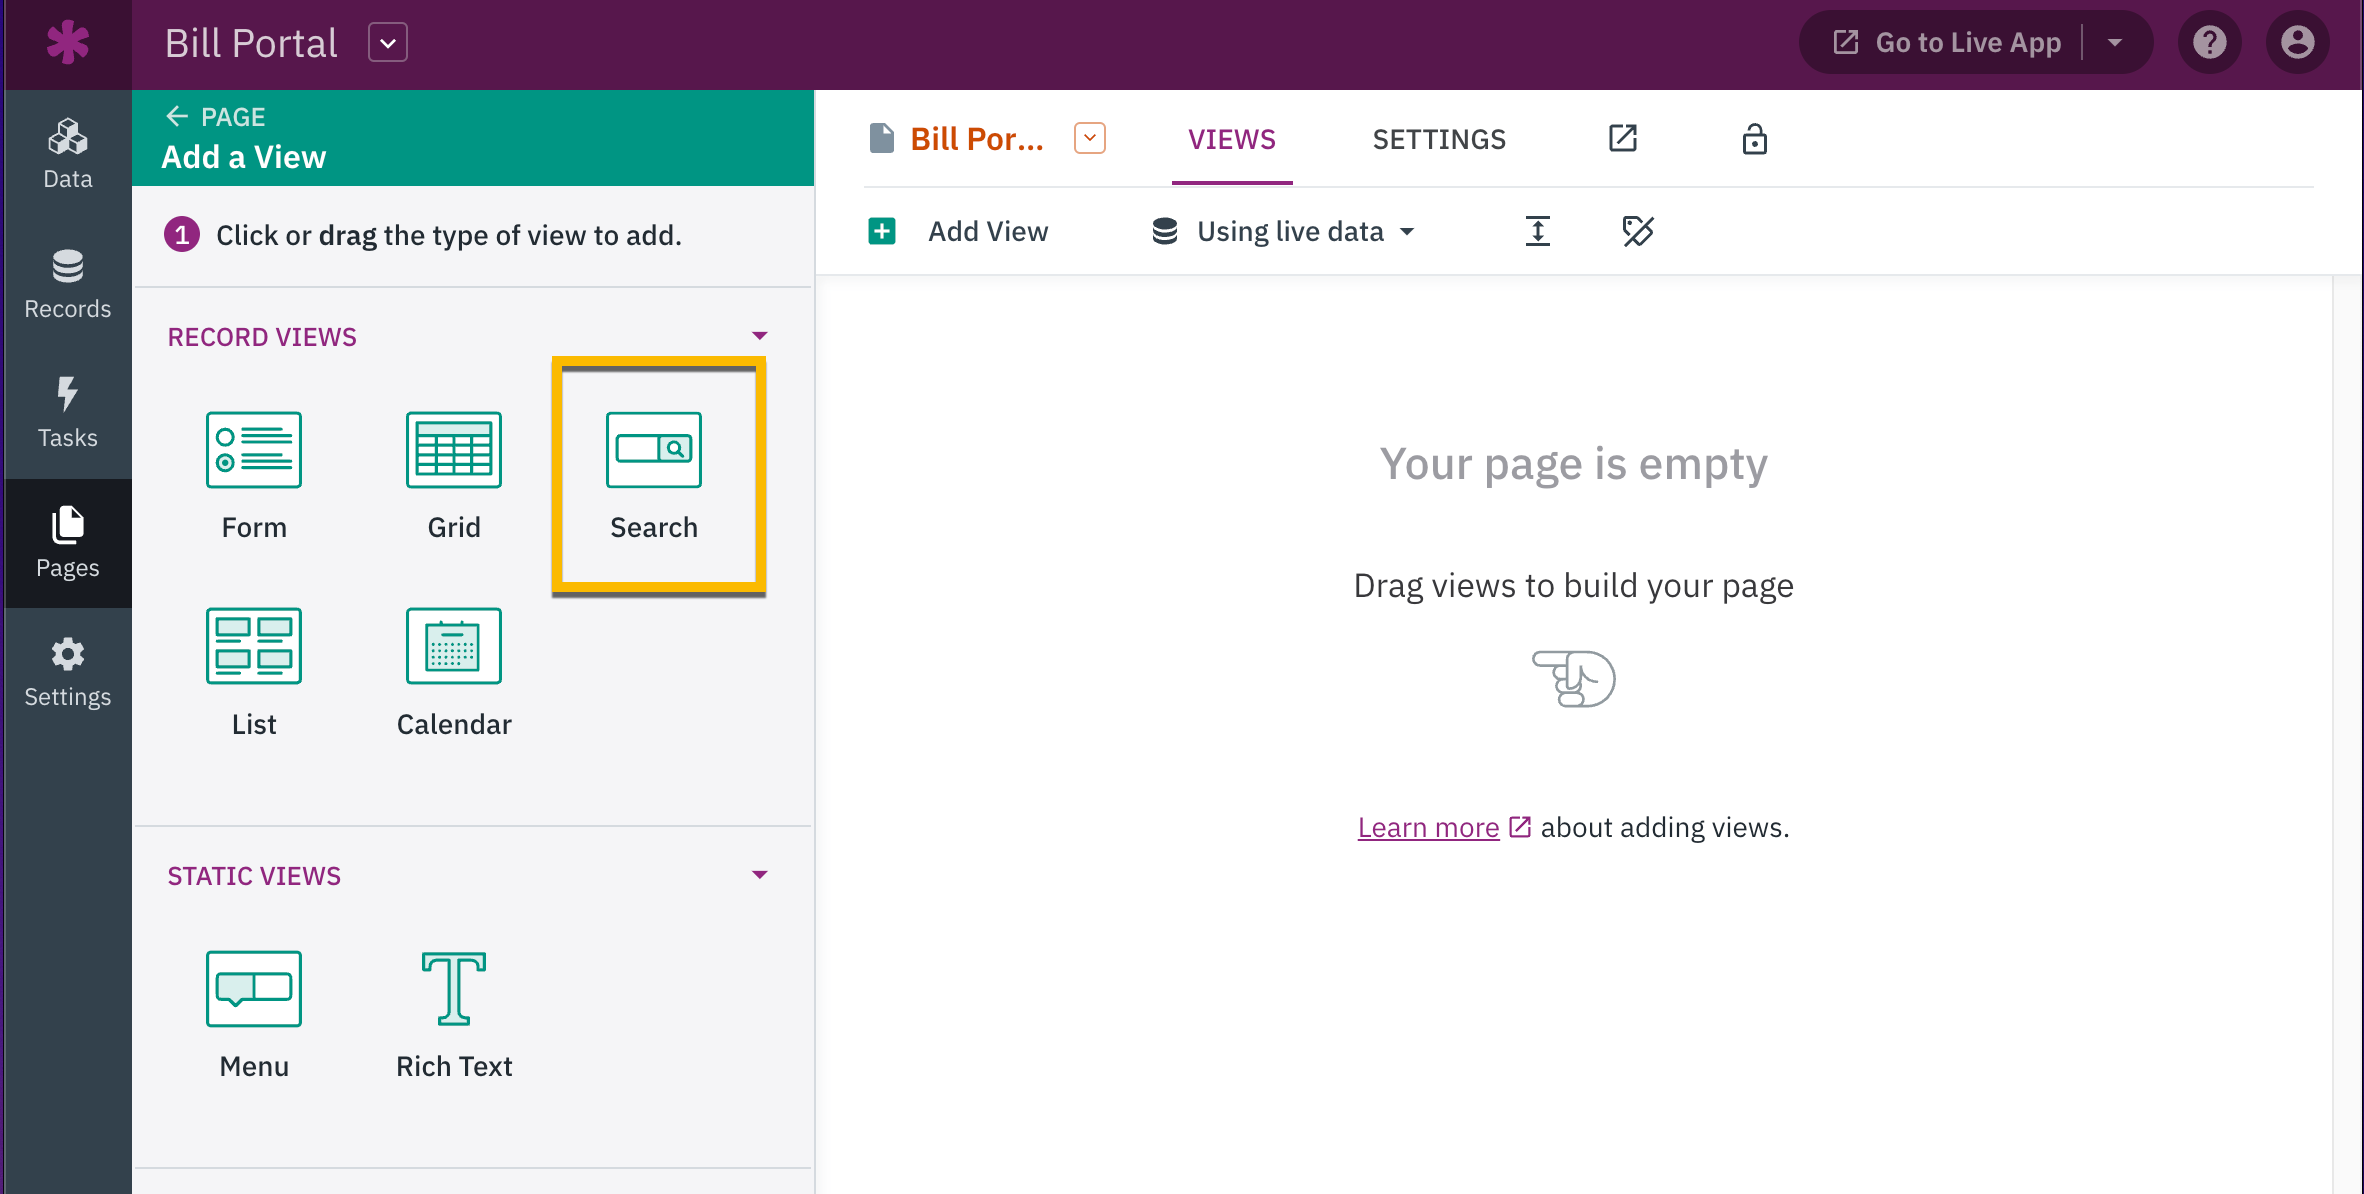
If there are multiple tables in your app, you will need to choose the specific table that we are working with. In this case, we will be focusing on the "Bills" table.
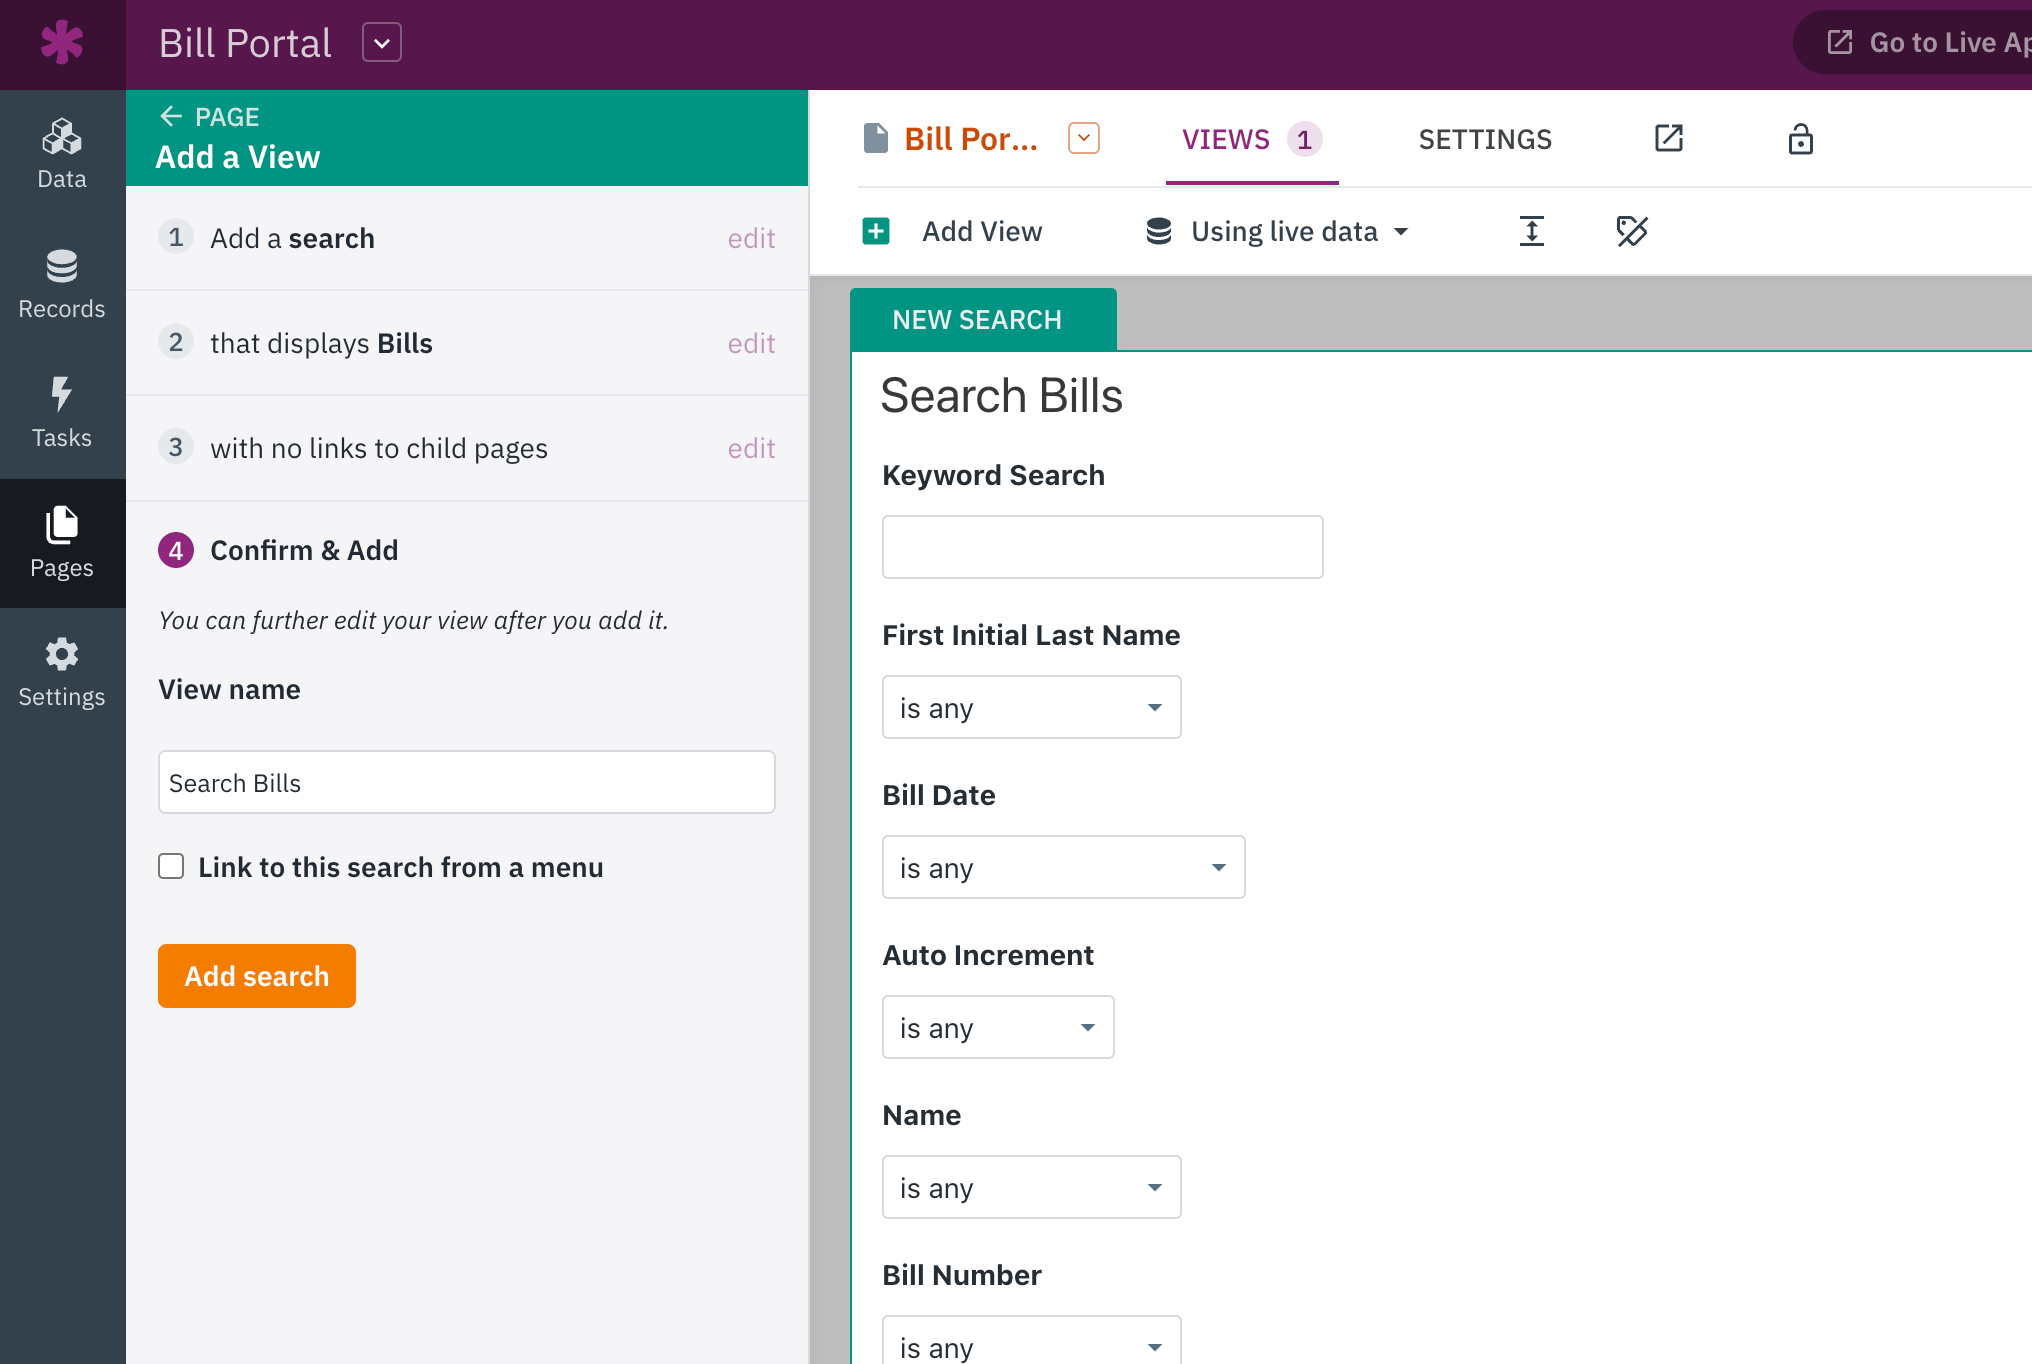
3. Configuring the Search View
Next, you will find yourself on a page with a search view. Click on either the search view or the pen icon located above the Search view to access the view editor:
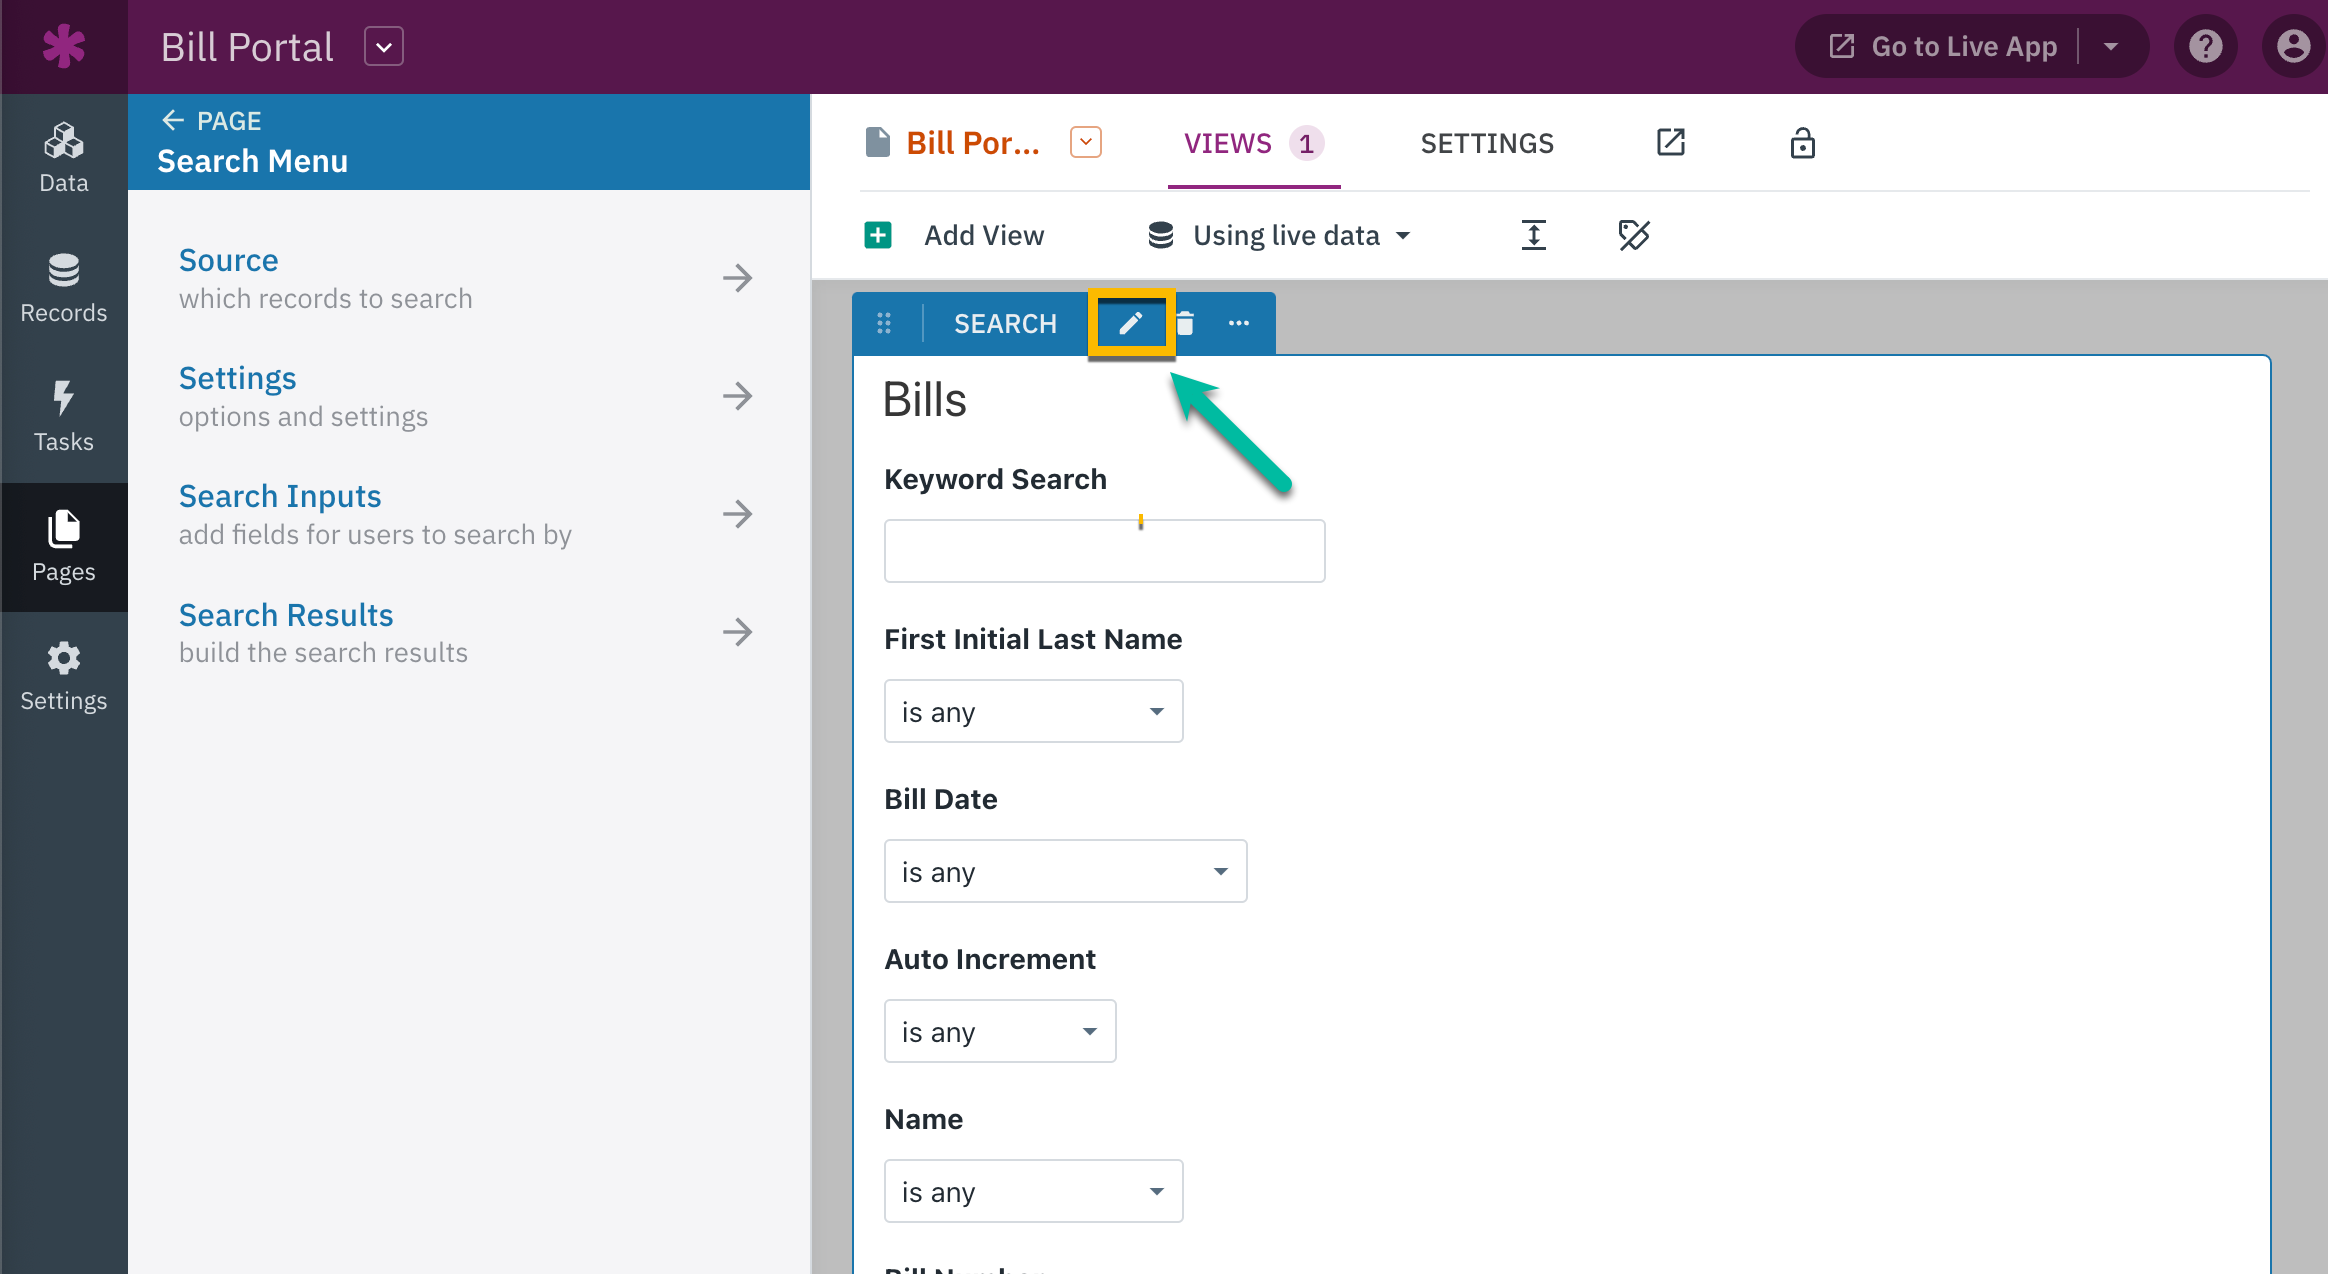
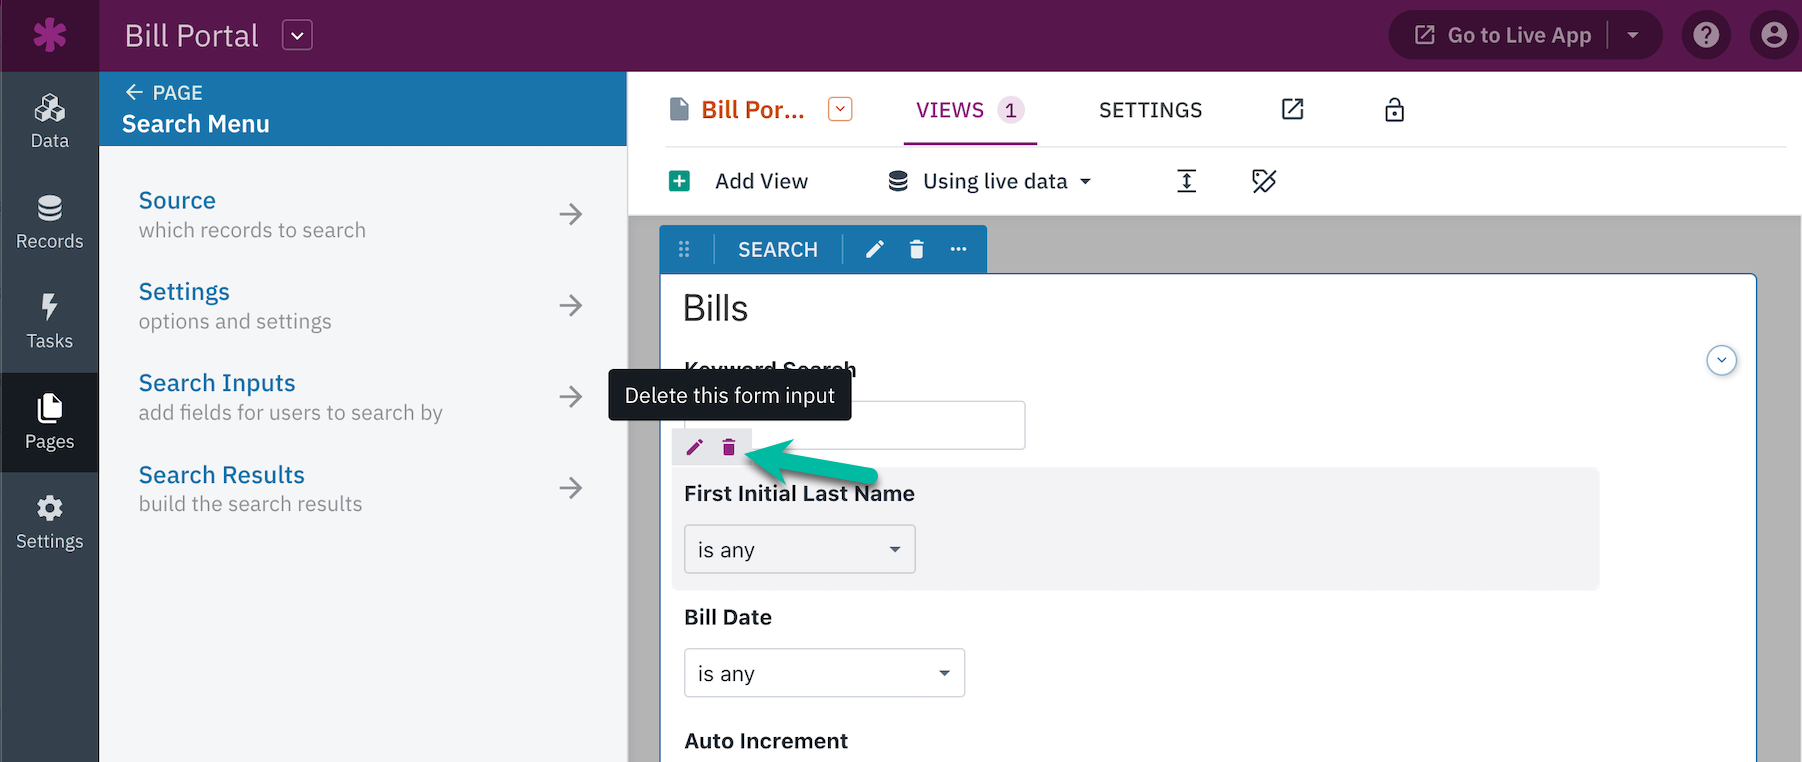
In the search view editor, you will need to remove all fields except for the unique ID field that was created in step one:
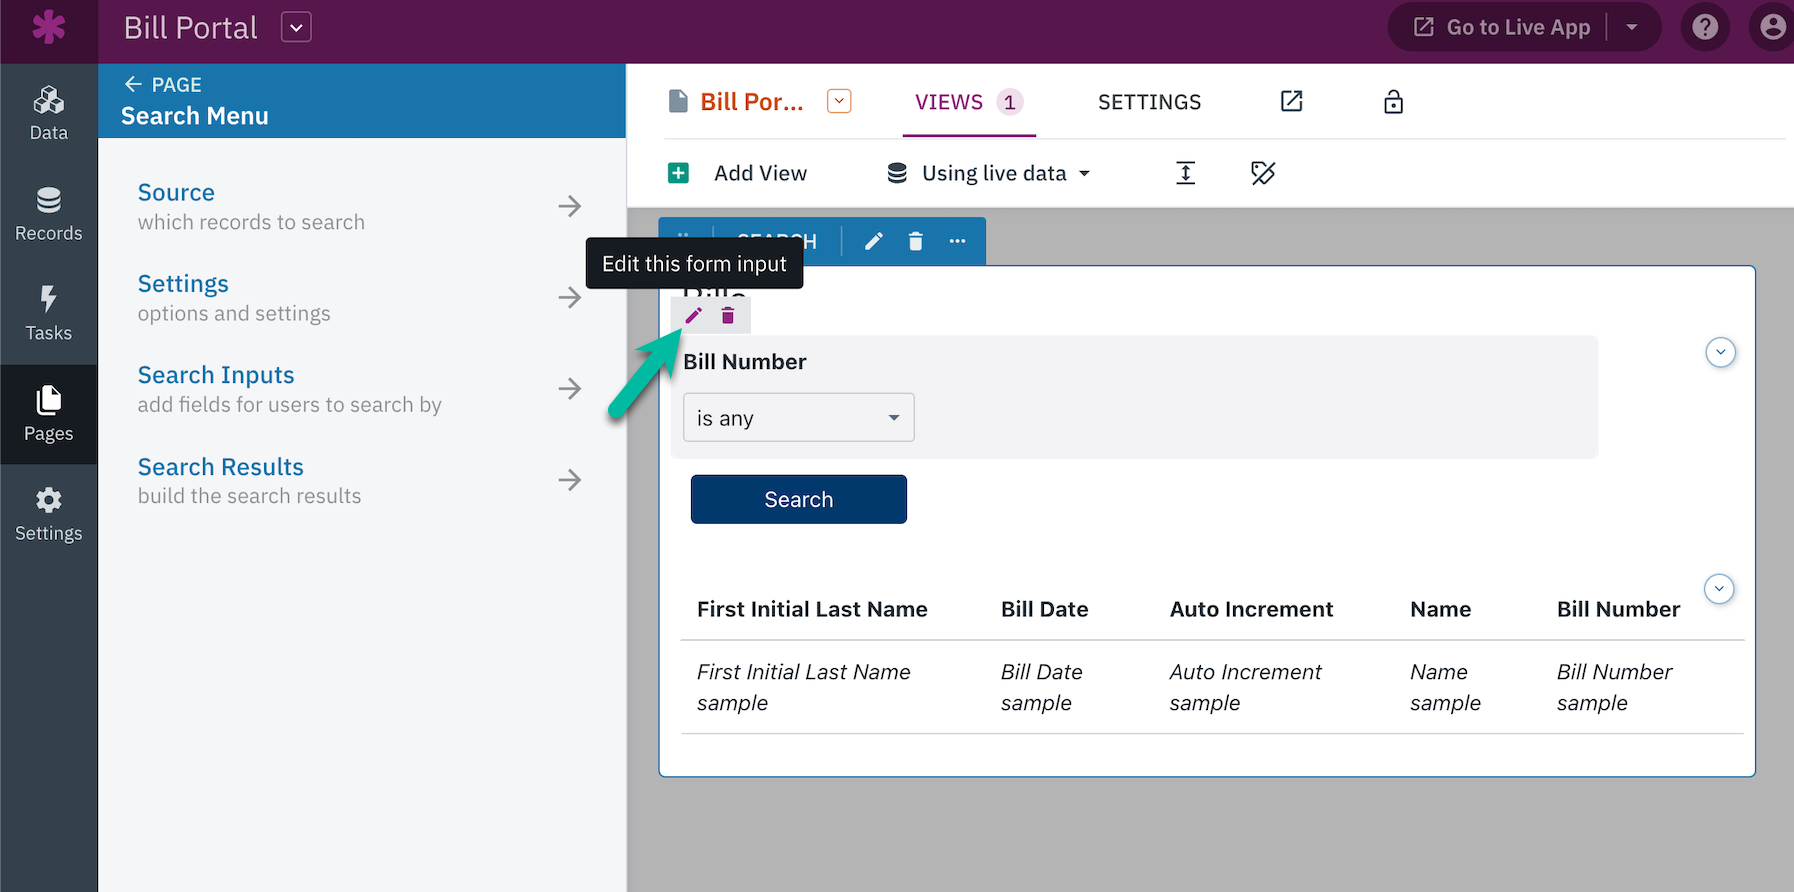
To edit the search settings for your ID field, simply click on the pen icon next to it.
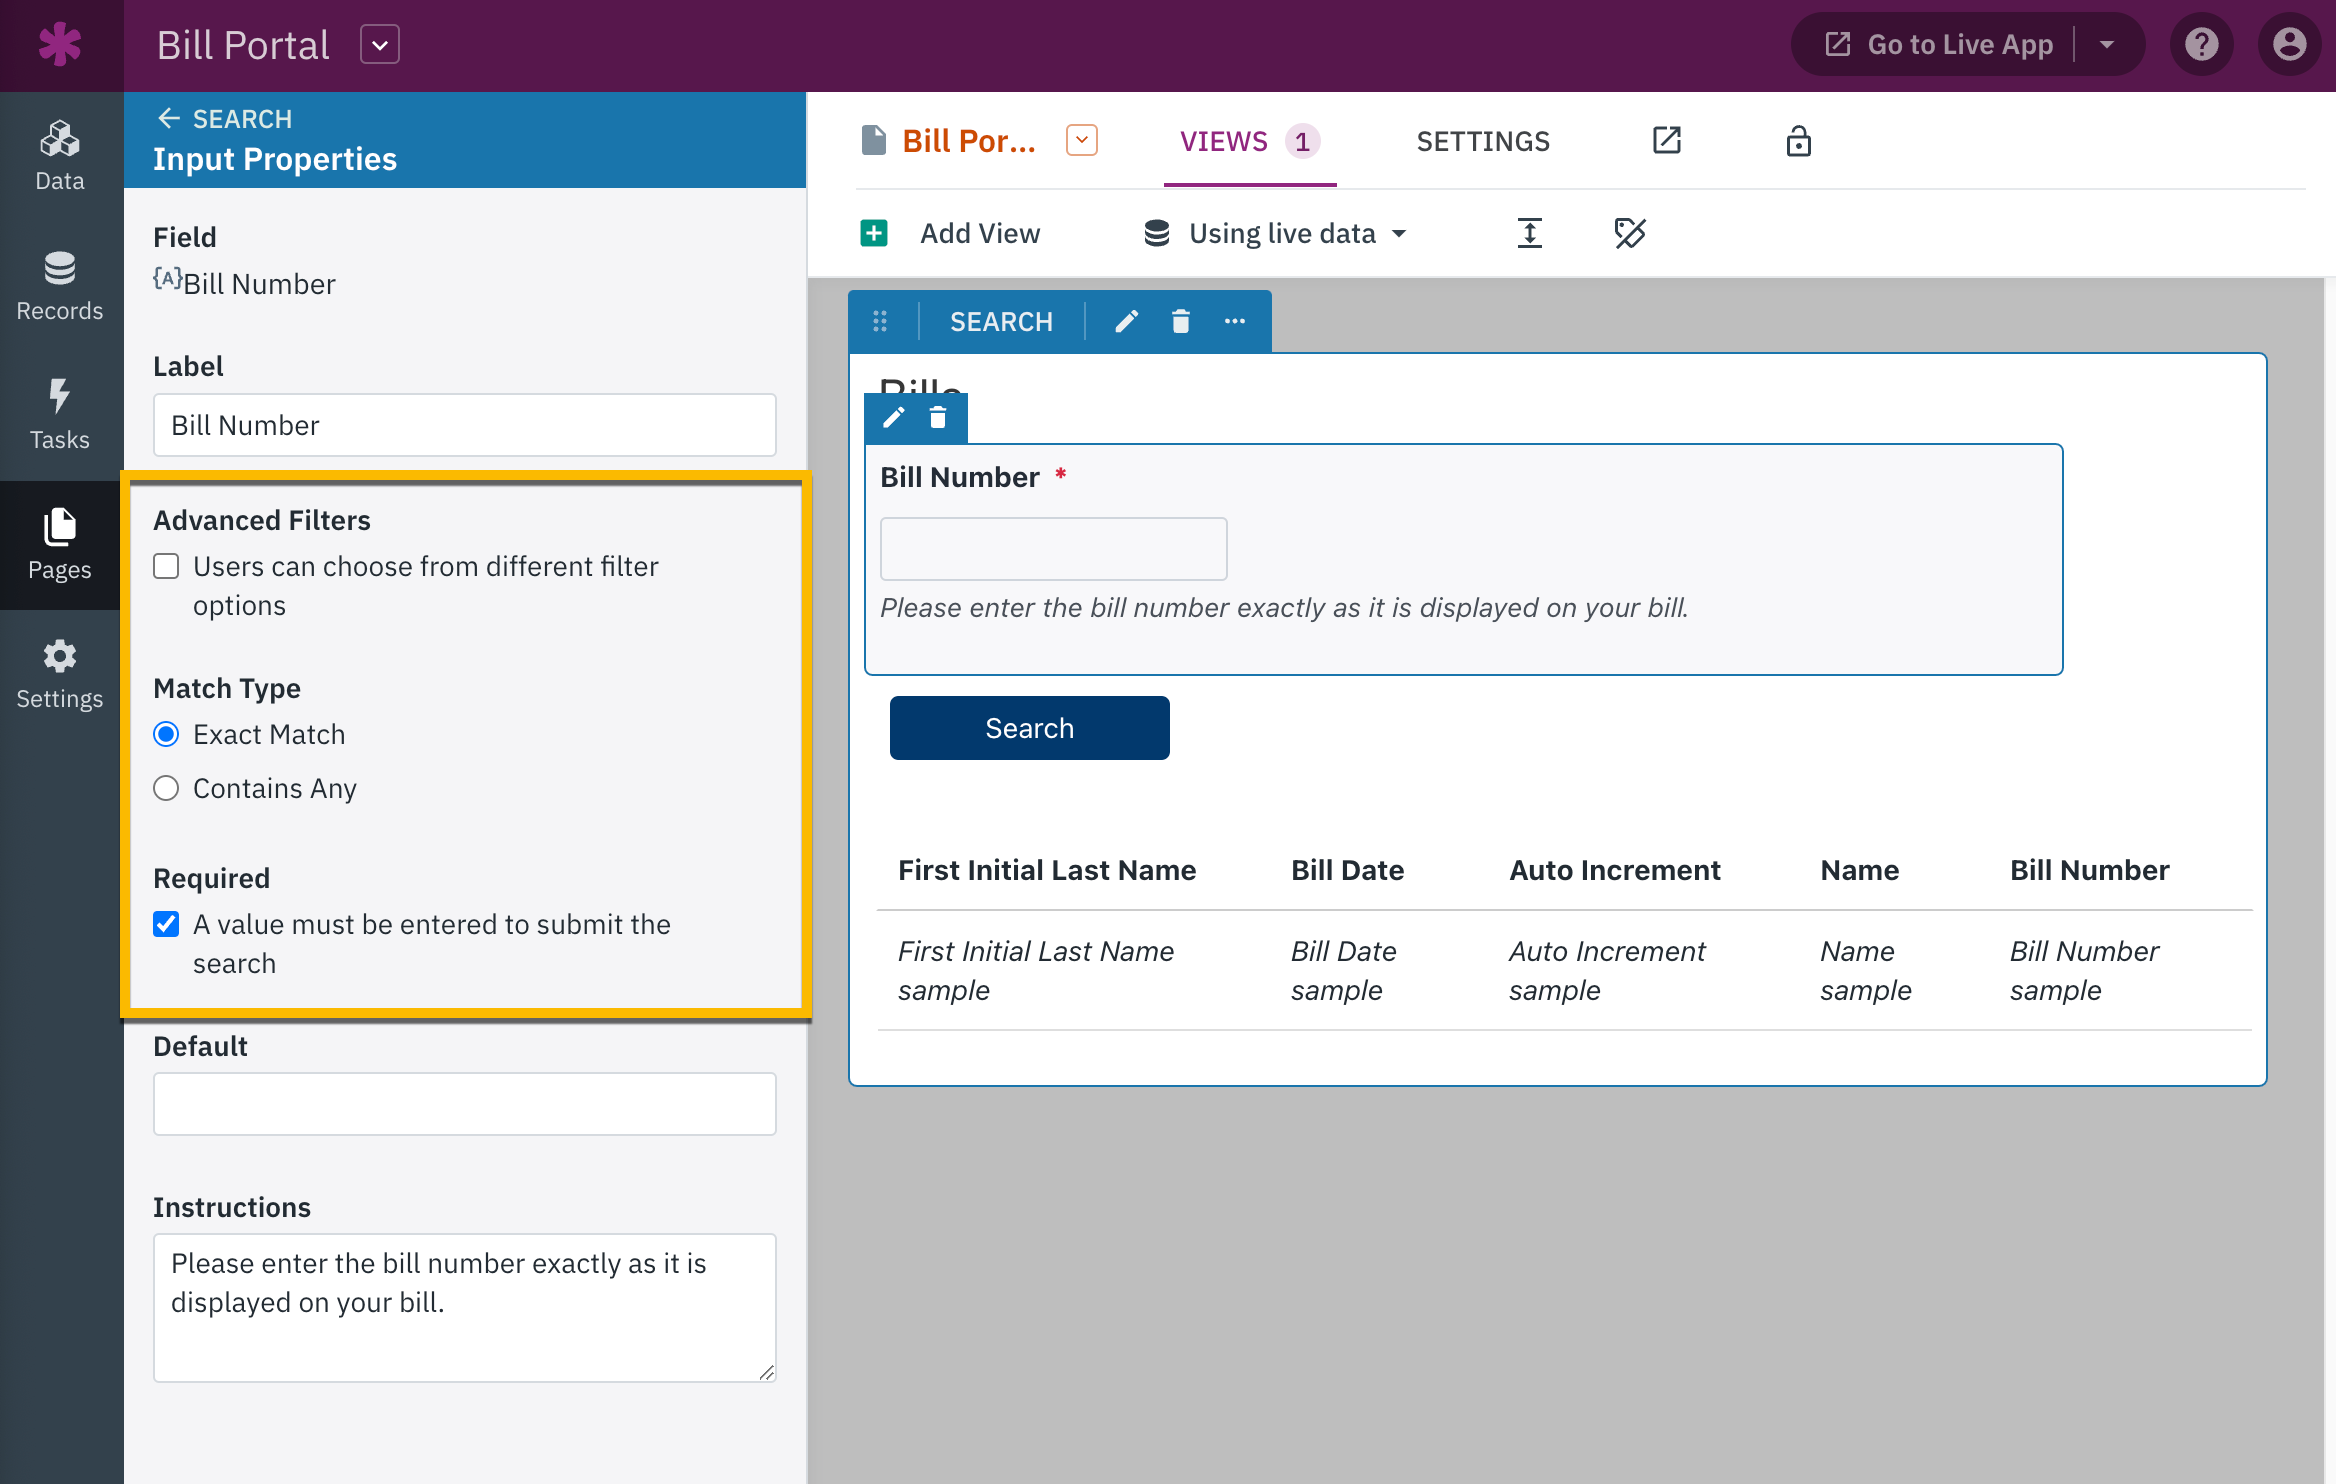
Change the field input property settings to:
-
Advanced Filters: Unchecked box
- Match Type: Exact Match
-
Required: Checked box
You can also add instructions for your users:
4. Viewing Your Finished Page
In order to test your page, it is necessary to add one or two test records to your database. You can easily add them by navigating to the Records tab:
Then, navigate to the page you just created in step two and select the "Go to Live App" button:
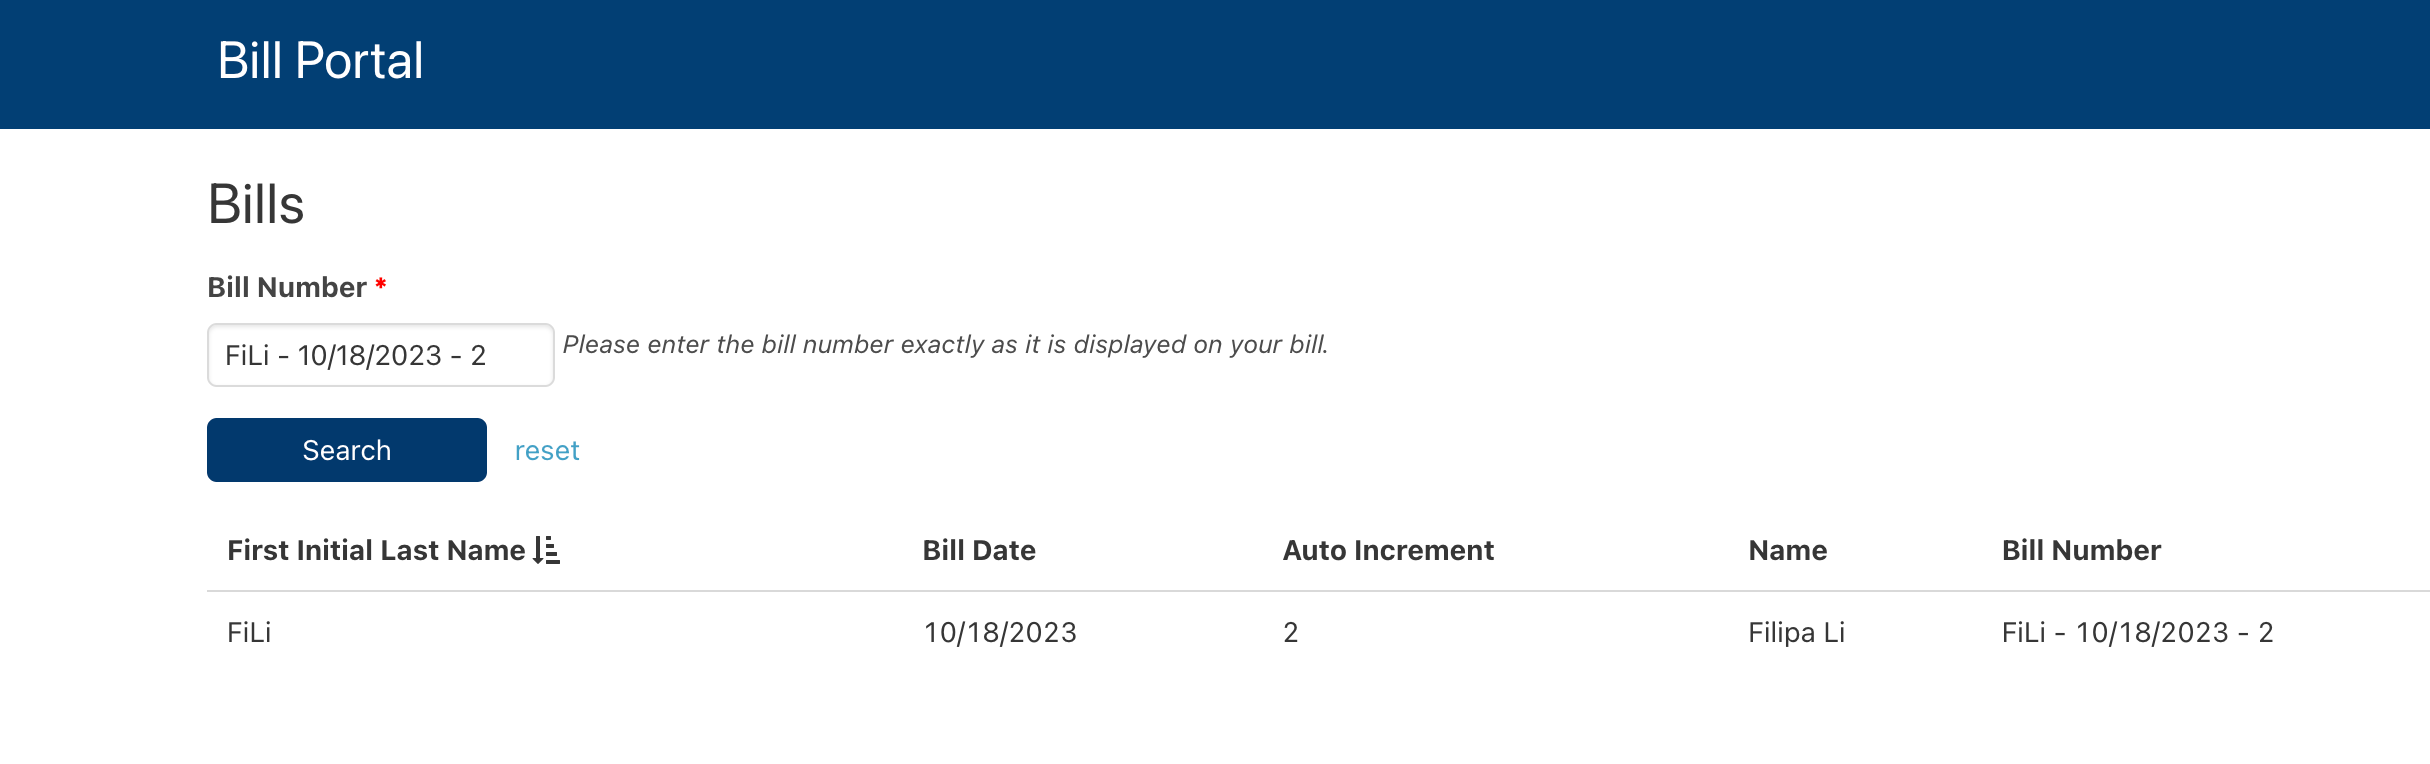
To view the corresponding record, simply enter the Bill Number in the search bar and click on the Submit button while viewing the Live App.
Congratulations! You have successfully completed this workflow. Well done!
Note: If the ID is not entered correctly, including missing a character, having an extra character (even a space), or in any way not matching an existing record exactly, the search will not yield any results.
Optional Feature
You can use this “login” method for a billing portal, as previously mentioned. See our About E-Commerce guide for more information on accepting payments directly in your Knack app.