Scenario
You need more information (or multiple fields) included in your connection field dropdown.
Requirements
Steps
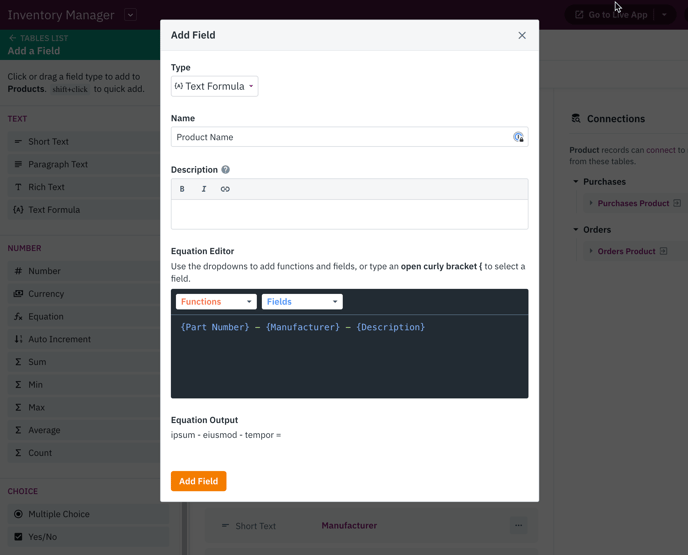
Adding a Text Formula Field to Your Table
Navigate to the Data section of your Builder and choose the table where you wish to showcase multiple fields in the dropdown. Proceed by adding a text formula field, which we will name "Product Name".
After naming your new text formula, choose the fields you wish to include and insert symbols or characters between them as needed. For instance, in this Purchase Order example, we will add:
{Part No.} - {Manufacturer} - {Description}
Then, click "Add Field" to save the formula.
Tip: You can read more about using text formula fields here.
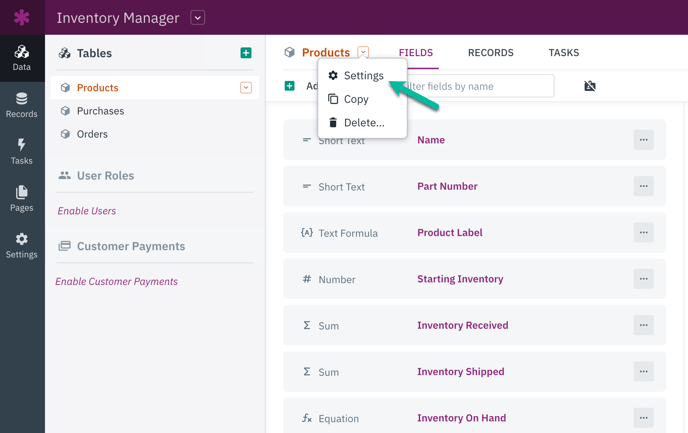
Setting the Display Field to Show Contents of the Text Formula
Navigate to the table where you created your text formula field. Then, click on the Settings tab:
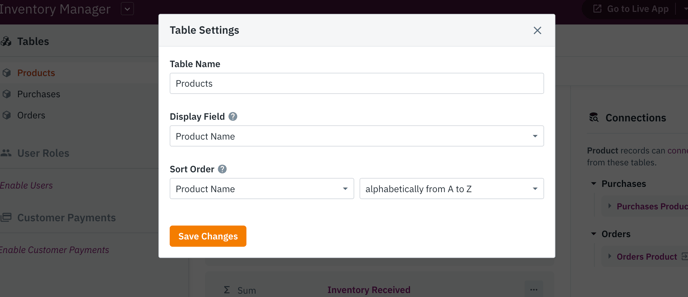
In the Settings tab, you will find a drop-down labeled as "Display Field." Simply click on it and choose the name of the text formula field that you have just created (in our example, this field is referred to as "Product Name").
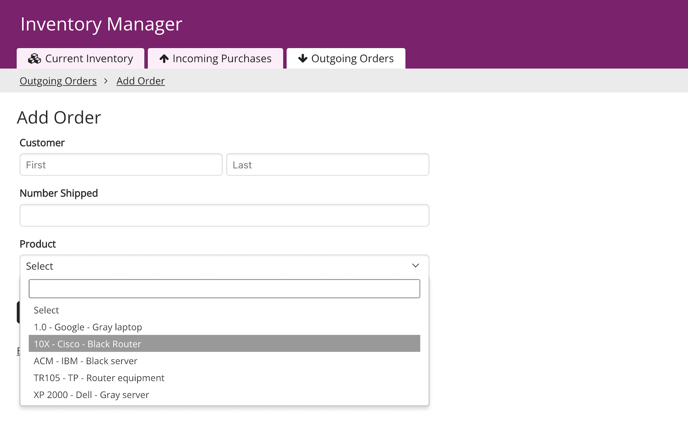
After saving your changes, open your app to test the new drop-down. The text formula you created will now be displayed, showing a combination of the fields you added.
In our example, the values for Part Number - Manufacturer - Description will be visible:
Note: It is important to wait for your records to update, as the text formula field functions like an equation and requires data querying to update records based on the new formula.