Use Case
In order to guide your users effectively in your apps, a few lines of text can work wonders. When it comes to forms, modifying the text on the submit button can make a significant impact on the completion of information from your users.
Without this change, you may frequently receive incomplete data.
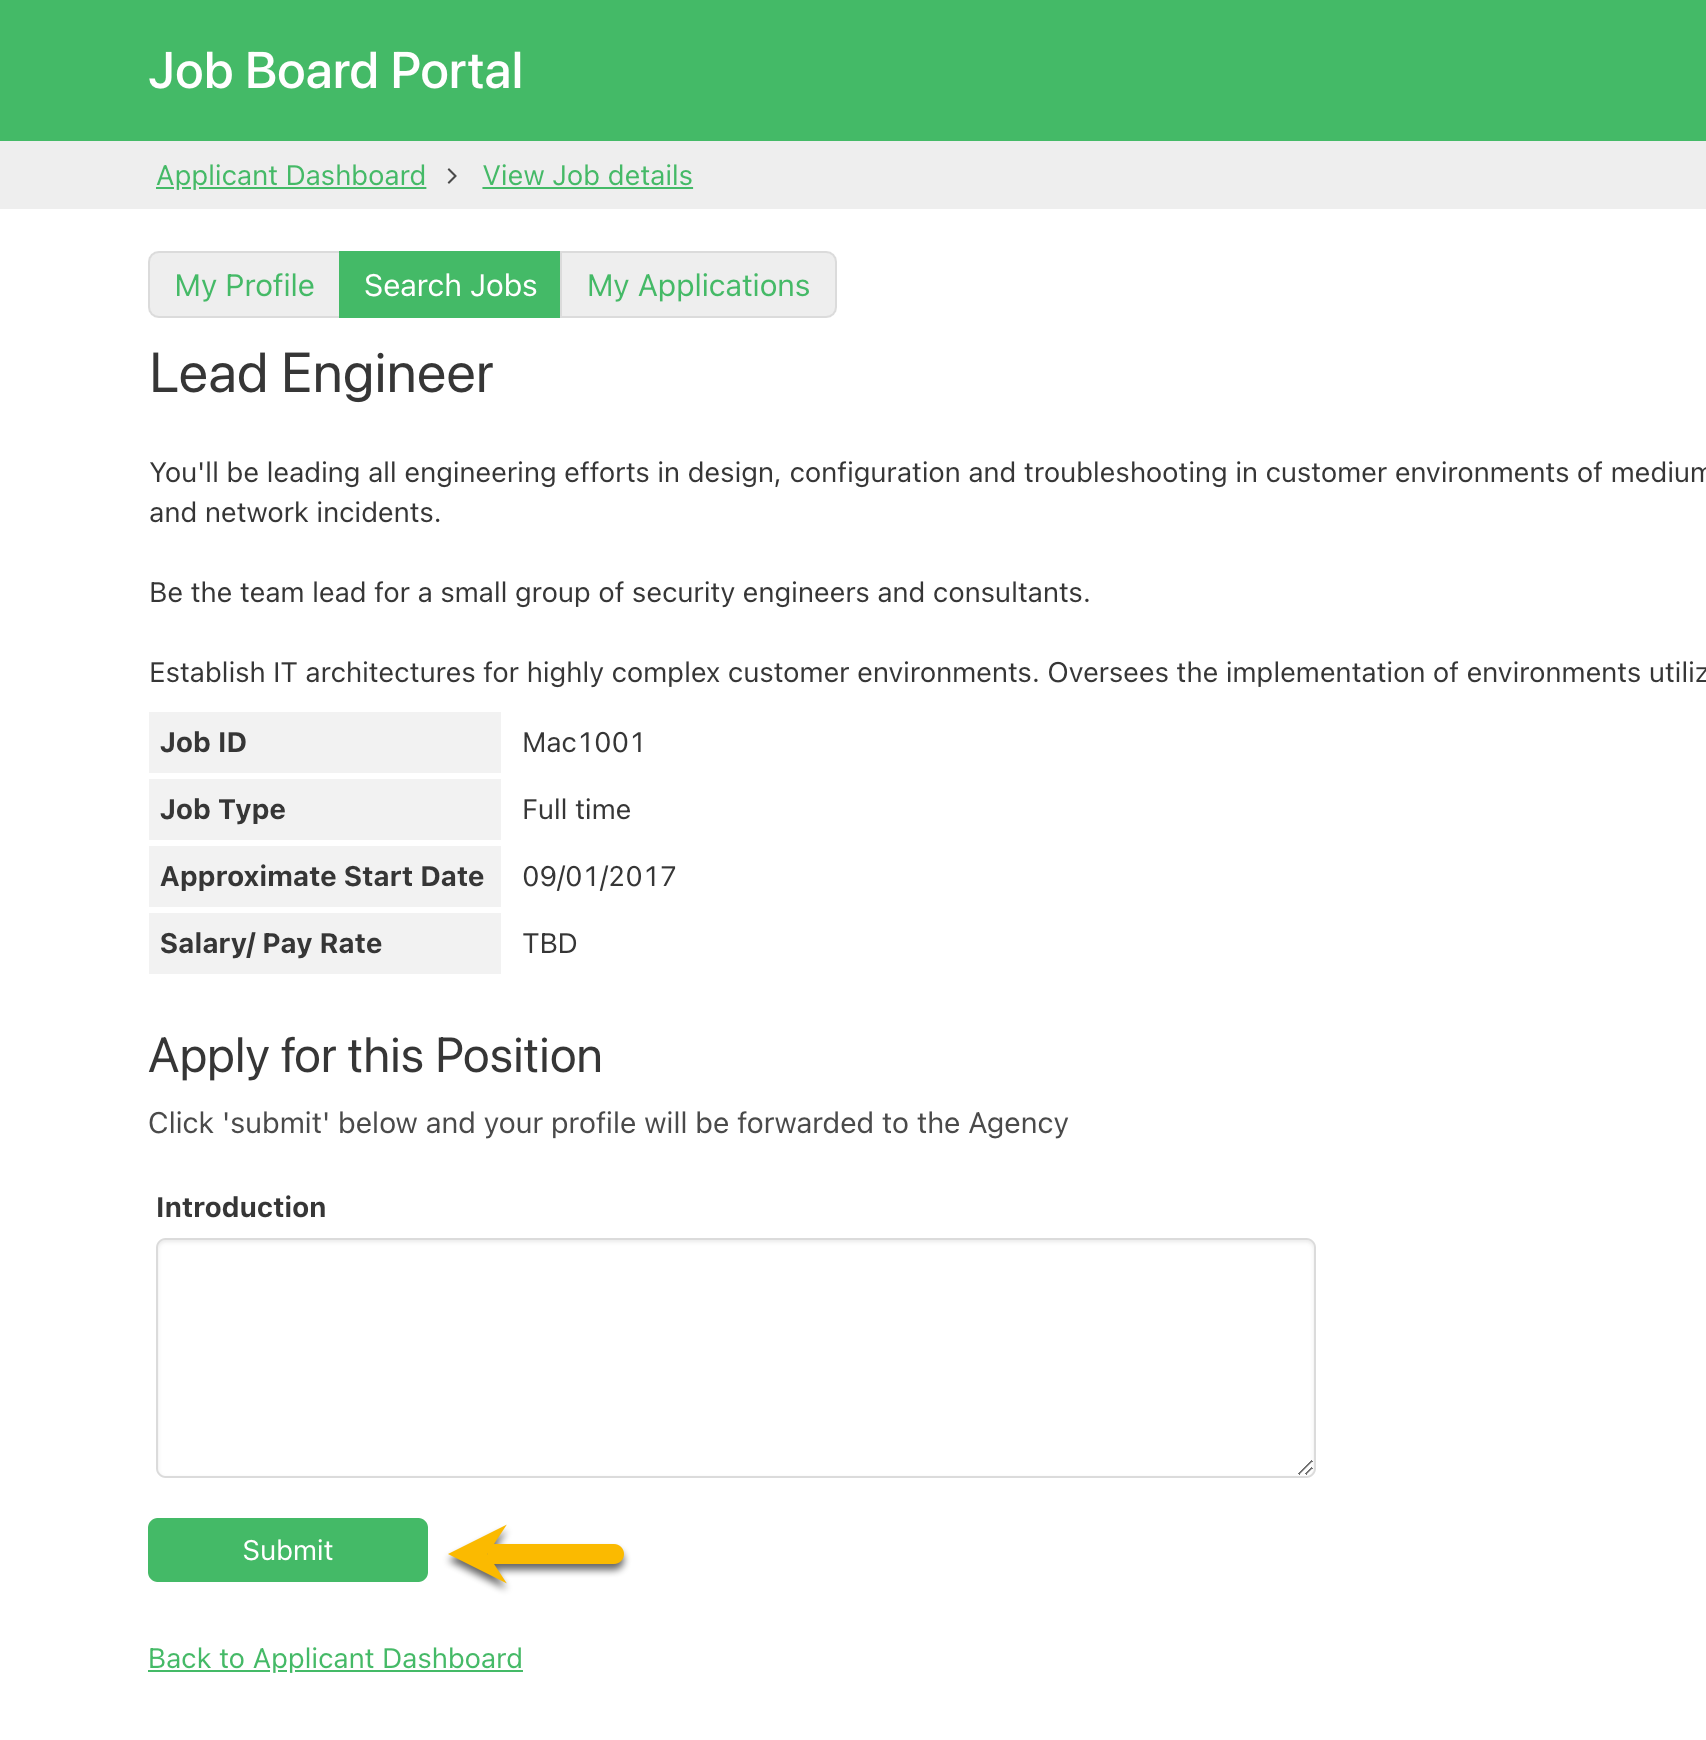
For instance, in a Job Portal app, it might be beneficial to replace the existing "Submit" text on the submit button with something that clearly indicates that they are about to officially submit the application.
Requirements
Steps
1. Select the Page with the Form
In the Pages section of the Builder, select the page with the form view.
2. Open the Form Editor
Click on the form view on the page to open the view's editor to view the form's settings.
3. Go to the Settings Section
Go to the "Settings" section within the form view editor.
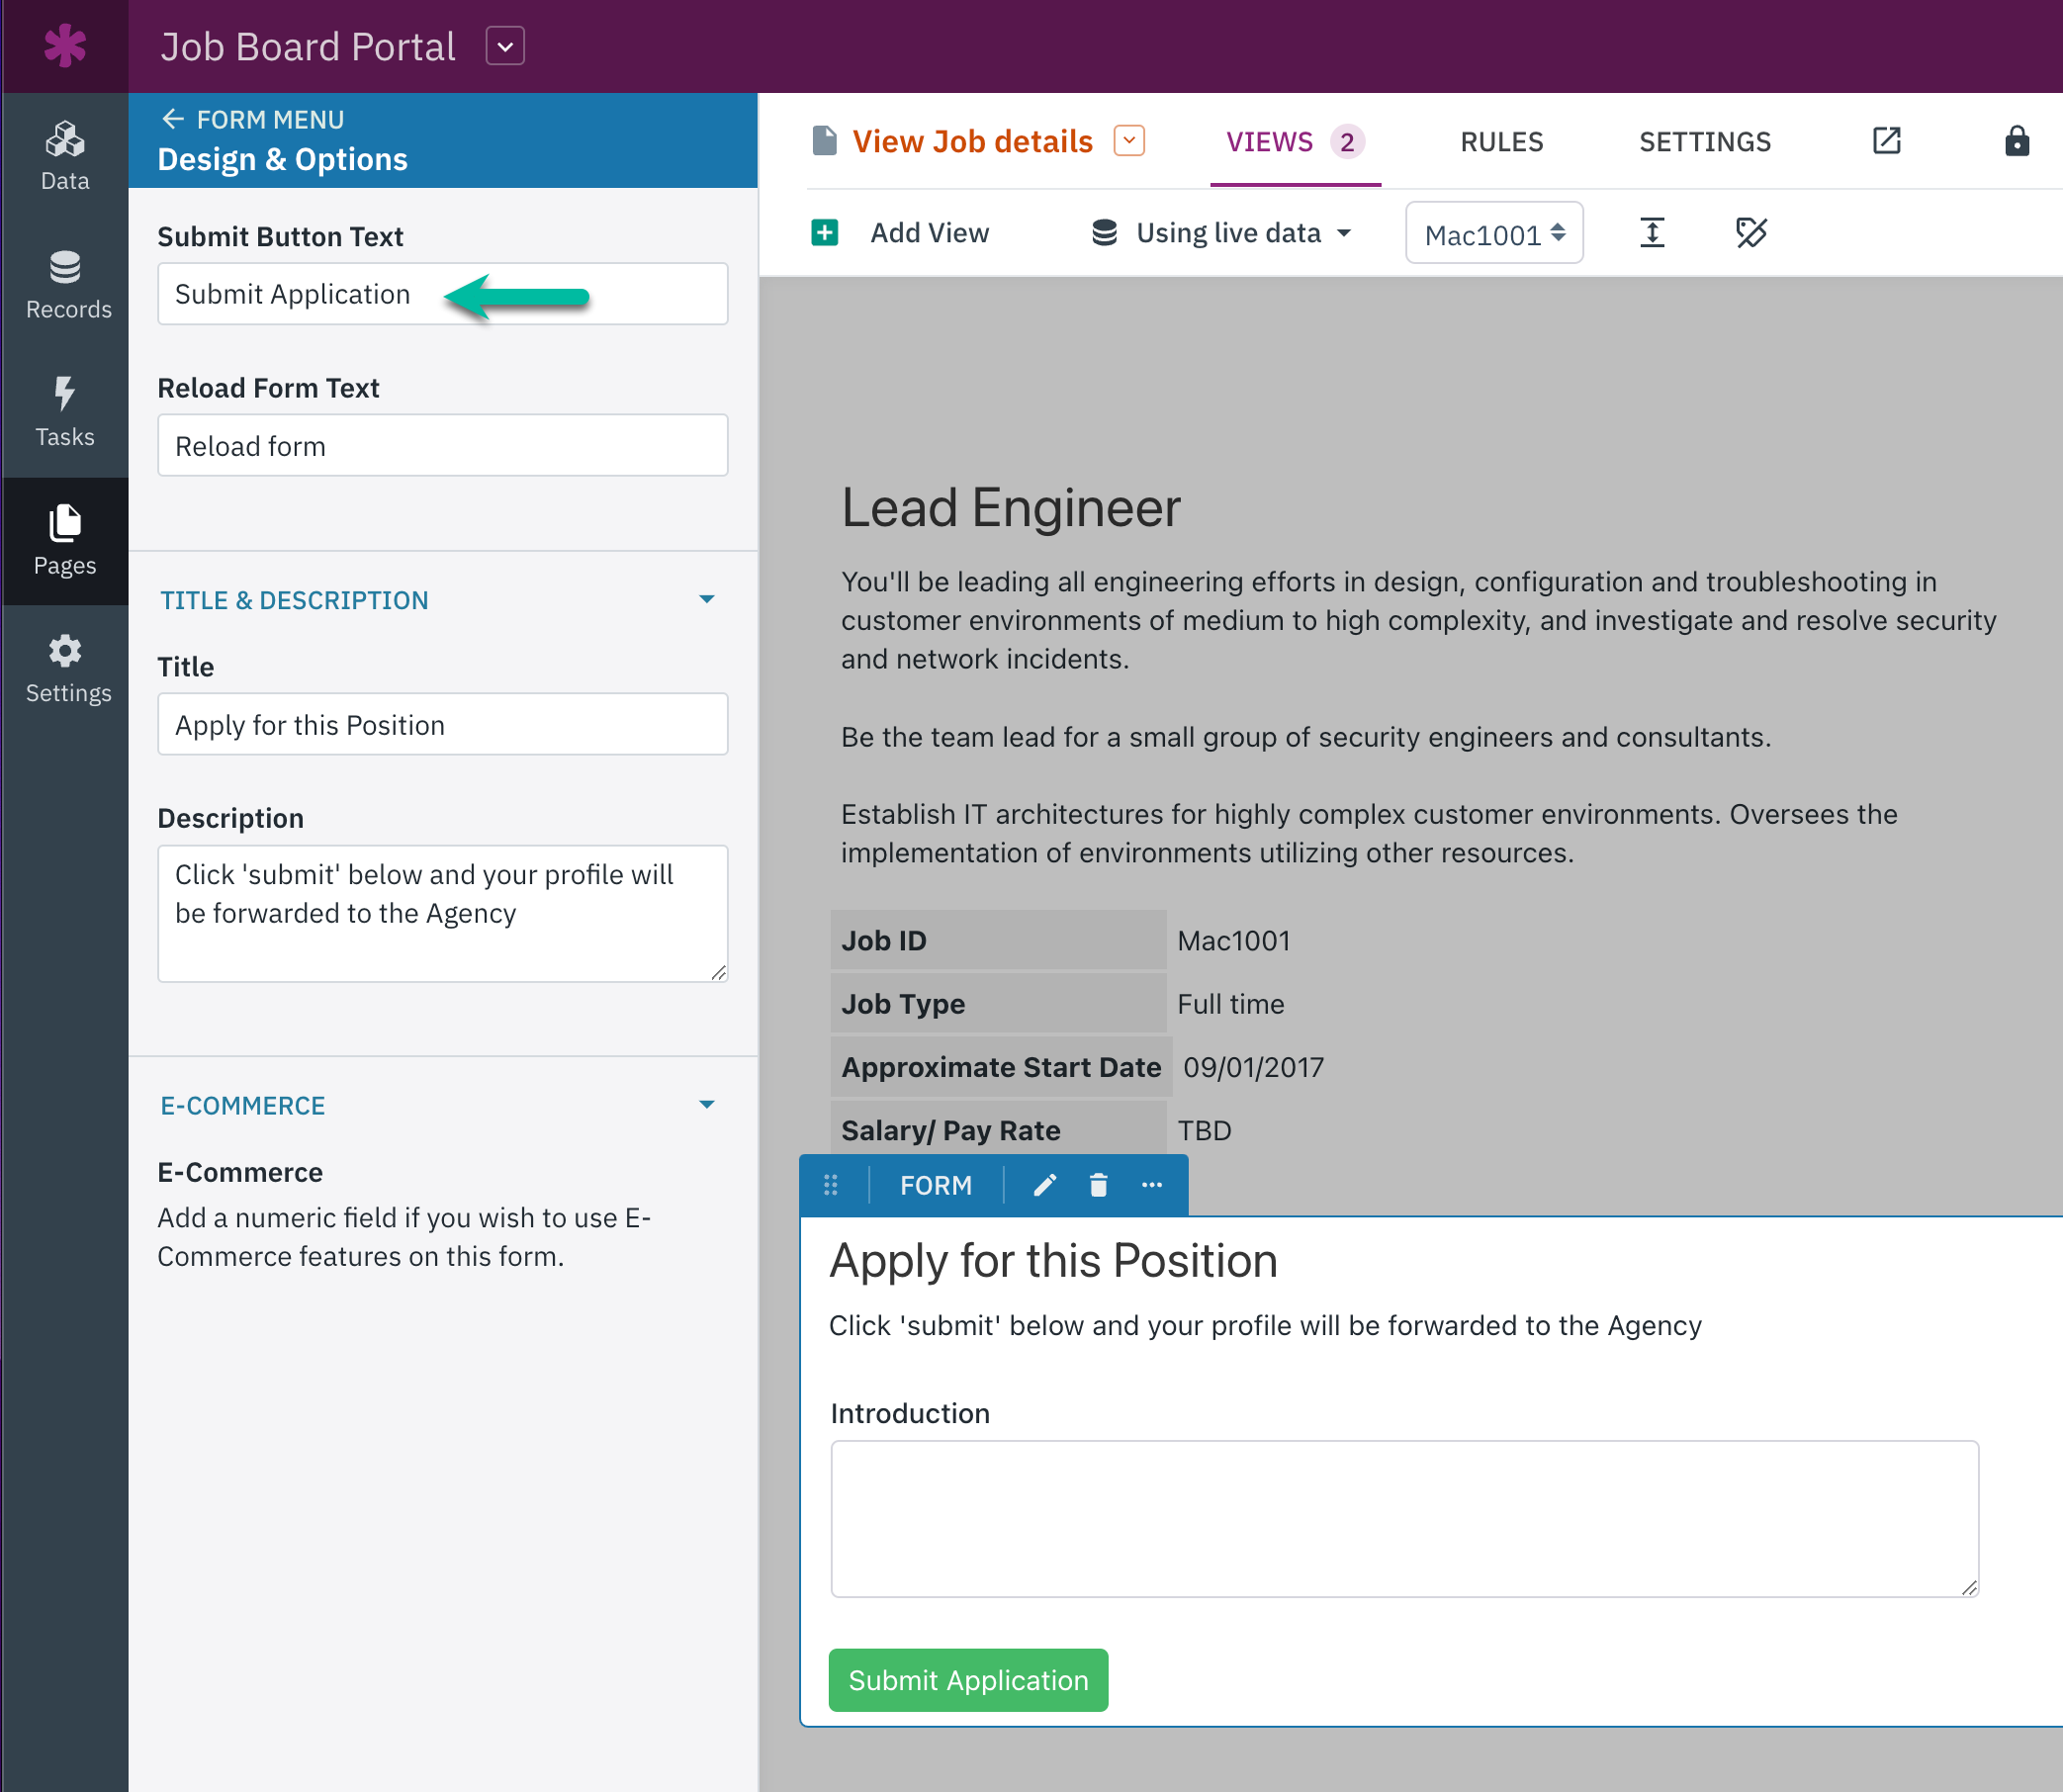
4. Update Submit Button Text Field
Modify the text in the "Submit Button Text" field input to reflect the desired text for the button.
That's all that's needed to customize the text for a submit button within a form view.
When users access the form in the Live App, they will be able to see the text you have added to the submit button.
