How to Limit an Uploaded File’s Size
In this article, we will share the step-by-step process of limiting the size of uploaded files using validation rules.
Use Case
You have a form where users can upload files from their computers or smartphones. It has been observed that a significant number of uploaded files are large and consume a substantial amount of storage space.
It would be highly beneficial if there was a way to restrict the size of the files that users can upload.
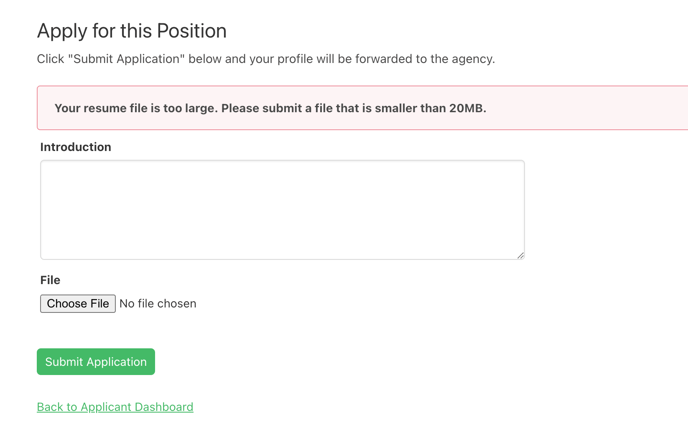
For instance, let's consider a job portal where applicants can apply for positions and upload their resumes. However, it is important to restrict them from uploading resume files that occupy excessive storage space.
Therefore, we aim to set a limit for files that should not exceed 20MB in size.
In the above image, an applicant tried to upload a file that was larger than 20MB. Instead of submitting the form, she received a message letting her know that she needed to upload a smaller file.
Note: It is now possible to resize images on uploading by enabling image resizing in the image field settings.
Steps
1. Select the Table with the File or Image Field
In the Data section of the Builder, select the table that contains the File or Image field in which you would like to limit the size. If the field doesn't already exist, here's how you can create a new one.
2. Open the Field Settings
Click on the more options icon (the "..." icon) and click on the settings to open the field's settings. Then, select the Validation Rules section.
3. Add the Validation Rule
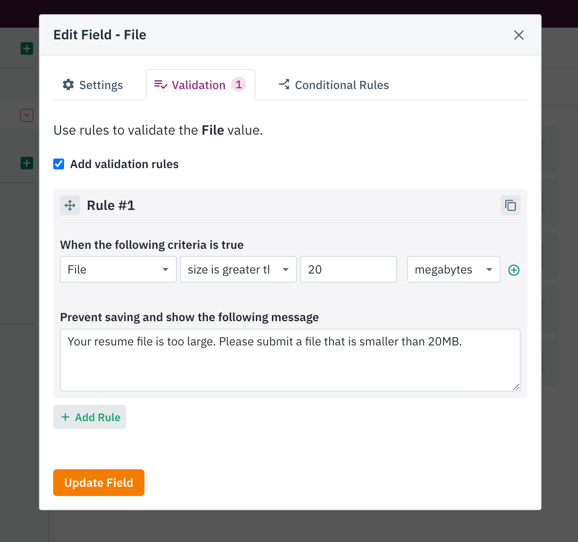
First, check the “Add validation rules” box.
For the When part of the rule, select the file or image field and then the "size is greater than" option. Once that's selected, you'll be able to choose the size limit.
For the Message part of the rule, you can enter the custom message you want the user to see:
Your validation rule is now ready, and your users will automatically be prompted if they try to upload larger files.
Tip: You can learn more about adding and managing validation rules here.
Note: It is also possible to resize images upon upload. This setting can be accessed from the settings on the image field in the Data section of the Builder.

