Knack makes it possible to import records into your database from a spreadsheet. You can use the import process to both create new tables and insert or update records to existing tables.
Note: Currently, the only limits to the size of your file are that it cannot be any larger than 250 MB. Trial users are limited to 10k records.
This article covers the following topics:
Save as .CSV, .XLS, .XLSX, or Import with Google Sheets
We currently support various formats for importing, including .CSV, .XLS (Excel), .XLSX (Excel), and Google Sheets.
Adding Column Headers
It's highly recommended that you add a single row at the top of your spreadsheet that will act as the headers (or labels) for each column. These headers are used with the table fields as follows:
-
When you create a new table using an import, each header of your data file that you select is used as the name of the field that will be automatically created for that column.
-
When you update existing records in a table, the headers of your data file are used to match that column with an existing field in the table. During the import process, the header is used to identify any existing fields with a relative name or similar data.
Formatting Your Data
It's worth reviewing your data and making sure that the formatting is consistent before importing. This can be much more painful to correct after the import.
For example, say you have a spreadsheet of t-shirts, including a "Size" column that you want to be a multiple choice. These sizes need to be consistent. If you have values of "large," "Large," and "L,” each of these will be a different option for size in your new Knack “Size” field.
Tip: Learn more about formatting your data in this article here.
Multi-Column Fields
Some fields, like names and addresses, can have more than one component and will need to be separated into multiple columns. For example, a name field can contain a title, a first name, and a last name.
If you want to import columns into these special field types, you'll need to follow these rules:
-
Make sure each component is in a separate column. If you have the full name in one column, the import will not be able to parse out the first name from the last name. It will just treat it as a normal text field (without the special formatting of a name or address field).
-
Columns do not have to be sequential in the upload. They can be separated by other fields. The import will combine only the columns you select into the multi-column field.
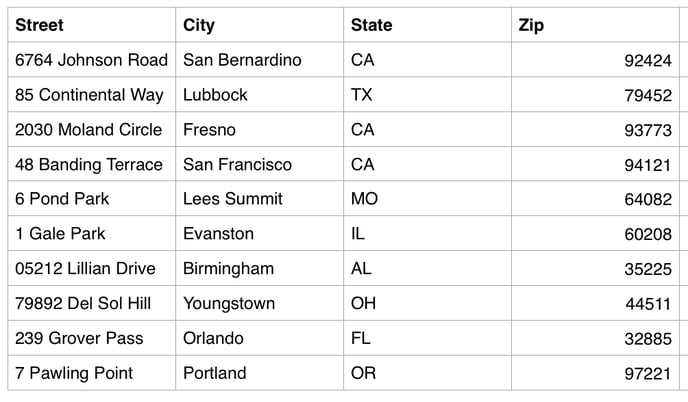
The following is an example of correctly formatted address fields in a spreadsheet:
Starting a New Import
You can import a data file to either create a new table or update an existing table.
In this section, we'll start with the options for adding a new table. To learn about updating an existing table with an import, see this section below.
Adding a New Table
To create a new table, click on the “+” button in the left panel:
/Importing%20Records/importingrecords1.png?hsLang=en)
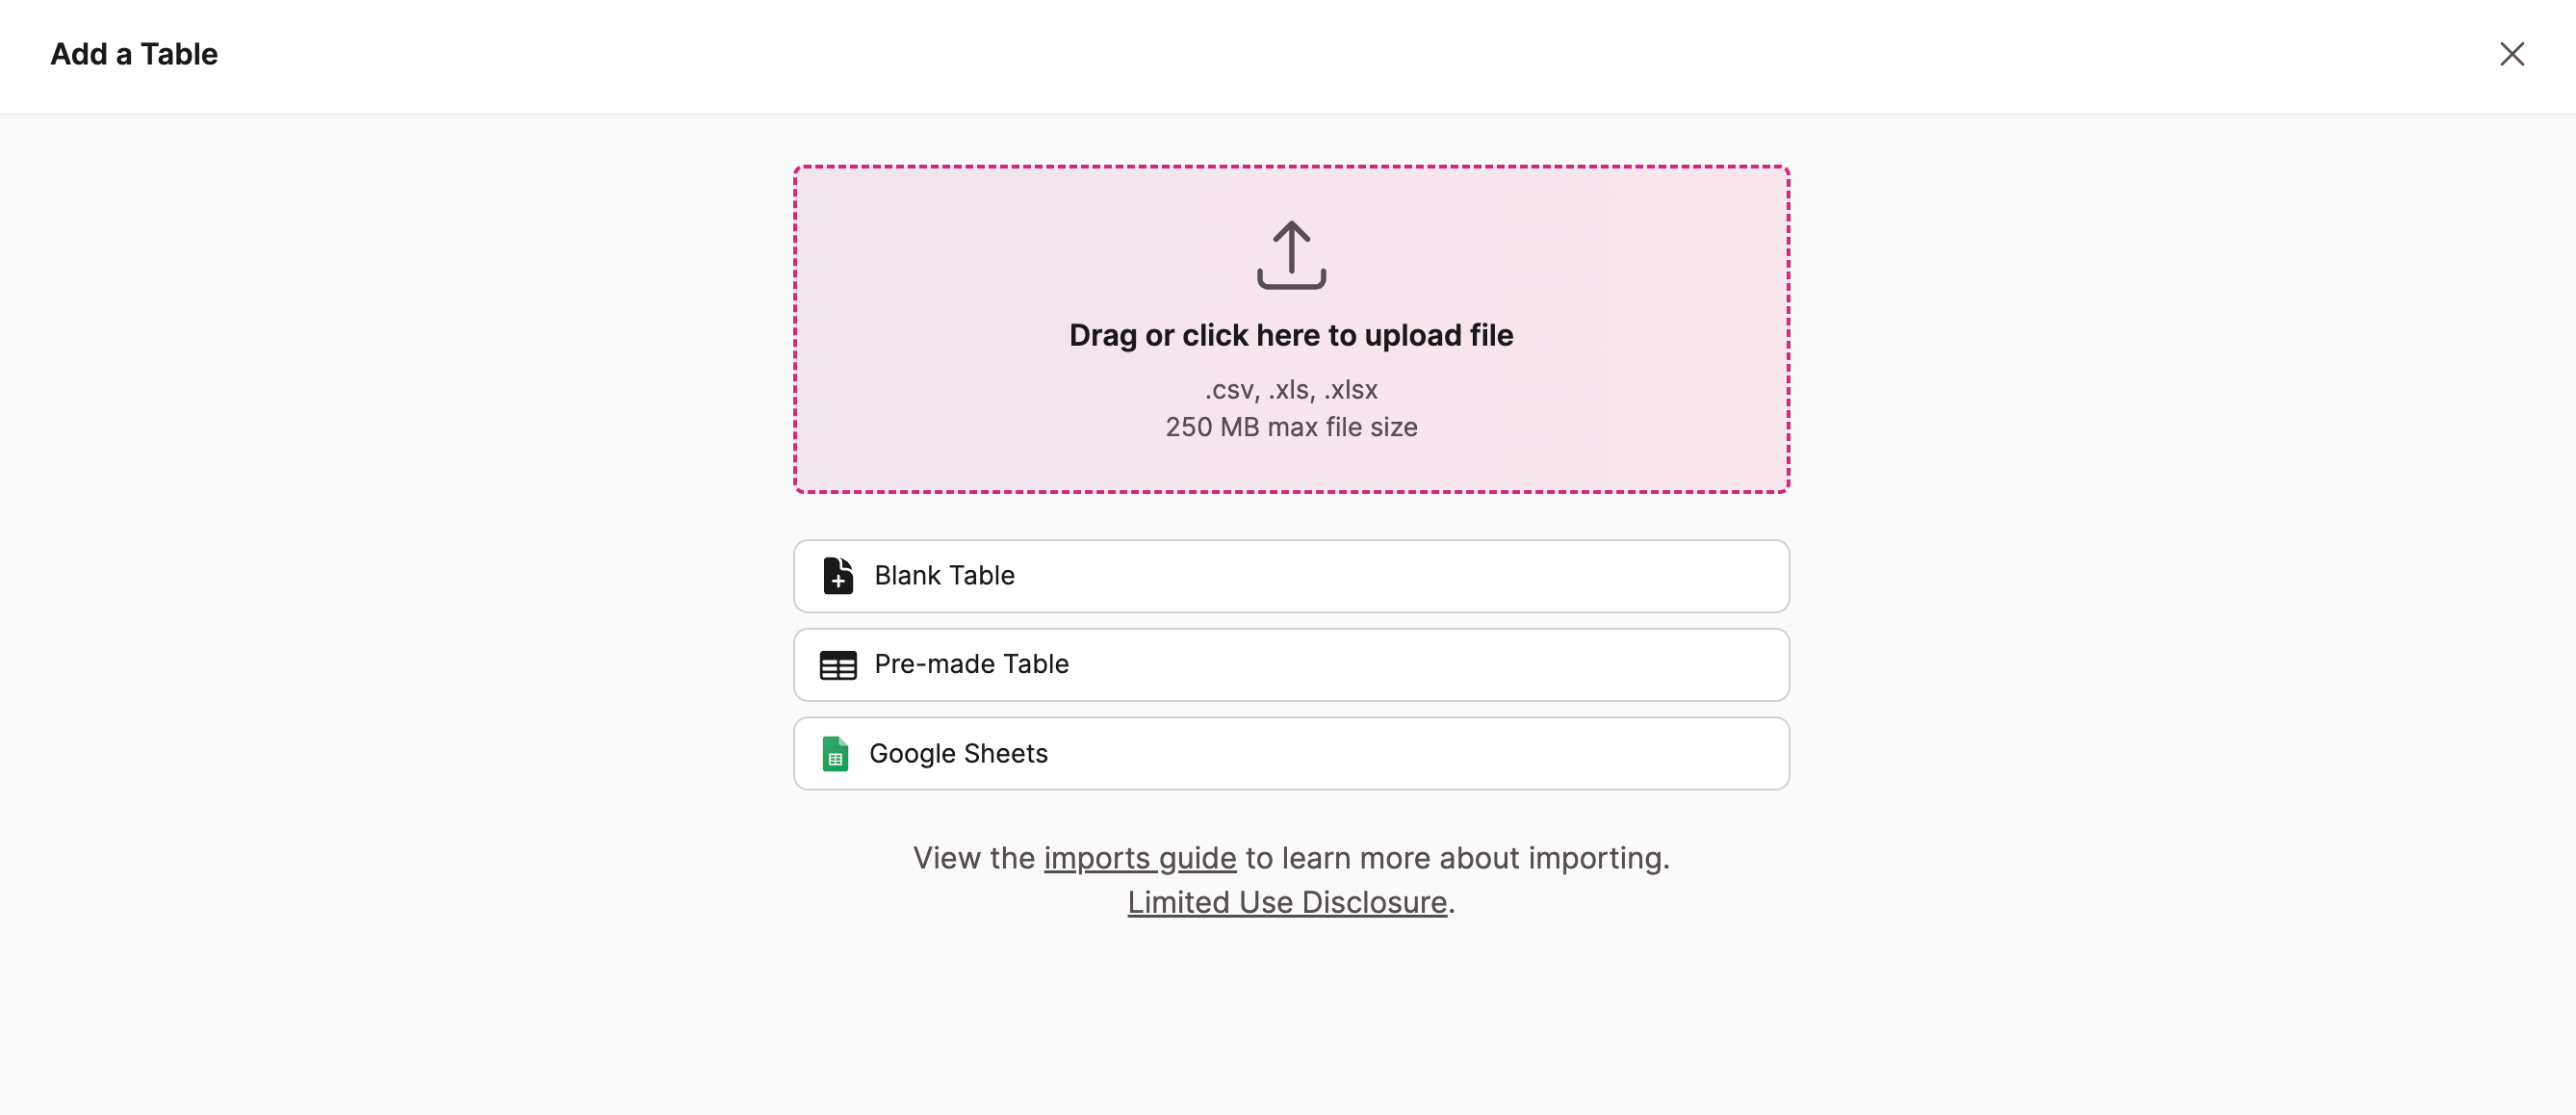
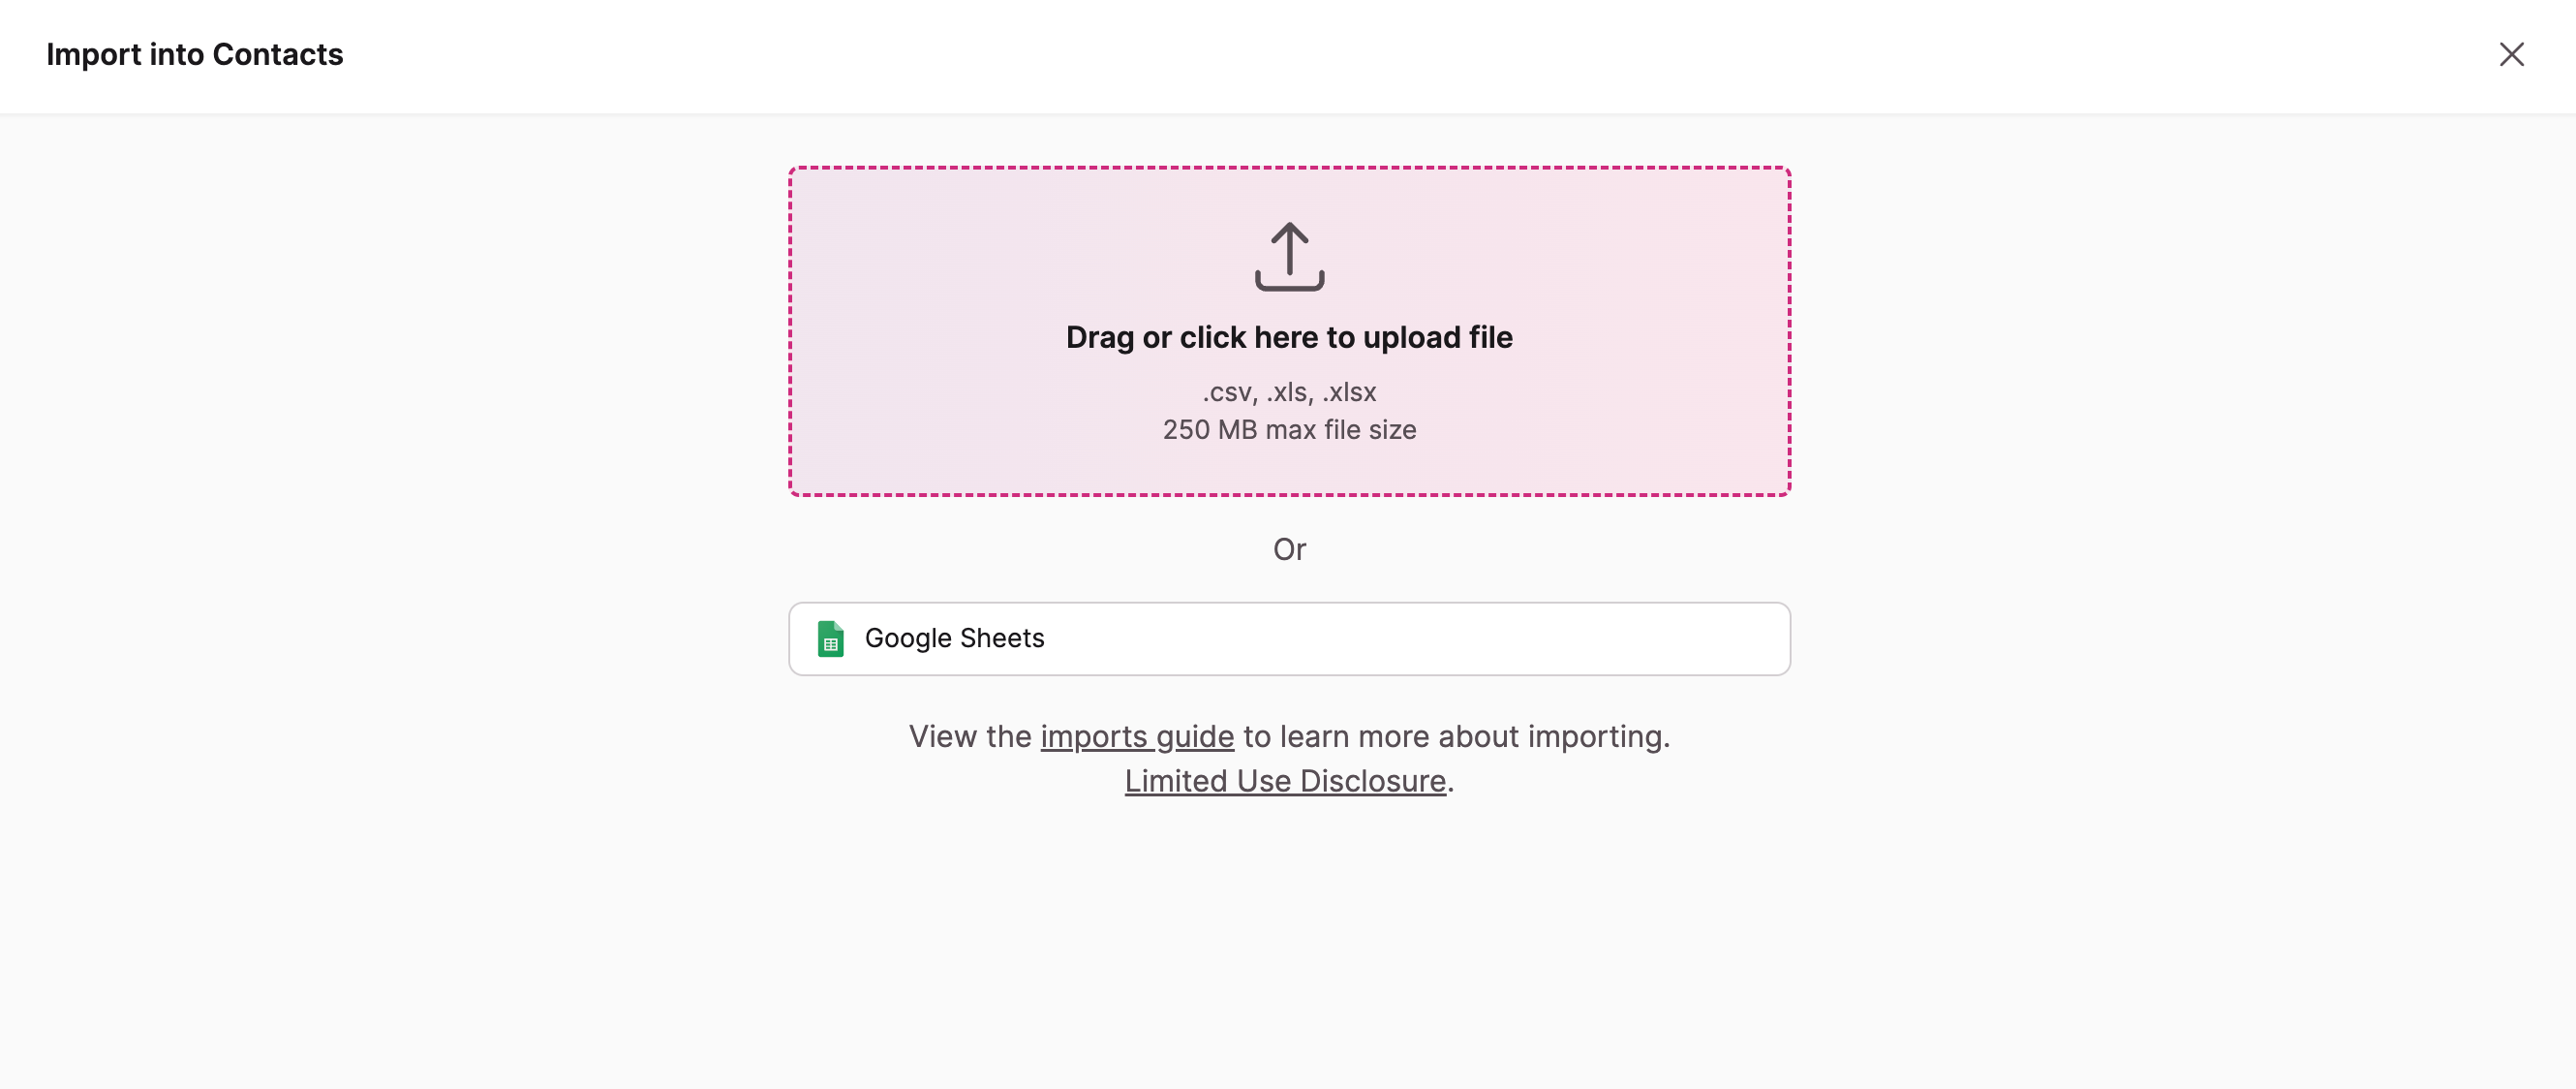
You will then have options to upload your file, create a blank table, populate a pre-made template table, or upload data from Google Sheets.
To upload a file, you can start by dragging and dropping it into the space provided, or by clicking into the space outlined to open your computer’s file finder.
Tip: To learn about using Google Sheets to import your data, see our article here.
Blank Table
By selecting the Blank Table option, you can create a new table without importing data into it immediately. You will be directed back to the Data section of the Builder with your new table highlighted on the left:

Pre-made Table
By selecting the Pre-Made Table option, you can pick between several template tables offered:
Importing a Data File to Add a New Table
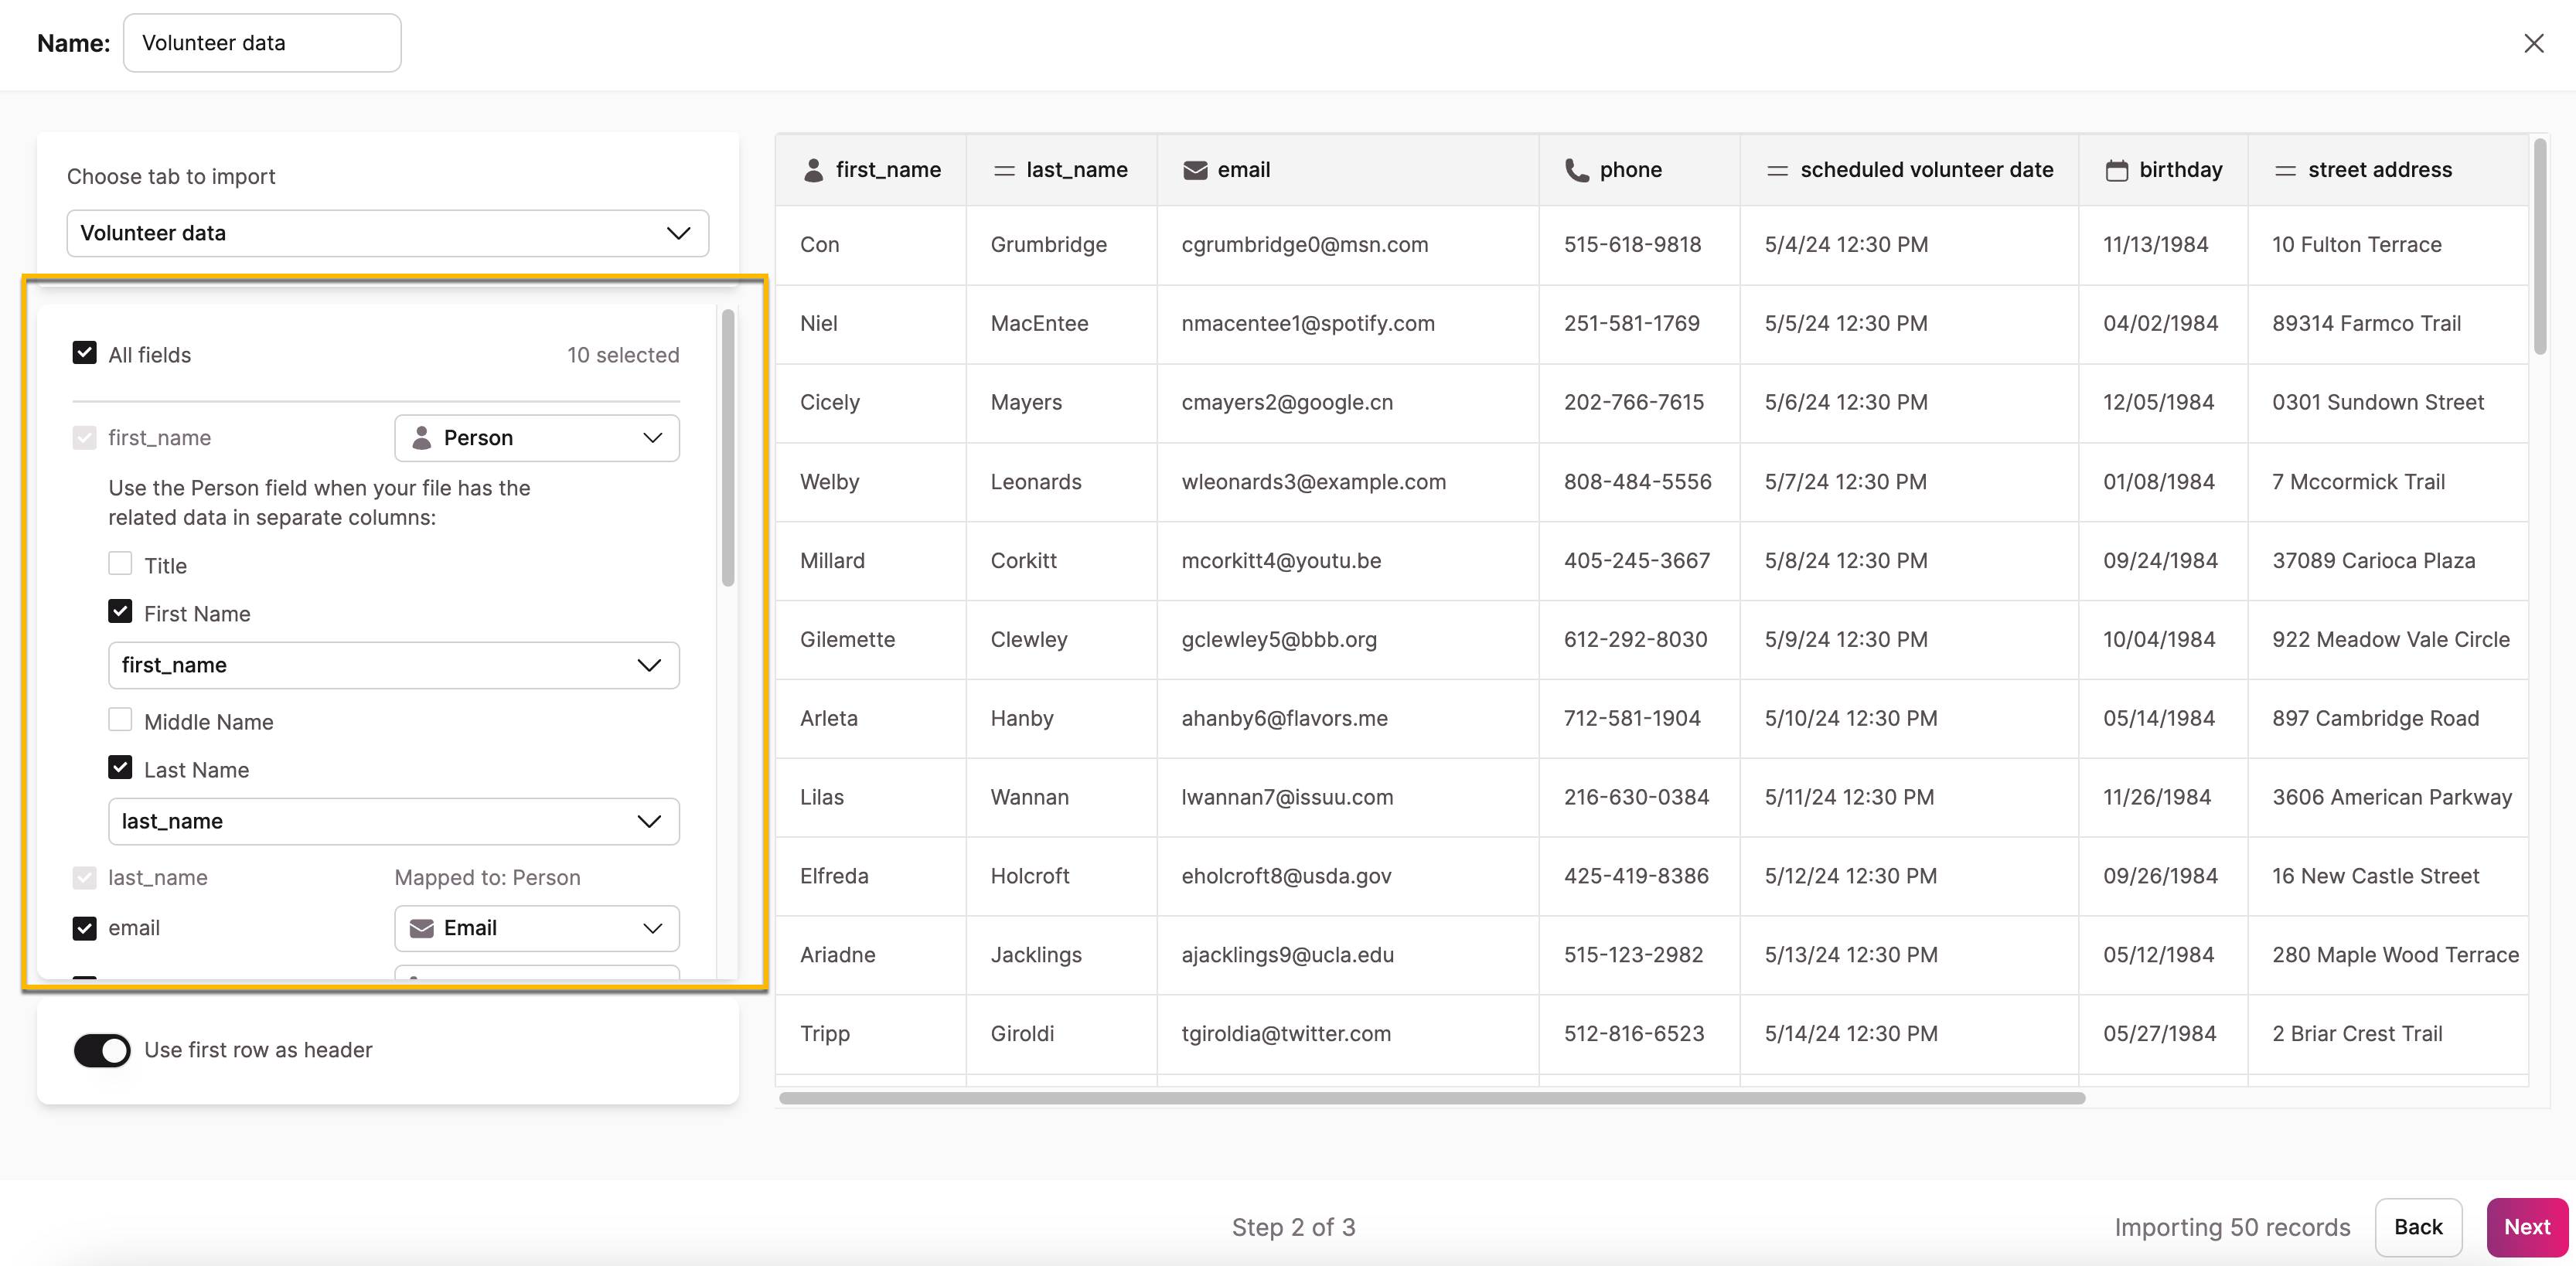
After uploading your data file, Knack will predict and allow you to edit field type predictions on the left based on your data:
Notes:
- The name of the table can be edited in the top left input field or by going into the table's settings once it is created.
- If you have multiple tabs in your data file, you can select which one you would like to import in the dropdown above the field type predictions (Choose tab to import).
- You can uncheck any columns to prevent them from being imported.
- You will not be able to map columns to any fields in your table that are non-mutable, such as auto-increment or formula fields.
Person, Date/Time, and Address Field Options
If you're importing name data, or address data, you will need to have the data for these separated into multiple columns. For more information about multi-column fields, see our section here.
The options for mapping your data file's column for addresses are the following:
-
Street Address
-
Street Address 2
-
City
-
State / Region / Province
-
Zip / Postal Code
-
Country
-
Latitude
-
Longitude
You can map person field data from your column to the following options:
-
Title
-
First Name
-
Middle Name
-
Last Name
For date/time data in your file, the following options are:
-
Selecting the date format
-
mm/dd/yyyy
-
dd/mm/yyyy
-
M D, yyyy
-
Ignore Date
-
-
Selecting the time format
-
HH:MM (am/pm)
-
HH:MM (24 hour)
-
Ignore Time
-
Notes:
- You can import into a date/time field that is set up to hold both date and time values.
- You can also import into a date/time field that is set up to hold date values and start/end times. Learn more about importing dates and times in this article here.
- To import only a time into a date/time field, your data must also include a date (i.e. "06/30/2024 12:30 PM" will work, but only having "12:30 PM" will not).
Tip: If you're adding new name and address fields, ensure your data file has multi-columns for these field types. Learn more on this topic here in this section.
For a quick tutorial on mapping columns for address and person data, see our article here.
Confirm Your Import
The final step of the import process summarizes the number of records being imported and the destination data table.
You can also choose how to handle records with import errors:
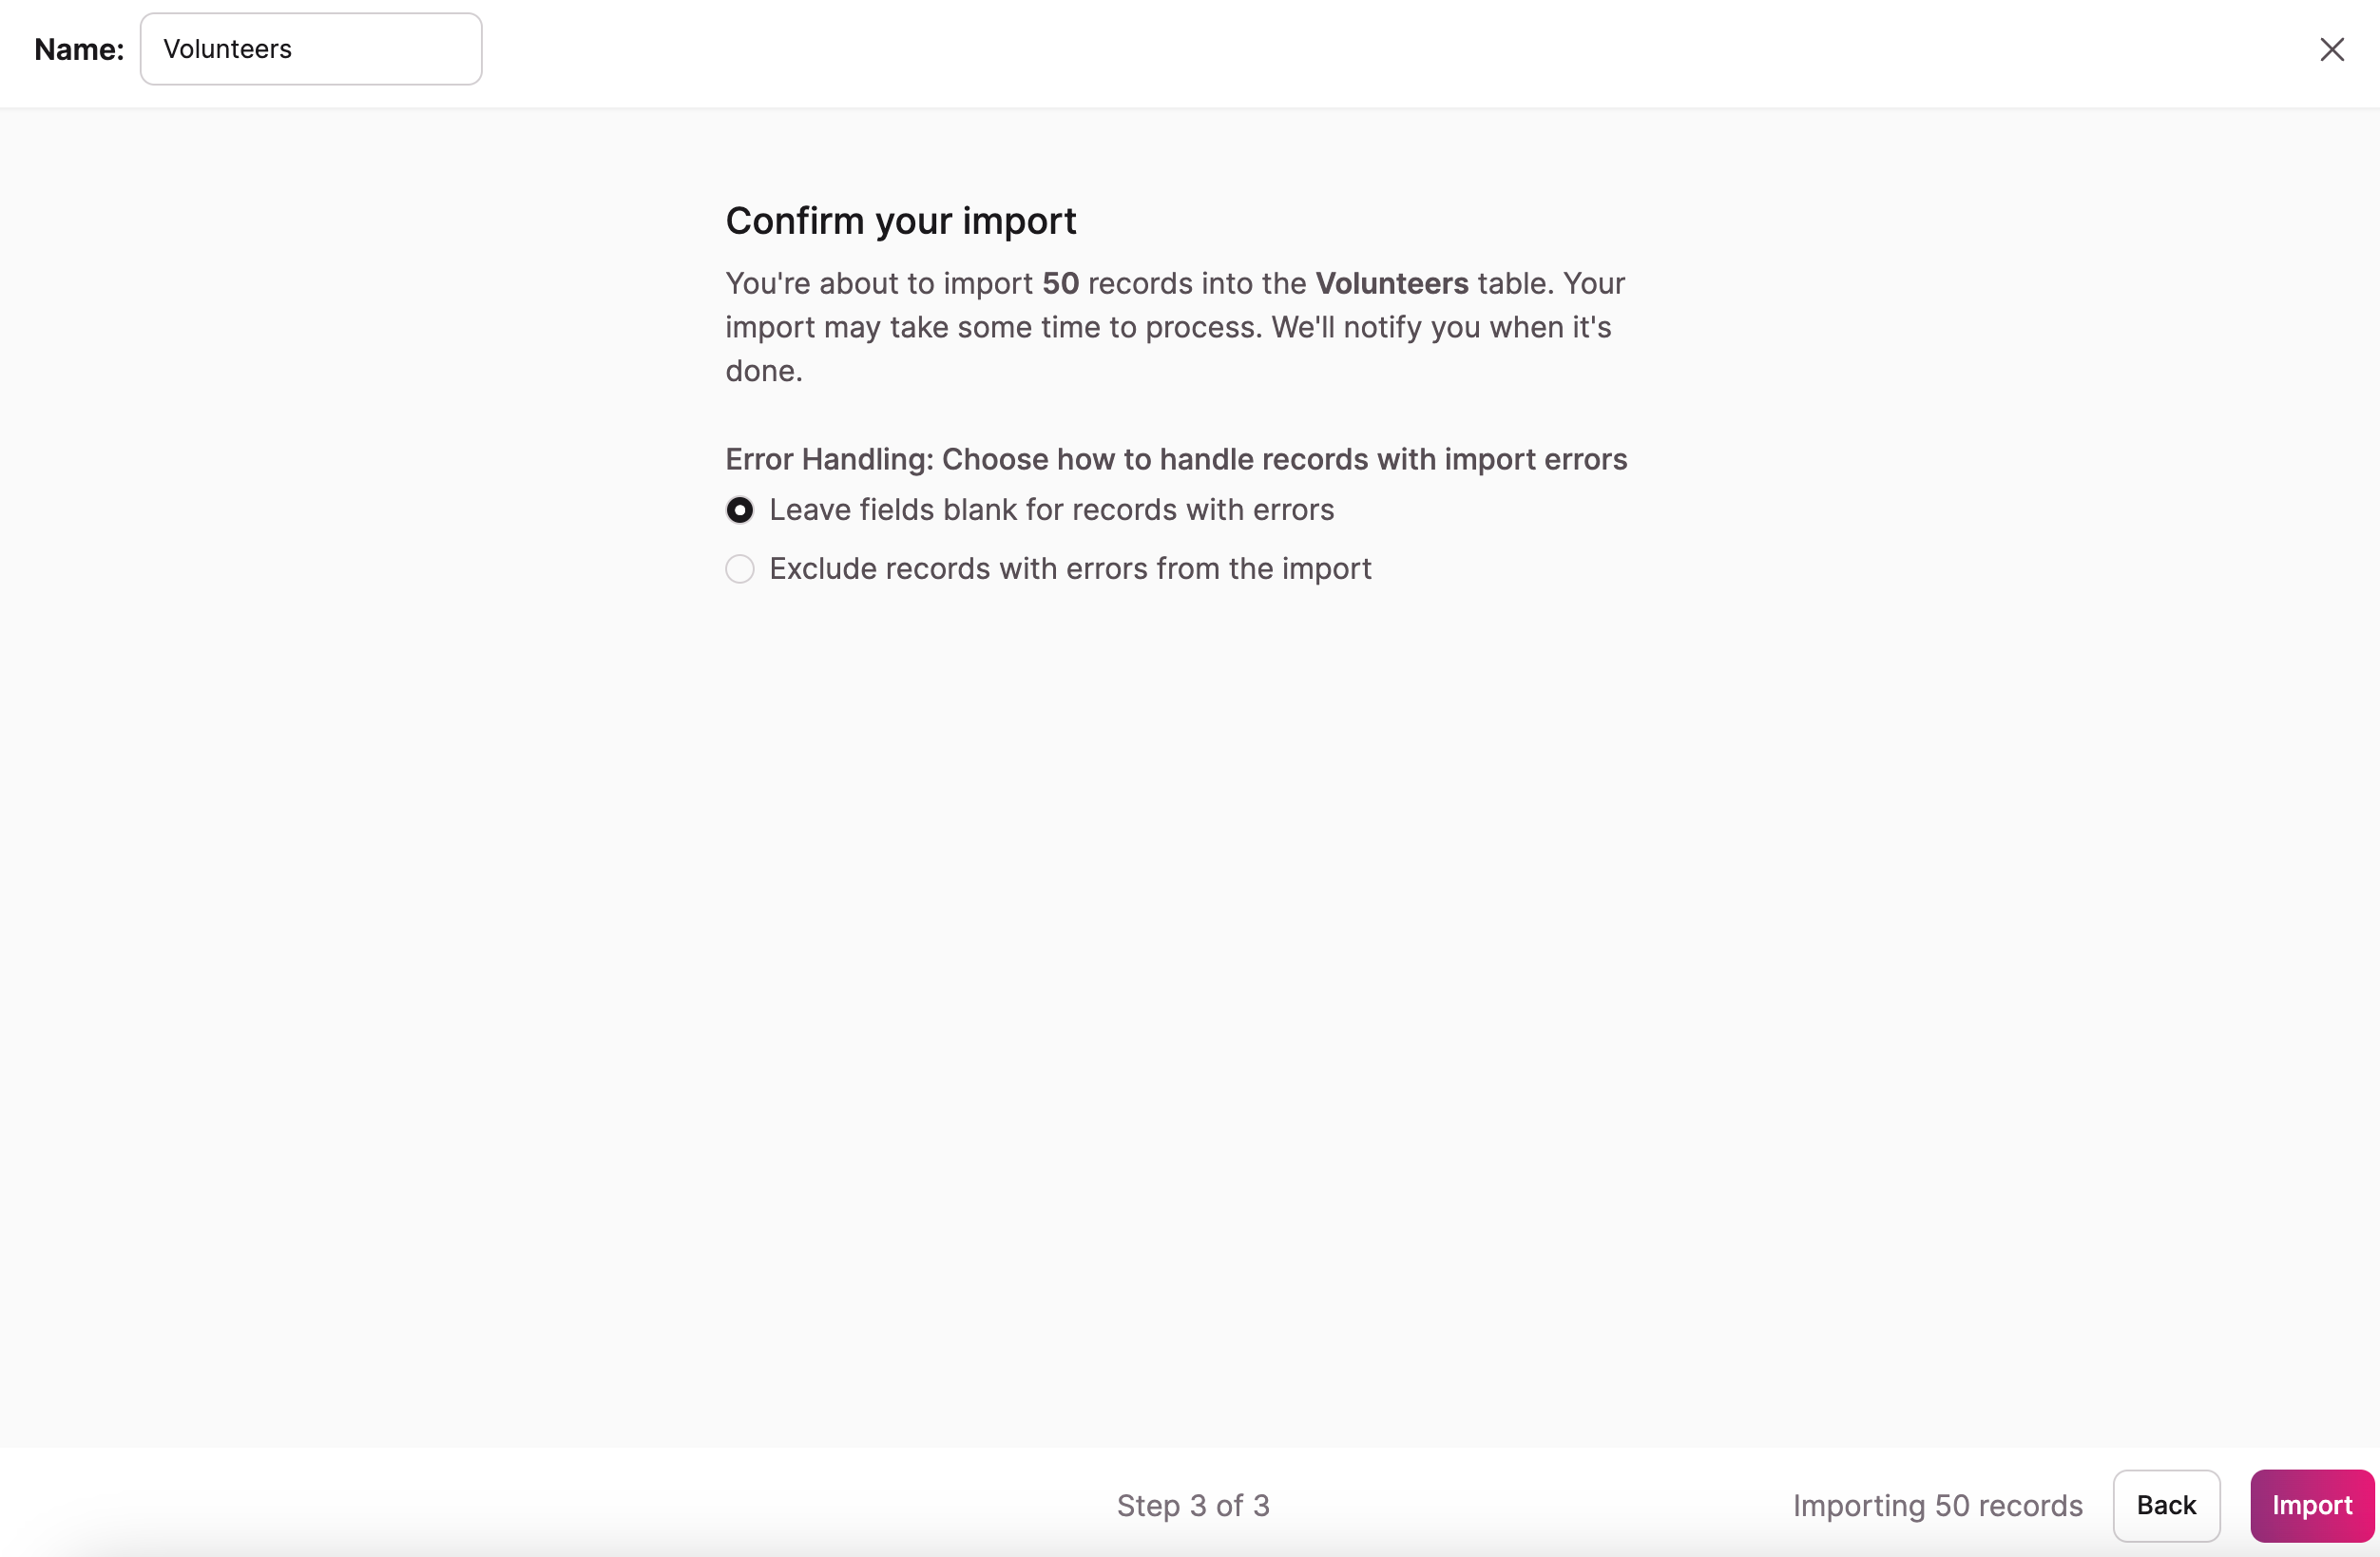
After selecting the Import button, you will be directed to the Records view of your new table with a progress bar showing the import status:
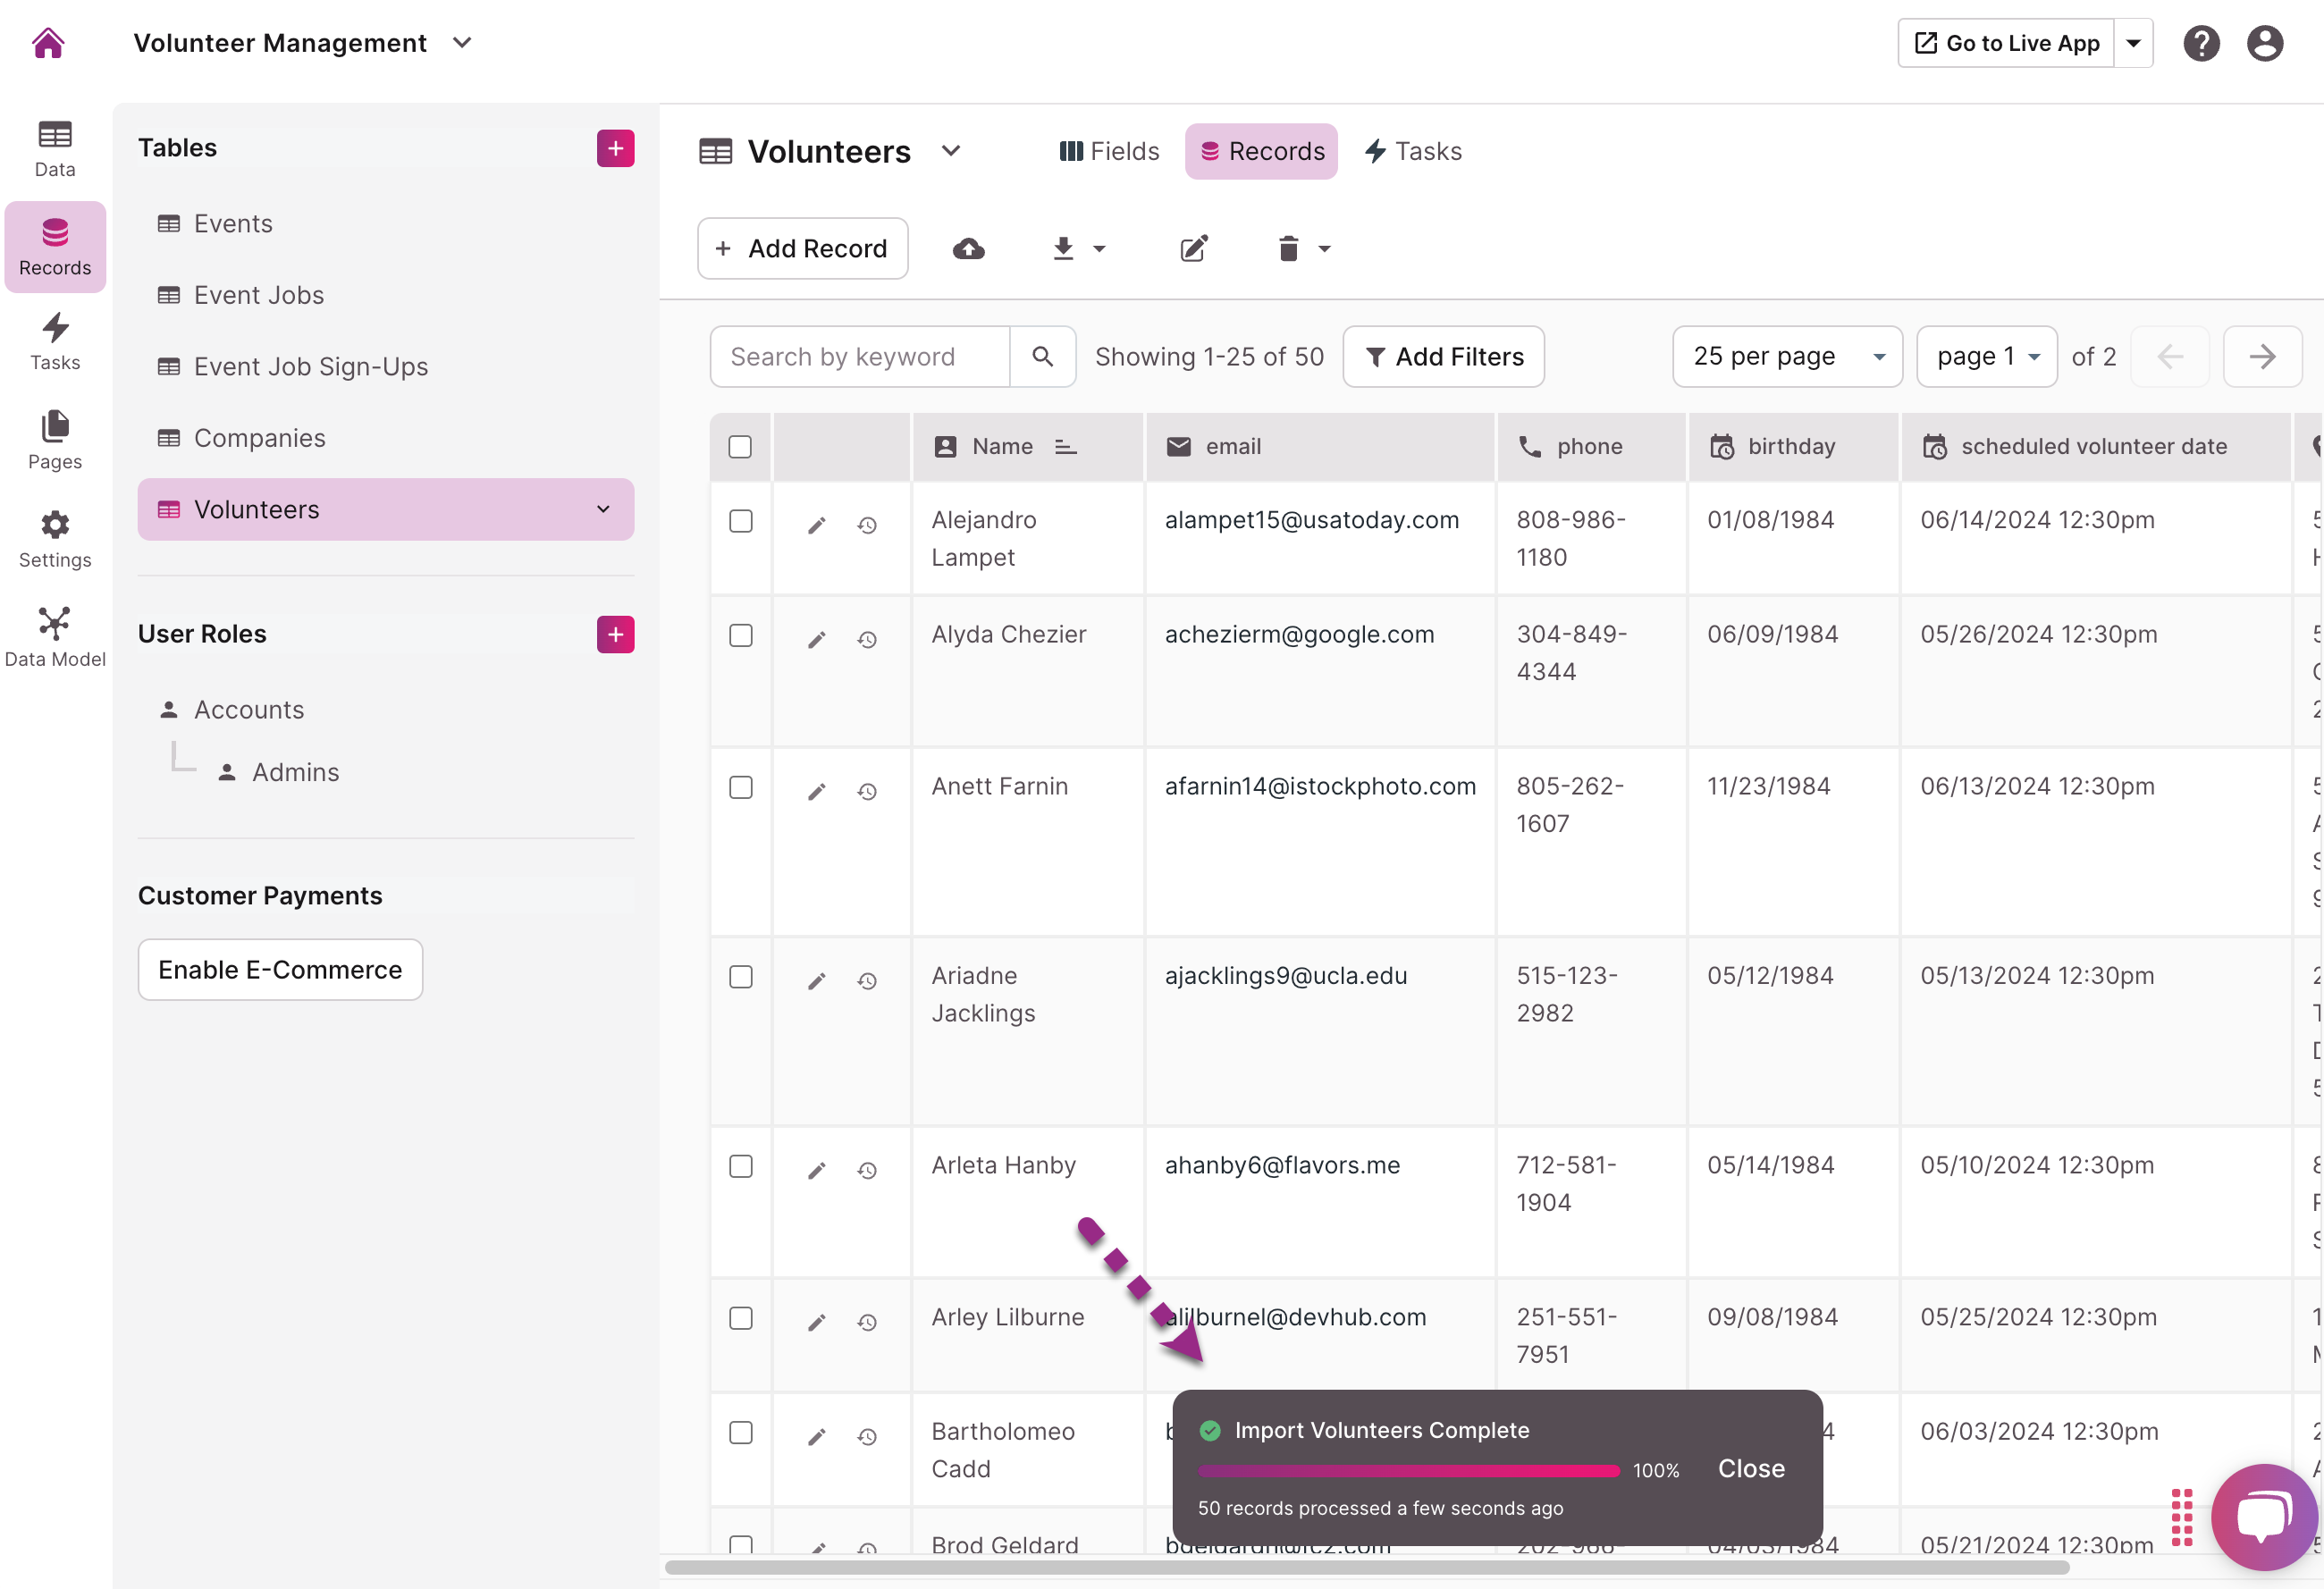
Notes:
- The names of fields are automatically created using the data file's column header text (see the "first_name" example field in the image above which is a person field type that includes both the first and last name).
- You can edit the fields' names once the import is done. To learn how to edit the field's settings, see this article.
- Imports may take some time, especially if you have more than 1,000 records or if you are connecting the imported records to other tables.
- It is advisable to avoid making any modifications to the data in the table during the import process. This is to prevent any potential overwriting of changes by the imported data.
Importing a Data File to Update an Existing Table
To update an existing table, navigate to the Records section in the Builder and choose the desired table from the menu on the left-hand side. Next, click on the Import option located at the top of your list of records.
/Importing%20Records/importingrecords4.png?hsLang=en)
A new window will be opened to initiate the import process:
When importing a data file to update an existing table, Knack will predict and allow you to edit the existing fields selected or create new fields for columns in your file.
Notes:
- You can uncheck any columns to prevent them from being imported.
- You will not be able to map columns to any fields in your table that are non-mutable, such as auto-increment or formula fields.
Learn more about updating an existing table by importing here: How to Import Your Data into an Existing Table
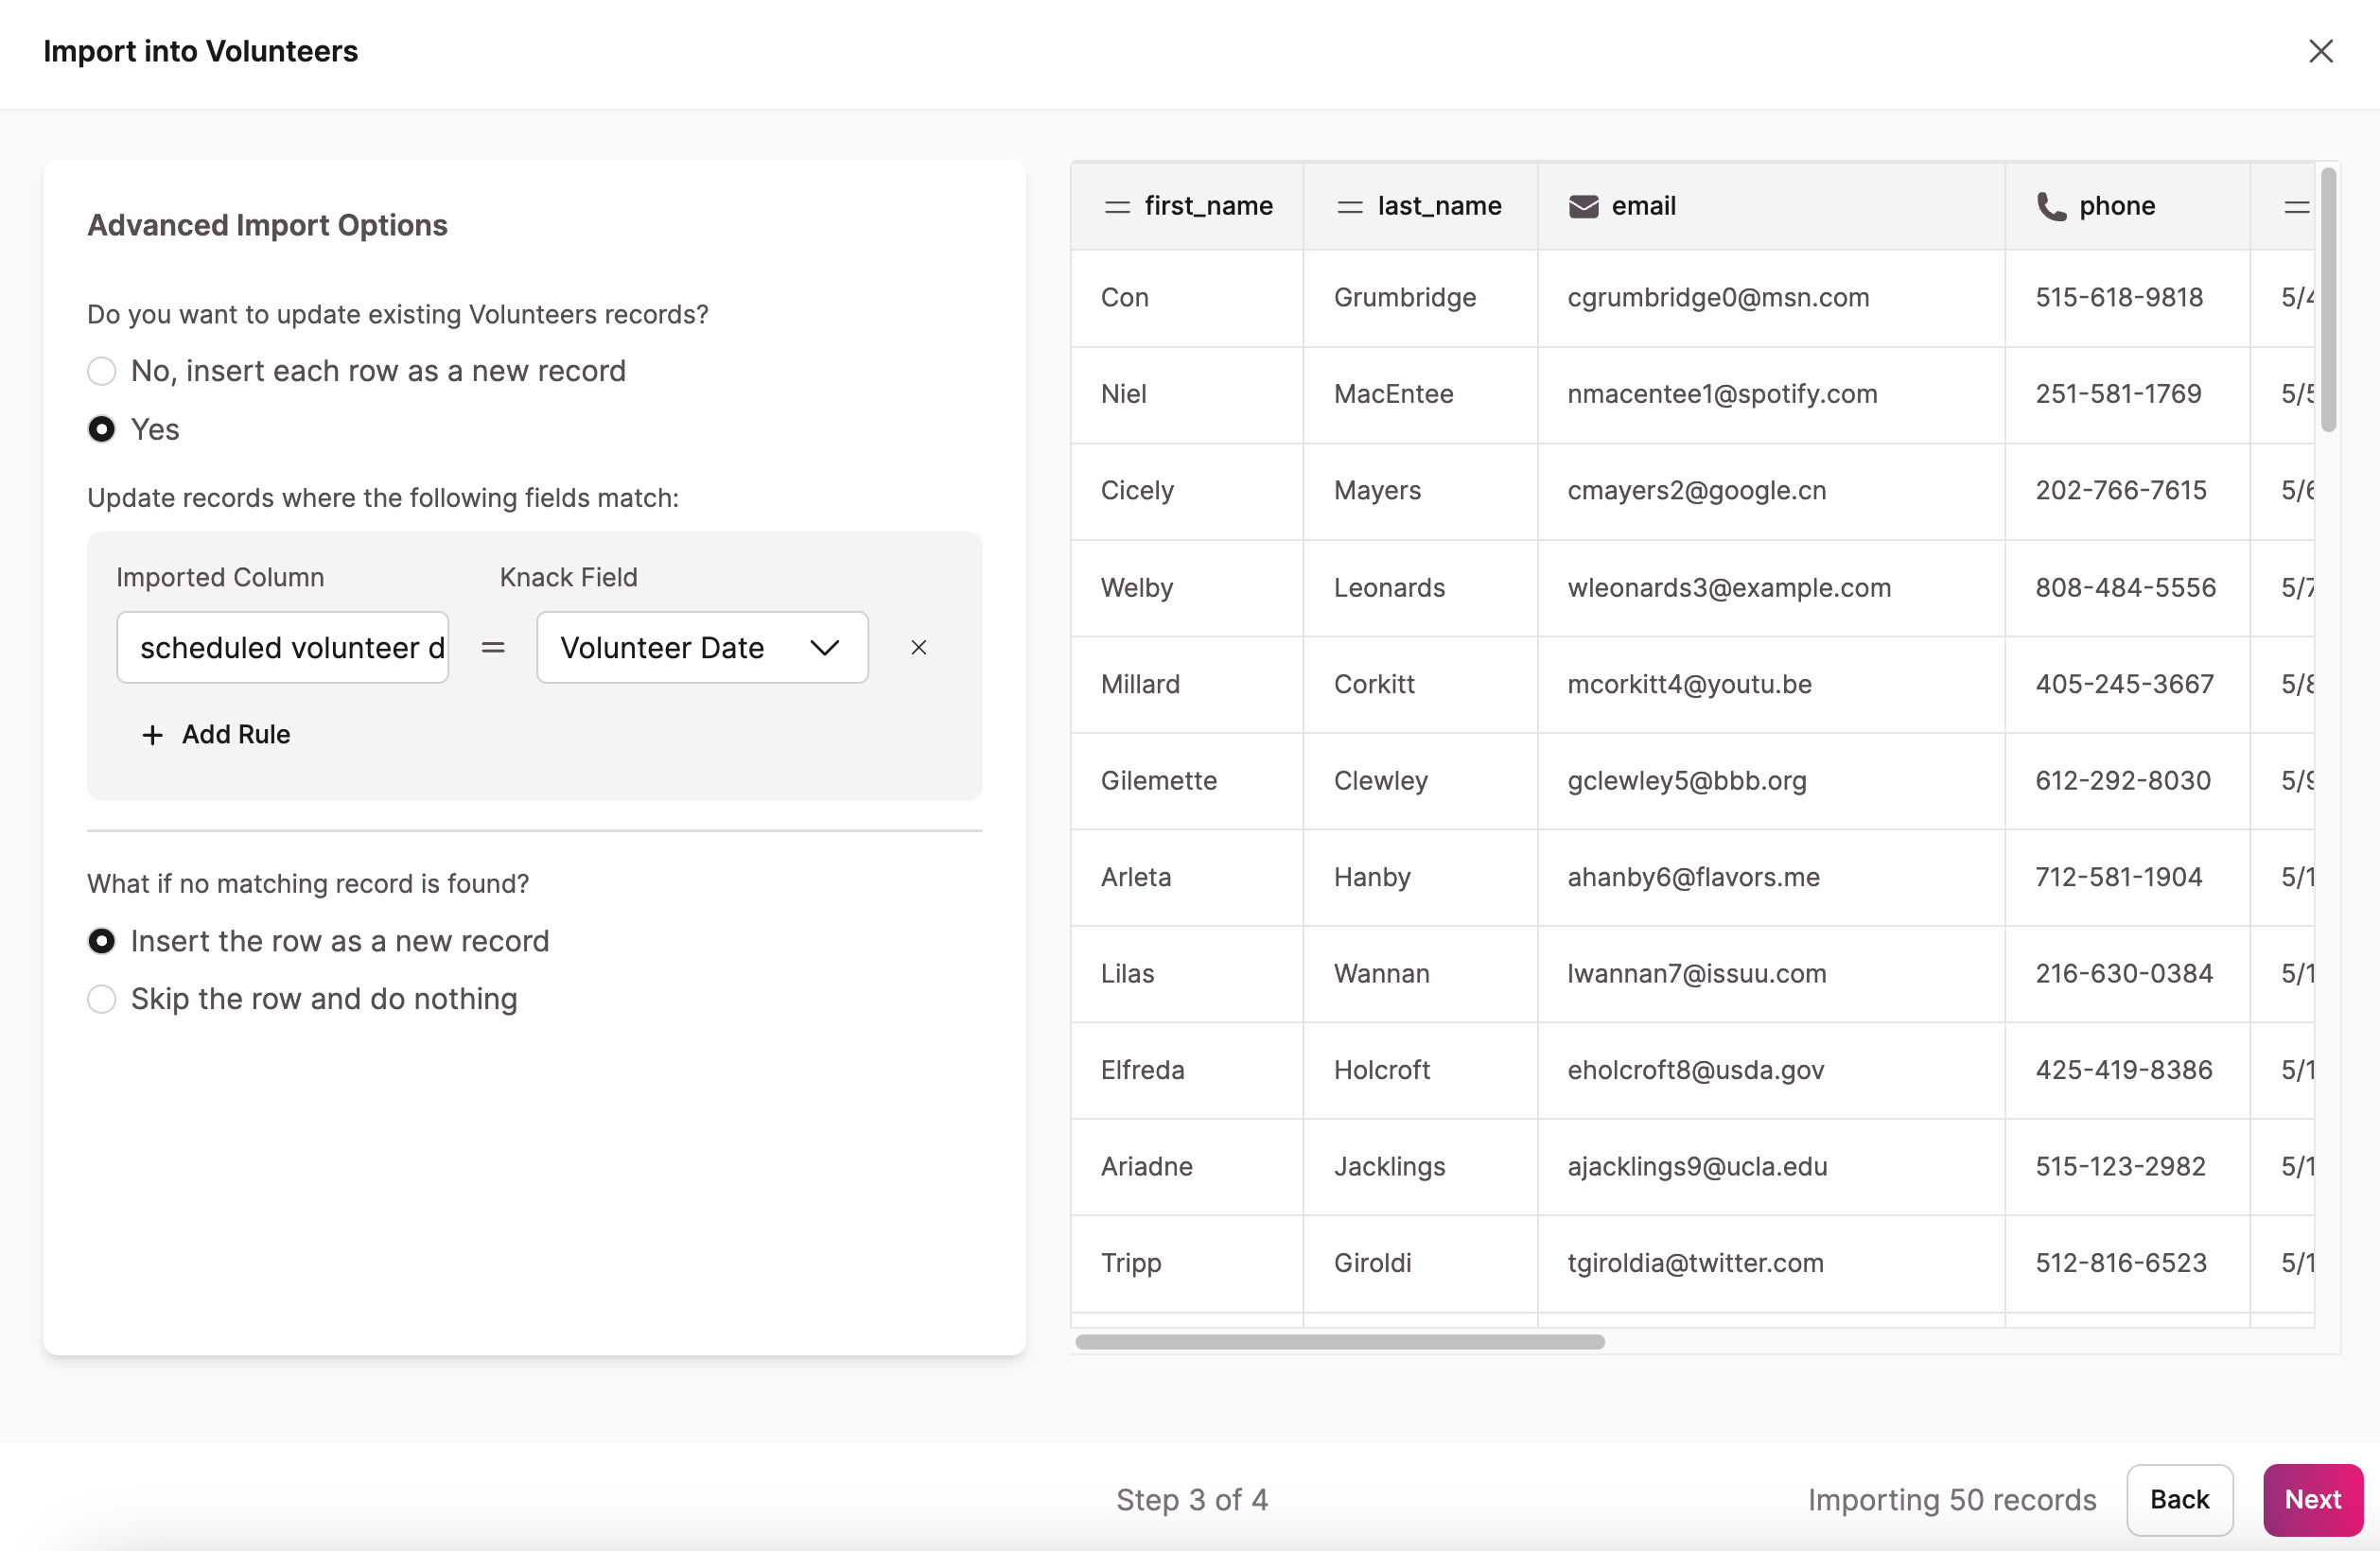
Advanced Import Options
After the above step 2 of the import process, you will have the option to select whether you want to update existing records with your data file or insert each row as a new record.
When selecting yes, you can choose to update records where the following fields match. To add more than one rule, there is an option to select "+ Add Rule" below.
Lastly, if no matching record is found, you can select to insert the data file's row as a new record or skip the row and do nothing.
After selecting the next button in step 3 of the import process, you will be directed to the Confirm Your Import screen, where you will have the option to set defaults for any empty or missing fields:
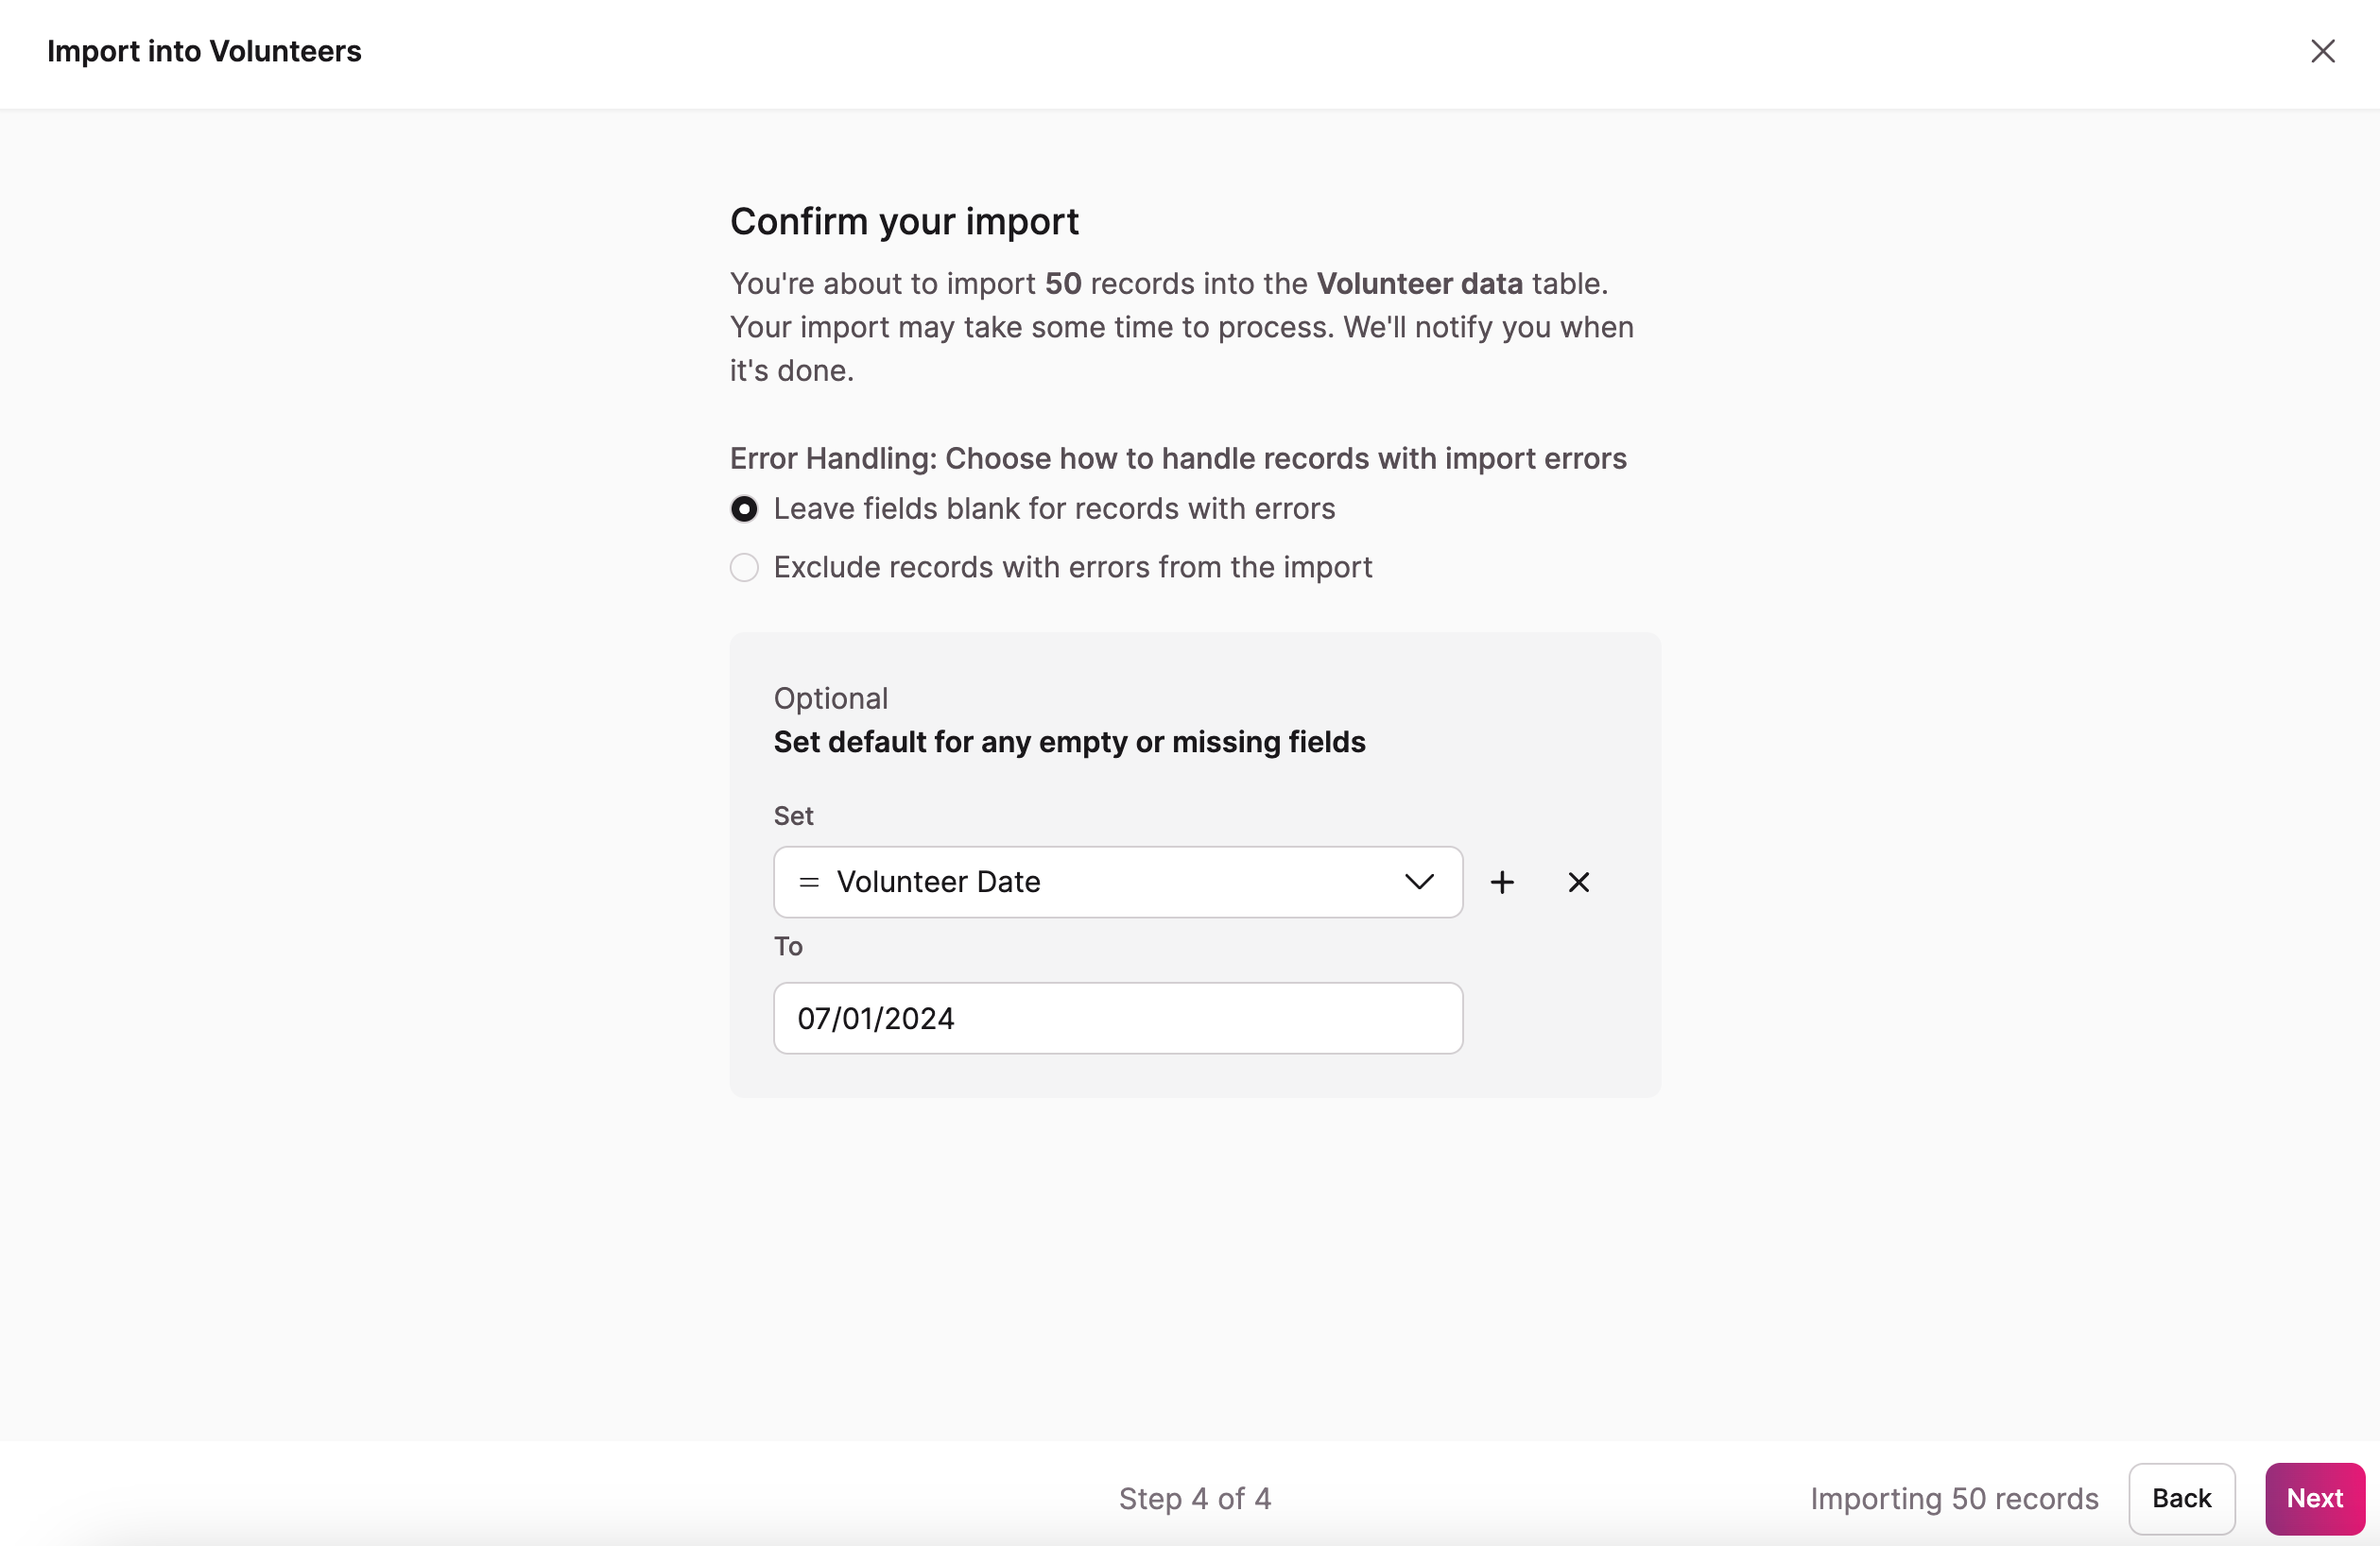
Tip: To add multiple defaults, you can select the plus sign icon shown in the image above.
Batch Importing Images
You can import images in batches. However, please note that the image field should be set to upload, not URL. In the import file, you will find either an <img> tag or URLs to the images, depending on where they are currently hosted.
When you import the images, they will be automatically uploaded to our image server. However, please note that there may be some issues when importing images from Dropbox URLs. The URLs must be specific image URLs that are publicly accessible for the import to work correctly.
Predicting Field Types
Knack can predict certain field types during the import process. If you import any columns with valid HTML, we will automatically recognize them as new rich text fields. Similarly, if you import values in any of our supported phone formats, we will identify the column as a new phone field.
When you import valid URL formats, Knack will automatically identify the column as a new link field. If the URL ends in a supported image format, it will be predicted as an Image field.
Importing Connections
You can establish connections between records by using the import feature. When importing records into an existing table, you have the flexibility to select the field from that table that corresponds to the column in your file.
Similarly, you have the option to match a column in your file with a field in a connecting table. Knack will utilize this match to locate a record to establish a connection with.
When importing data into a connection field, Knack provides you with the flexibility to select the column in your file that corresponds to the connection field.
Tip: To learn more about importing connections, see our article here.
Importing into a Many-to-Many Connection Field or a Multiple Choice Field
You also have the option to import data into a many-to-many connection field and multiple choice fields that allow multiple selections. Ensure that the file is formatted correctly so that the multiple values to be stored in the connection field/multiple choice field are:
-
Comma-separated or row-separated
-
Without a space before or after each comma
-
Contained within a single cell
Here are examples of how your data can be formatted:
First child,second child,third child
Or:
First child
Second child
Third child
To ensure a successful import for many-to-many connection fields and multiple choice fields that allow multiple selections, it is essential to first create the table and the associated connection and/or multiple choice field(s).
When setting up multiple choice fields that support multiple selections before importing your data, ensure that you choose the layout option labeled "Dropdown - Multiple Selections" within the field settings. This step is important for importing multiple options, as it guarantees that each value is recognized as a distinct choice rather than being treated as a single combined option.
Notes:
- When formatting your .CSV in Excel, there is no need to manually include quotation marks. Excel will automatically add them for you.
- To ensure that the format is correct, you can open your .CSV file in a text editor application and verify it.
Importing Images
There are two ways to load images into image fields:
-
You can upload images directly into your Knack app. Once uploaded, the image fields will display the images.
-
Alternatively, you can use external URLs for images that are already hosted elsewhere on the web. Knack will display the images from those URLs.
To import multiple images at once, make sure that in the image field's field settings, the image source is set to "Upload image files" instead of "Load images from an external URL".
The import file will include a <img> tag or URLs to the images from their current hosting location. When you import the file, the images will be automatically uploaded to our image server.
Note: There may be some issues when importing images from Dropbox URLs. The URLs must be specific image URLs that are publicly accessible for the import to work correctly.
To import image URLs, you need to ensure that your image fields are set up to use the URL option as their source:
/Importing%20Records/importingrecords8.png?width=468&height=504&name=importingrecords8.png)
Notes & Troubleshooting
- Currently, on an import, a field's "Required" setting is not checked.
- If you import your data via an API call, this method will enforce the unique setting that can be applied to certain field types. When importing your data via the Builder, this method will not enforce the unique setting.
- Currently, it is not possible to map existing file fields during the import process or import into signature fields.