Use Case
You have the option to allow users to create new records in your app, but you can choose to review and approve each new record before it is displayed to other users.
Example: A Community Events app displays a list of community events. There's a form for the community to submit a new event for the app to display.
Requirements
To enable user activation in your app, you will need to configure user settings to include logins for different pages and user roles. To learn more, see our article here: About Users.
If this is your first time creating an app, you'll need to know some basics about adding tables, fields, pages, and views. You can start by learning from our Builder Basics section of the knowledge base.
Other good resources can be found in our About Your Database and Working With Pages articles of the knowledge base.
Steps
The example for this article will use a "Status" field to limit which records a view can display. New records added by users will not be approved by default, and they can only view records that have been approved.
An administrative page is added to review records and update the "Approved" to "Yes".
1. Add a Field to Store a "Status"
Find the table that stores your records in the Data section of the Builder. In this example, it will be the "Events" table.
Add a new "Yes/No" field type using the "Add Field" button in the top navigation. In this example, we will name the field “Approved”:
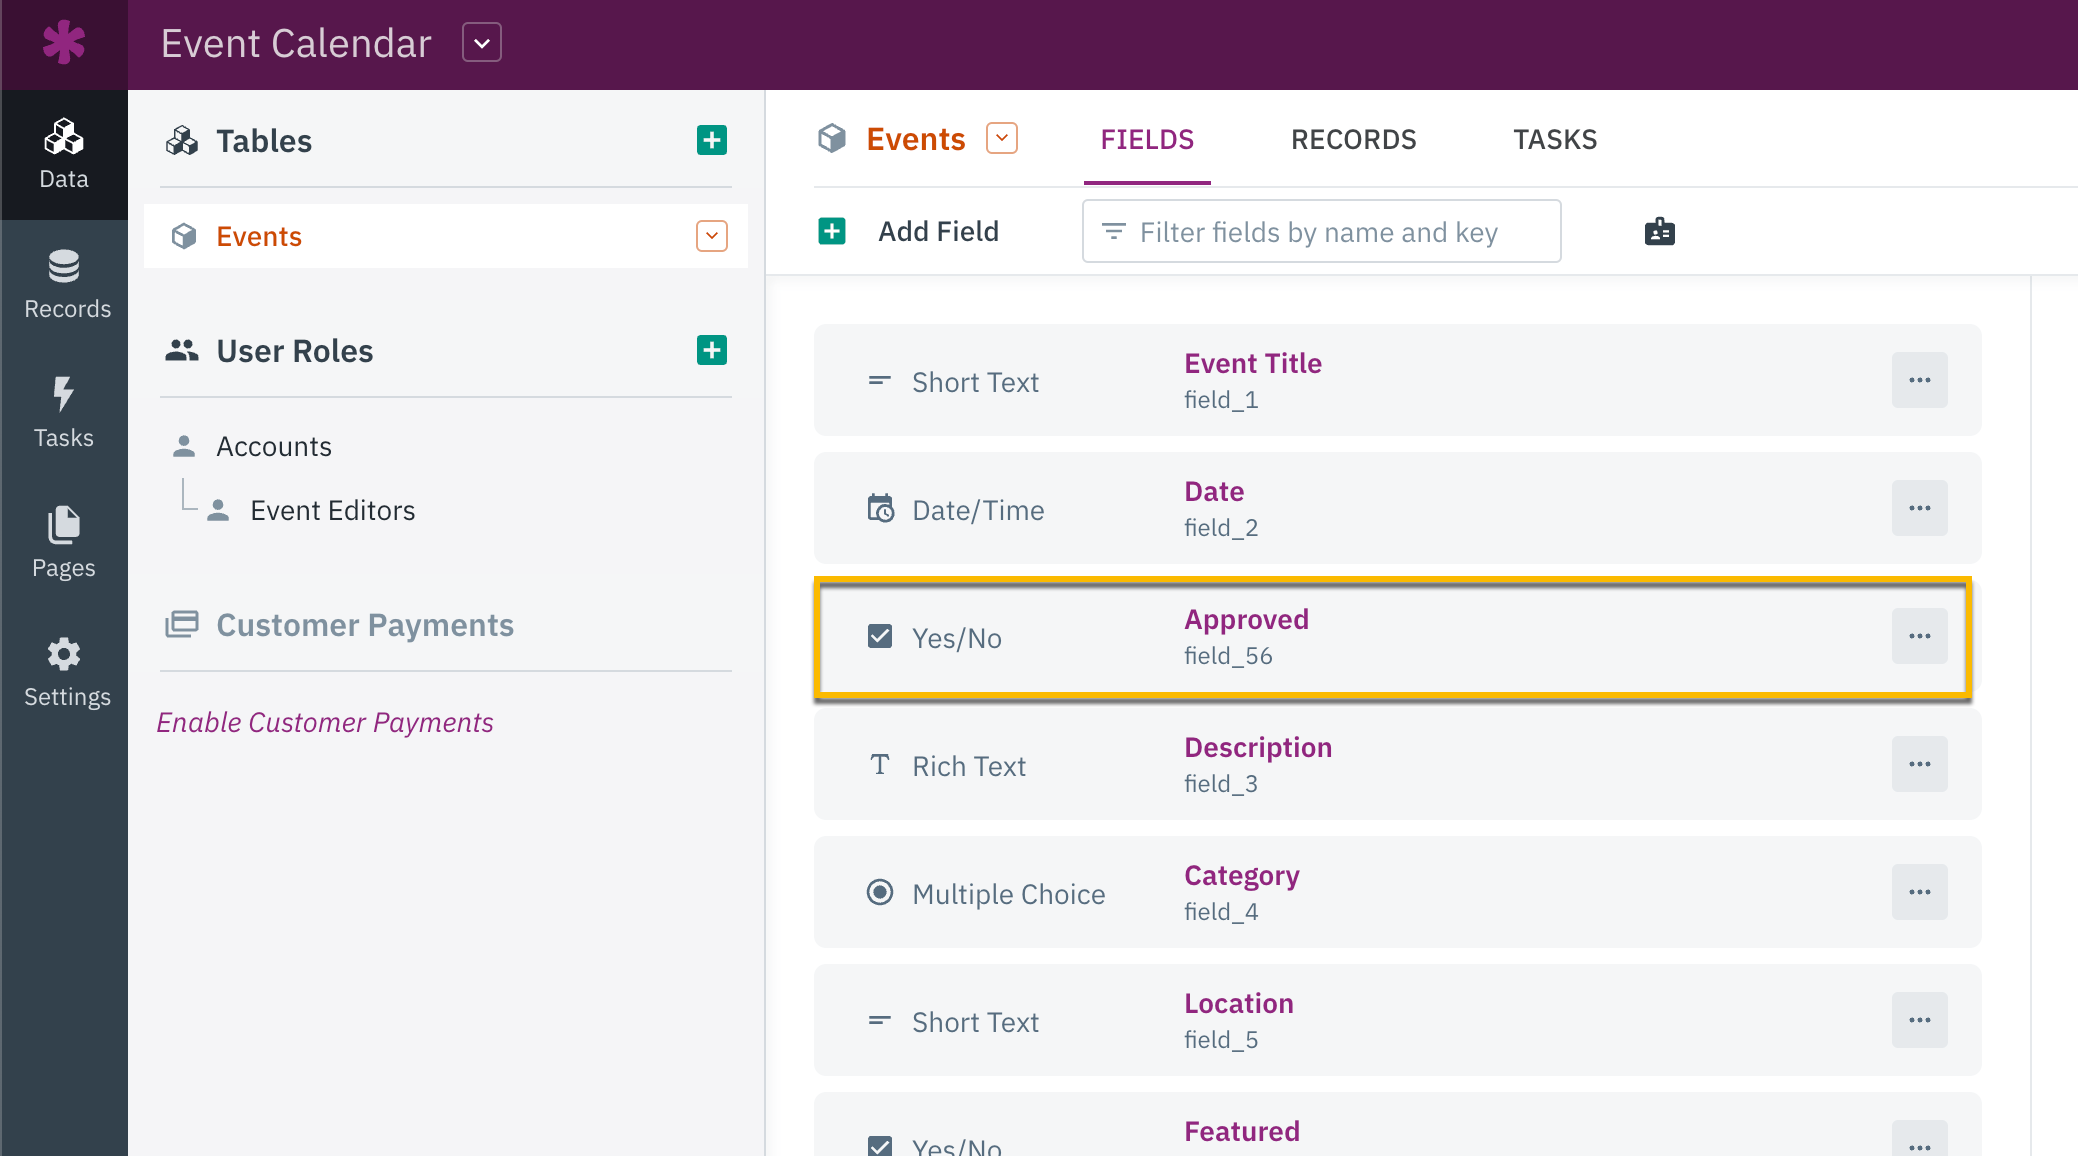
Note: The Approved field will default new records to "No". If you have existing records, make sure to update them to the new Approved value. You can use a batch update to update them all at once.
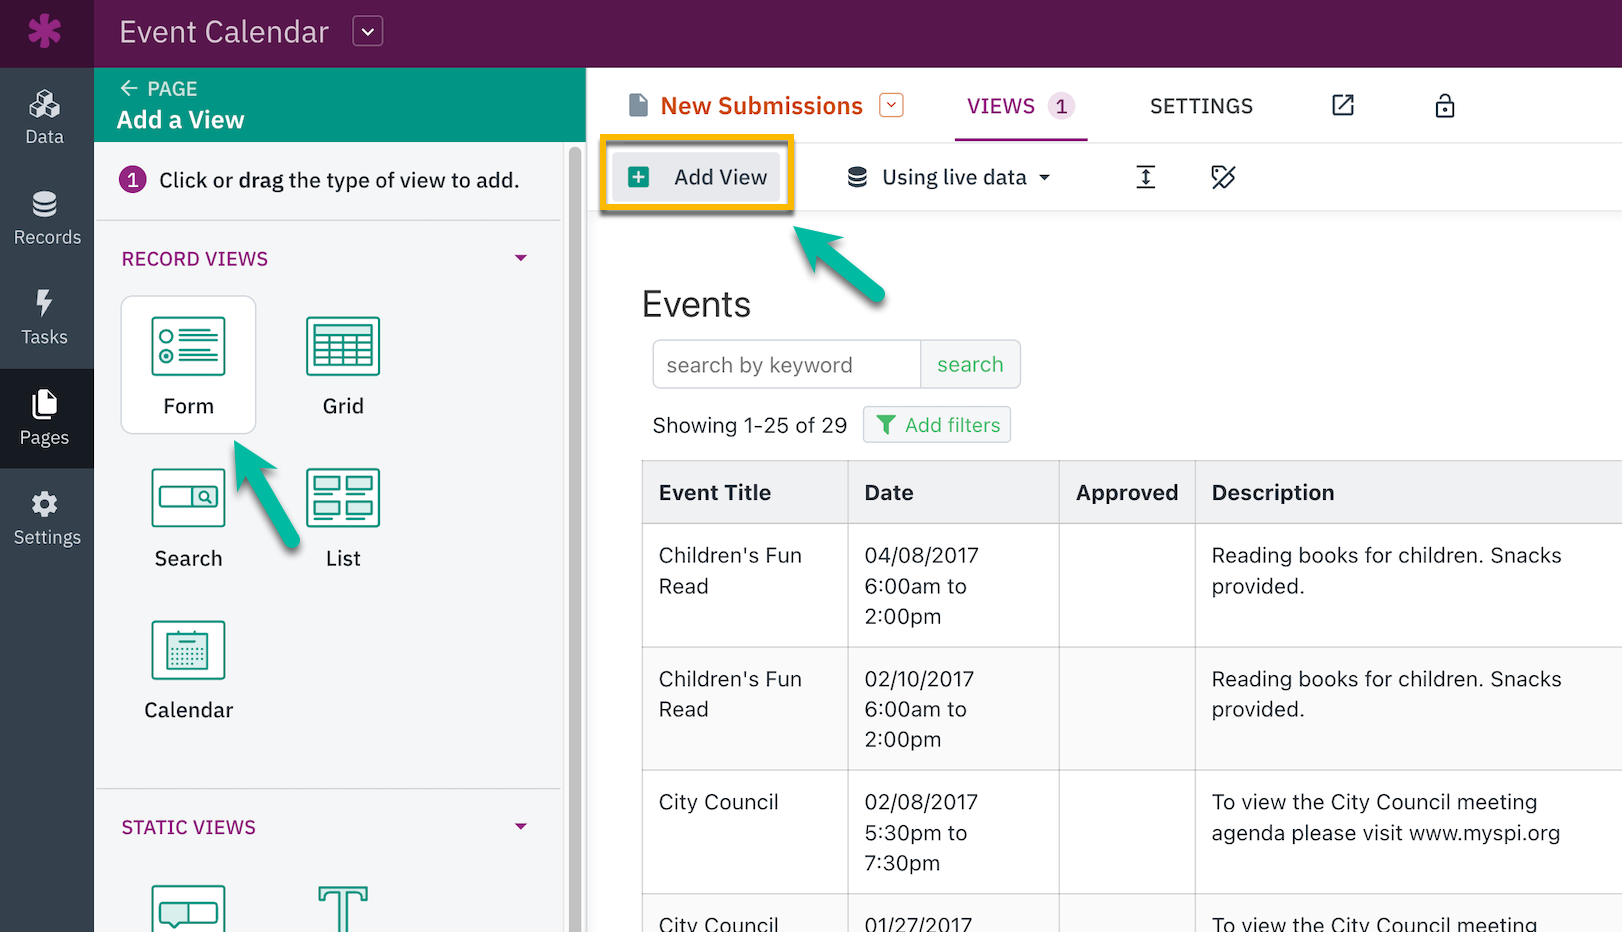
2. Add a Form for Submitting a New Record
Next, we will navigate to the form where our users submit the record that needs to be approved. If you don't have one yet, you can add a form for your users to submit a new Event.
In this case, we will add a new form to submit an Event record.
From the Pages section of the Builder, we can select the page where we want to add the form. Then, we'll select "Add View" and select the form view type.
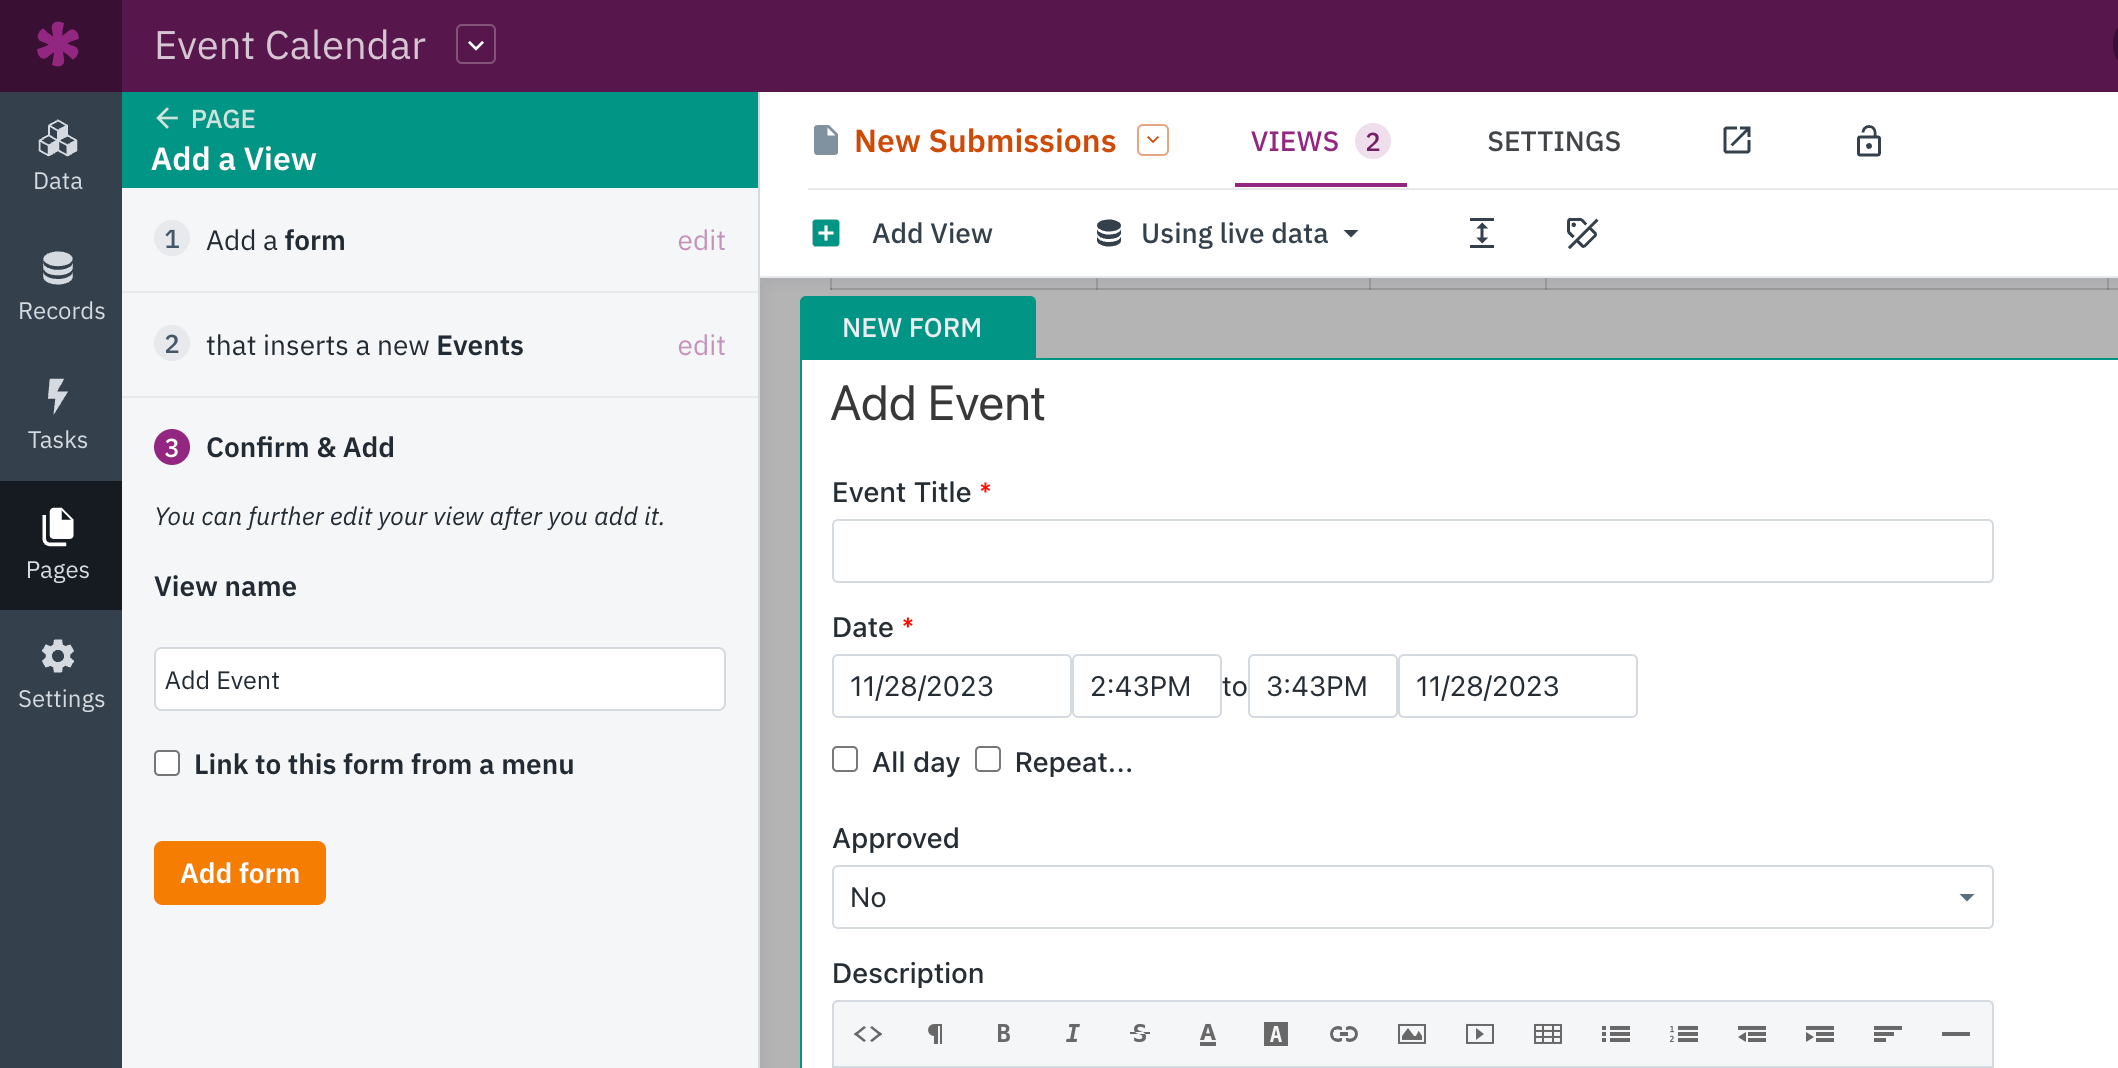
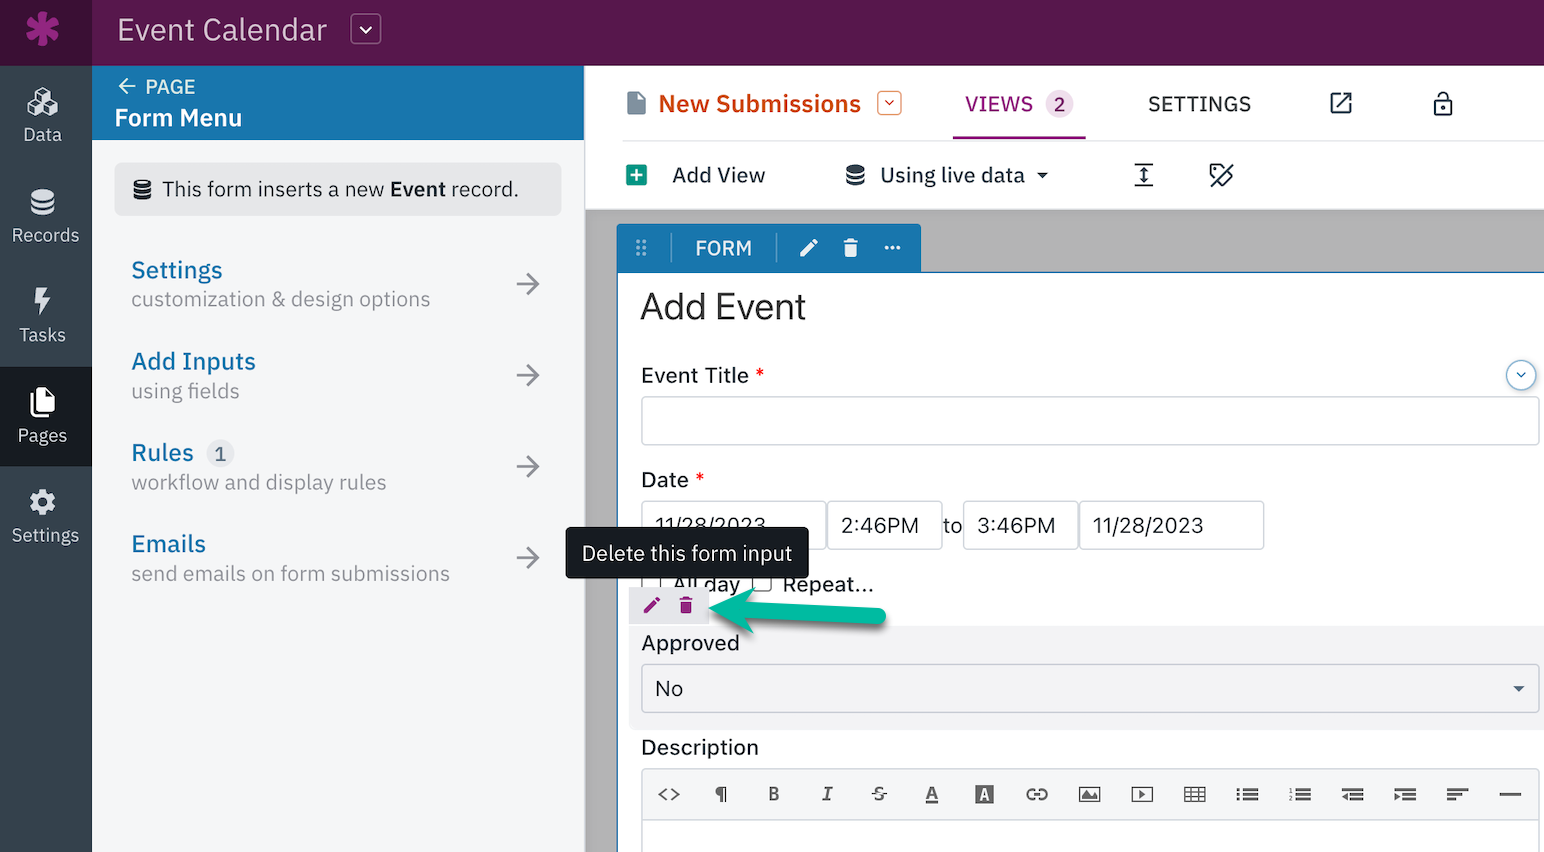
After adding the form, we can then open the view editor to access the view settings. We'll make sure the "Approved" field is deleted from the group of form inputs.
Otherwise, the submitter of the form would be able to set the Approved value.
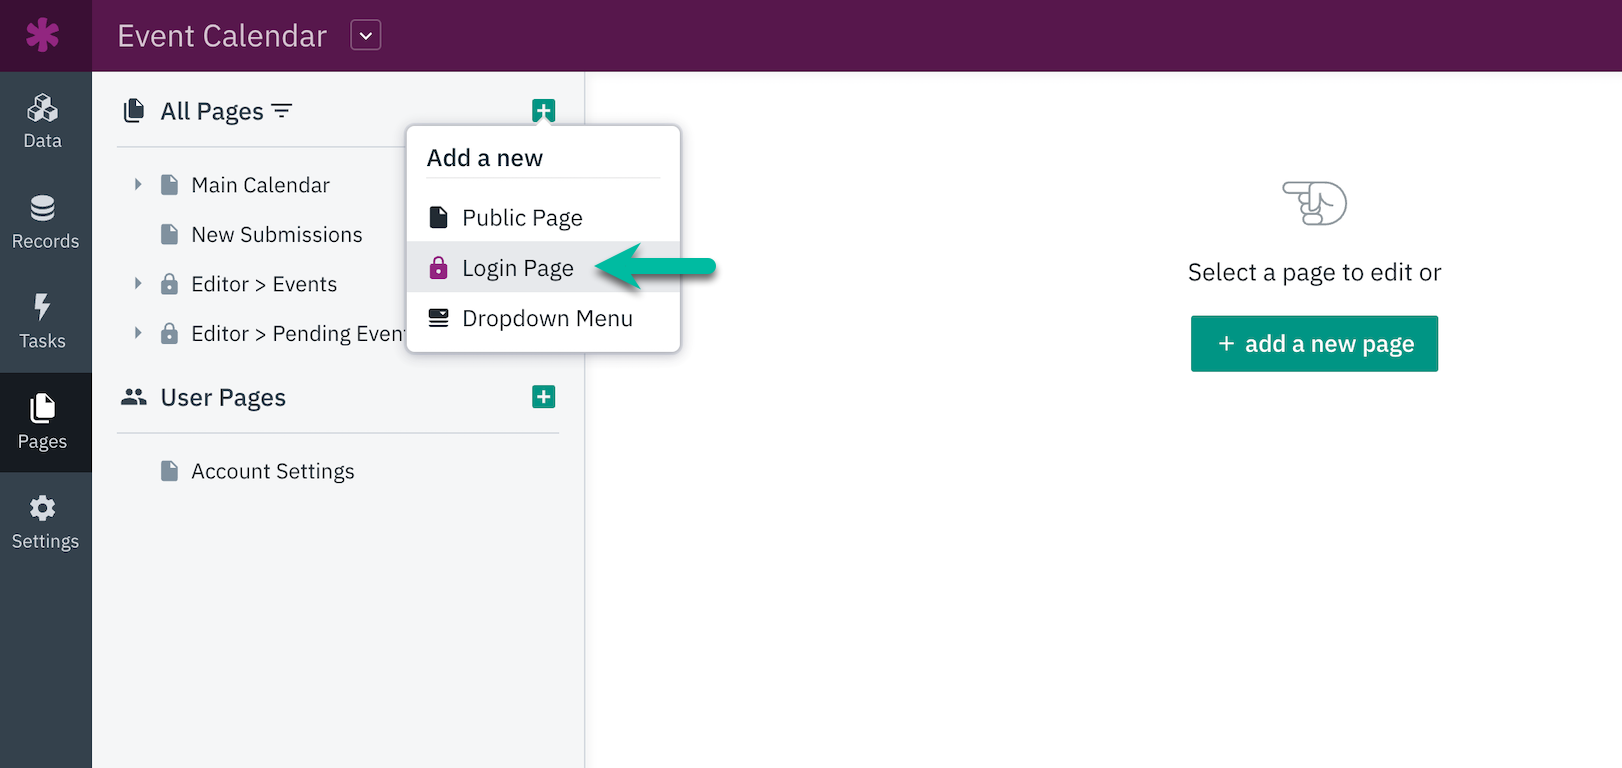
3. Add a Page to View and Approve Records
Next, we need to add a page where we can view new records submitted from the form and approve them.
From the Pages section of the Builder, click on the green "+" button to add a new page that requires a login. The login should be restricted to a higher-level role that not all users have access to.
In this example, we will use a user role named “Admin”.
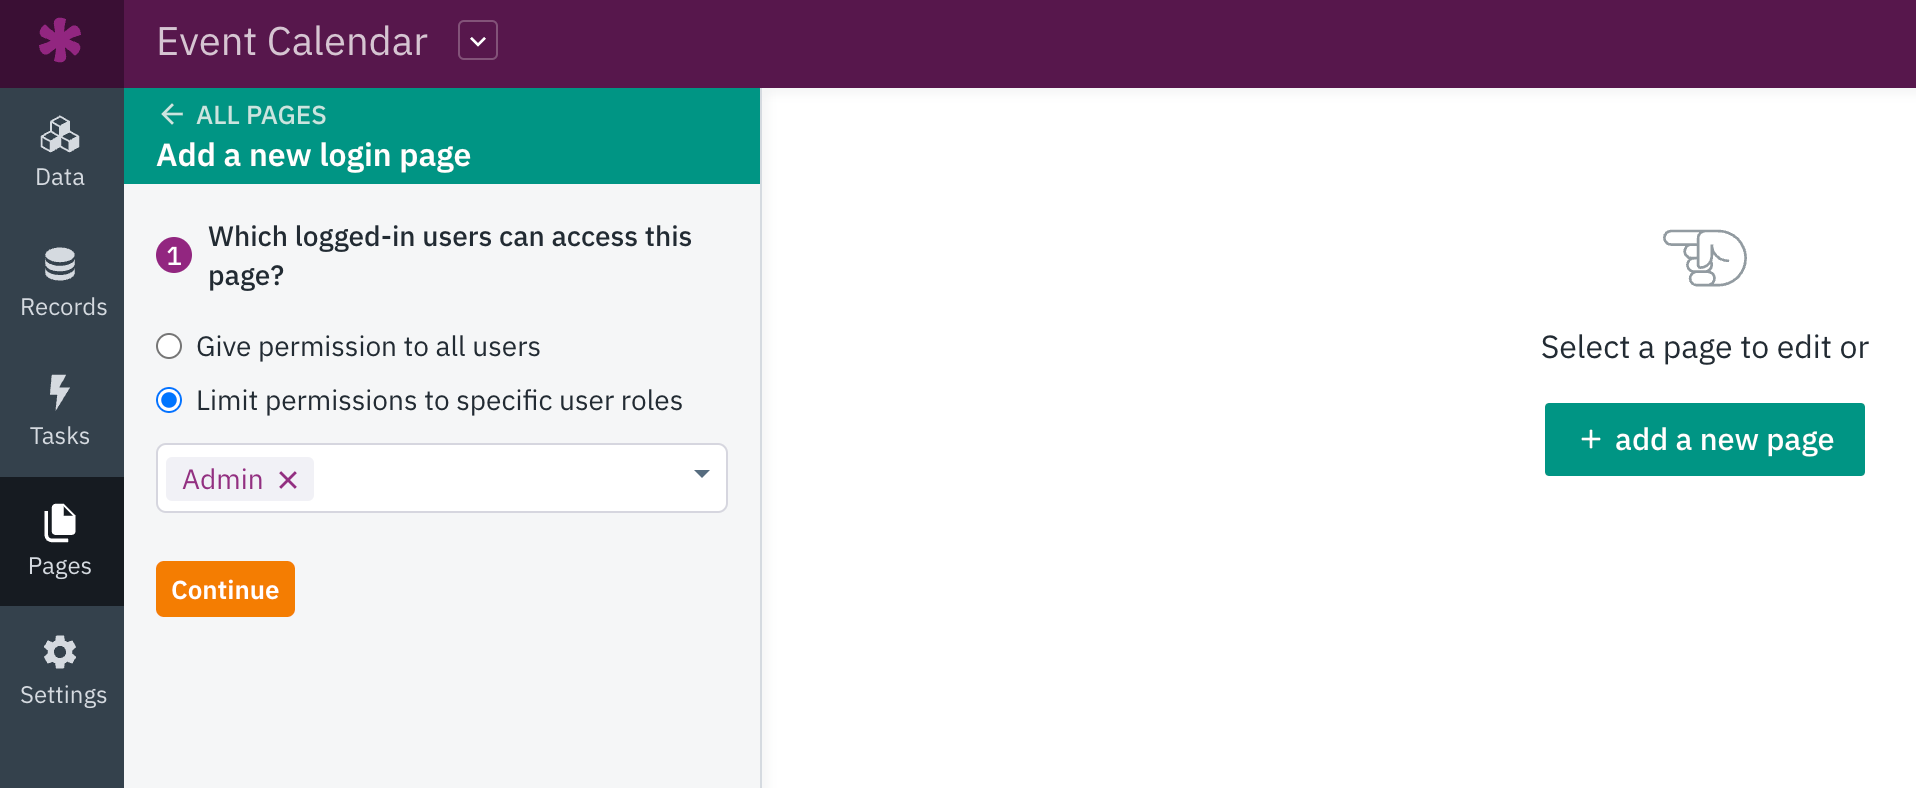
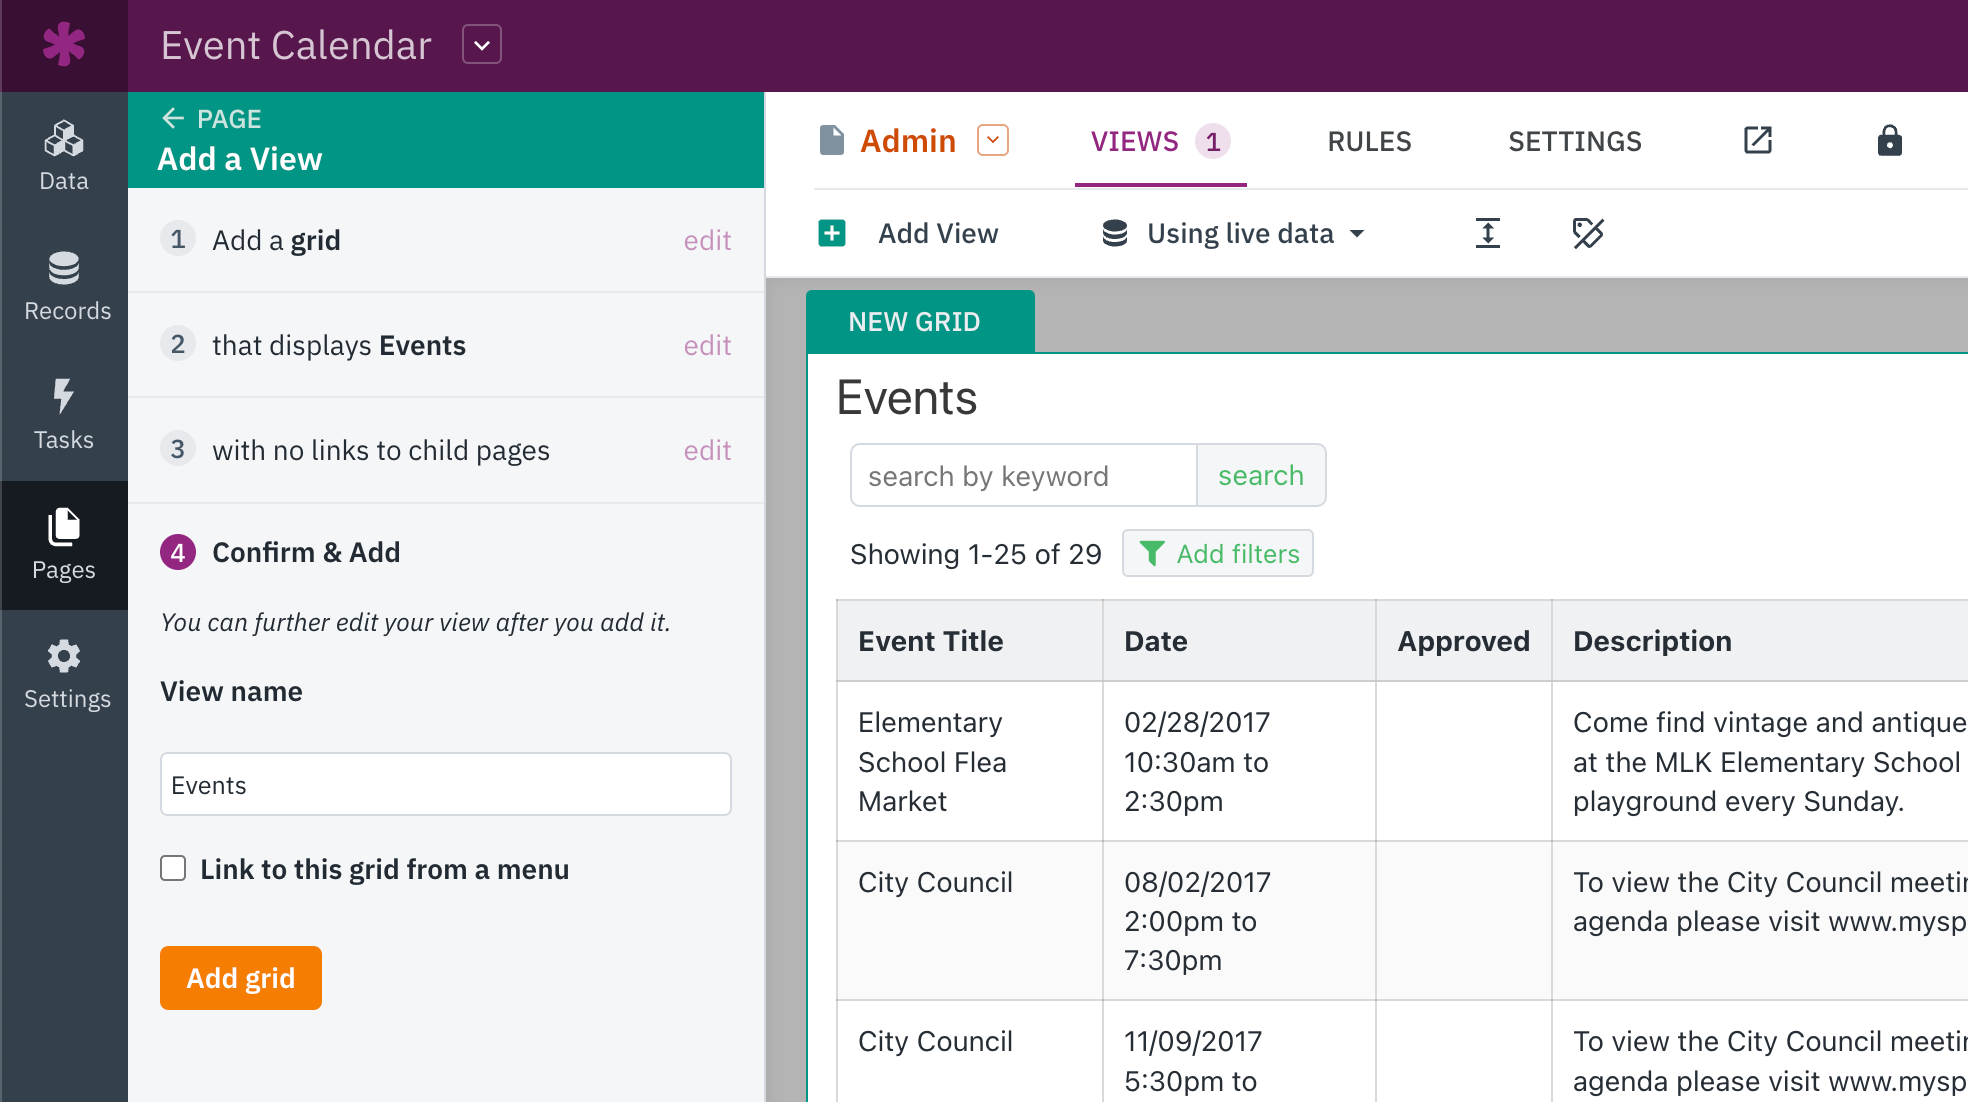
After selecting the user role and selecting "Continue", you will be prompted to name your page and choose a view to add to your page.
In this example, we will add a grid view displaying event records.
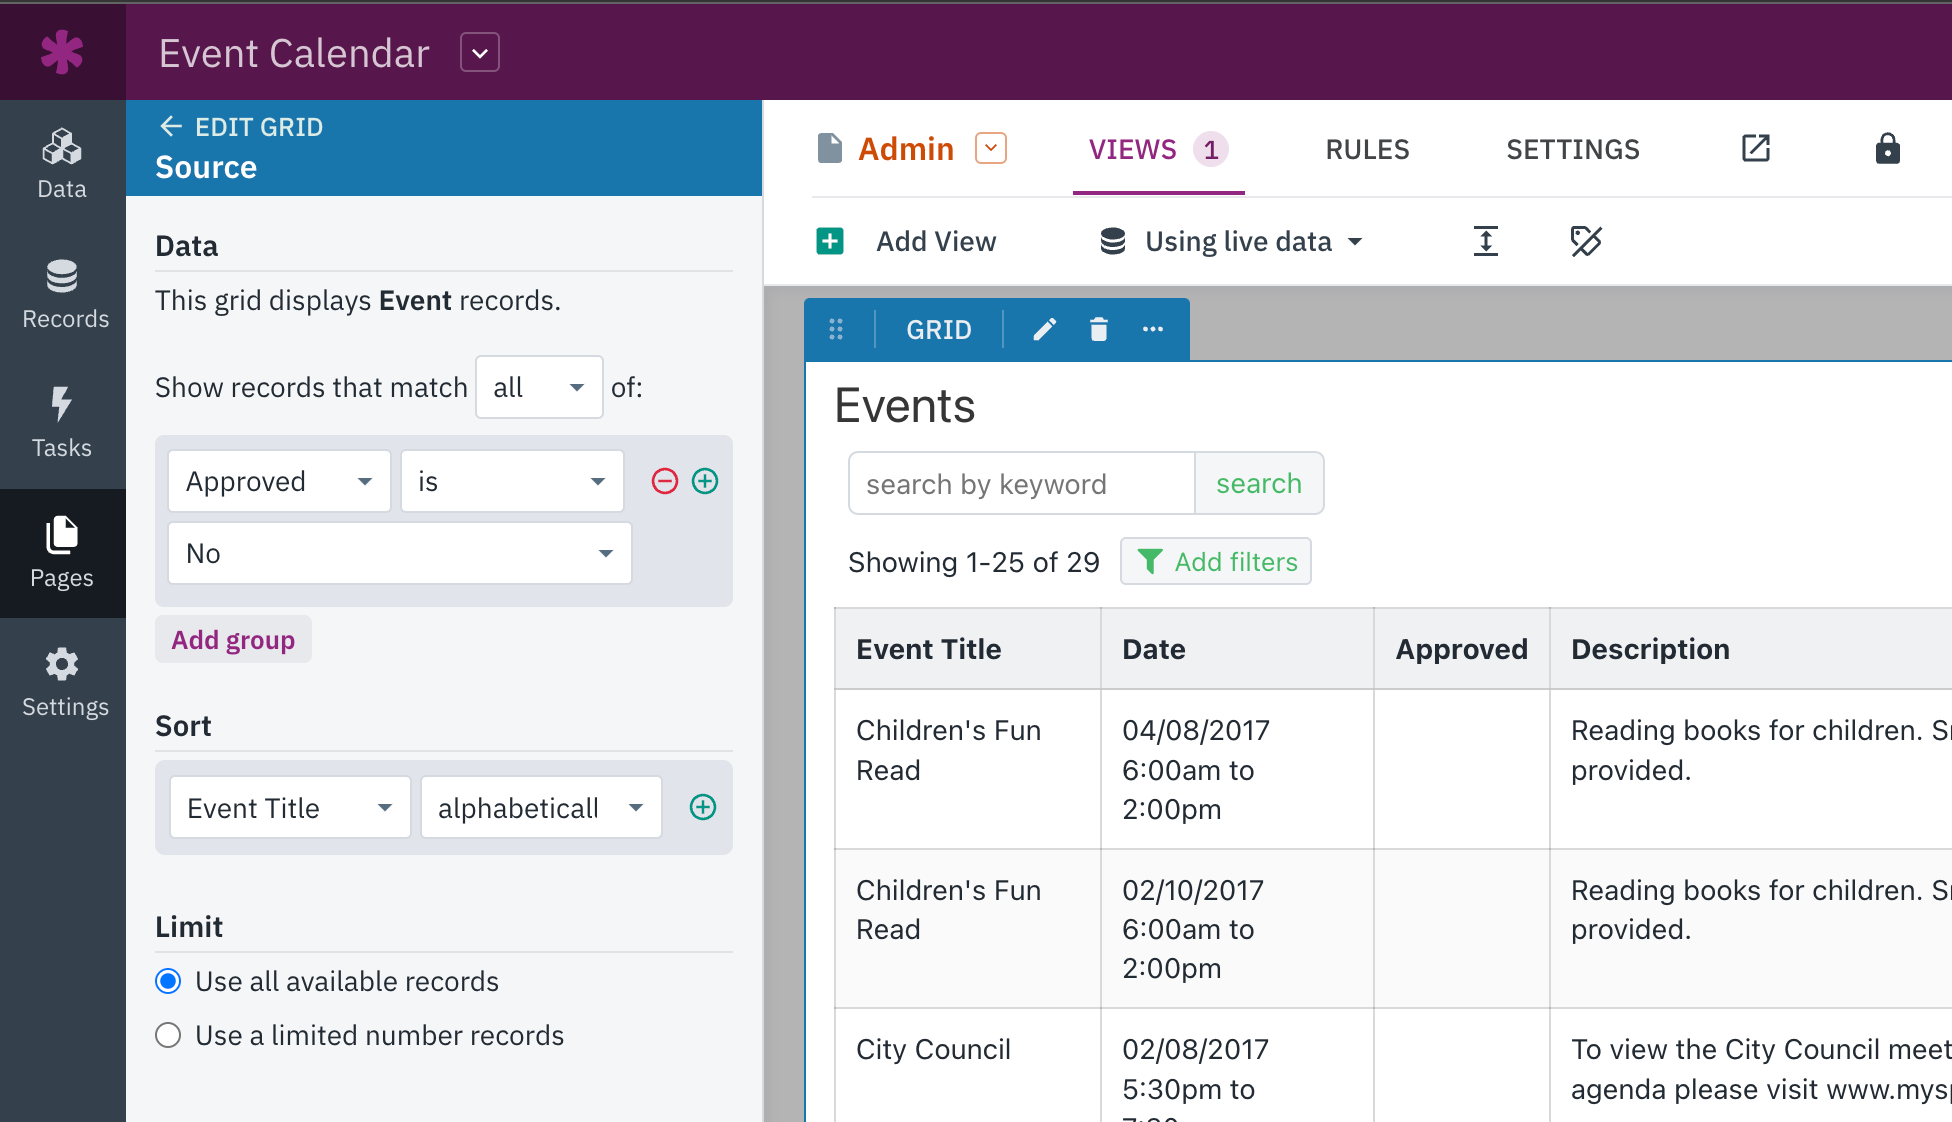
Next, we need this page to only display records with an "Approved" value of "No". Since that’s the default for new records, this grid will now show any records that haven't been approved yet.
In order to filter out records with an "Approved" value of "Yes", we need to edit the source of our new grid. In the view editor, open the Source section of the grid settings.
Then, click on the "Add rules to filter records" link and add a filter that is set to “Approved” is “No”:
4. Create an Action Link for Admins to Approve Events
In order for Admins to set the events to an approved status, we'll need to either allow inline-editing with the grid view or create an action link to set the Approved field value to "Yes".
For this example, we will use an action link in the grid view. To do this, head over to the Admins page and select to edit the Events grid view.
From there, we'll need to select "Add Columns" and then select "Actions".
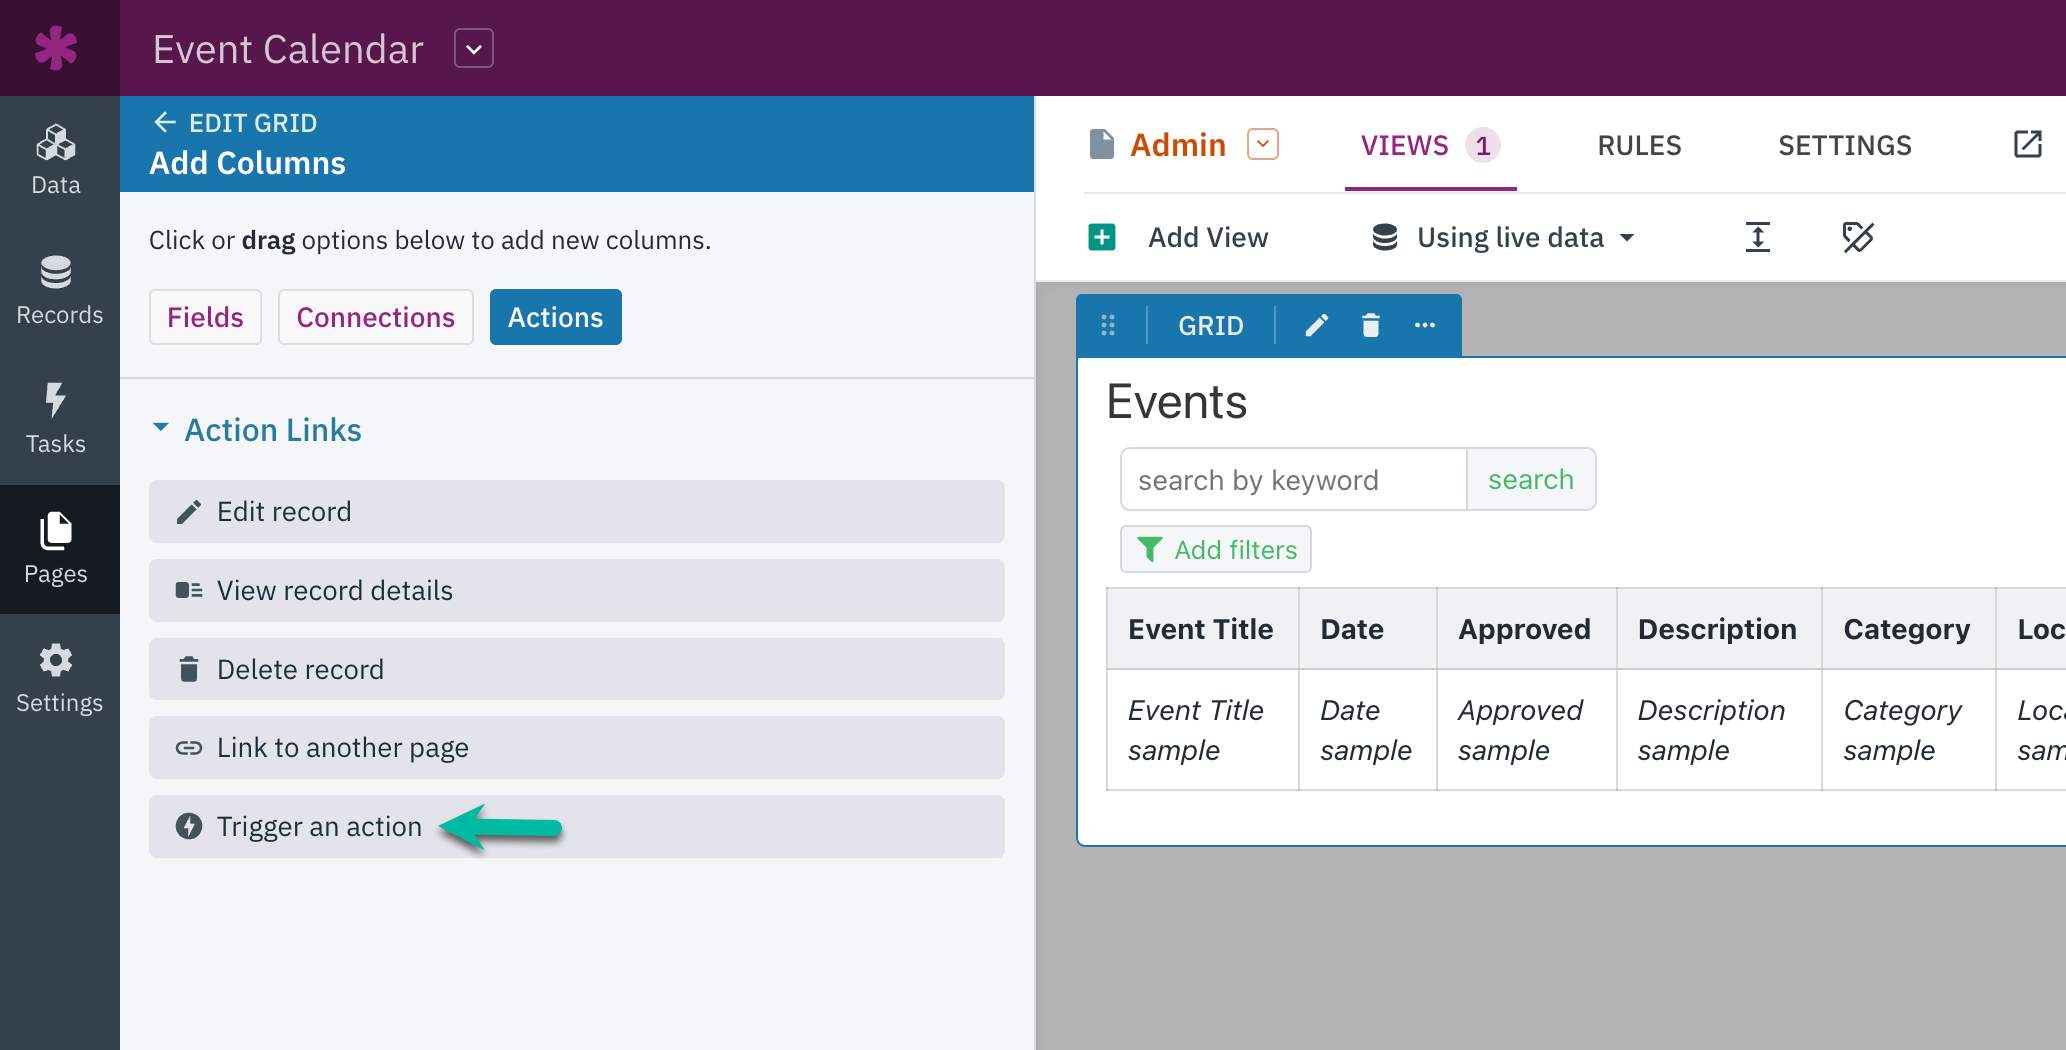
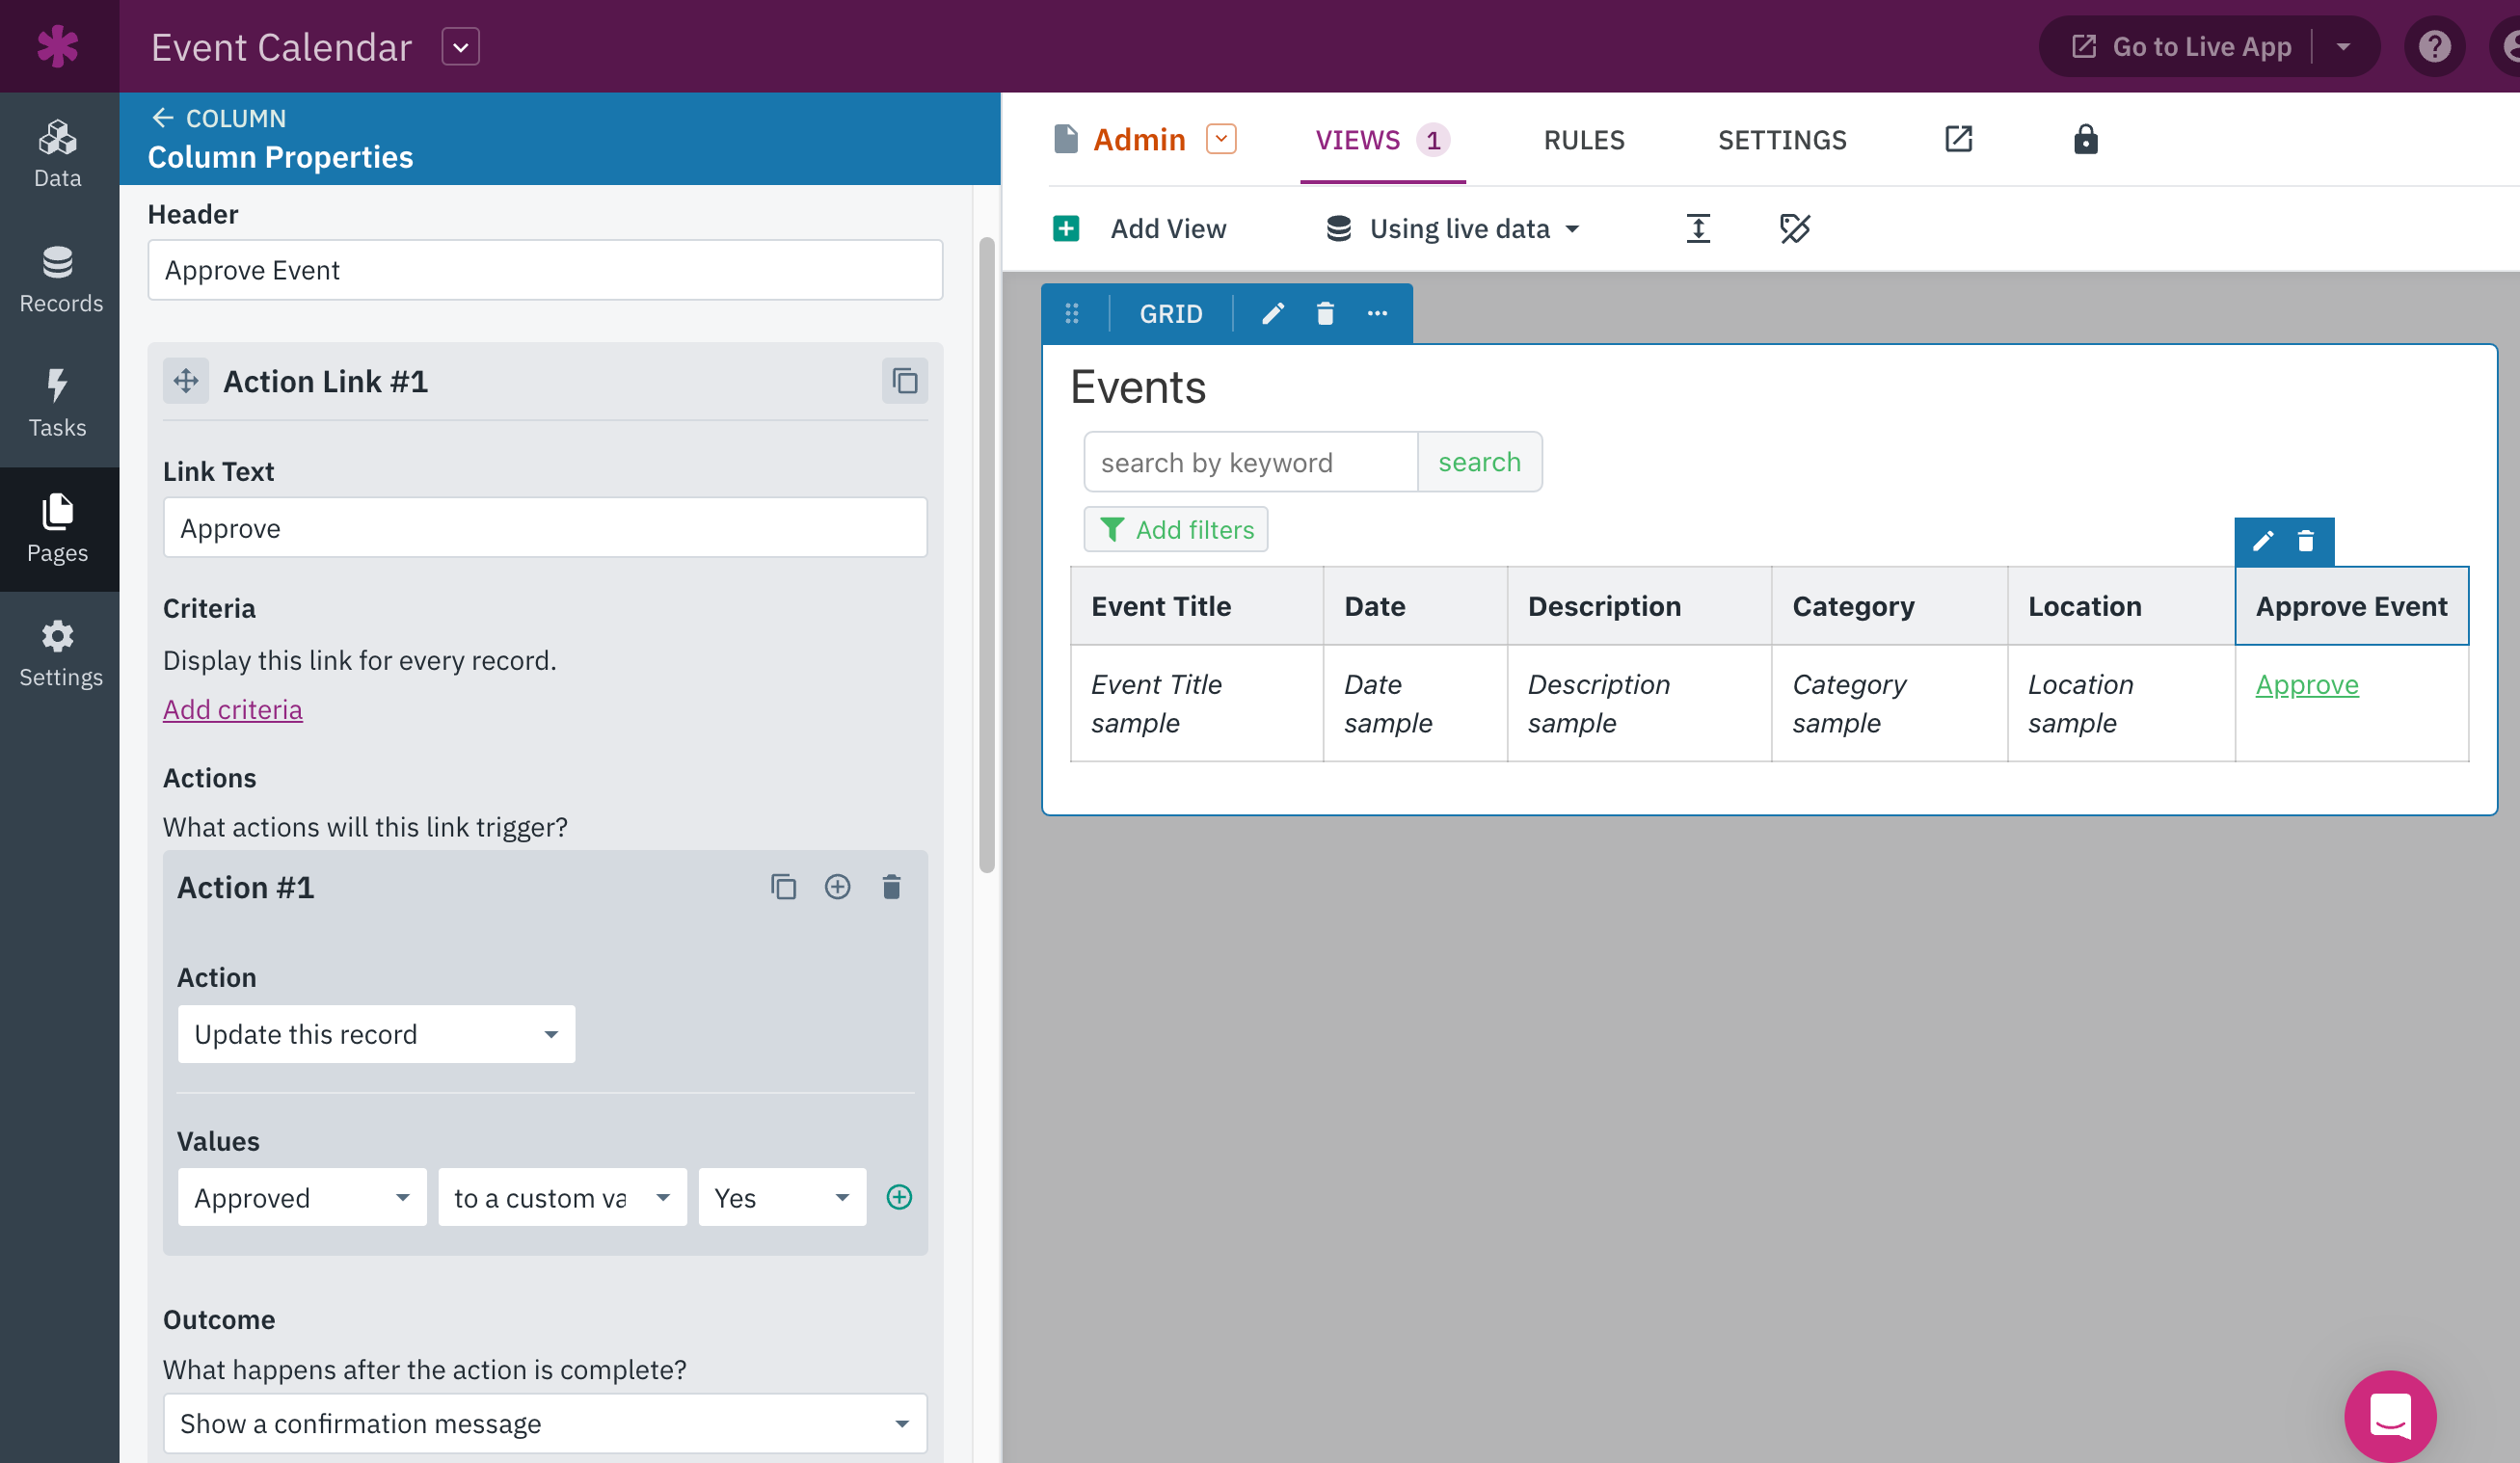
By selecting "Trigger an action", we can include a link to set the value of the Approved field to "Yes" for each individual Event record.
See the below image for how this action link can be configured:
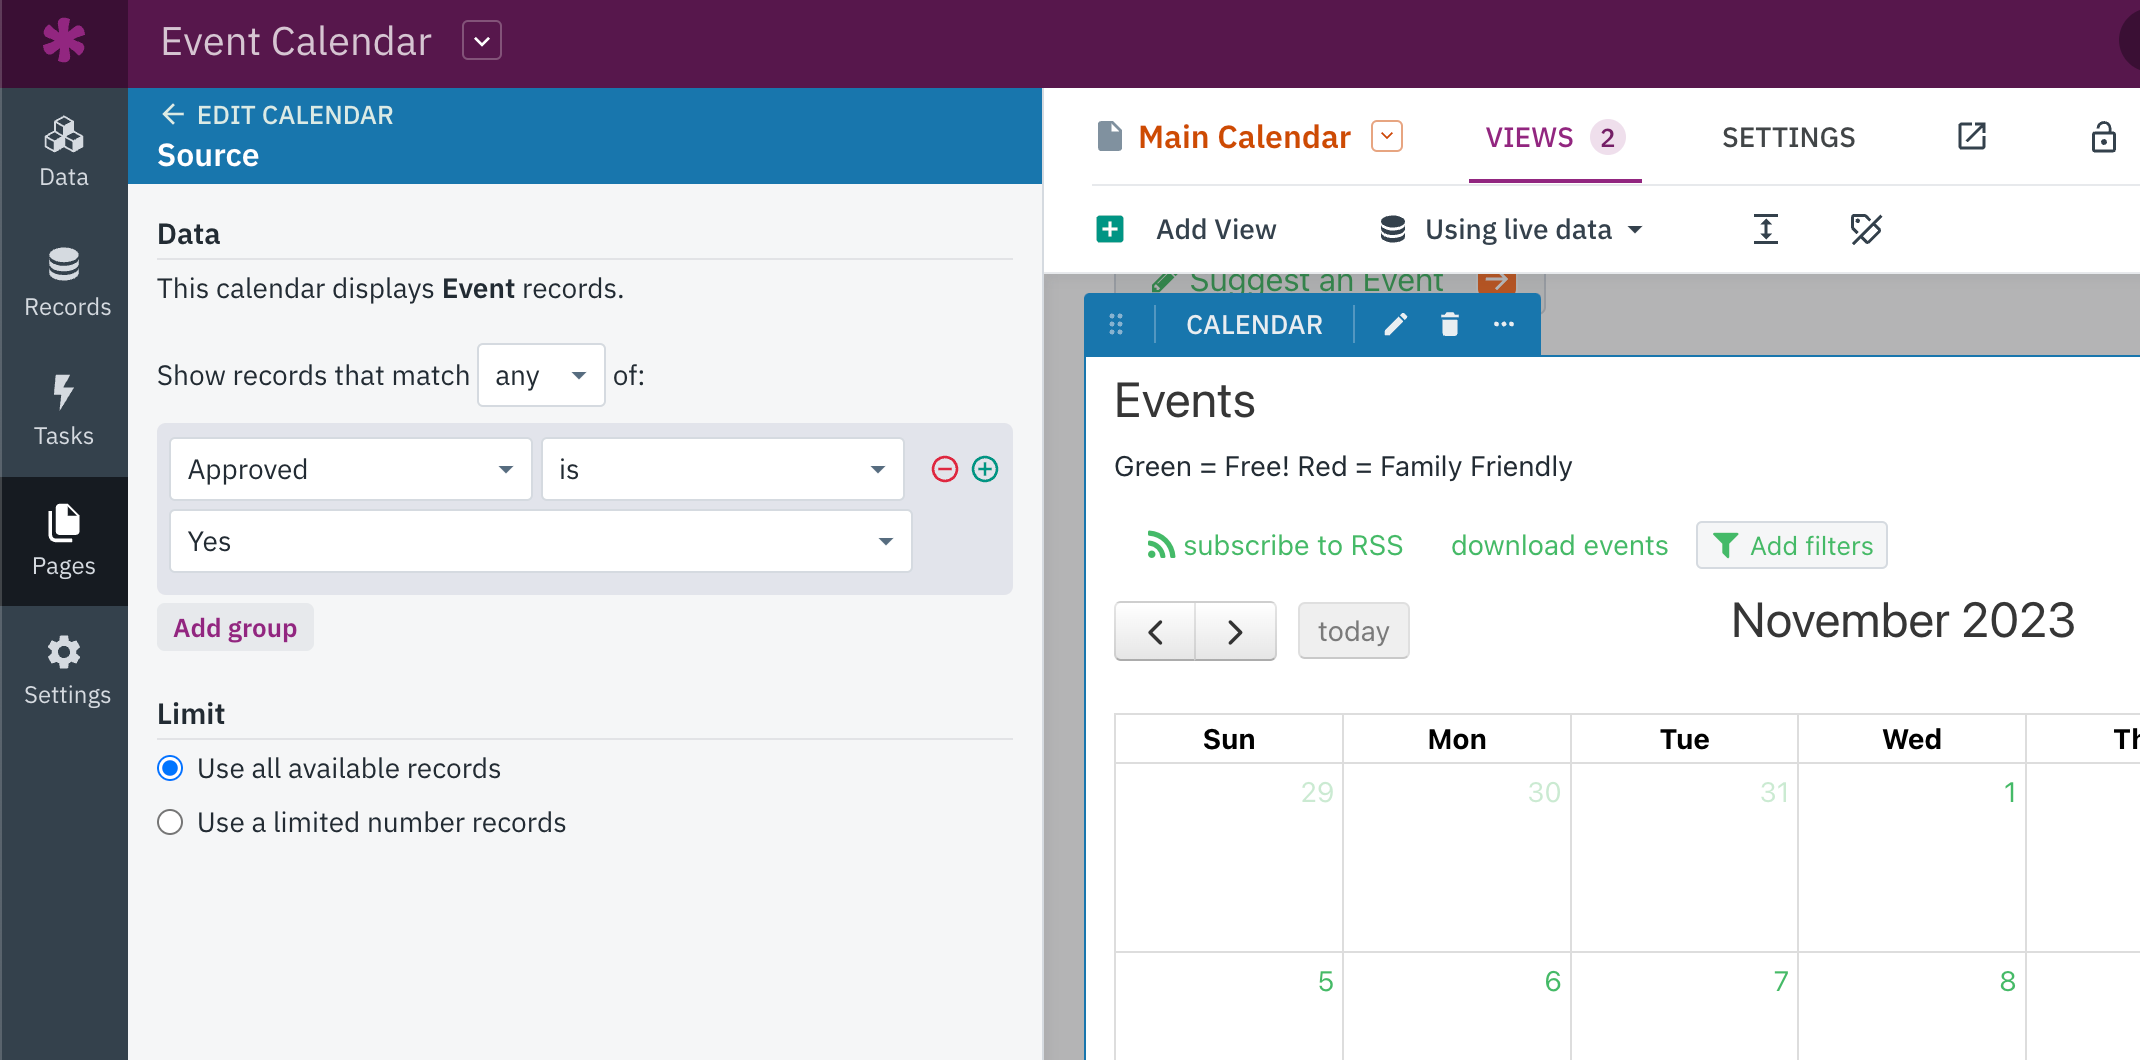
5. Update Your View to Show Approved Records Only
In the Pages section of the Builder, we'll locate the page with the public view that displays the Event records. If you don’t already have a view for this, you can follow the previous step again without applying the login restriction.
We'll edit the view by clicking on it in the page preview, then we'll need to access the "Source" section in the view settings.
This time, we'll add a filter that says "Approved" is “Yes”. Now, the view will only display records that have been approved by someone with higher access (Admins).
Tip: To learn more about the Source section of the settings, see our article here.
Notes
-
If you need more complex workflows, you could use a Multiple Choice field instead of a Yes/No field. You could include at least two options: "Pending Approval" and "Approved".
-
If you have existing records, make sure to update the new "Approved" value for those. You can use a batch update to update them all at once.
-
Track who made updates by adding a form rule to connect the record to the logged-in user. You could also update a "Date Approved" field with a form rule to track when it was approved.