Use Case
If you're looking to create a print-friendly invoicing page in your app, we've got you covered! This page will not only showcase your company logo but also include all the necessary billing information, customer details, and order specifics.
In this guide, we'll take you step by step through the process of creating a print-friendly invoice page, just like the one you see in our Quotes and Invoices sample app.
Requirements
To create this page, you will first need your app to be set up with the tables and connections outlined in our How to Build an Orders App guide. That includes tables for: Orders, Line Items, Products, and Customers.
You will also need to activate users and add at least one user role to your app. In this guide, the user role will be named "Sales".
We will be using Rich Text, Grid, and Details views to create the invoice print page.
Steps
1. Add a Status Field to the Orders Table
In the Data section of the Builder, click on the Orders table. Create a new multiple choice field and name it "Status".
The Status field will have three options: Quote, Invoice, Paid.

2. Add a Page to View Orders
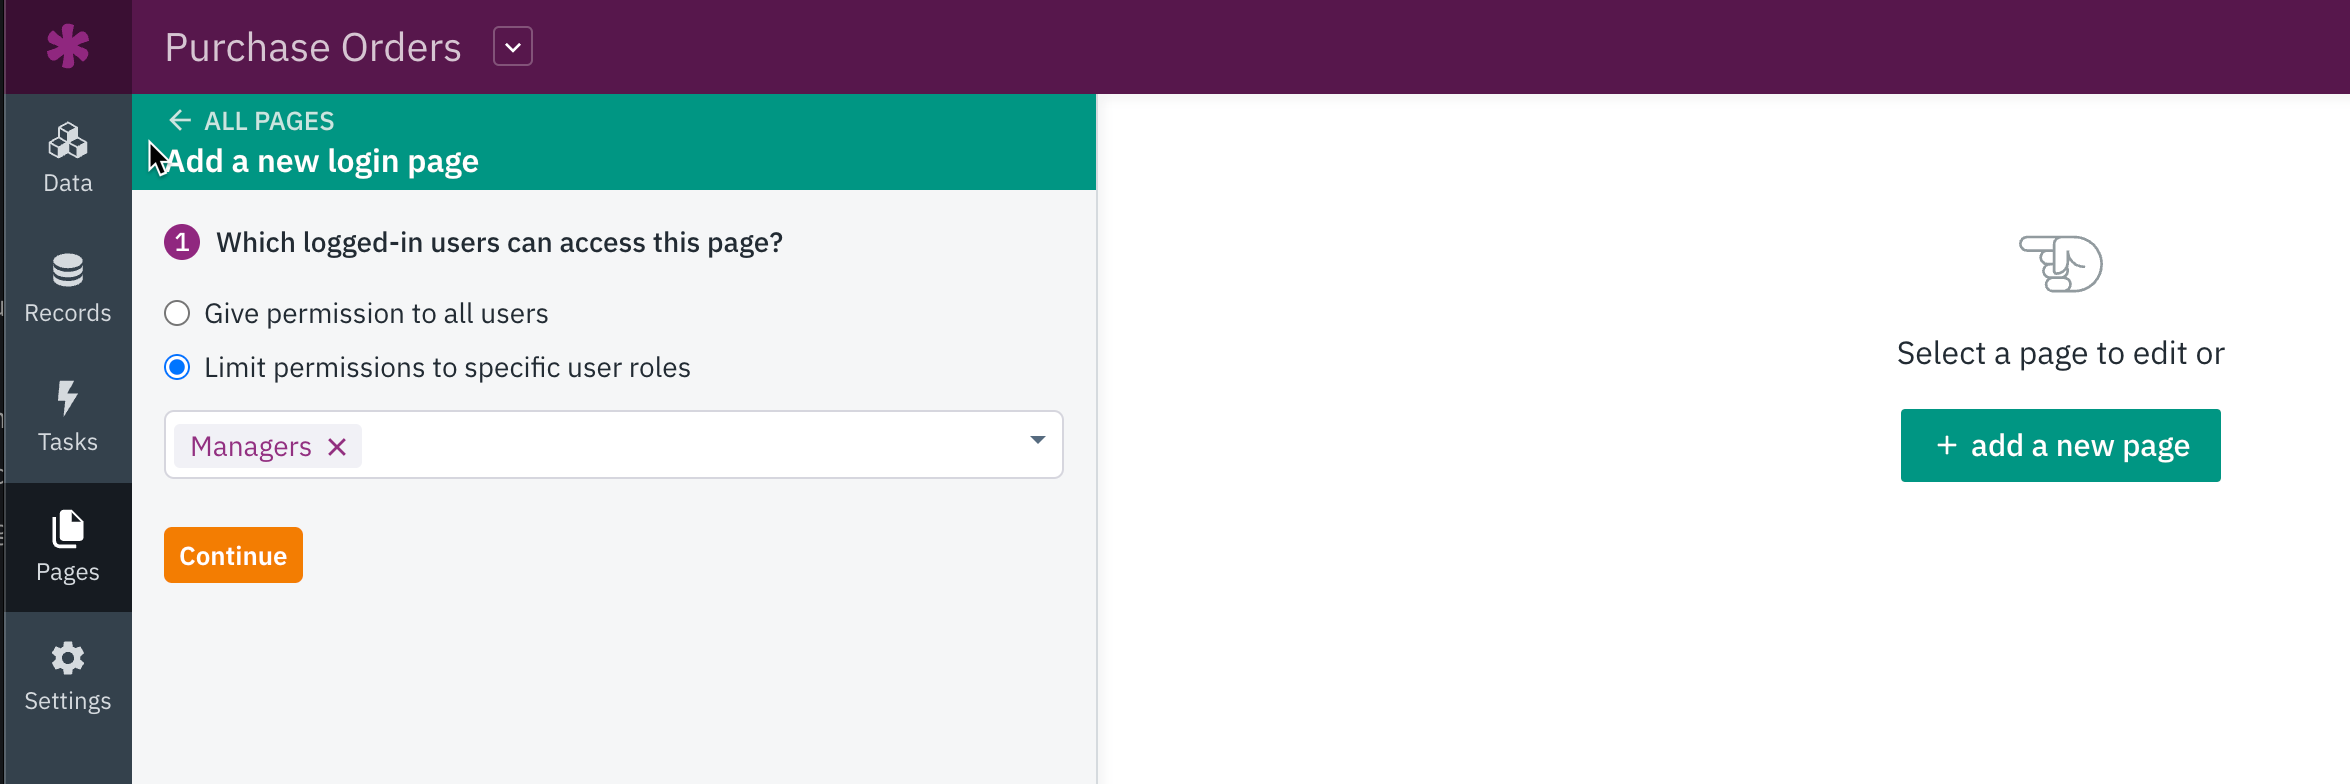
Next, navigate to the Pages section of the Builder and click on the green "+" button to create a new login page.
For the new page, you'll need to enable logins and restrict access to the user role that should have access to the invoices page. You can give the page a name, for example, "Manage Invoices".
On that new page, create a Grid view displaying Order records with the following selections:
- A grid view to display Orders
- Links to view each Order records on a Details page
- An Orders Details view
- A Grid view to display Line Items connected to the page’s Order record
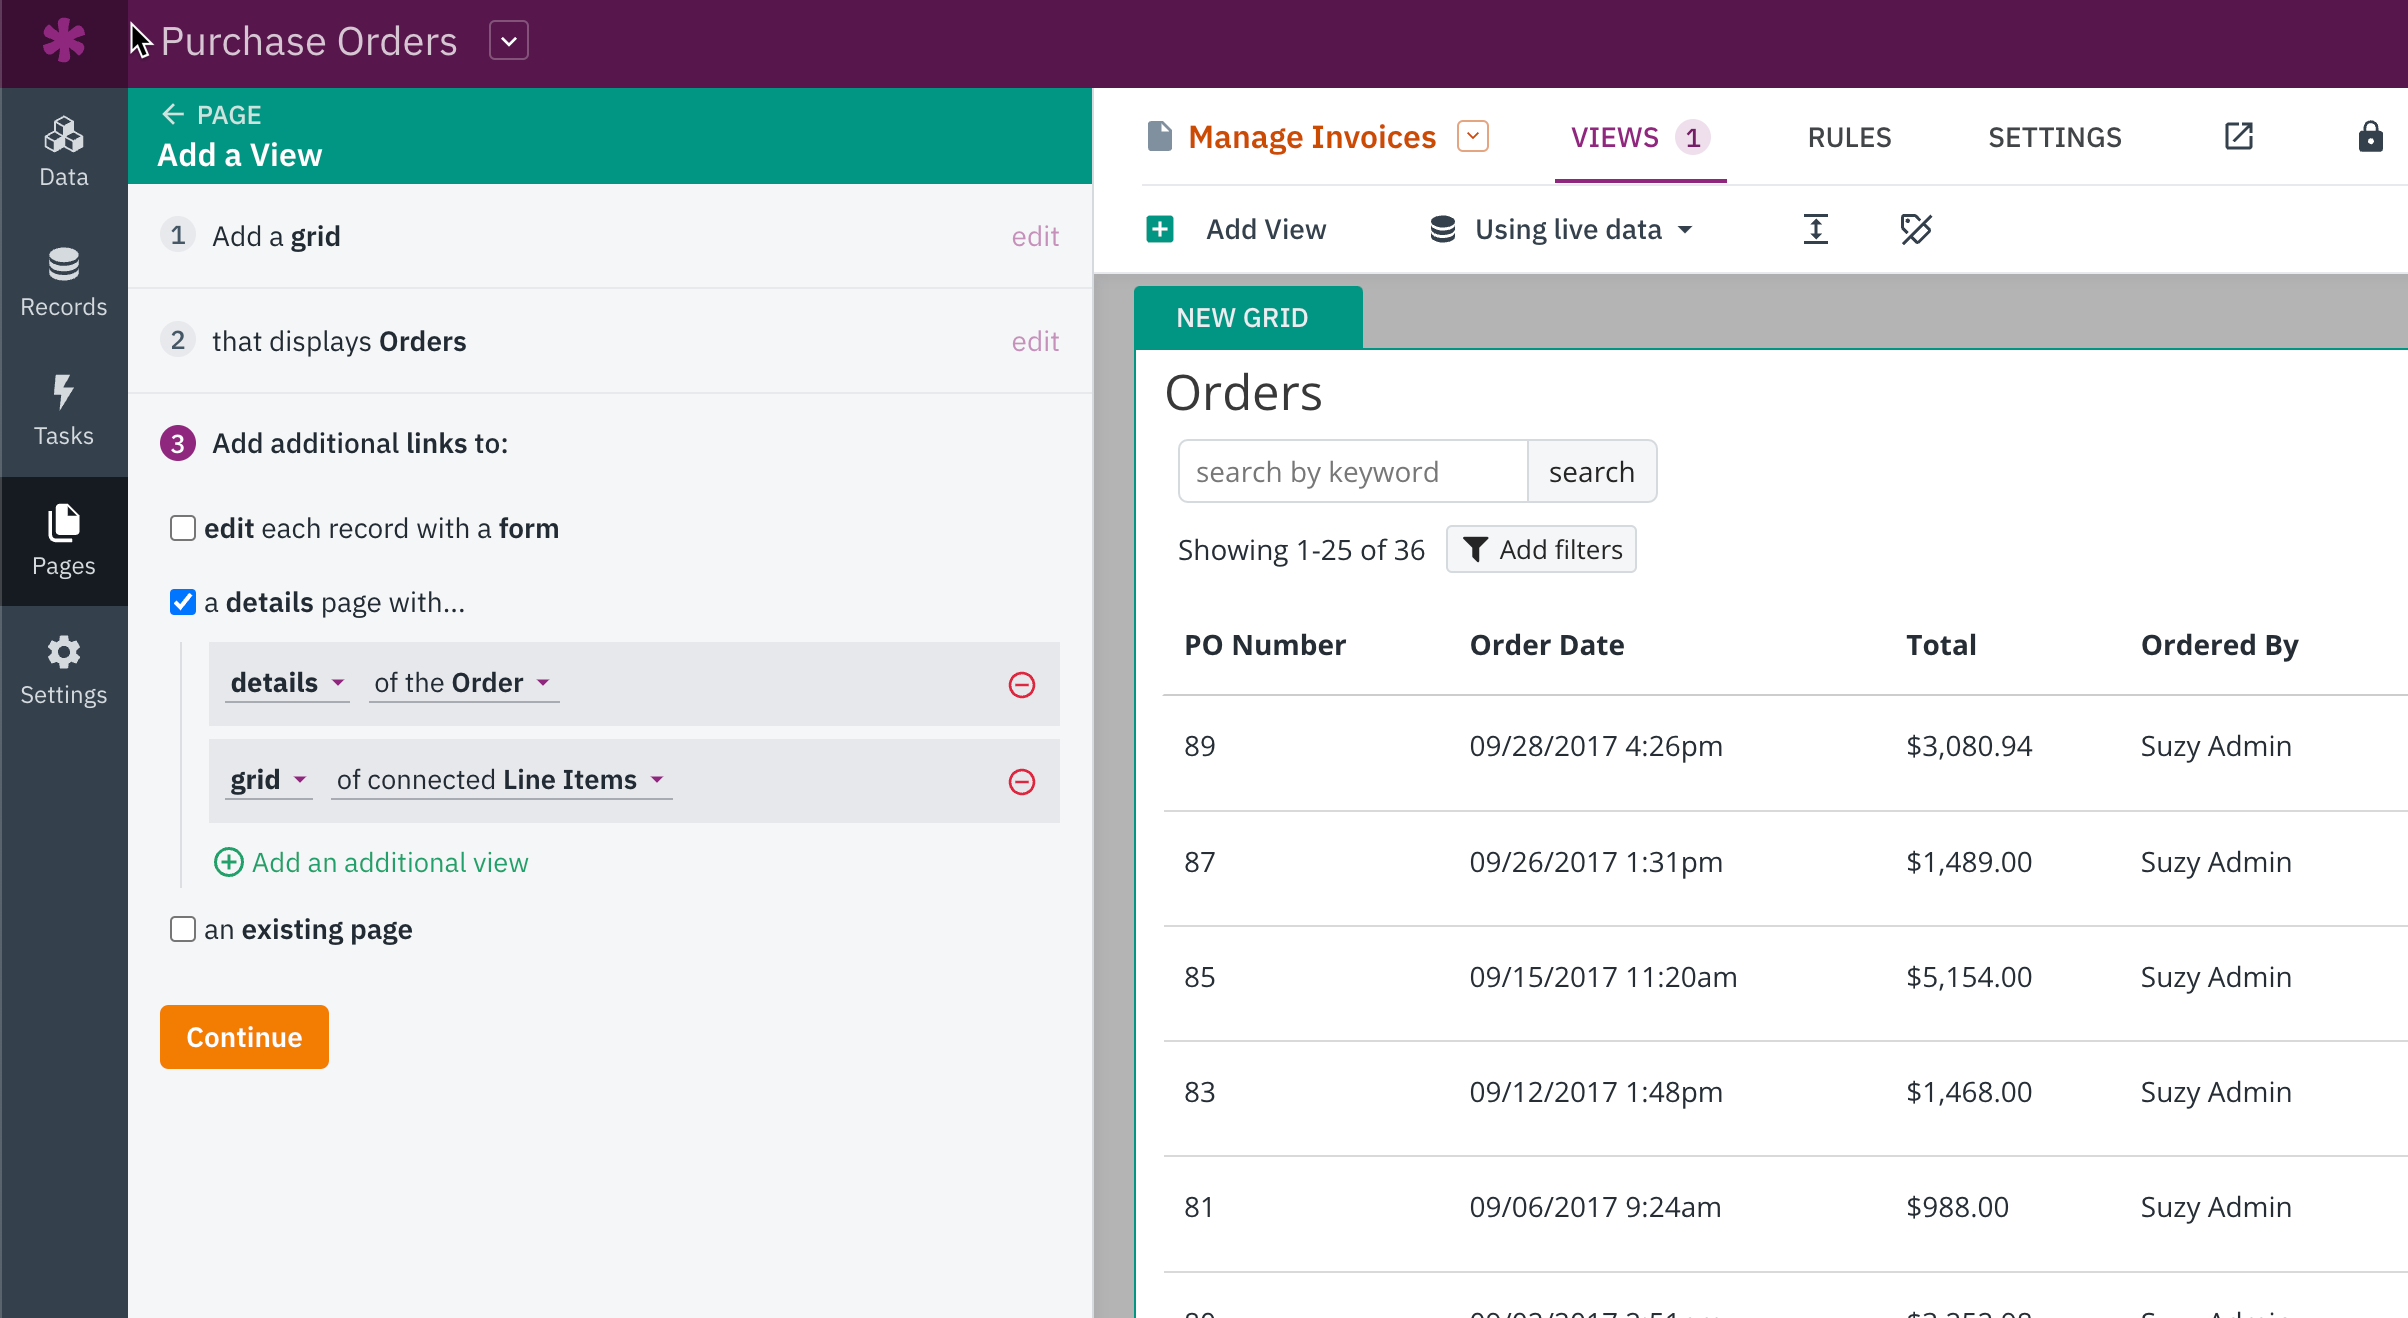
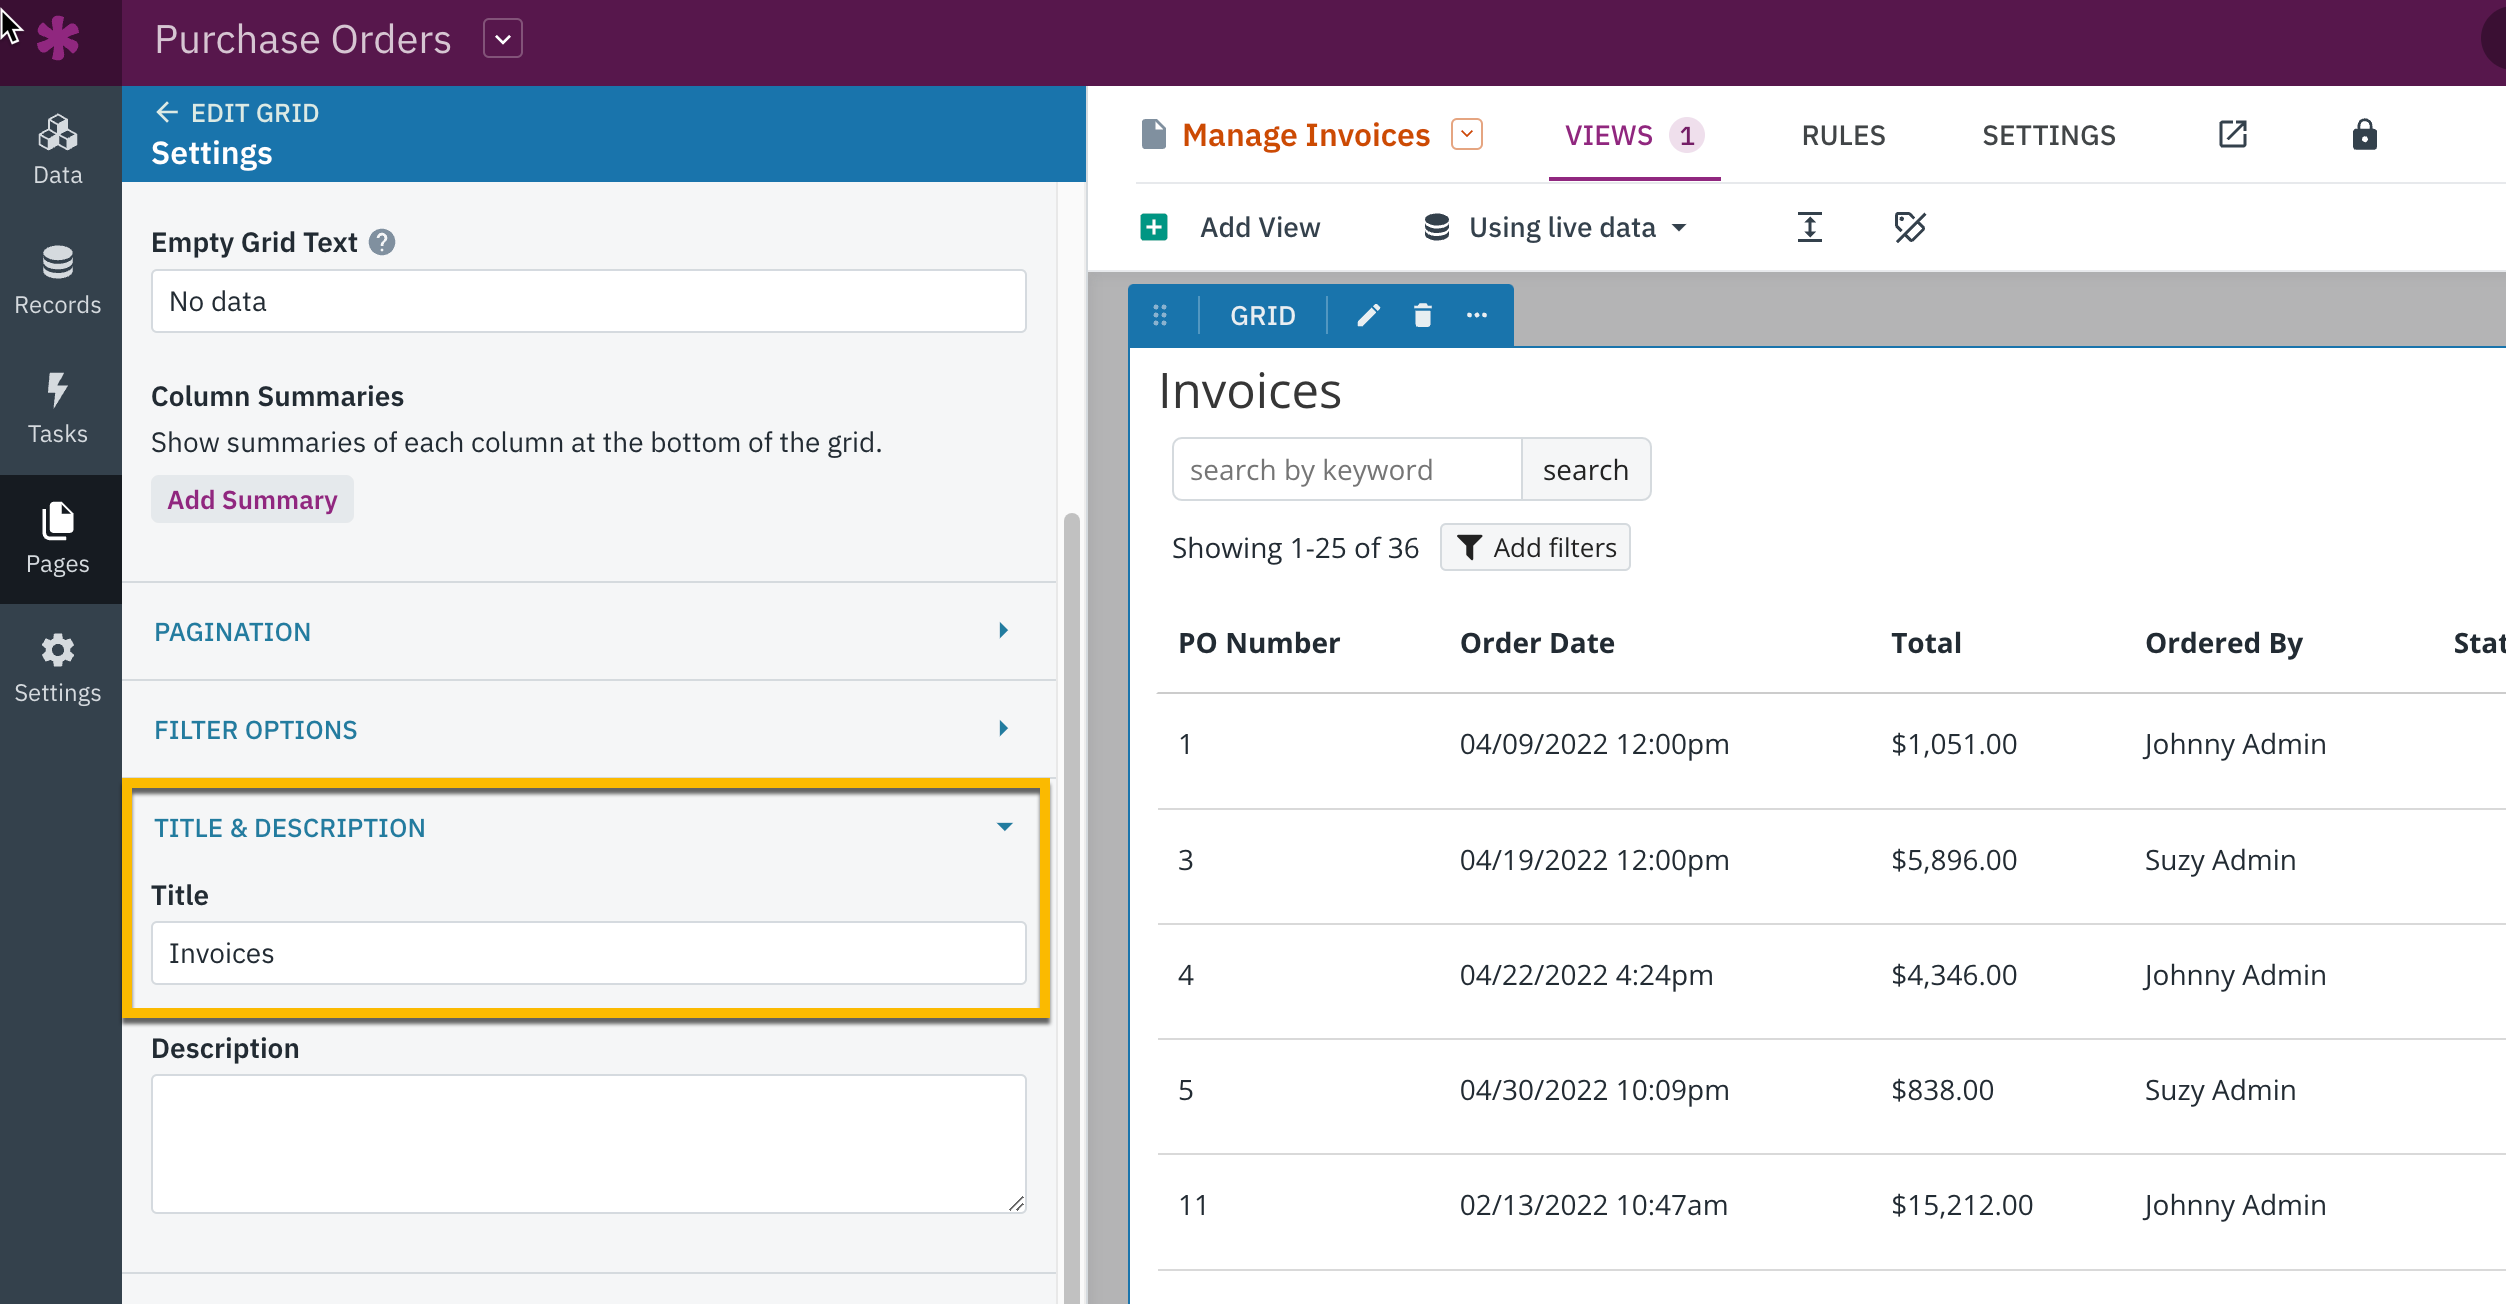
On your new Manage Invoices page, click the grid displaying Order records to edit the view.
In the Source section of the grid view editor, add a filter to only display Order records where “Status is Invoice.” This is how we will restrict this view to only show our invoices.
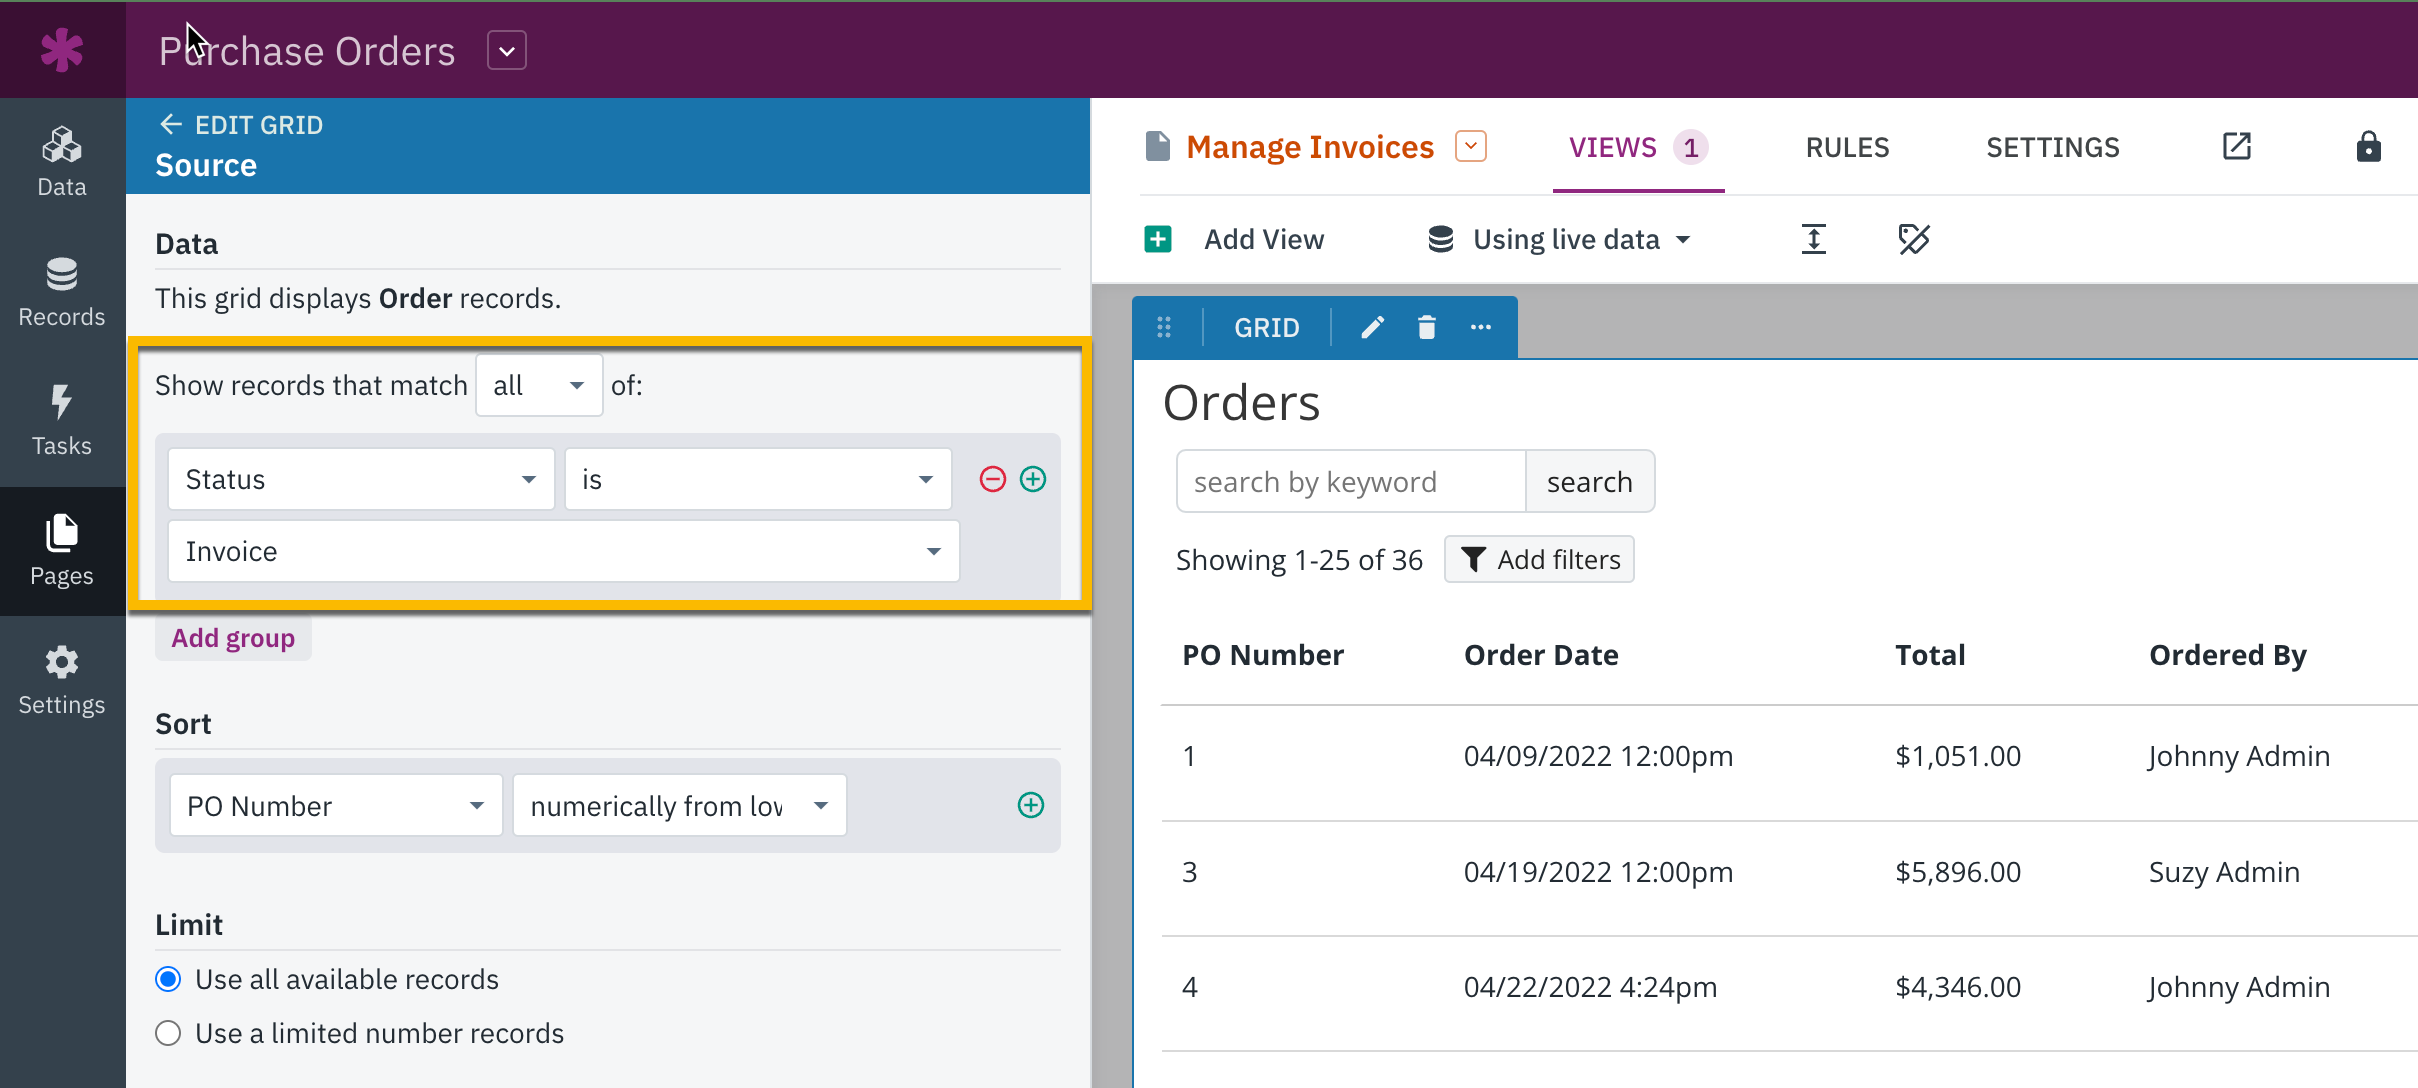
You can also rename the view from “Orders” to “Invoices.”
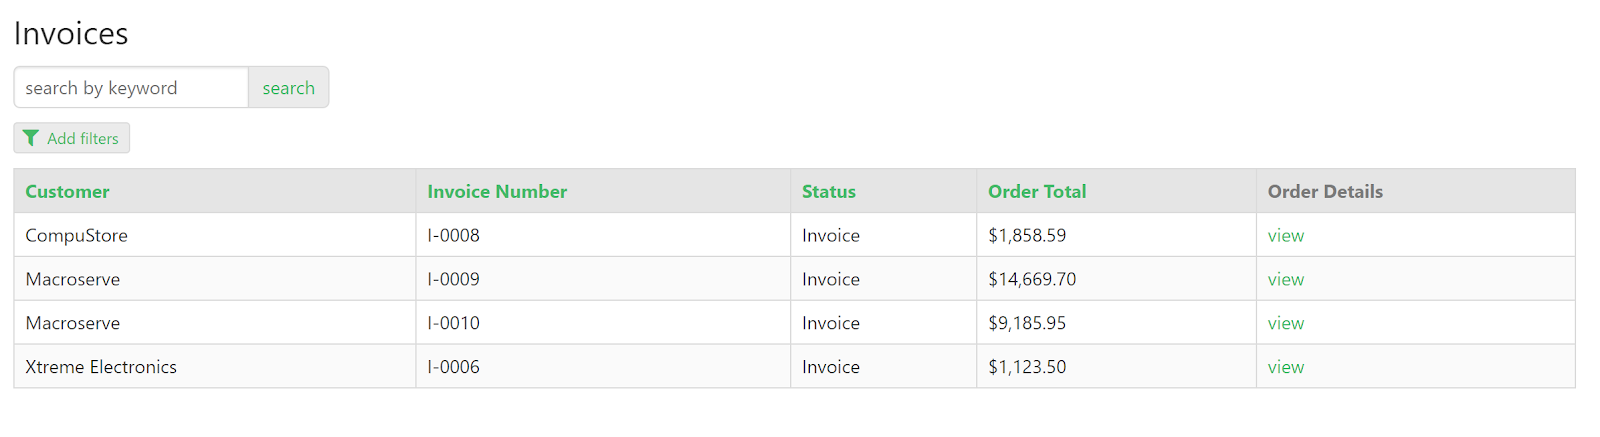
In the Live App, you will have a Grid view displaying all your Orders records in the Invoice stage:
3. Create the Invoice Print Page
Next, let's proceed with editing the Order Details page to transform it into a print-friendly invoicing page. To begin, navigate to the details page you recently created by clicking on the "Order Details" link located within your page tree.
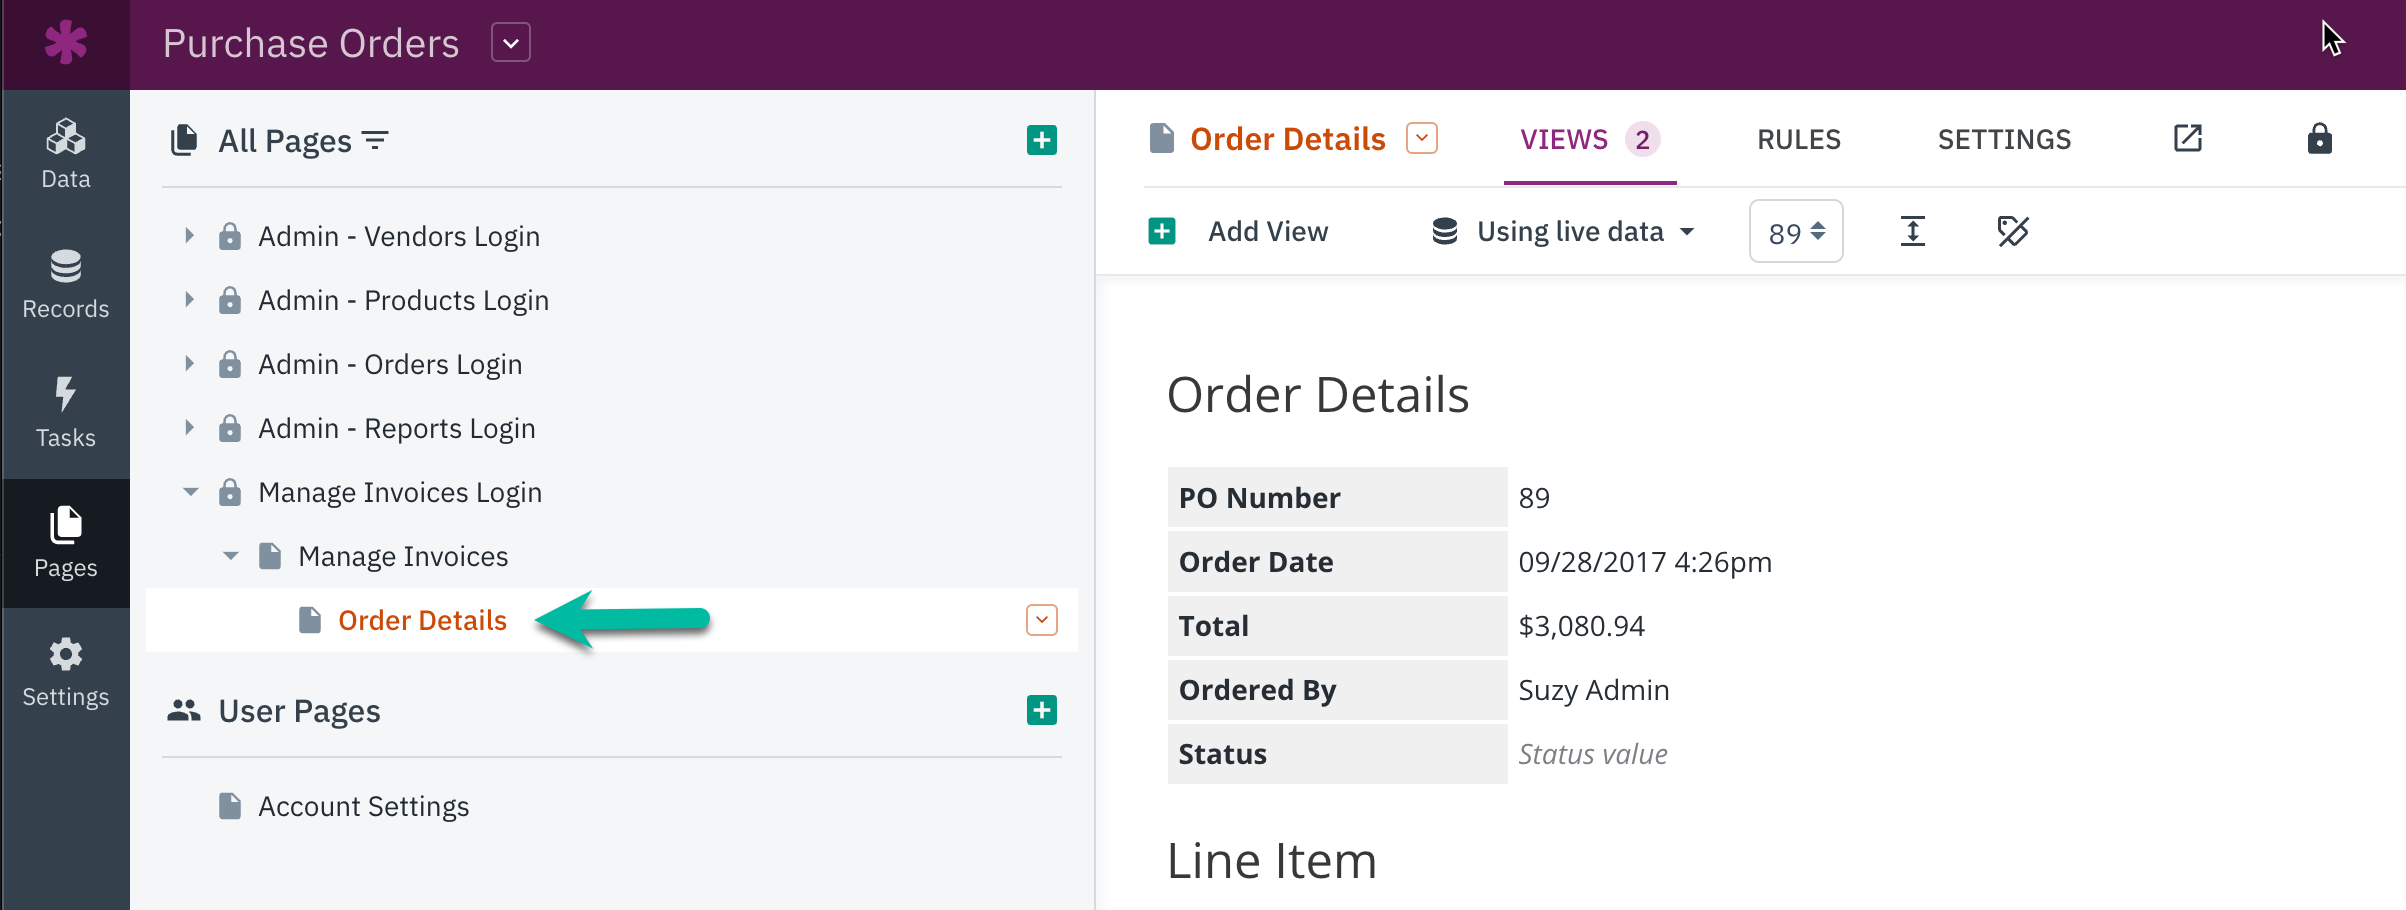
On the Order Details page, you will see an Orders Details view and a Grid view displaying the connected Line Items.
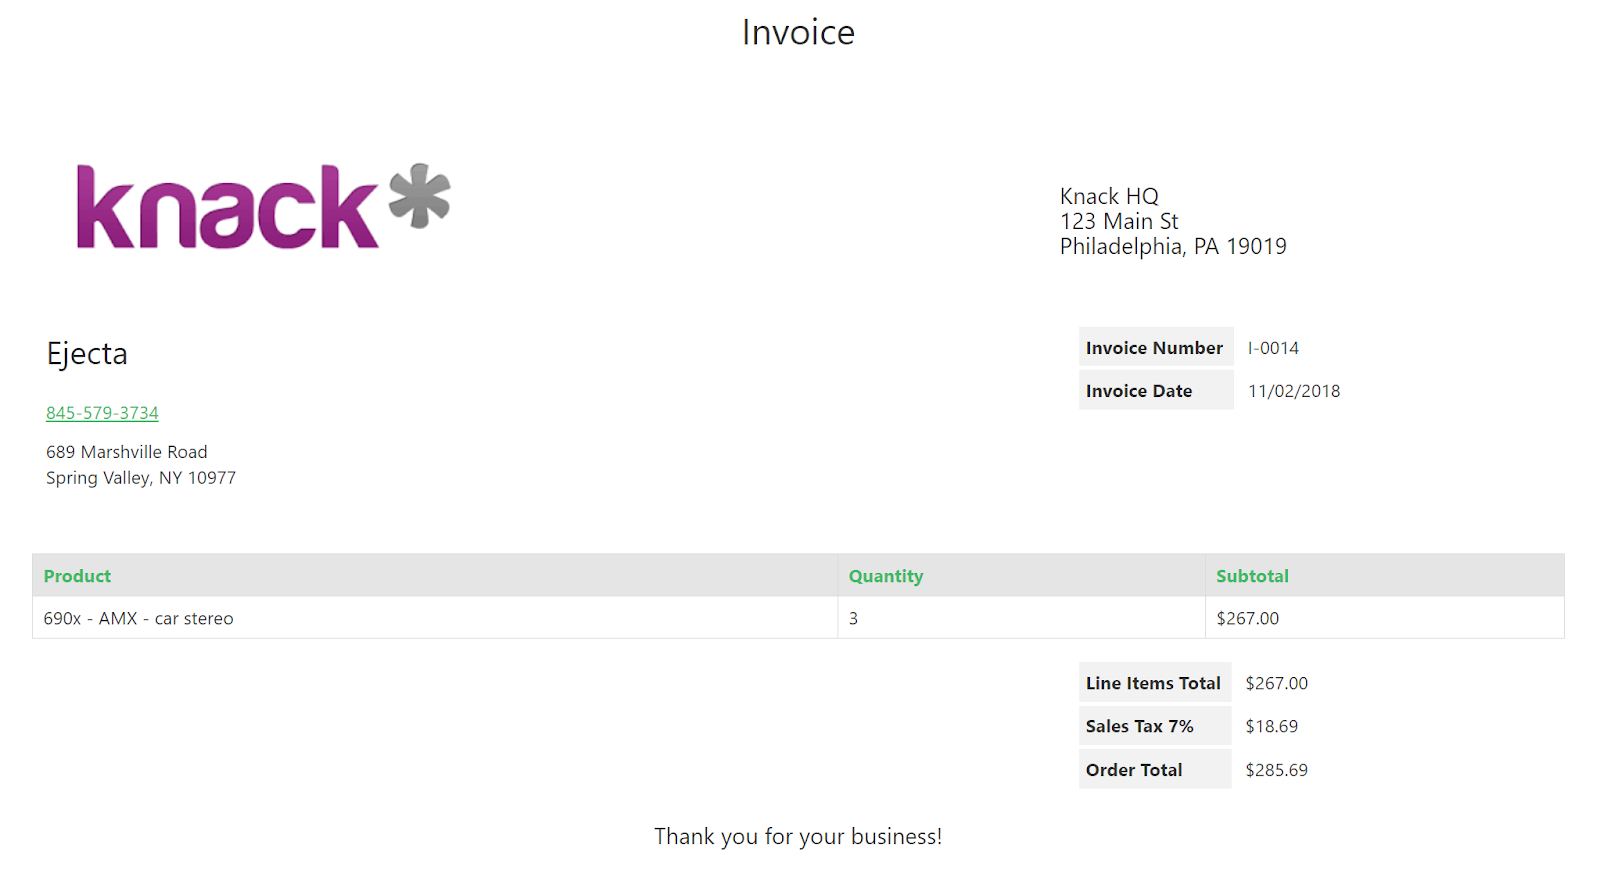
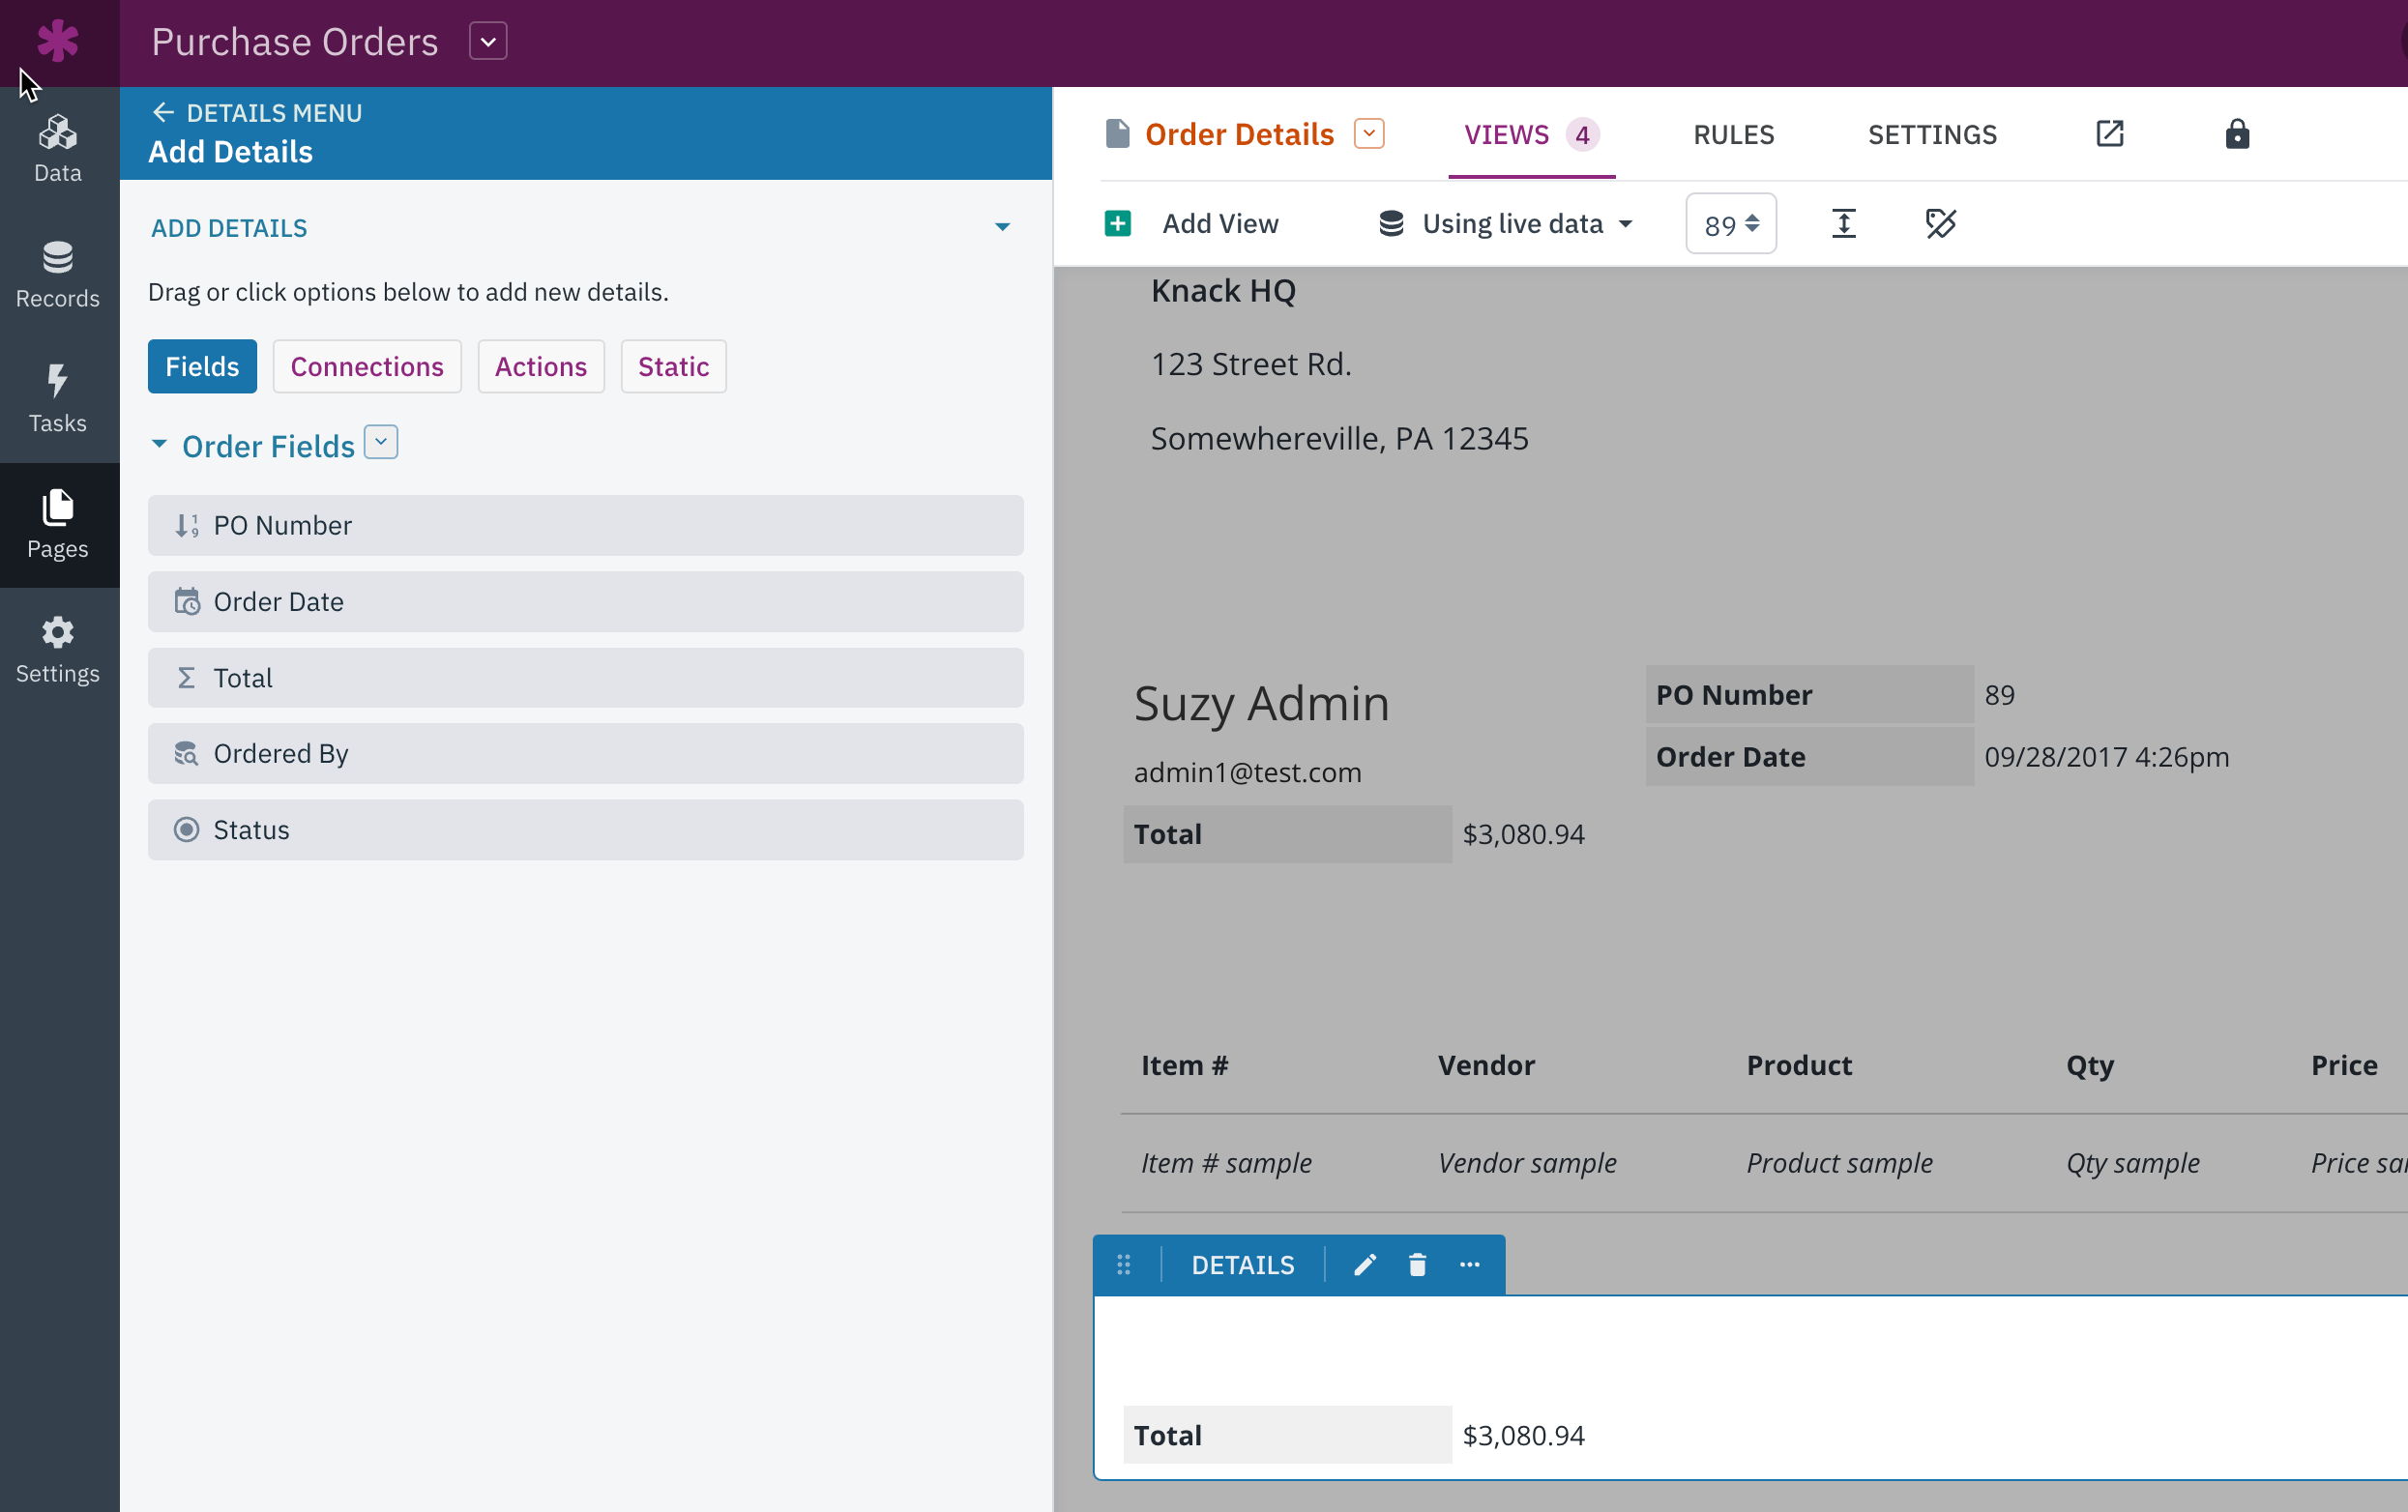
Our ultimate objective is to create a page that encompasses all the pertinent order details and incorporates the company's branding when it is printed:
We'll be creating this print-friendly page by combining Rich Text, Details, and Grid views.
The page will display:
- Company logo and address
- Customer information and invoice details
- Line items belonging to the invoice
- Invoice tax and total
- Thank you message
The upper section of the page remains consistent for all invoices, showcasing the term "Invoice," along with your company logo and billing information. With Knack, you can create this page using a Rich Text view.
To enhance the Invoice Print Page, you can easily add a Rich Text view on the Order Details page. Simply click on the "Add View" button located in the top menu and select the Rich Text view type.
The Rich Text view will be added below your other views; you can move it above the other views in the Builder by dragging and dropping it. The view will contain the content for the top of the print page, so the view must be arranged above all the others.
Next, simply click on the view to open the Rich Text view editor. Add your static content to the Rich Text view.
In this example, we added the word "Invoice" across the top and the company name and address:
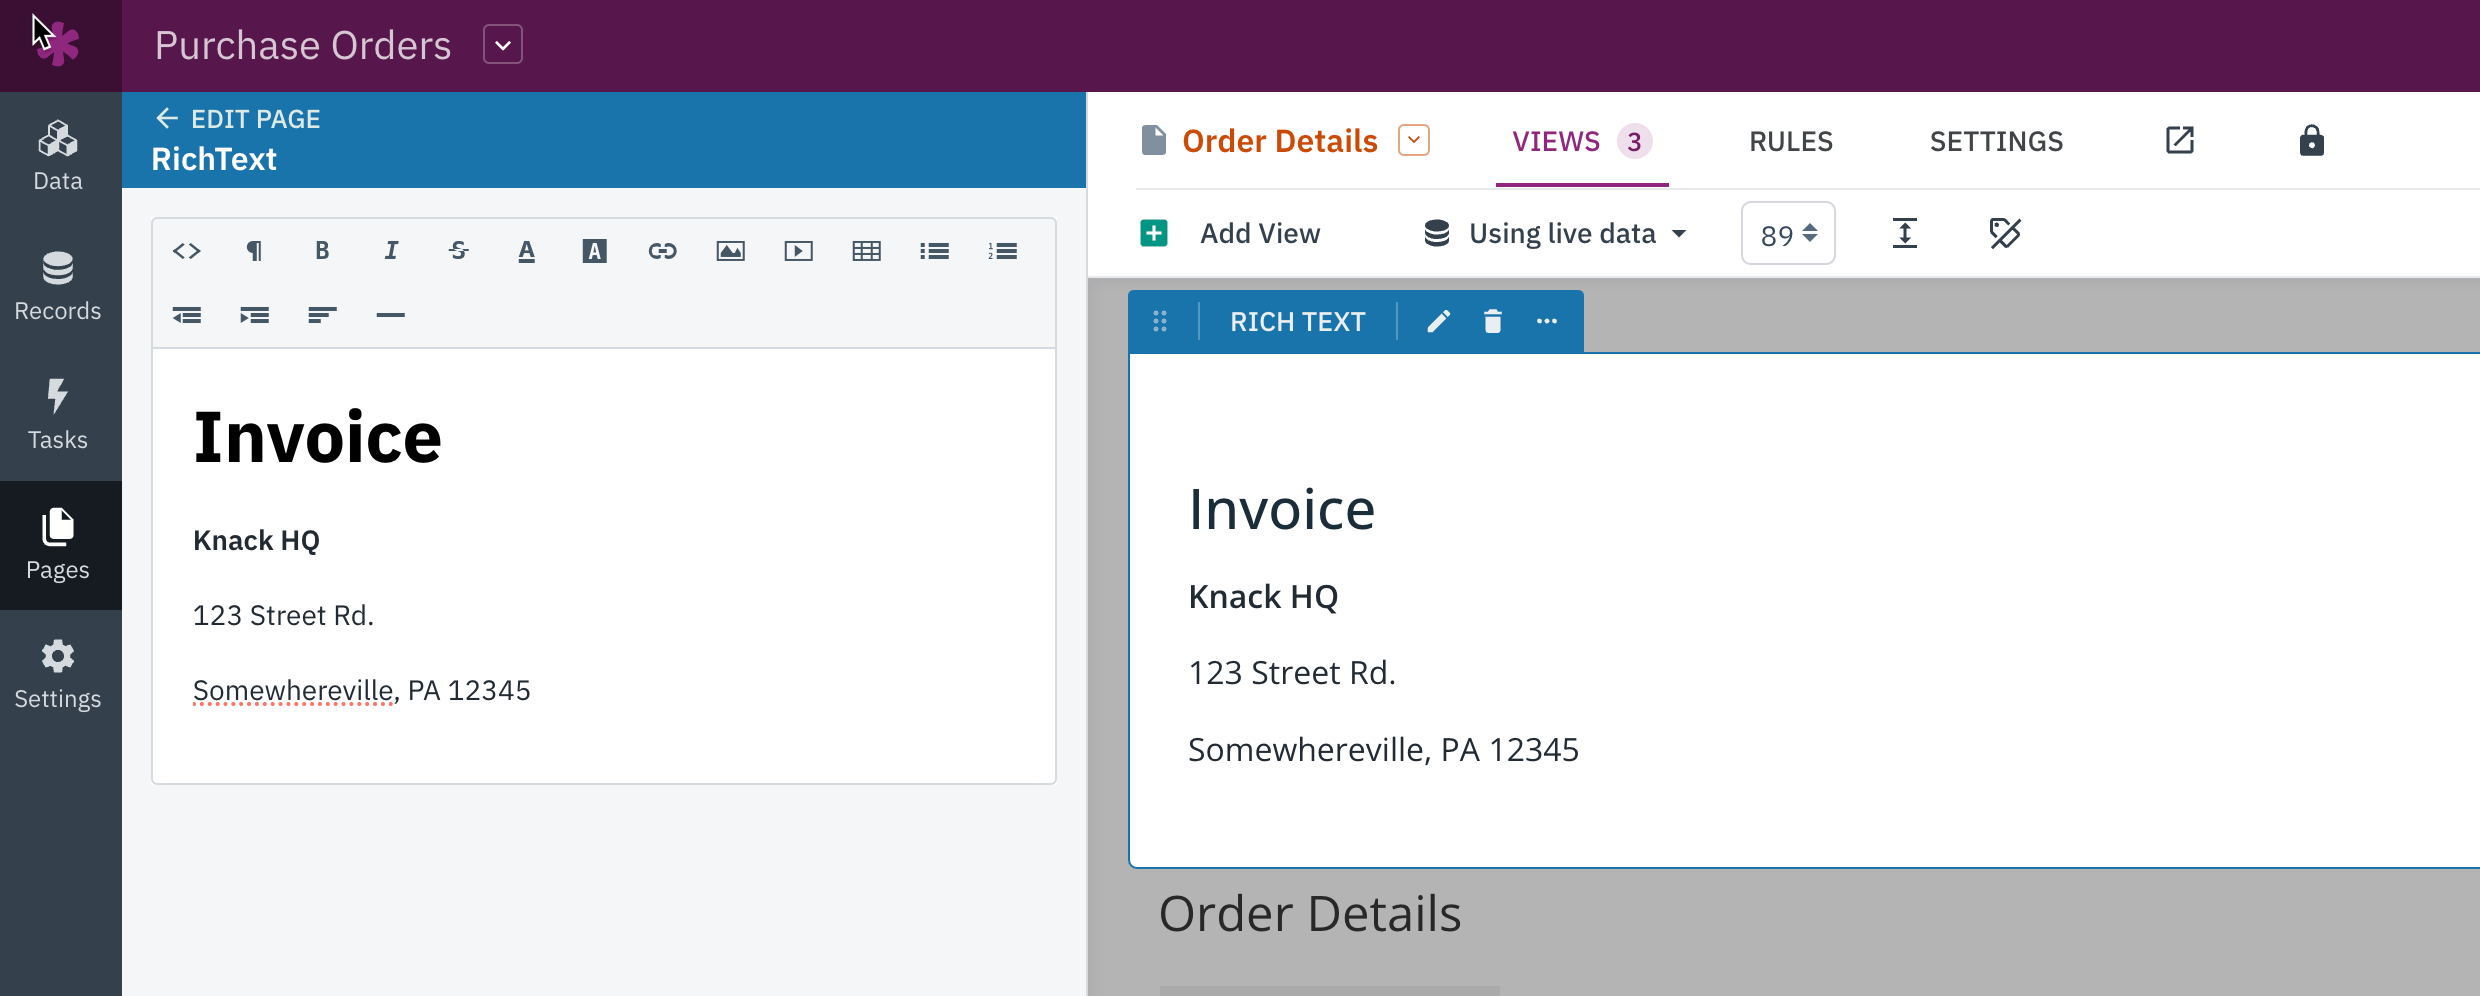
Tip: You can learn more about how to add the logo to this Rich Text view in our Rich Text article.
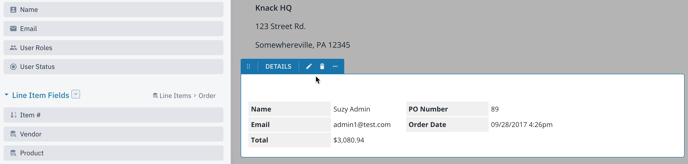
Below the Rich Text view, we will use the existing Details view to display the rest of the invoice information.
Click on the Details view to open the view editor. Remove the Details view title from the Settings section of the view editor.
Details views can display fields in three columns. Now, you can arrange your fields in the Details view:
- The right column will contain the Invoice Date and Invoice Number fields, so click on those fields in the left-hand Fields column and drag them to the right-hand group if needed.
- The left column will contain data from the connected Customers record. To access that data, select the orange arrow next to Orders in the left-hand Fields column and click on "Customers".
- Then, add the name and address fields to the left group:
Next, hover over the "Name" field and click on the pen icon to make edits. Update the settings to “Hide Label” and change the style to "H2":
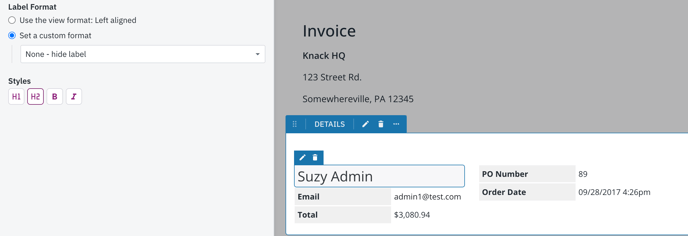
Now, hover over the Address field to click the pen icon. For this field, simply select “Hide Label.”
This view is now complete, and you can save your changes.
On the Order Details page, click on the Line Items grid to open the grid view editor. In this grid, hover over and click on the trash can icon for fields you don’t want to display on the invoice.
Remove the title from the Line Items grid view. You can do this by going into the Settings section of the grid and deleting the Title there.
Once you have only the fields you want to display on the invoice, this view is complete.
Now, we’ll add another Details view to display the order subtotal, sales tax, and order total. Add a new details view displaying this page’s Order record:
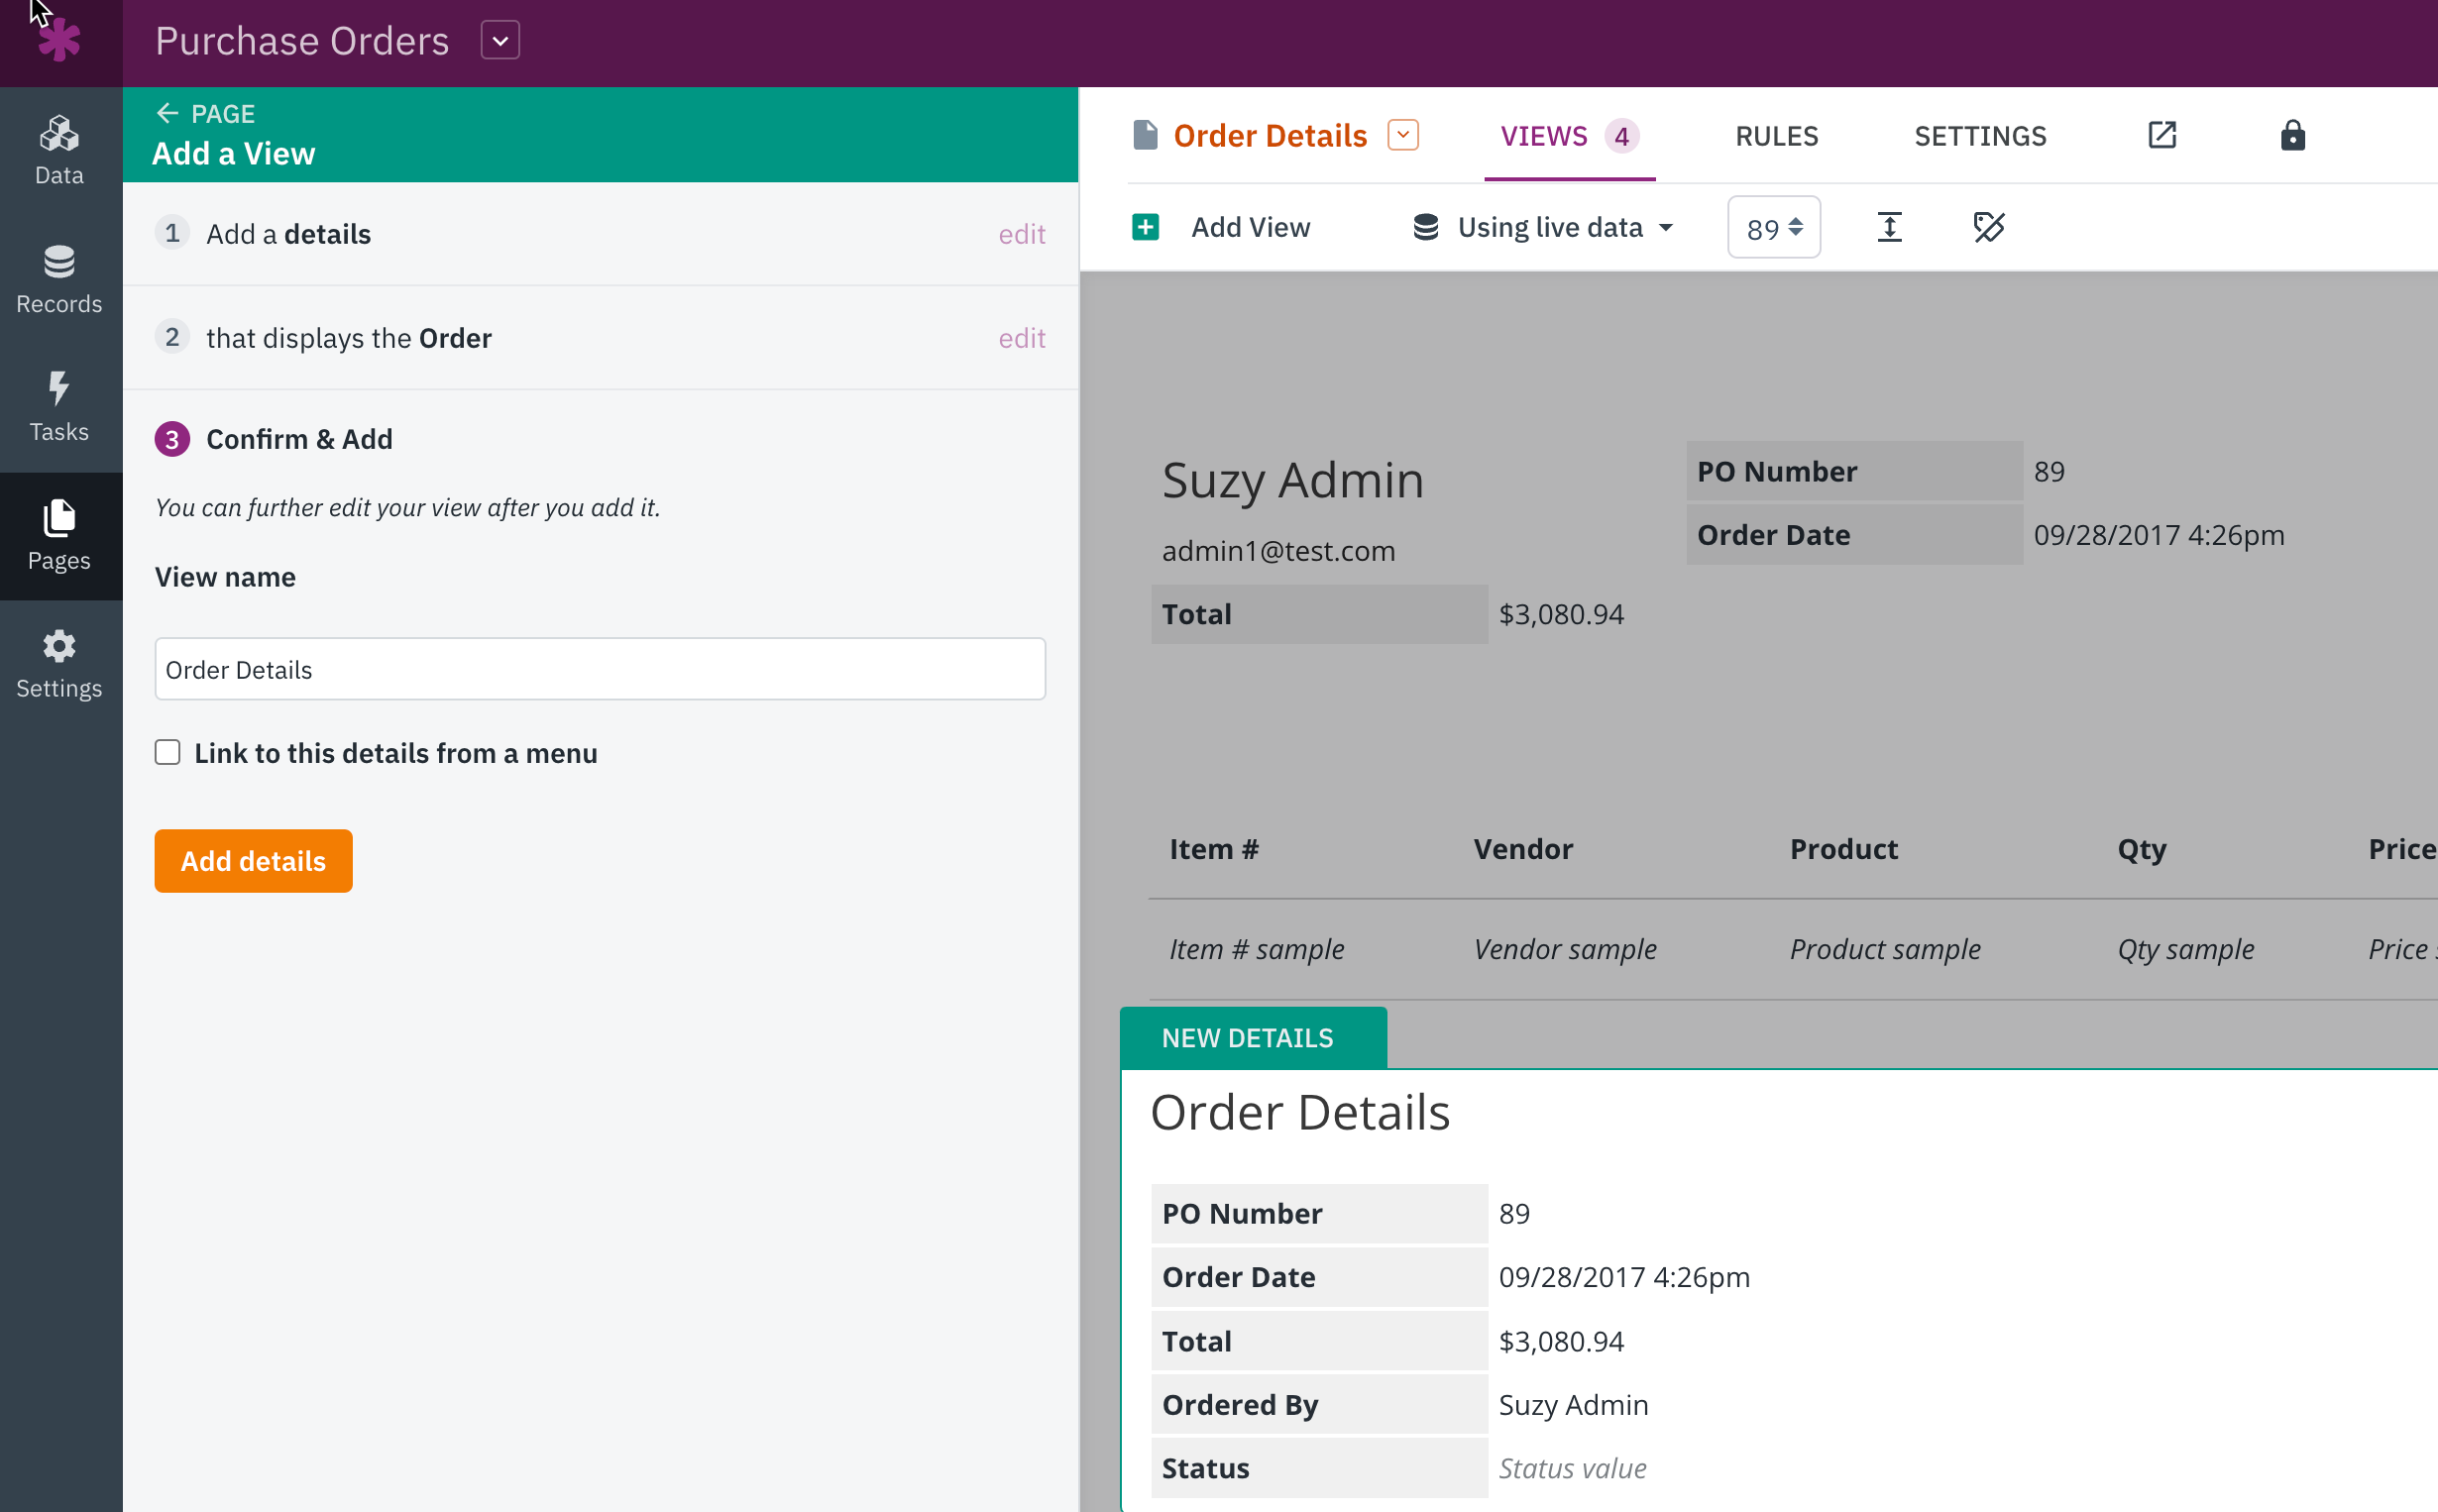
Once you add the new Details view, click on it to open the details view editor. In this view, you will only need to add a field in a single row.
In that group, add your Total field:
Save changes to go back to the Order Details page.
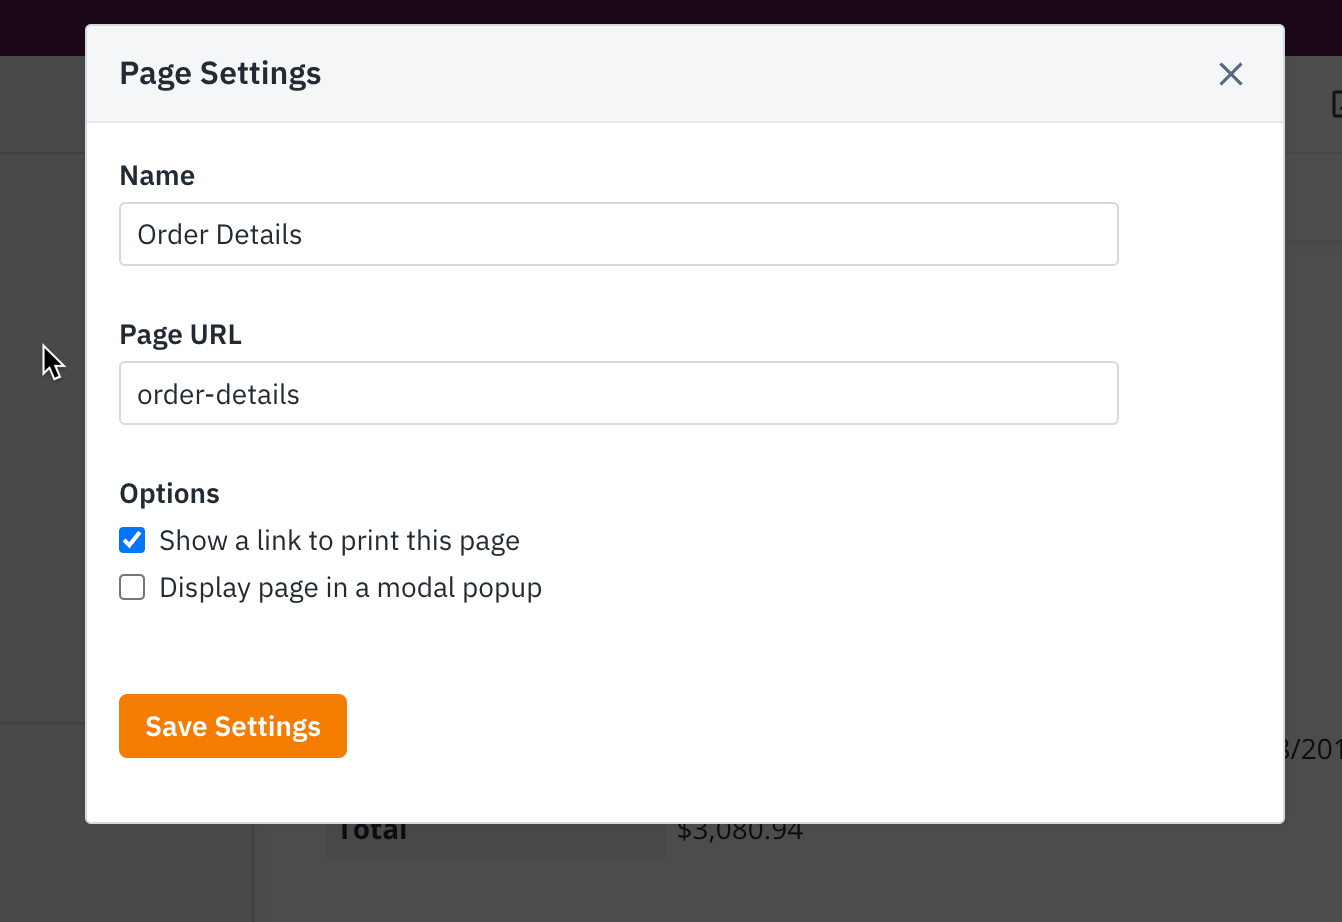
4. Enable Printing
This last step is to enable printing on the Order Details page.
Simply go to the Settings tab of the page. Tick the box that says "Show a link to print this page" and save your changes by clicking the "Save Settings" button.
Now you are finished! Go to your new invoice print page in the Live App to preview it.
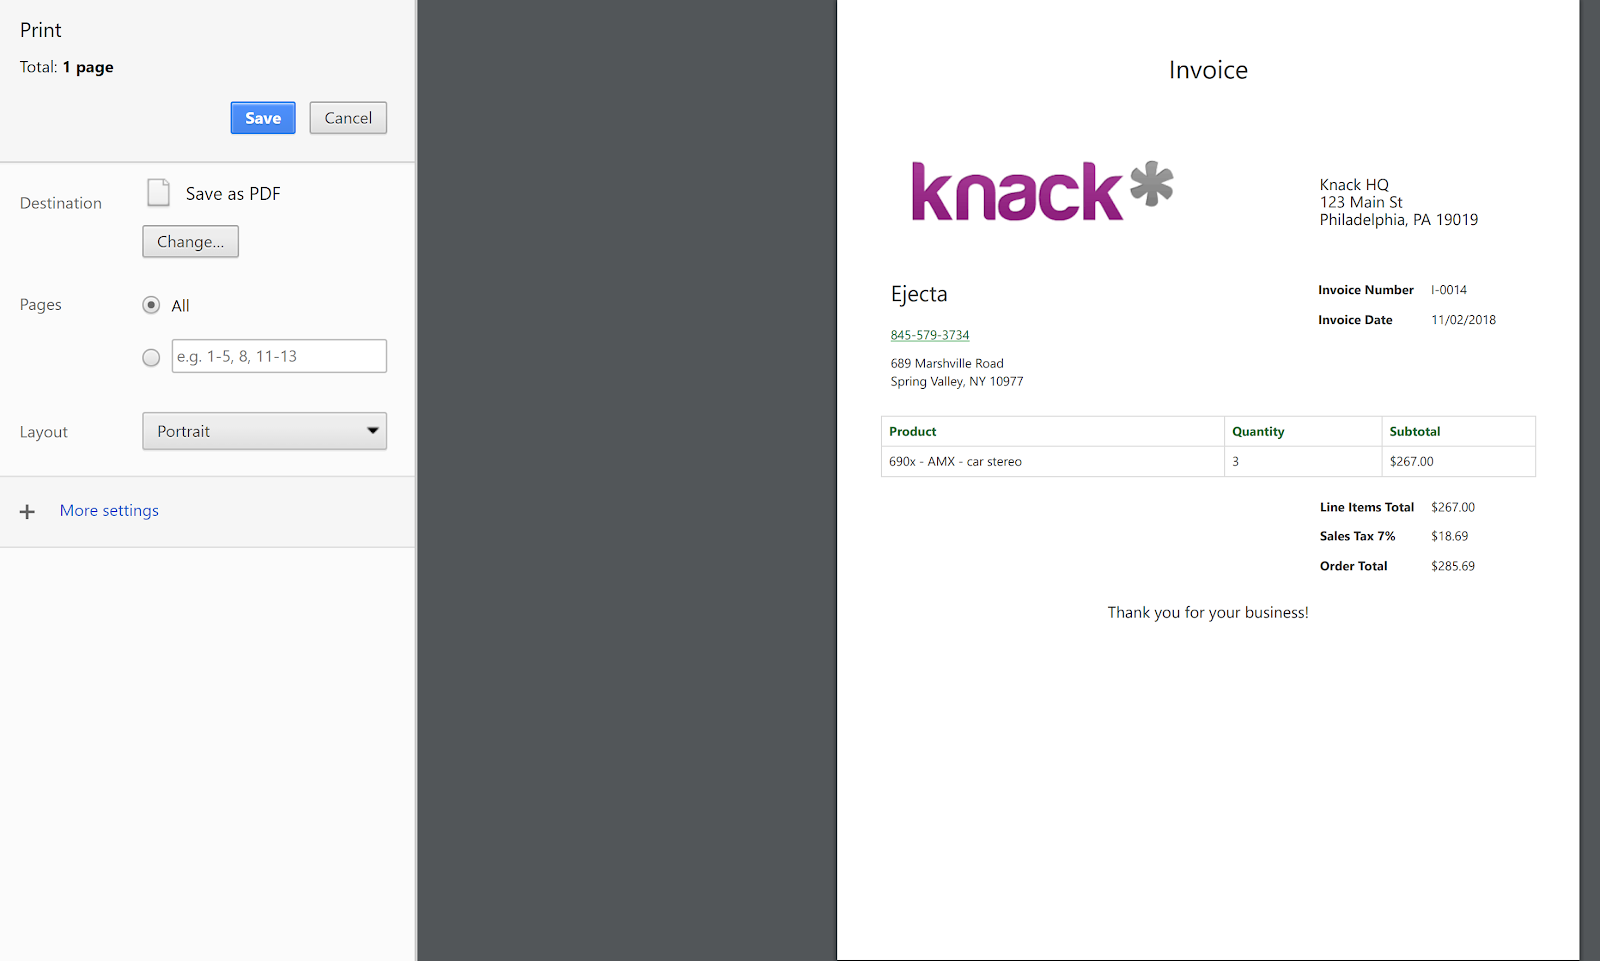
You can print this page using the button in the top right to mail or email to your customers:
Here is a preview of how it will appear when printed:
