Use Case
This article is similar to the article, Show Records Connected to the Logged-In User , however, in addition to adding user logins to enable users to access records intended only for that logged-in user, you can also set up user access to view records shared among groups or divisions.
In this article, you will learn how to enable Sales Reps to access Sales Leads shared within their Division. Only members of the same Division will be authorized to see these shared records.
Requirements
In order to set up your app to show records connected to the logged-in user, you will need to have Users enabled in your app. Refer to the About Users article for additional information.
You may find it helpful to review the above article as well to learn more about connections prior to reading this article.
Steps
1. Creating Tables and Users
In this scenario, we are working with the Sales Leads and Division tables and a Sales Reps user role.
Tip: If you do not currently have tables and users set up in your app for this scenario, you can refer to the following articles to learn more about how to do so:
Creating Connections
First, we need to connect Division to the Sales Rep table. To do so, select the “Sales Rep” user role and then add a connection field by clicking the "+" button on the right:
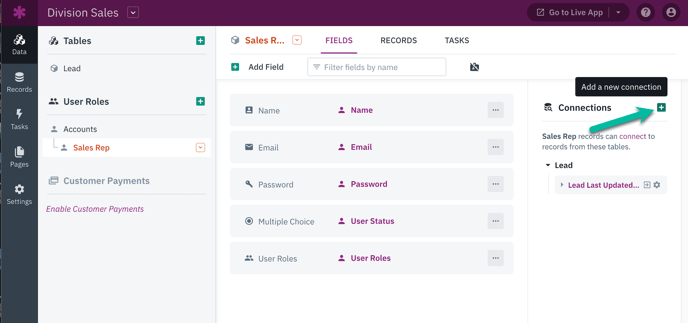
A pop-up window will appear, allowing you to select the table to connect to and the type of connection to use.
For this connection, we want Sales Reps to connect to one Division and each Division to connect to many Sales Reps. This is called a “one-to-many” connection type.
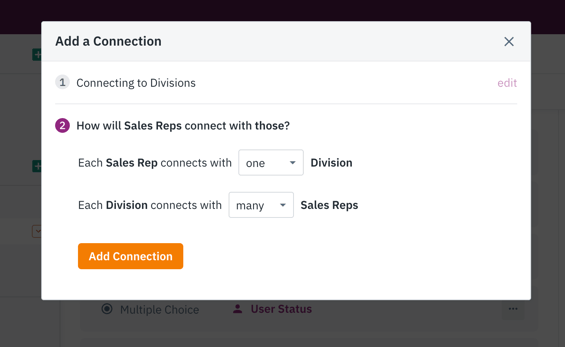
Next, select the Sales Leads table and create a connection to the Division table using the same steps as above. For this connection, every Sales Lead record will connect to one Division, and each Division will connect with many Sales Lead records.
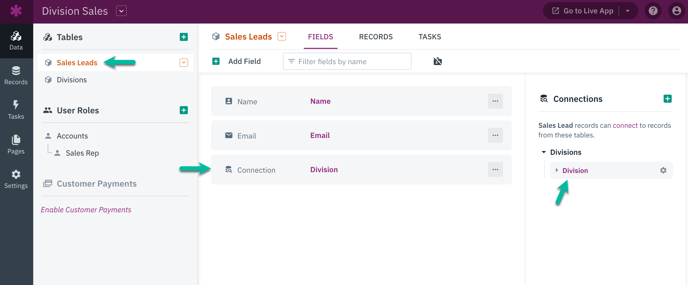
This creates a connection for the Division table in both the Sales Rep and the Sales Leads table, which will become the common data linking the two tables.
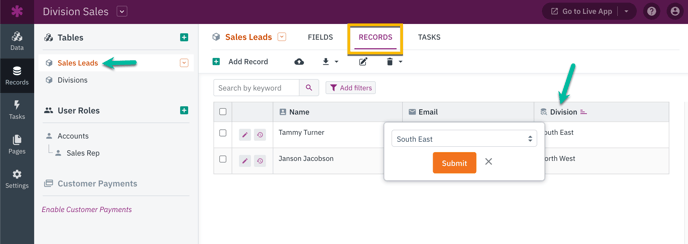
2. Updating Records
Now that you have your tables and connections set up, you will need to update the records to assign a Division to both Sales Reps and Leads. This will allow Sales Reps in the same division to view (share) common records.
Select the Sales Rep user role, then choose the Records tab at the top. Select the Division cell to select a division for each record:
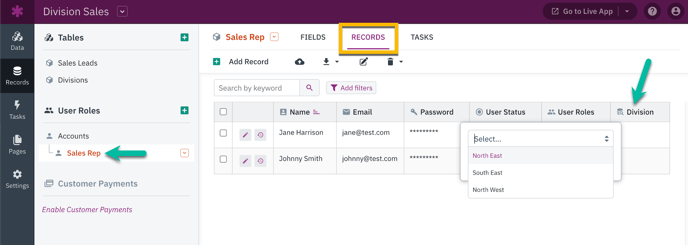
Then, repeat these steps for the Sales Leads table.
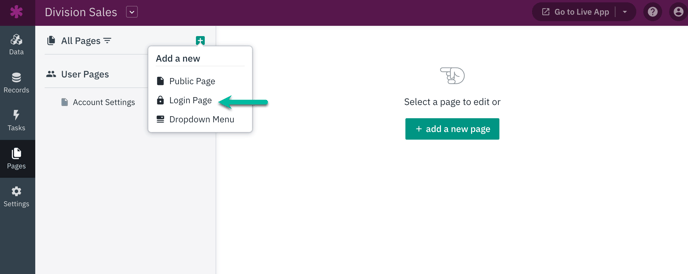
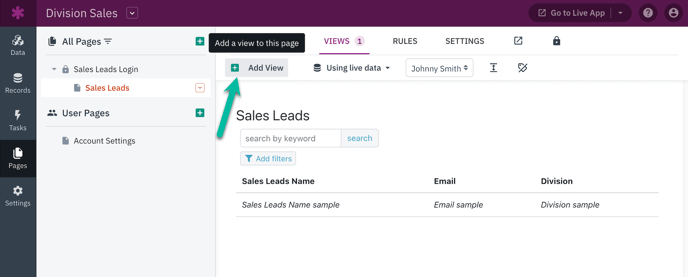
3. Adding a New Page
Next, we need to add a page to display these shared Sales Leads records. In the Pages section of the Builder, click the "+" button to add a new login page for Sales Leads.
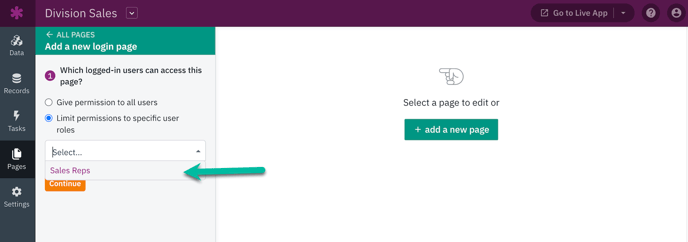
Then, you should choose to restrict the access to this page by selecting the Sales Rep user role from the dropdown menu displayed below.
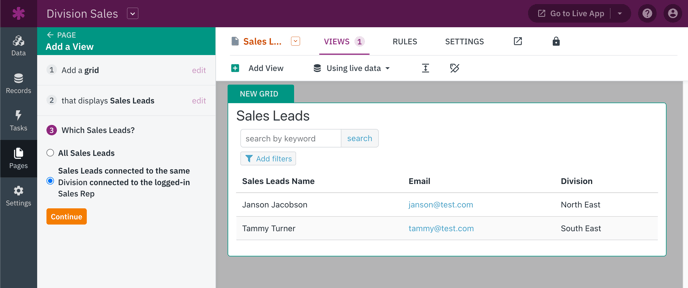
Selecting to add a Login Page will prompt you to create your new page and add a view. In this scenario, we want to add a new grid view showing Sales Lead records connected to the same Division connected to the logged-in Sales Rep.
Tip: Check out these articles for more information about using login, adding pages, and adding views.
4. Login & Test
Next, log in to your Live App and test your new page. To view the Live App, click “Go to Live App” or the open button in the top right corner of the Builder.
Make sure the Sales Rep only has access to those Leads within their assigned Division:
That's it! You have successfully set up a workflow in your Knack app that enables your users to view and manage records shared within their company or group. 🚀
Notes
How do I add a view to an existing page?
If you already have a login page in your app, you have the option to add a view by selecting the "Add View" button while viewing that page. By doing so, you will initiate the view setup process, which allows you to create a view that displays records connected specifically to the logged-in user.
How do I show records connected to only the logged-in user?
It's also possible to show records connected to only the logged-in user rather than the logged-in user's group. View the article on showing records connected to the logged-in user for more options and scenarios.