Create an Add To Favorites Feature
This article uses Connections and Record Actions to create a workflow where users can view a record and save it for later viewing.
Example Scenario
DataBrew offers a delightful "Recipes" page where coffee enthusiasts can freely share their creative brew ideas. Users have expressed their desire for a convenient way to save these recipes for future exploration with just a simple click of a link.
In this example, we will demonstrate the process of creating a "Favorites" feature that enables users to easily add recipe records to their list of favorites.
See it in Action
Users will be presented with a comprehensive list of records, accompanied by a user-friendly link that allows them to effortlessly add the recipes to their collection of favorites. Once added, users will have the convenience of accessing their favorites anytime they desire from a dedicated page.
Steps
Create a Favorites Table
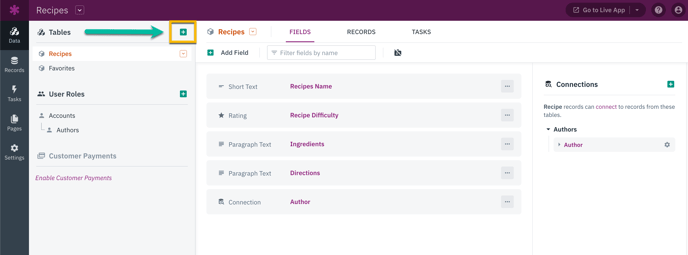
To begin, navigate to the Data section of the Knack Builder and click on the green "+" button to create a new table named "Favorites".
Add a Connection Pointing to the Original Table
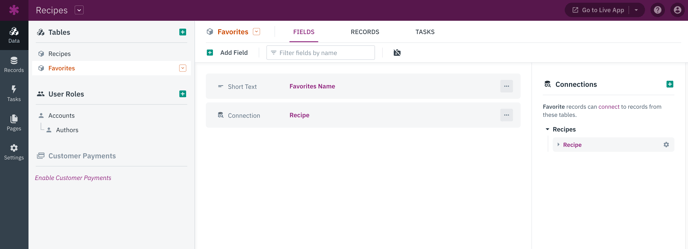
In your newly created Favorites table, add a Connection Field that points to the original table. This original table is where users will find the records they want to add as favorites.
In this case, we will point the connection to the Recipes table.
Add a Connection to the User Role
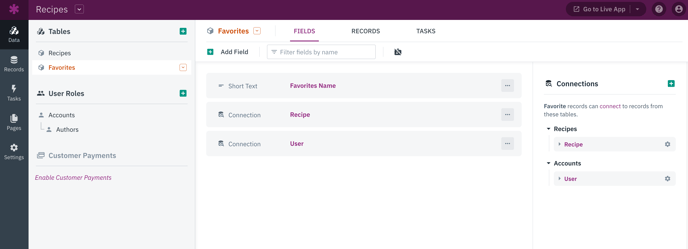
To ensure that all user roles have access to the Favorites feature, add a connection field to connect the Favorites table to the Accounts table. If you only want a specific user role to have access to the Favorites feature, you can connect to the user role table directly instead of the Accounts table.
For further details on working with connections, please refer to our comprehensive guide.
Notice how there’s no other recipe-related fields? With the single connection, we can display any Recipe field directly from the Favorite record.
We can remove the Favorites Name field since it does not store any information. As a result, our Favorites table will only have two fields:

Create an "Add to Favorites" Link
Now that you have set up your tables, it's time to create a page that enables users to easily favorite specific records.
In this example, we'll include a List View that showcases the recipes. The List view will feature a link where users can access more details, and by utilizing an "Edit Recipe" Form as a trigger, the Favorite record will be created automatically.
Add a Records View
Utilize the Add Page button to incorporate a new page that showcases the available records that users can easily add to their list of favorites (Recipes).
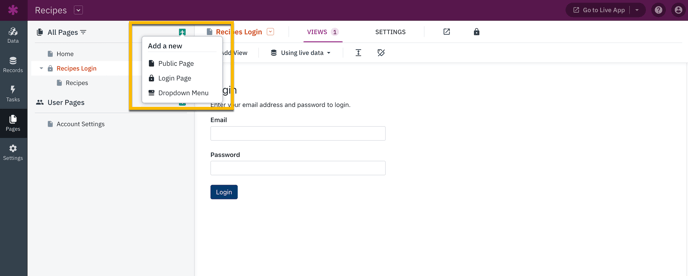
Feel free to choose any view type for the records that suits your preference. In this example, we have used a Grid view.

To enable users to add a new Favorite record, make sure to include the Form that allows them to add a connected Favorite.
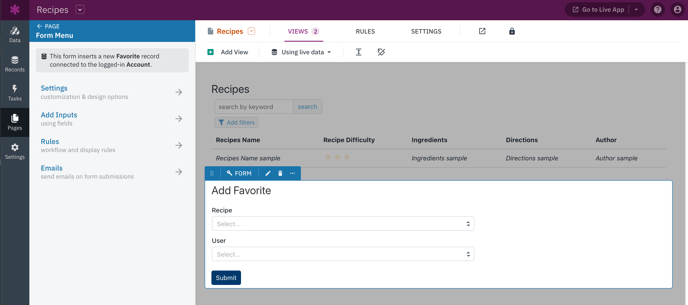
Remove the Form Inputs
When you open the Add Favorites Form we just created, you'll notice that the User connection field is available. However, this may not be ideal for the user who will be submitting the form.
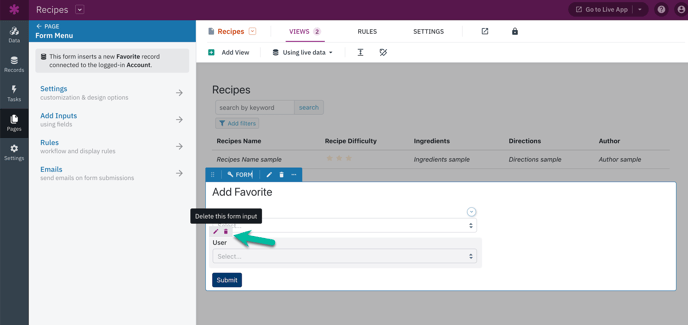
To make it more user-friendly, we can automatically populate the User field with a record action. Let's go ahead and remove the User input from the Form.
Simply select the trashcan icon to remove the form input field:
Connect the Logged-in User with Record Actions
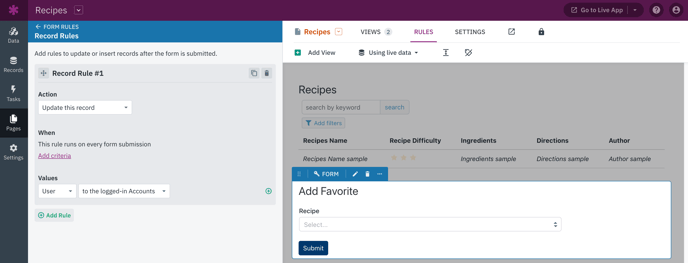
To add a new record action to your form, go to the Form Rules tab and select "Record Actions". Then, click on "Add Rule".
To configure this new rule, you need to add the following settings:
-
Action: Select "Update this record".
-
When: Leave as "This rule runs on every form submission".
-
Value: "User" (connection field) -> "to the logged-in Accounts"
Change Submit Button Text
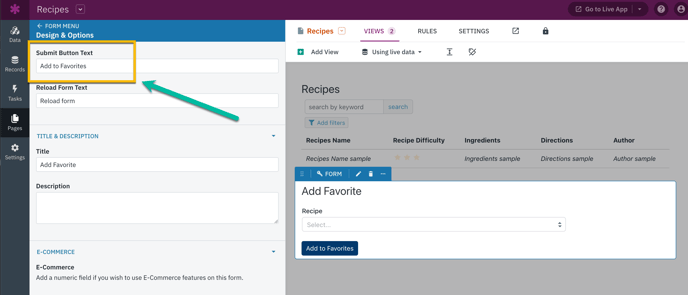
To enhance the user experience, we can make this form more user-friendly by customizing the text on the Submit button.
In the Settings section of the Form editor, you can change the text on the Submit button to display as "Add to Favorites".
For additional information on Form and Detail views, please refer to our comprehensive guides linked.
Create a View of User's Favorites
Users will be eager to view the records they have added to their list of favorites.
To continue, click on the Add Page button once more and create a new page that is restricted to the particular User Role (or Accounts). You have the flexibility to choose any view-type that suits your preference.
In this example, we have utilized a Grid view with a link that allows users to access more details.

Learn more about showing records connected to the logged in user here.
Control Which Fields the User Sees for Their Favorites
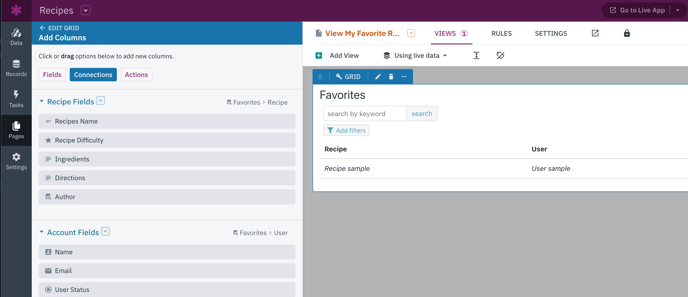
To give your users the ability to view additional fields from the original records, simply add fields from the connected table to the list. By default, the view will only display the two connection fields present in the Favorites table.
To view all fields from connected tables, go to the "Add Columns" section of the grid view editor and select the "Connections" tab. Here, you will find a list of all the fields you can access.
Optional Features
Adding Notes
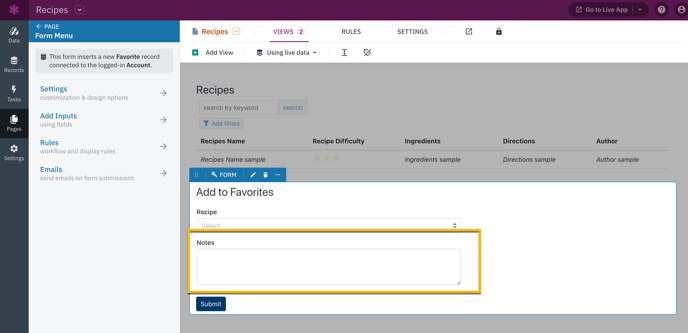
How about giving users the option to add notes to each record they favorite? You can easily achieve this by adding a Paragraph field to the Favorites table.
Include this field in the "Add to Favorites" form view to make the form more interactive. By doing so, users will have the option to add notes when they favorite a record, enhancing their overall experience.
Enable the Modal Popup
With the current setup, users are directed to a separate page in order to access the Add to Favorites button. However, it would be a more seamless process if they could easily access it directly from the grid without having to leave the list.
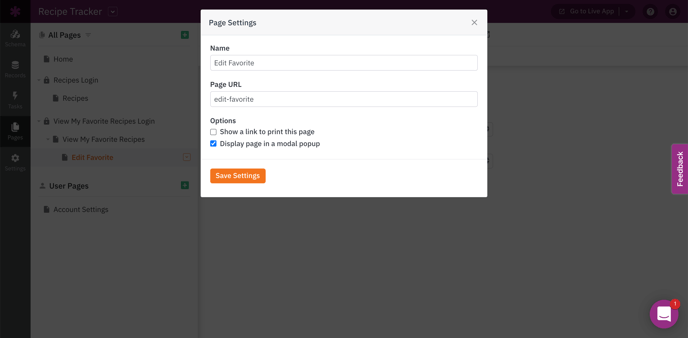
To create a more seamless user experience, you can enable the "Display page in a modal popup" option from the Settings tab of your Details page. This will allow users to easily access the Add to Favorites button without having to leave the list.
