Use Case
Your application stores images and requires the capability to store a variable number of images/files for each individual record.
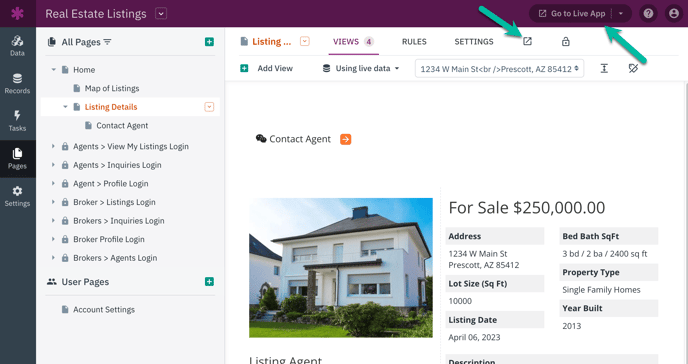
For instance, suppose you have an application that handles real estate management, and you wish to showcase numerous images for each property listing.
Note:
It is possible to add multiple image or file type fields to a single table; however, this will only allow you to add a finite number of images/files to a single record. For example, four image fields in a table means each record can only have four images associated with that record.
In this article, we will explore a scenario that enables you to add a limitless number of images or files connected to a single record.
Requirements
You will need an existing table with records that you want to store multiple images. In this example, it's the "Listings" table.
Further, if this is your first time creating an app, you'll need to know some basics about adding tables, fields, pages, and views. You can start by reading our Builder Basics section.
Other good resources can be found in our About Your Database and Working With Pages sections of the knowledge base.
Steps
This section will guide you through the steps of utilizing a connected table to efficiently store multiple images for each individual record. For these steps, we will be using our Real Estate Listings sample app.
Create a New Images/Files Table
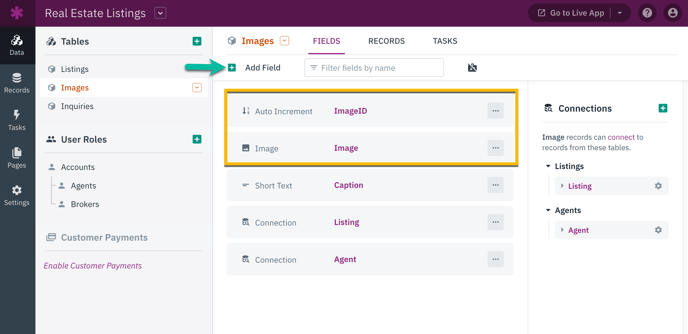
In the Data section of the Builder, select the "+" button and create a new table named "Images".
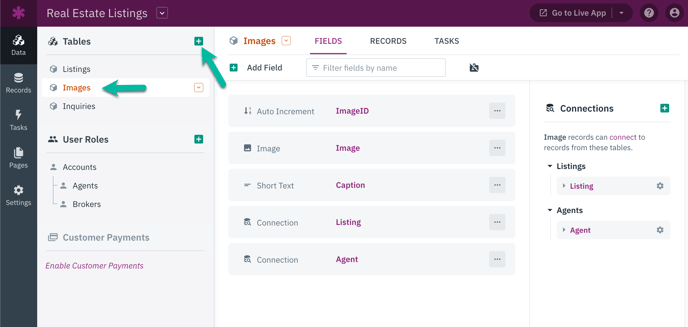
Next, click on the "+" button to add a new Image field type to your new "Images" table and delete the default short text field.
You may also want to add additional fields, such as an auto-increment field, to provide a unique identifier for each record:
Add a Connection Field
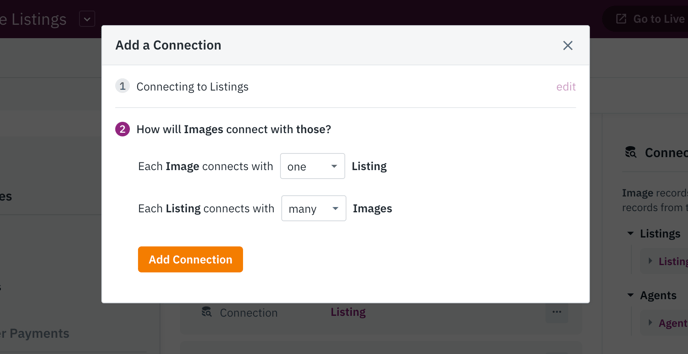
Next, we will establish a connection between your newly created Images table and the table where these images are stored. In this particular scenario, the table we are referring to is the Listings table.
In the Images table, add a new connection field to the Listings table by clicking the "+" button in the connections section on the right side of the Builder.
Select the Listings table and the type of connection. In this scenario, each Image connects with one Listing, and each Listing connects with many Images.
Create a Form to Add Connected Images/Files
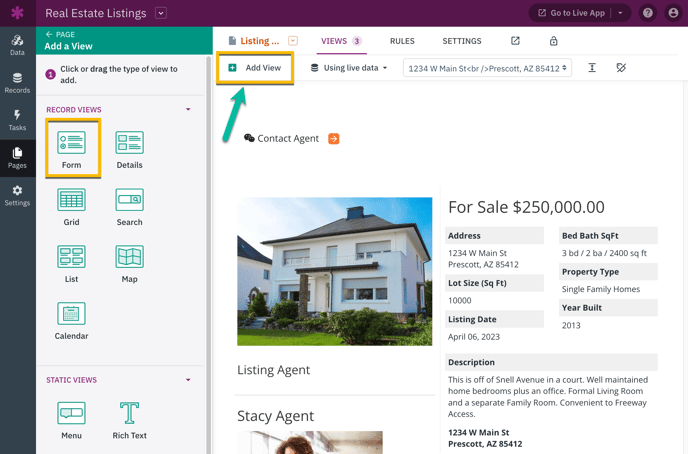
To add a view for the Listings table (or any other table connected to the Images table), go to the Pages section of the Builder. Select a details page for the Listings table and then click on the "+ Add View" button.
From there, choose a form view. This will allow you to specify the type of record the form will create and the connection it will have.
In this case, we are submitting a form view that creates Images connected to that page's Listing.
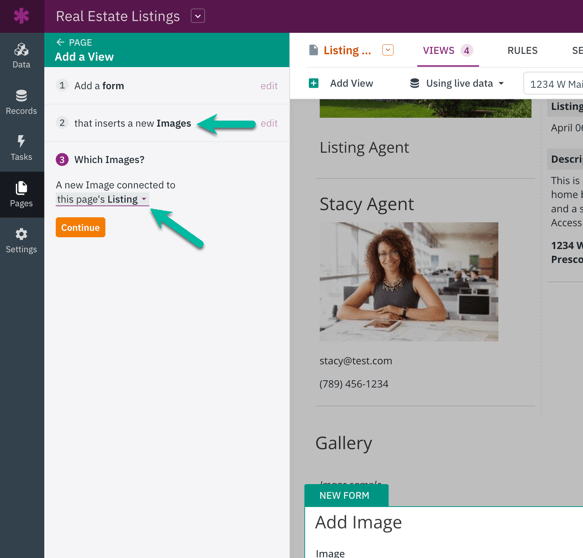
Tip: If you set the form to automatically reload, Live App users can continue to add more images as needed. To do this, head over to the Submit Rules section and check the box for "Automatically reload the form" in the default submit rule.
You can learn more about adding and managing forms here.
Displaying the Connected Images
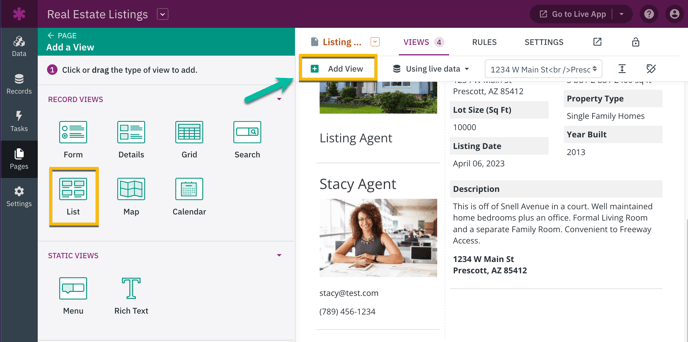
To display all the connected Images for a specific Listing, go to the Pages section of the Builder and click the "+ Add View" button. In this example, a list view will be added to showcase the images connected to the Listing on this page.
Login & Test
Now that you have successfully configured your Images to be displayed for connected Listings, you can view the changes by going to the Pages section of the Builder. Simply click on the open icon or the "Go to Live App" button, and your Live App will open in a new window.