Use Case
The Member Directory app allows users to log in, view a directory of members, and make changes to member records based on user roles.
Members have the ability to update their own profile and also have access to view other members' records. On the other hand, Admins have the capability to view, edit, and delete member records.
Requirements
Steps
1. Defining User Roles
Defining user roles is an essential step in creating an effective member directory for your business. This will enable Admins to assign tasks and edit fields, while allowing members to view and update their own tasks in the field.
To enable user activation, navigate to the left navigation panel and select "Settings". From there, choose "User Logins" where you'll locate the "Activate Users" button.
Clicking on this button will grant you the ability to add User Role tables to your app.
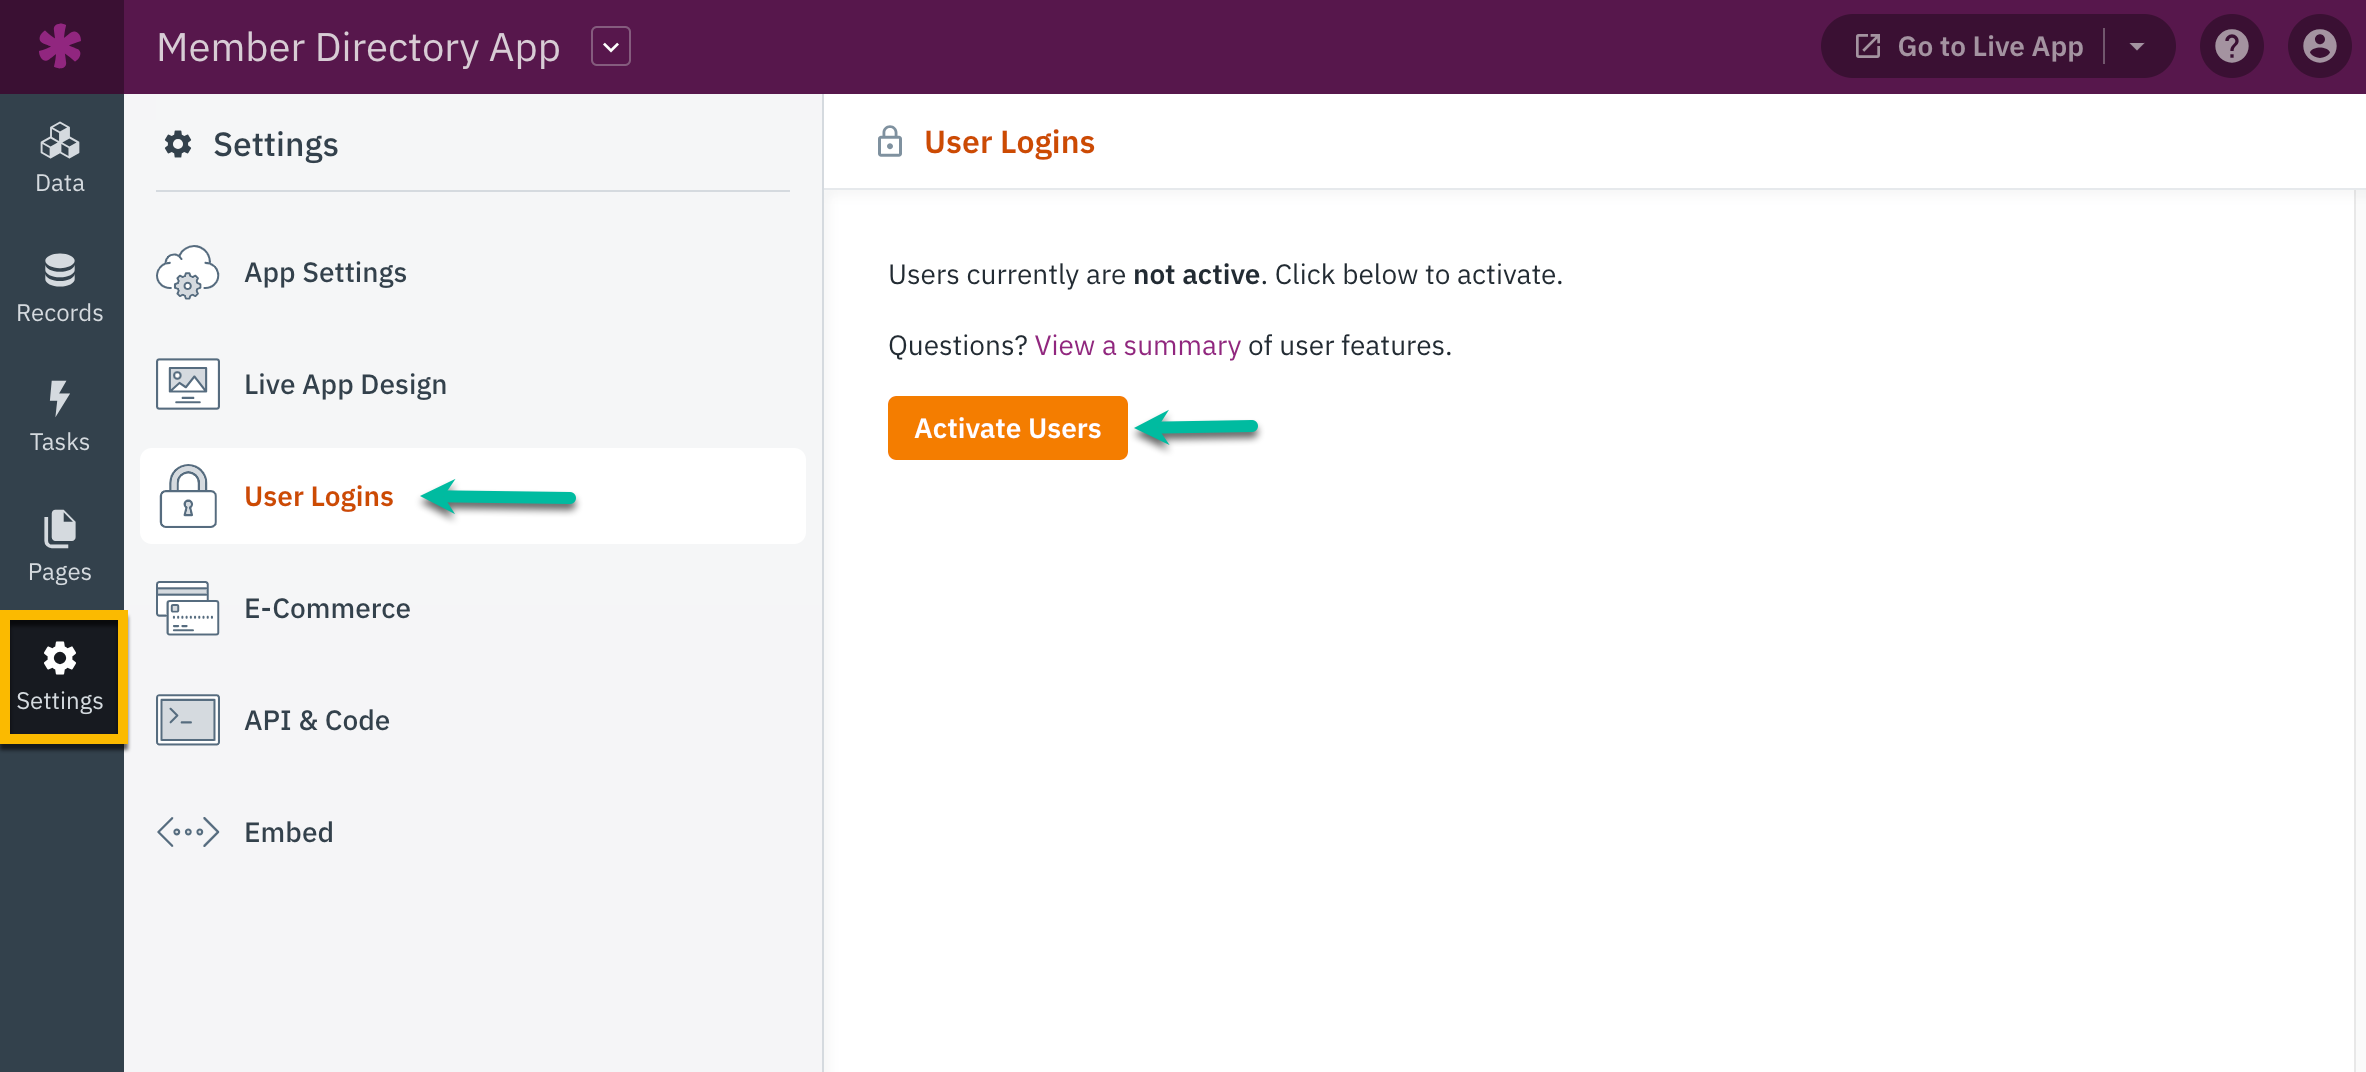
Note: You can also activate users by selecting "Enable Users" under the User Roles section of your Tables list.
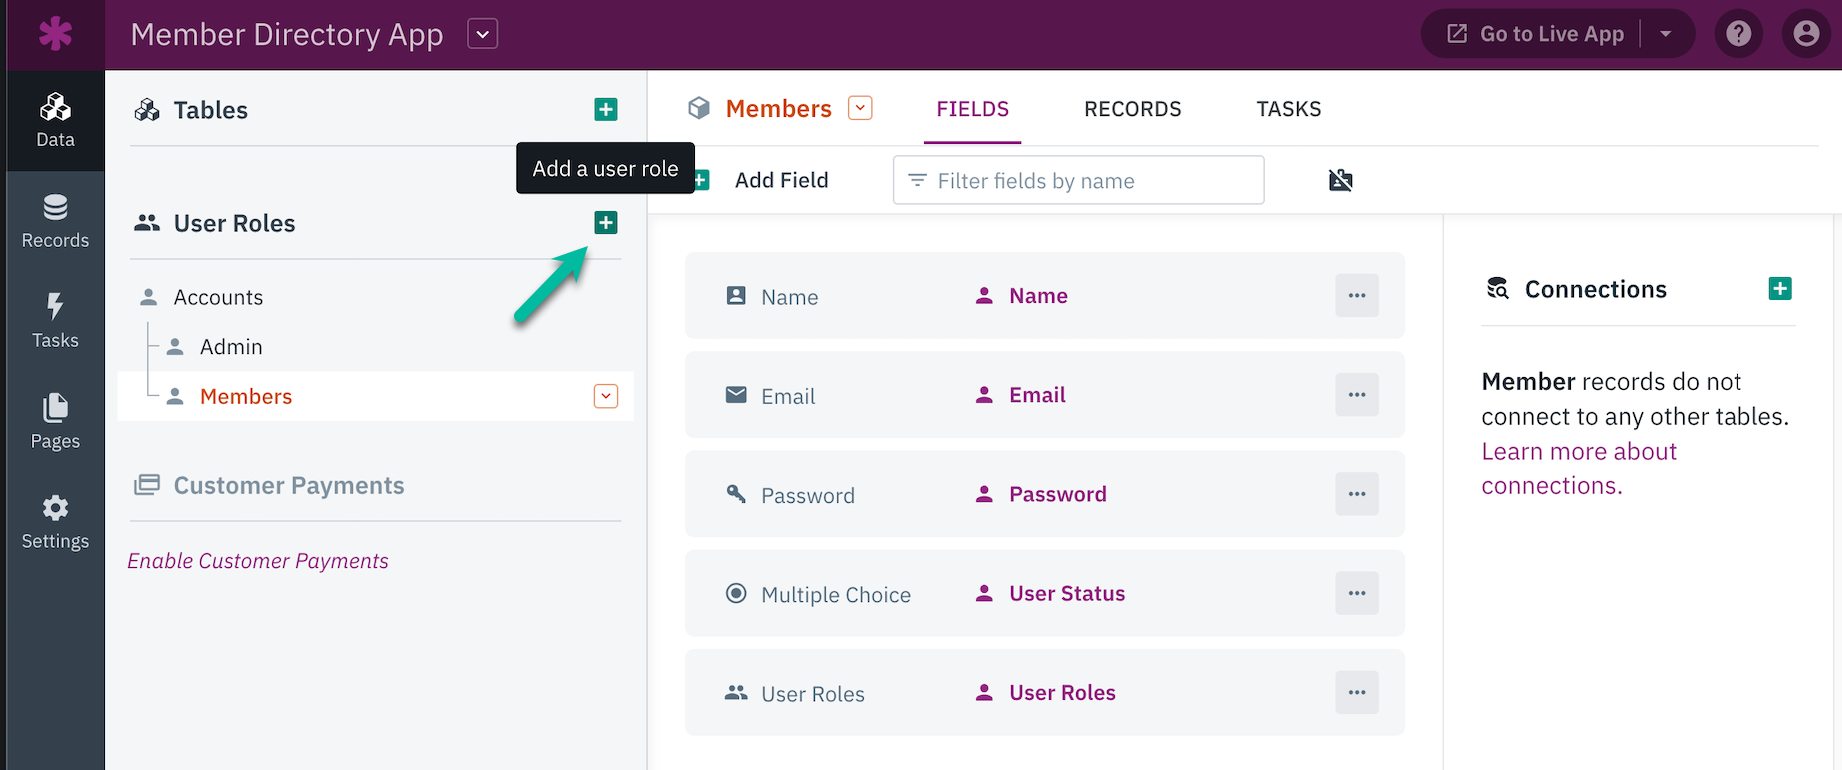
Adding User Roles
After activating your users, the next step is to add user roles. In this app, we will create an "Admin" role and a "Member" role. To create these roles, simply click on the "+" button located next to the User Roles section.
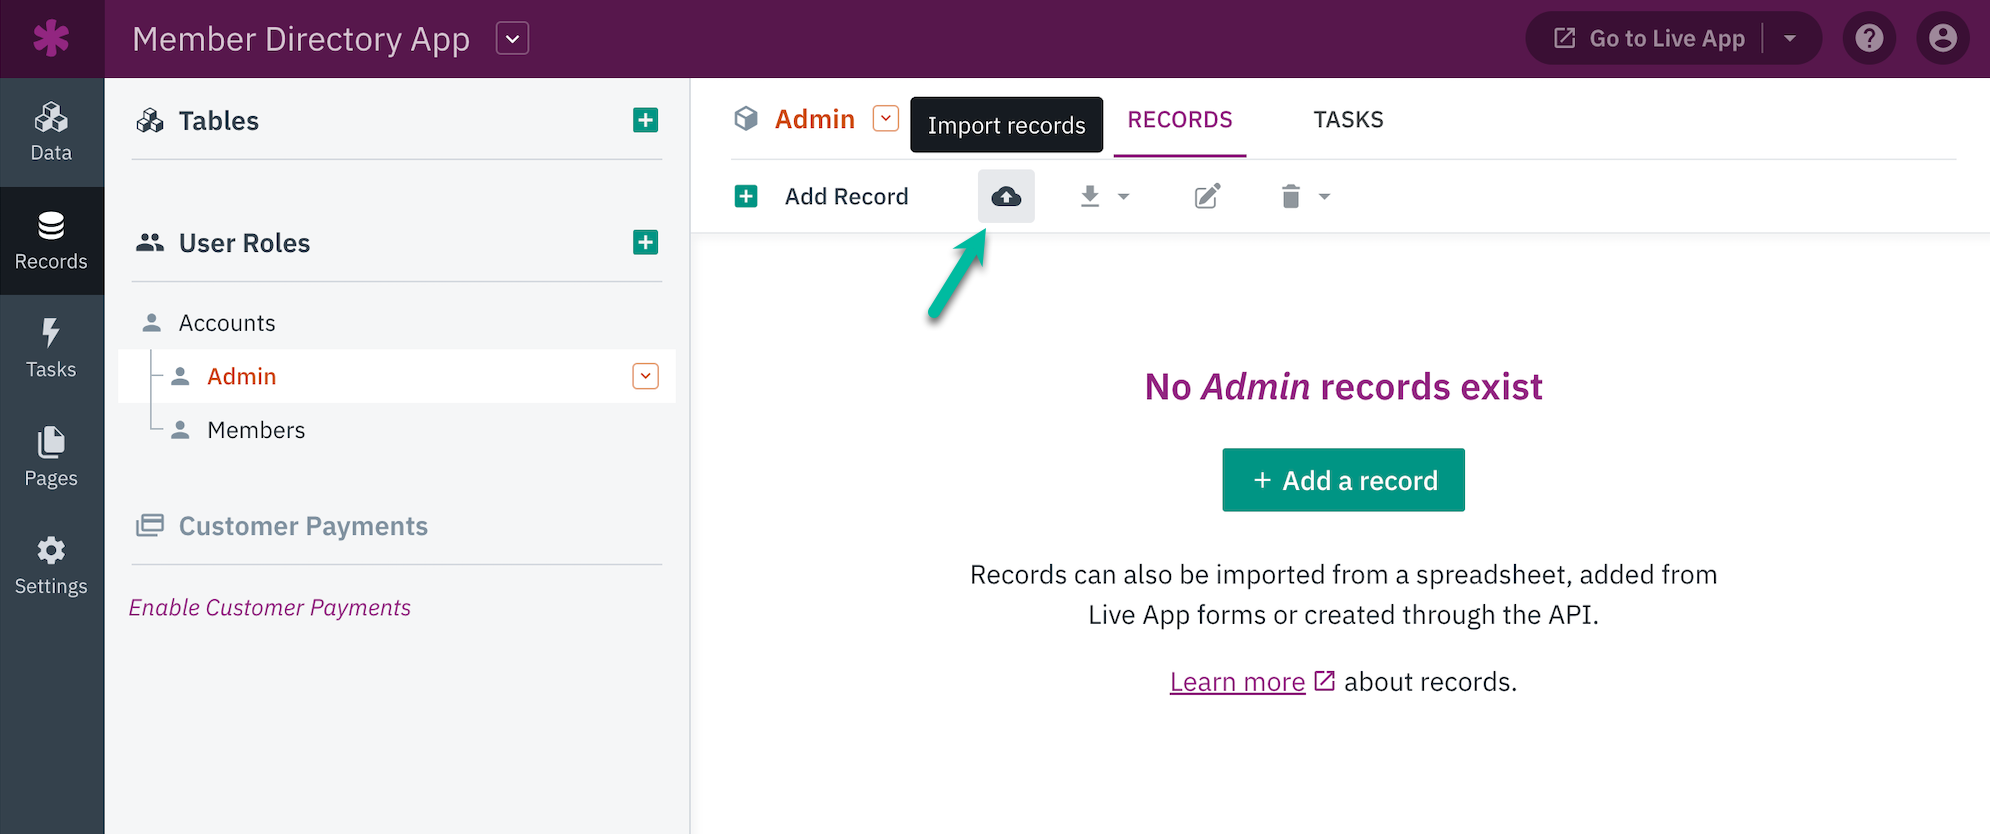
2. Adding User Records
There are two methods available for adding records to your user roles in the Builder: manual entry (selecting "Add Record") or importing records.
Tip: You can learn more about adding and managing records here.
Import User Records from a File
You can also import user records by uploading a file:
3. Building Your Pages for the Live App
Now that we have defined our user roles and added user records, it is time to bring the app together by adding pages.
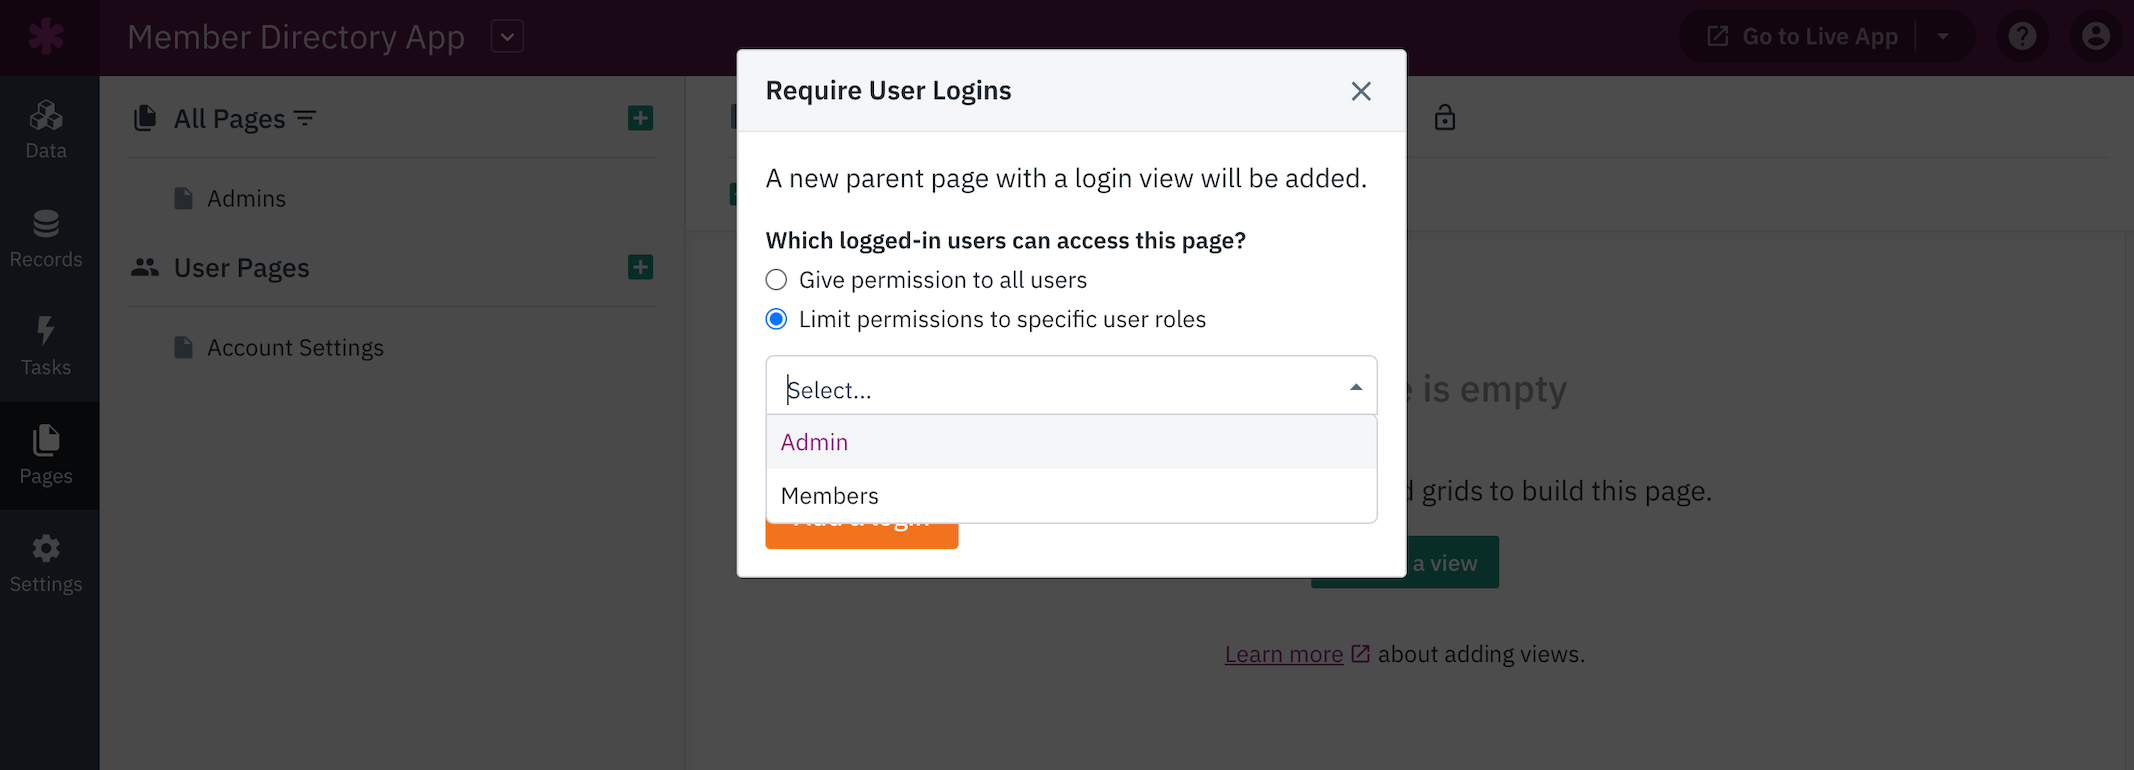
Adding an Admin Access Page
Beyond viewing and editing member records, Admins can also add or delete members.
To get started, in the Pages section of the Builder, we'll add a new page and require a login to access it. We'll limit permissions to the Admin user role:
Tip: To learn more about adding and working with Pages, see our article here.
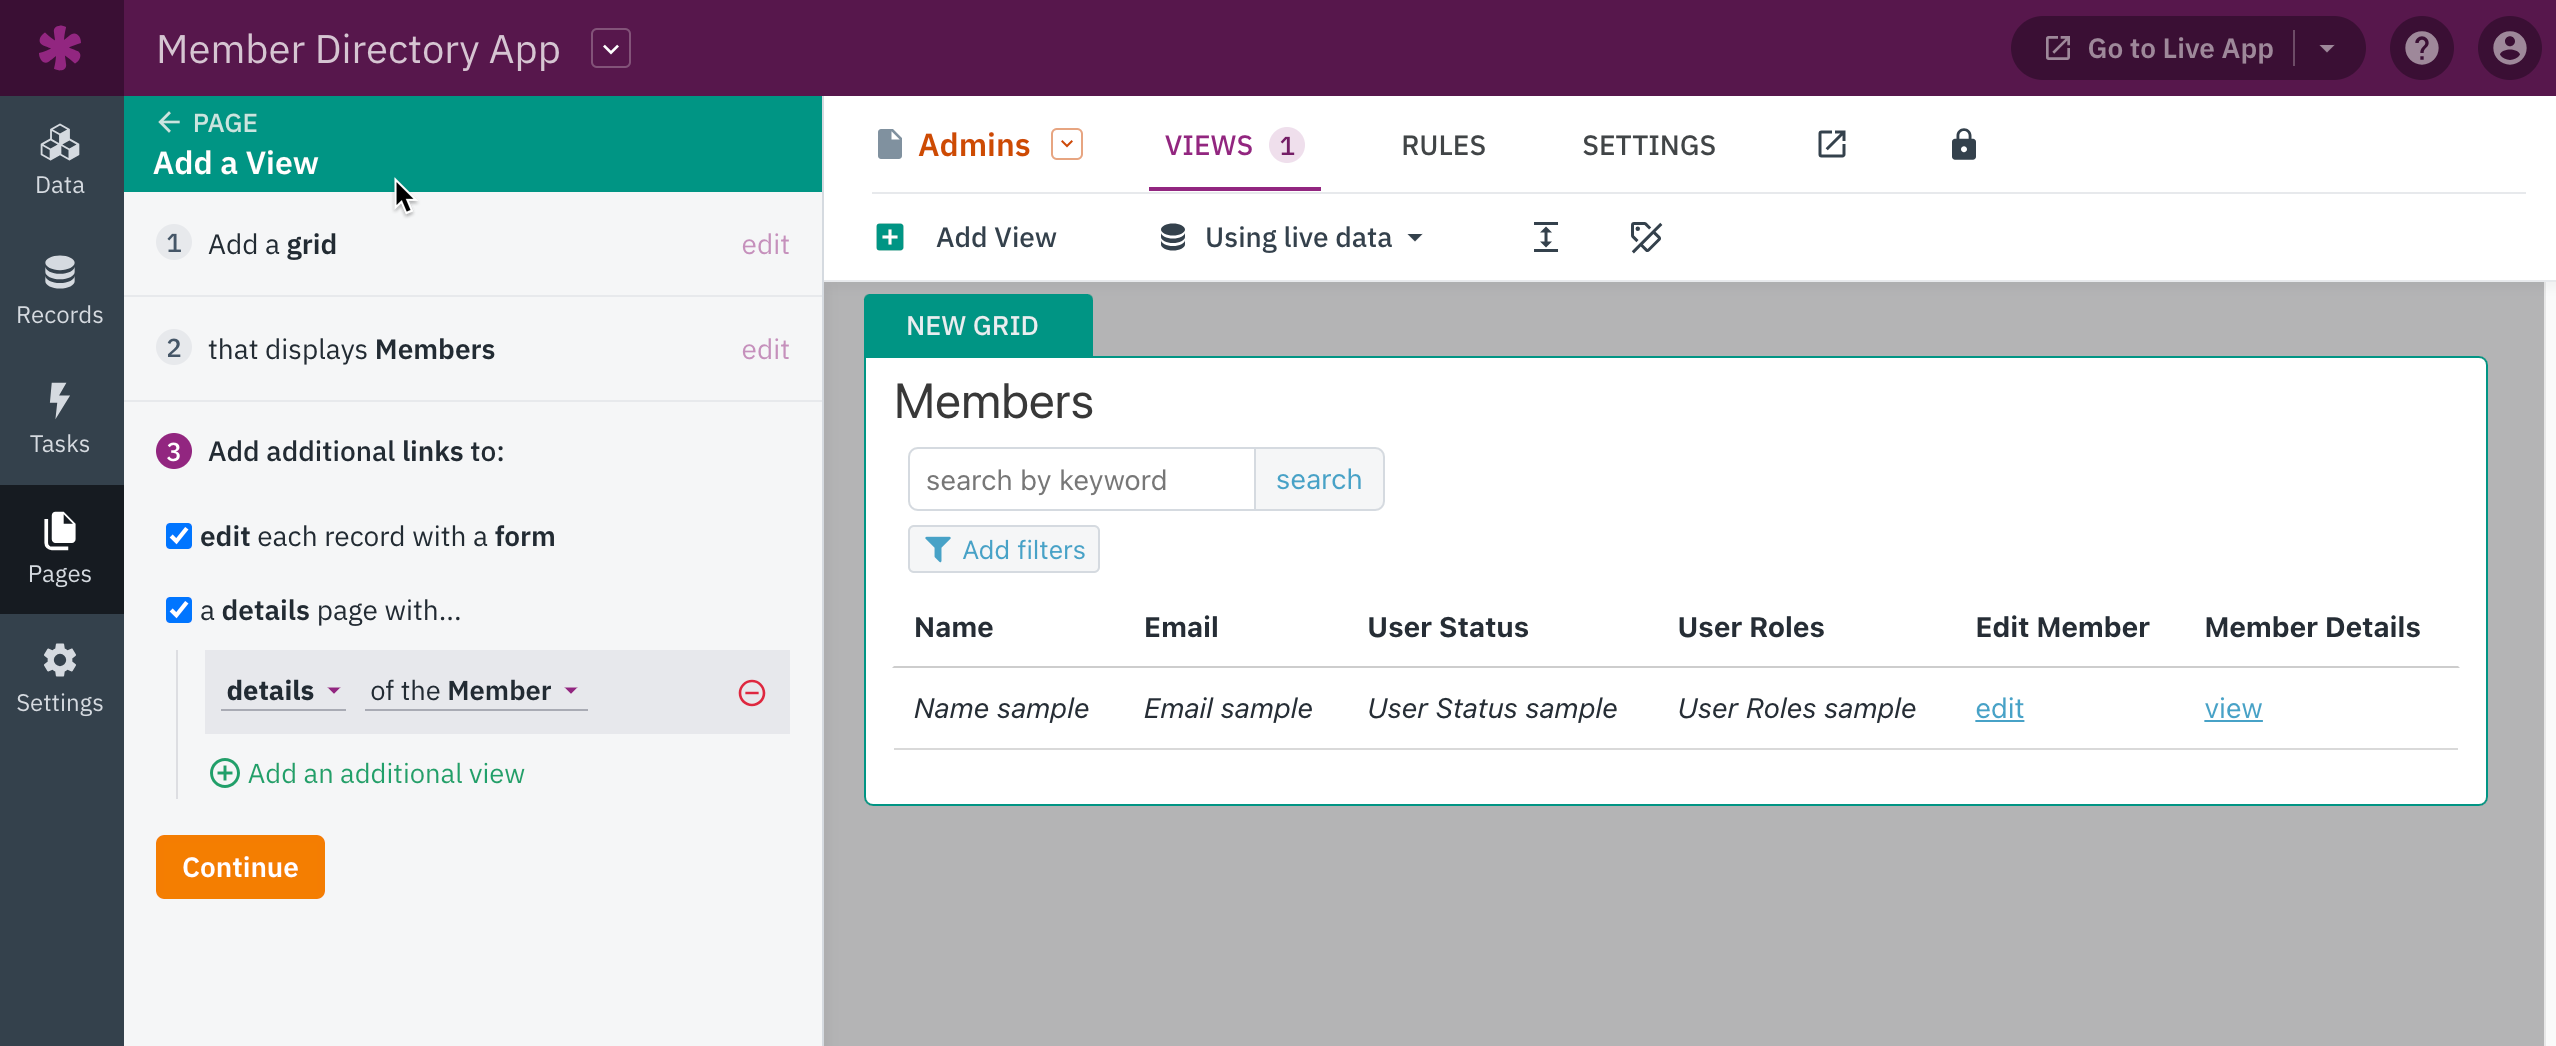
Adding Views to the Page
When selecting which views to add to this page, we'll select:
-
A grid to display members' details to view more Member fields
-
A form to edit the Member
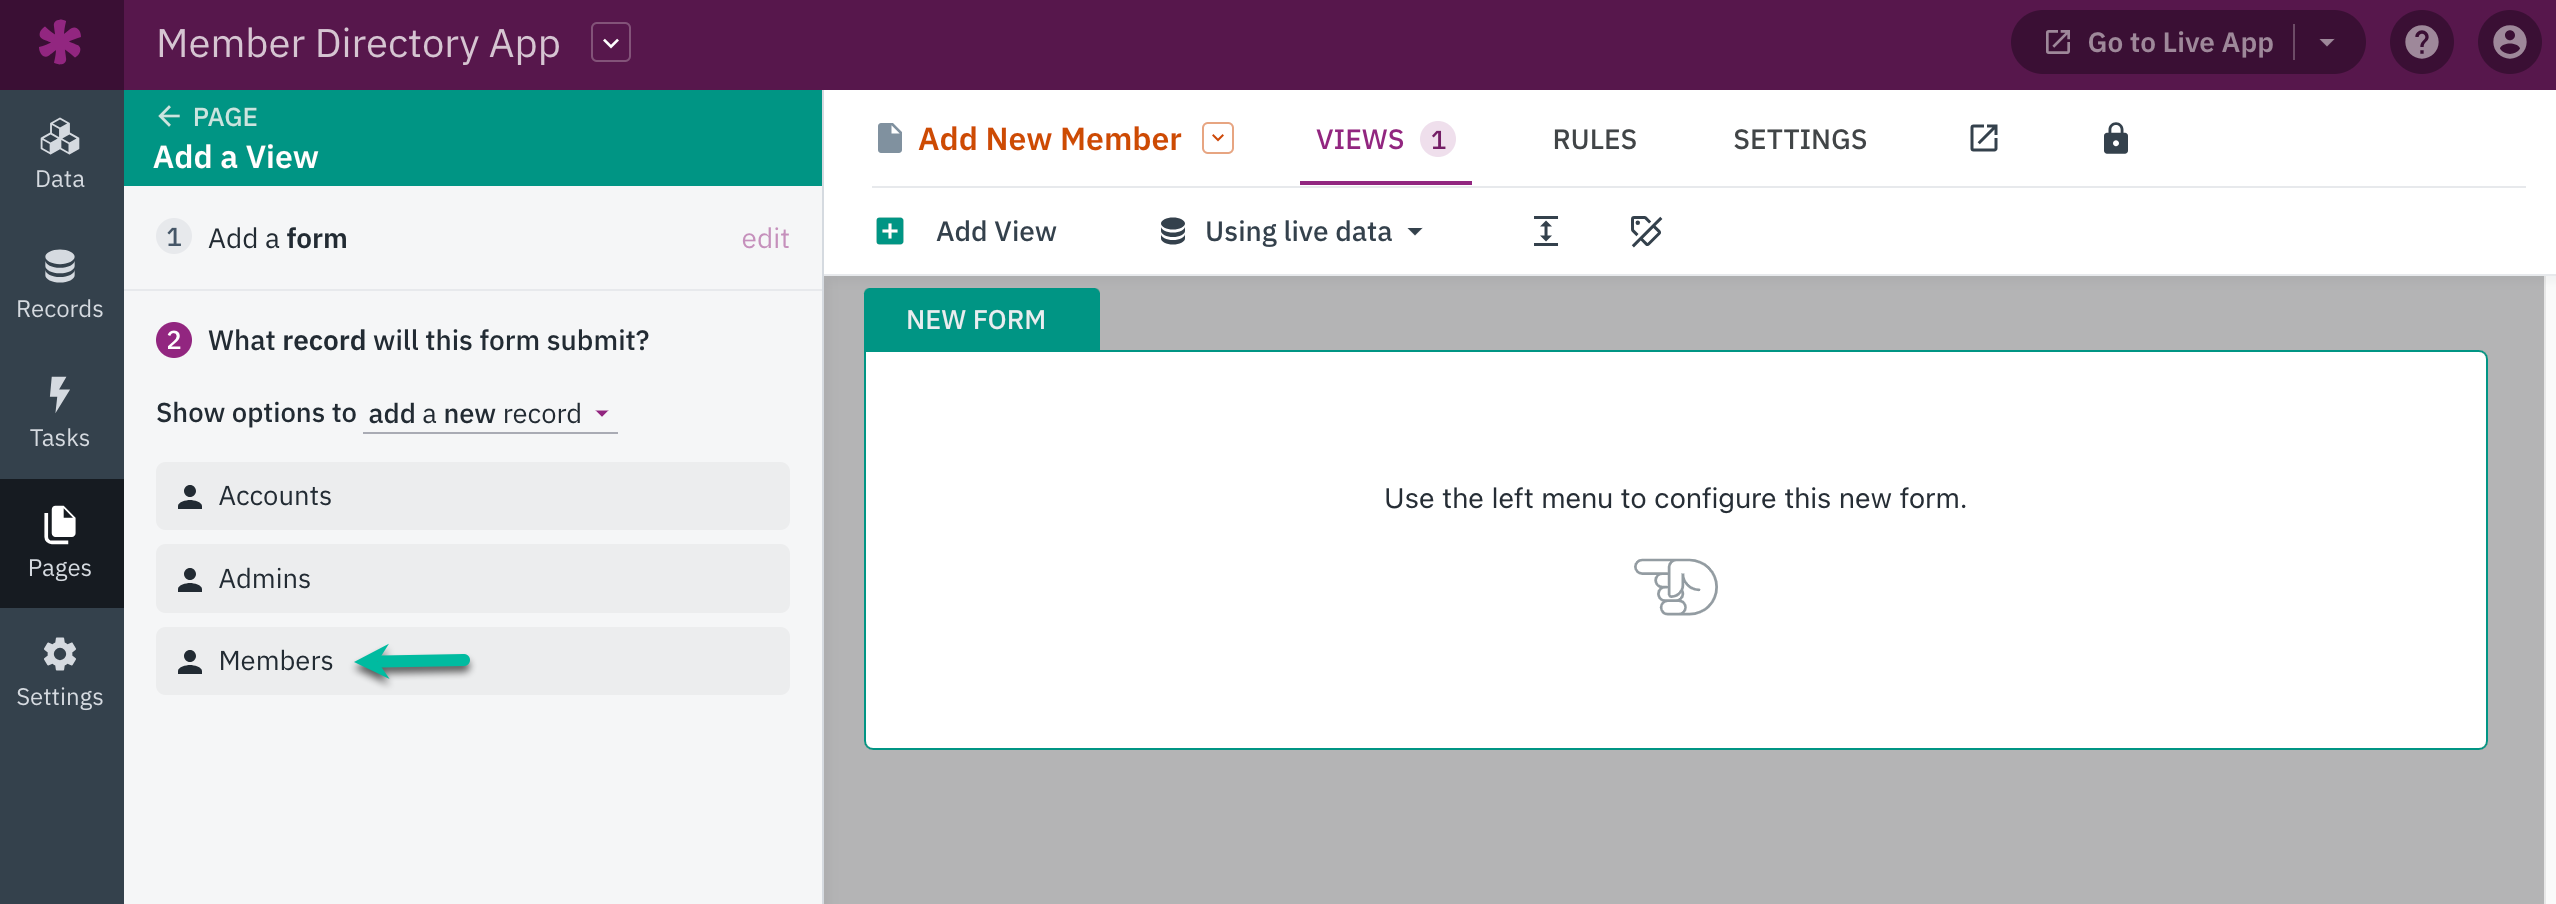
Once the page has been added, next we will need to add a menu view linking to a new page with a form to add new members.
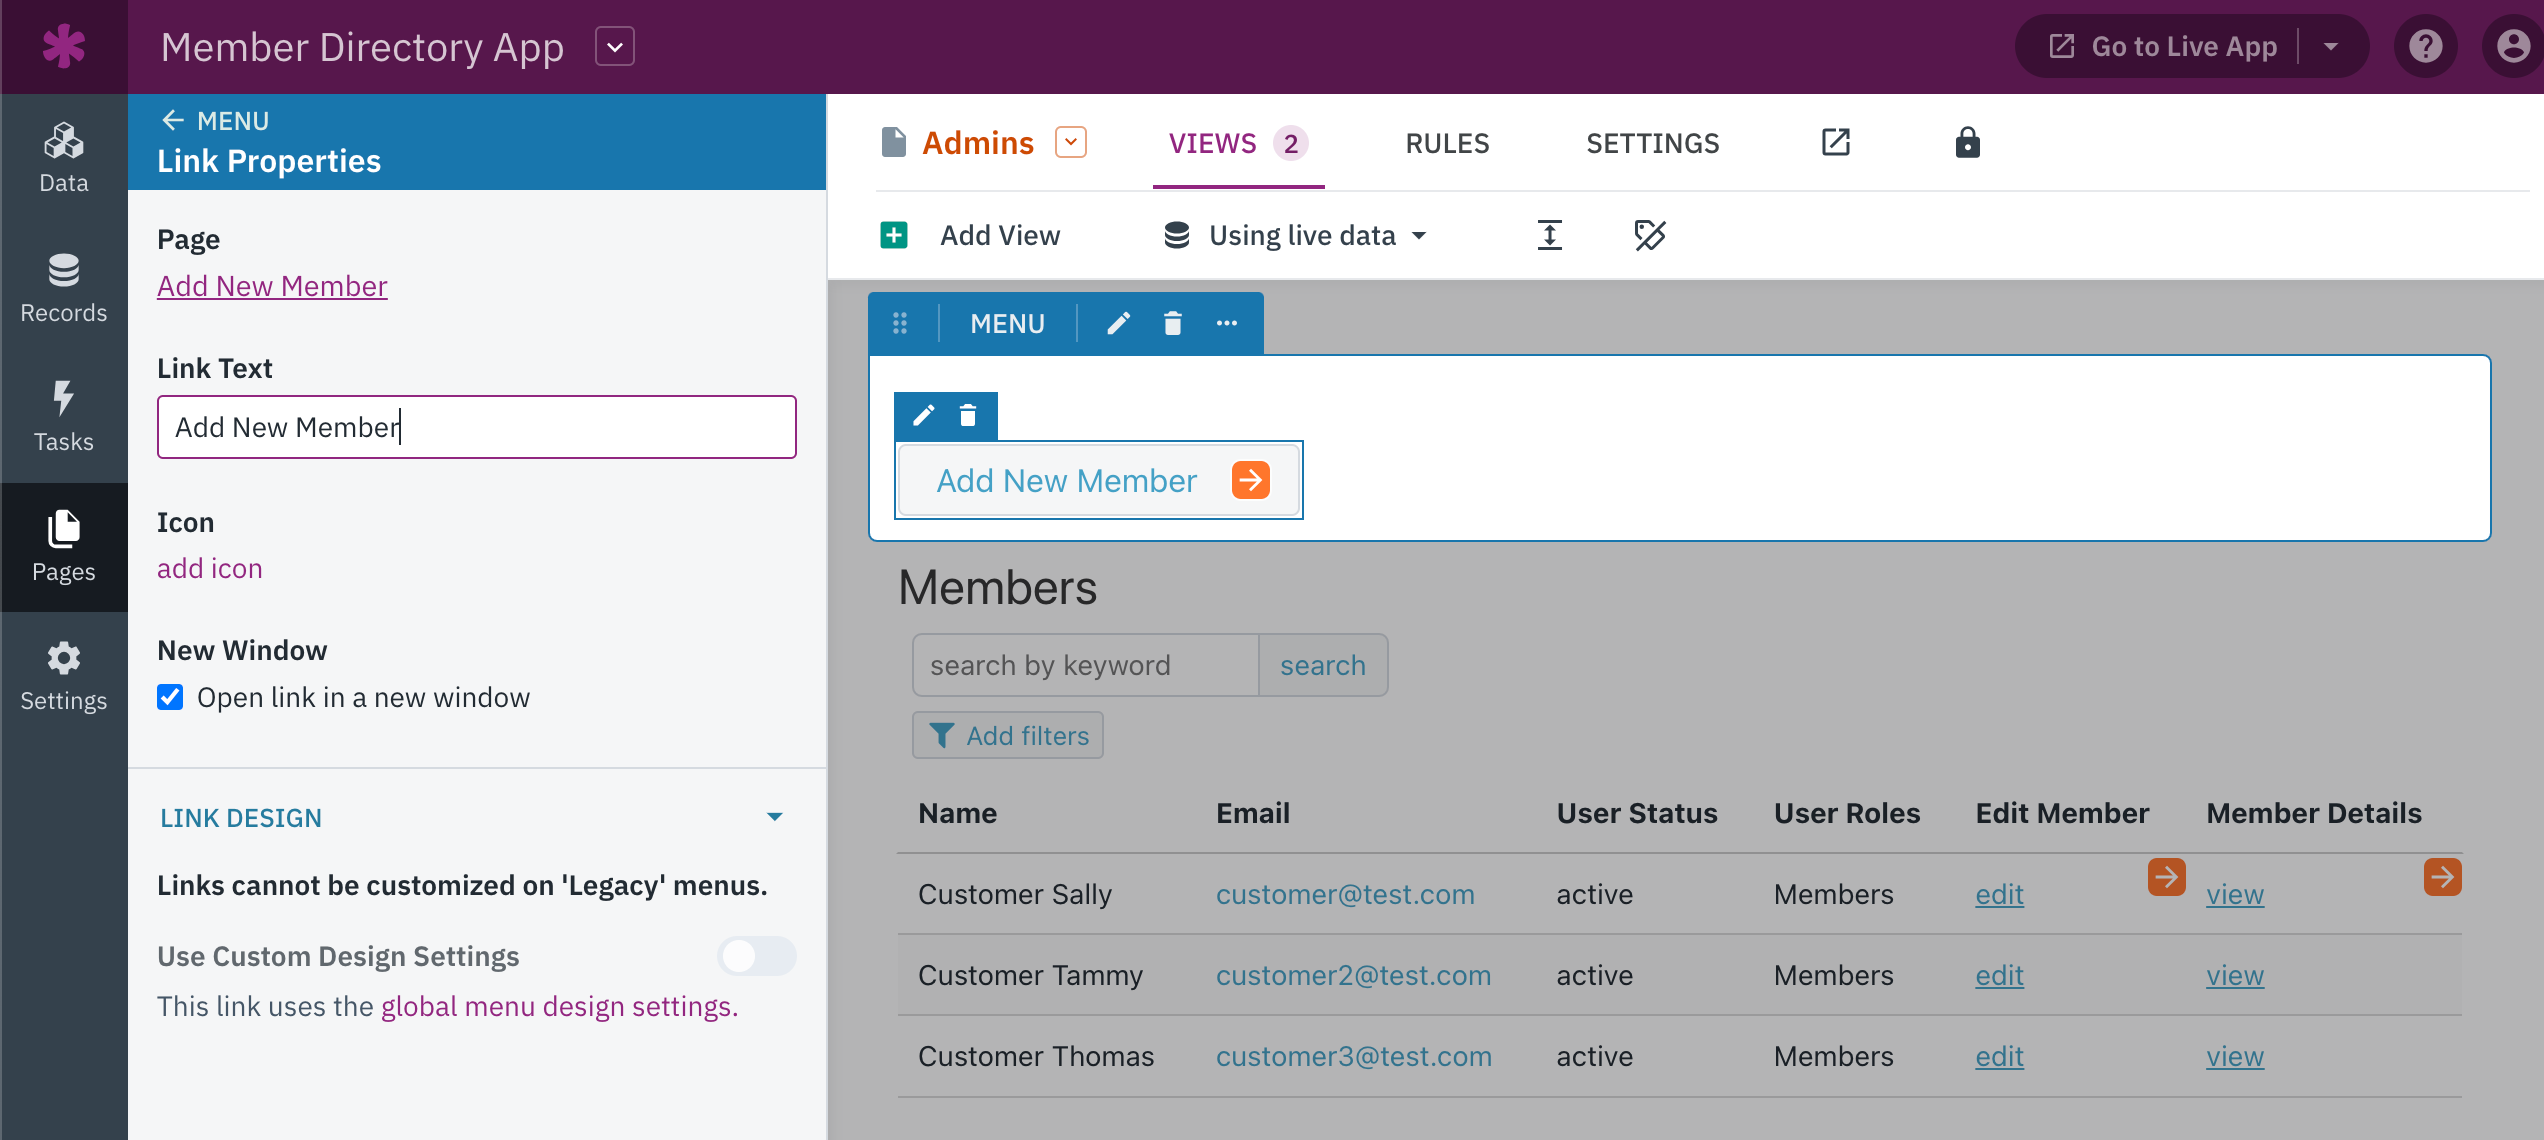
Next, we will need to add the ability to delete records in the Members grid view created on the Admins page. To accomplish this, access the grid view editor.
Within the "Add Columns" section of the grid view editor, you can include the delete link by selecting "Actions."
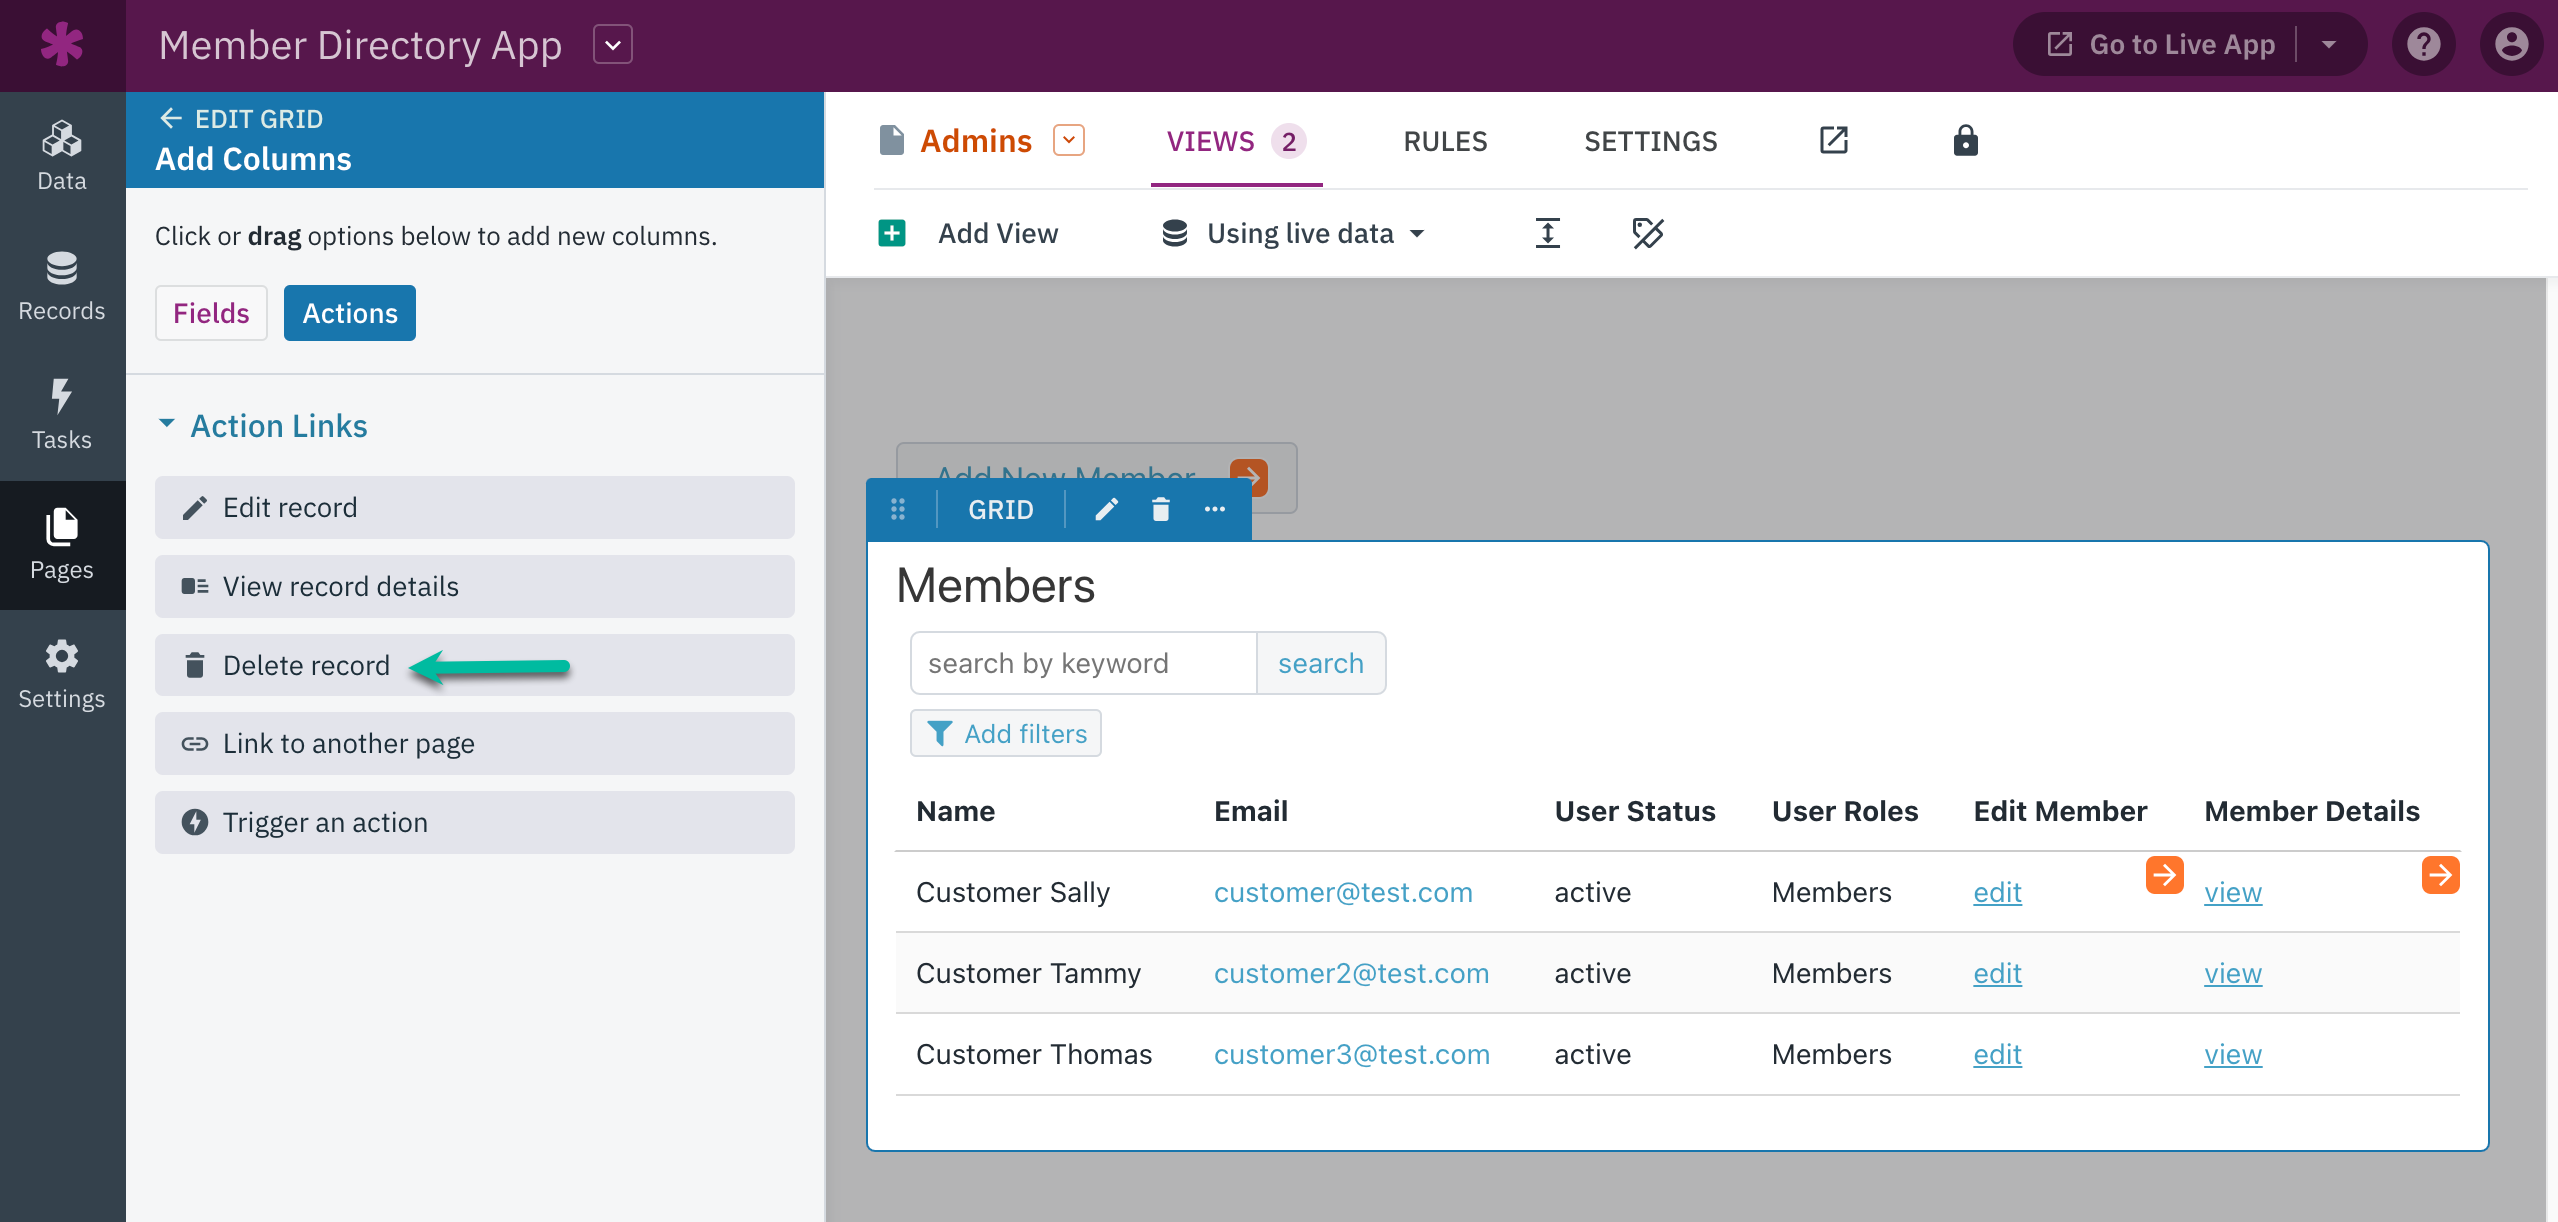
Tip: You can learn more about using action links here.
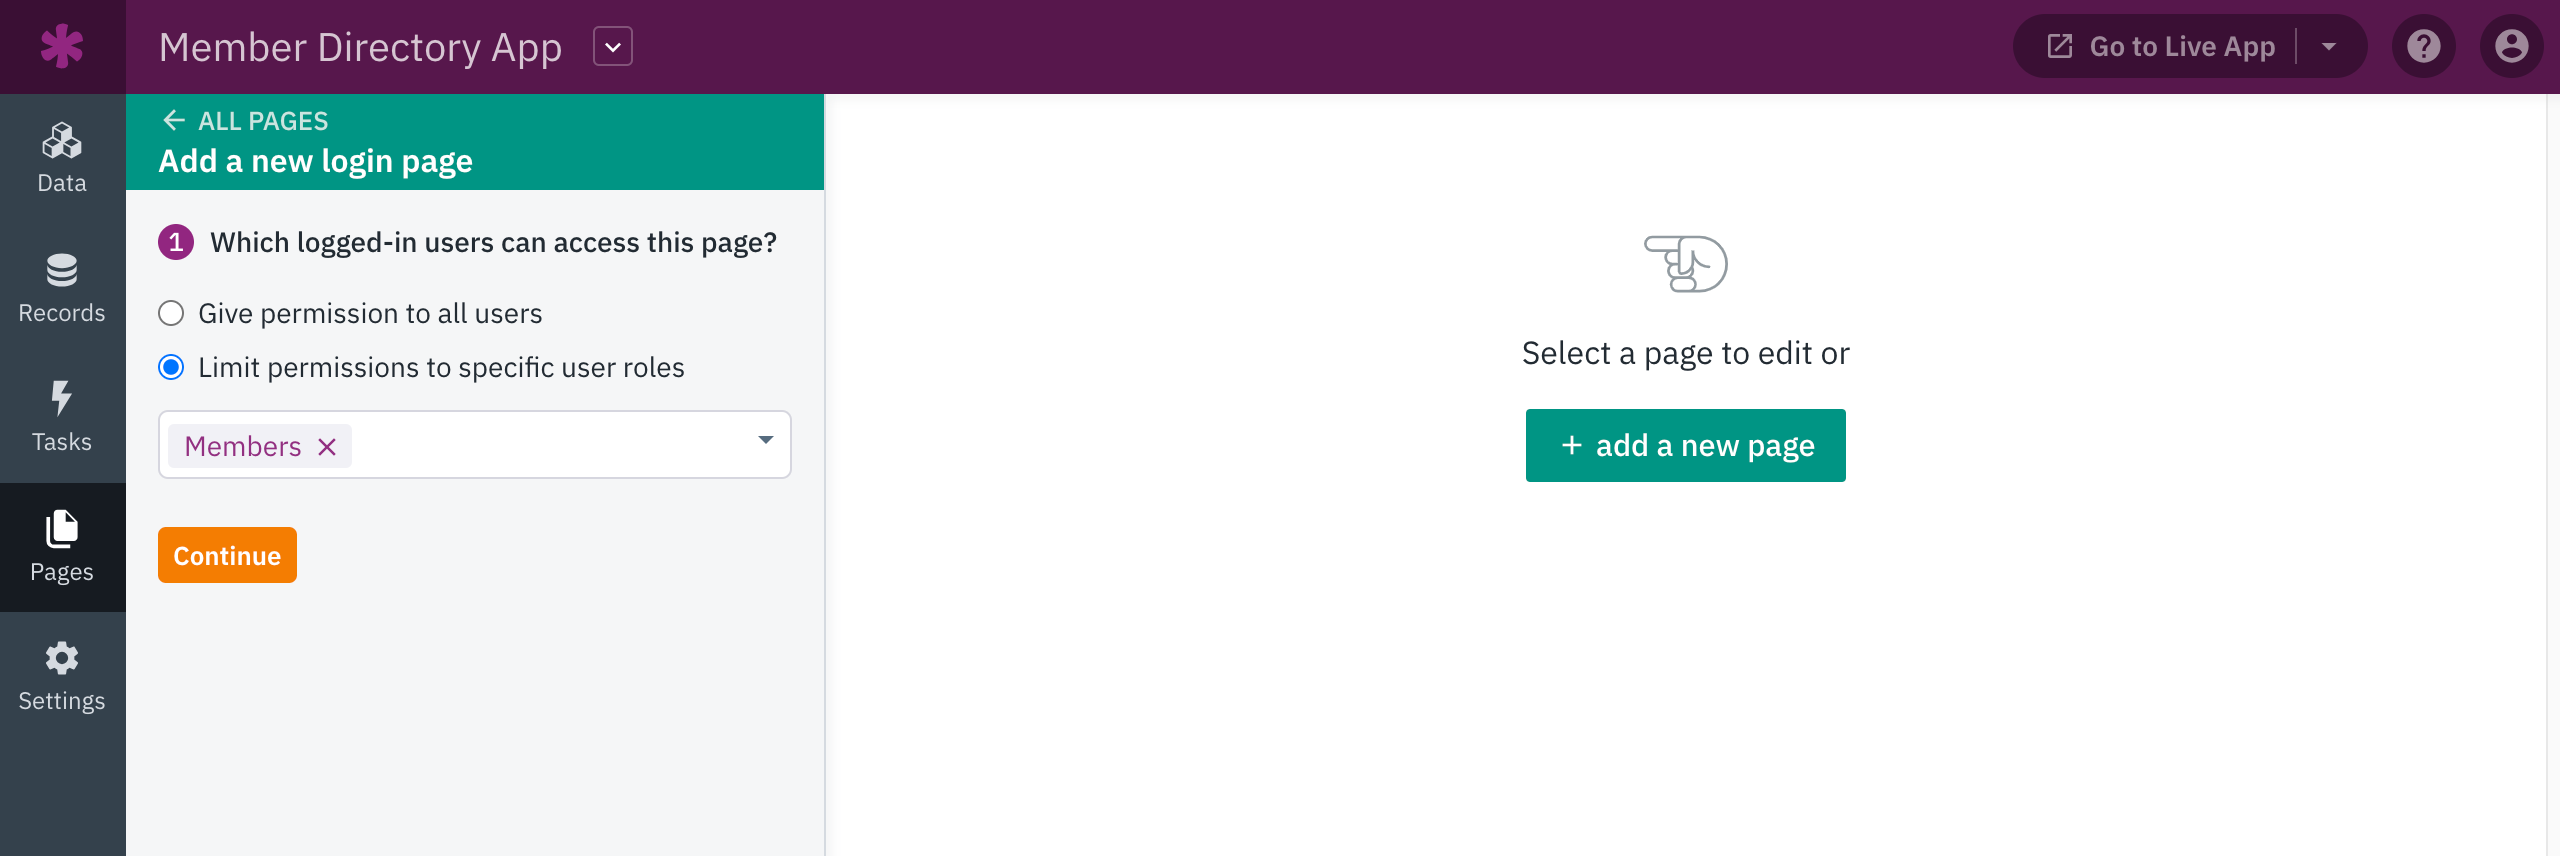
Adding a Member Access Page
To allow Members to access and modify their Member records, we will need to include a Member access page. This page will require users to log in to view it and will be restricted to Members only.
Members will have the capability to view and edit their own records, as well as view the records of other Members.
To get started, we'll add a new page and require a login to access it. We'll limit permissions to the Member user role.
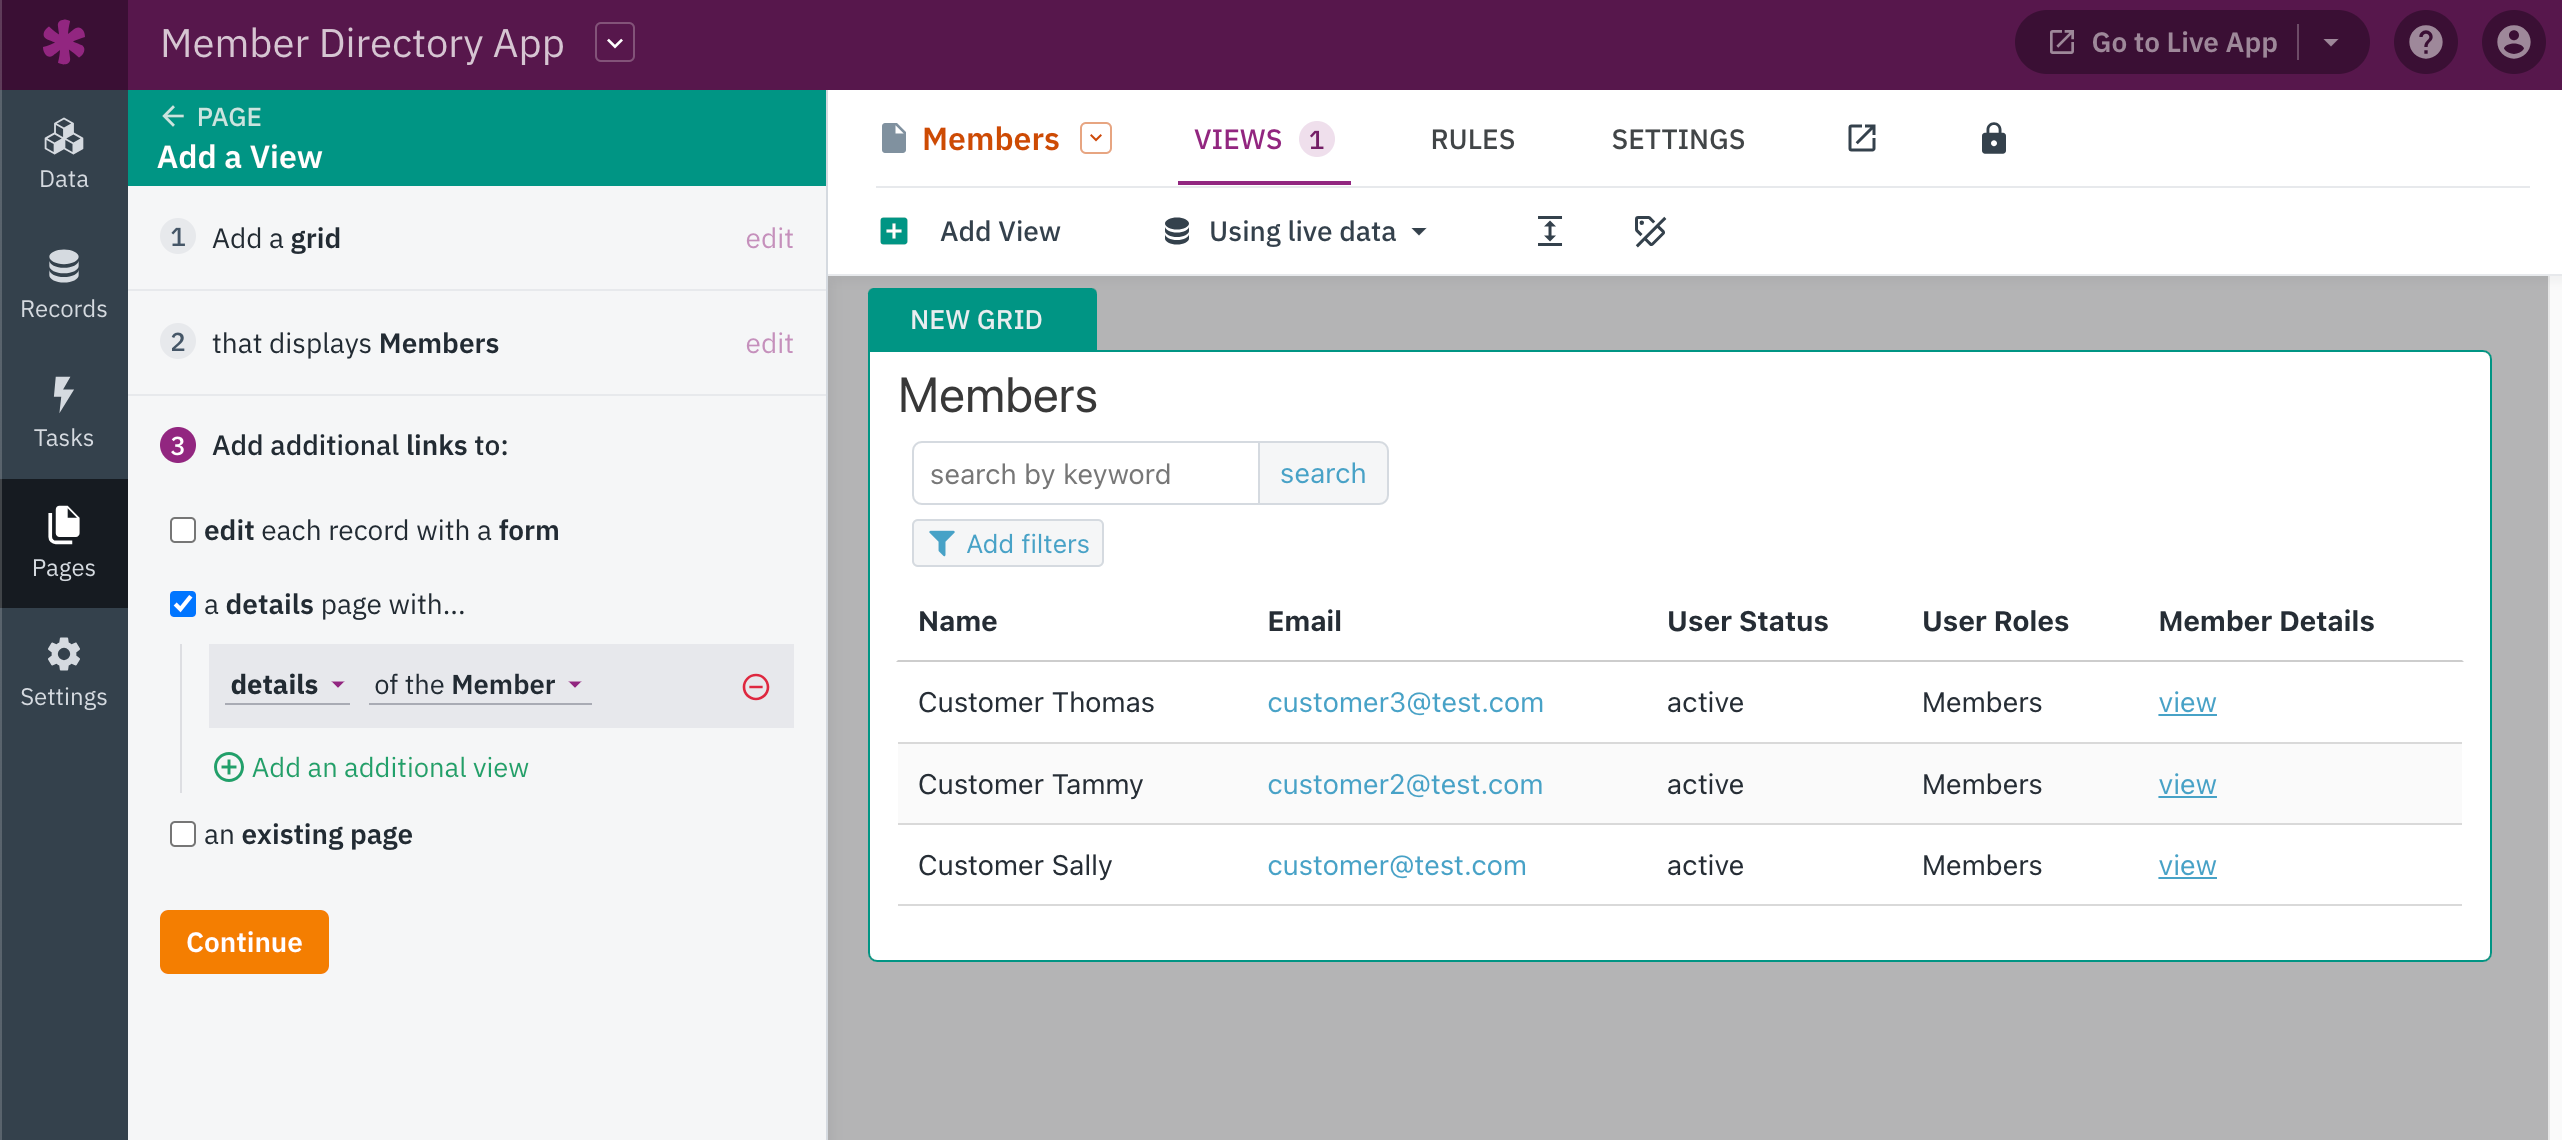
Once we have added our Member access page, we will need to add a grid view to display Member records.
This grid will display Member records and link to view more details about each Member in the grid:
4. View Your Live App
Well done, you have successfully created your member directory! Your page should resemble something like this:
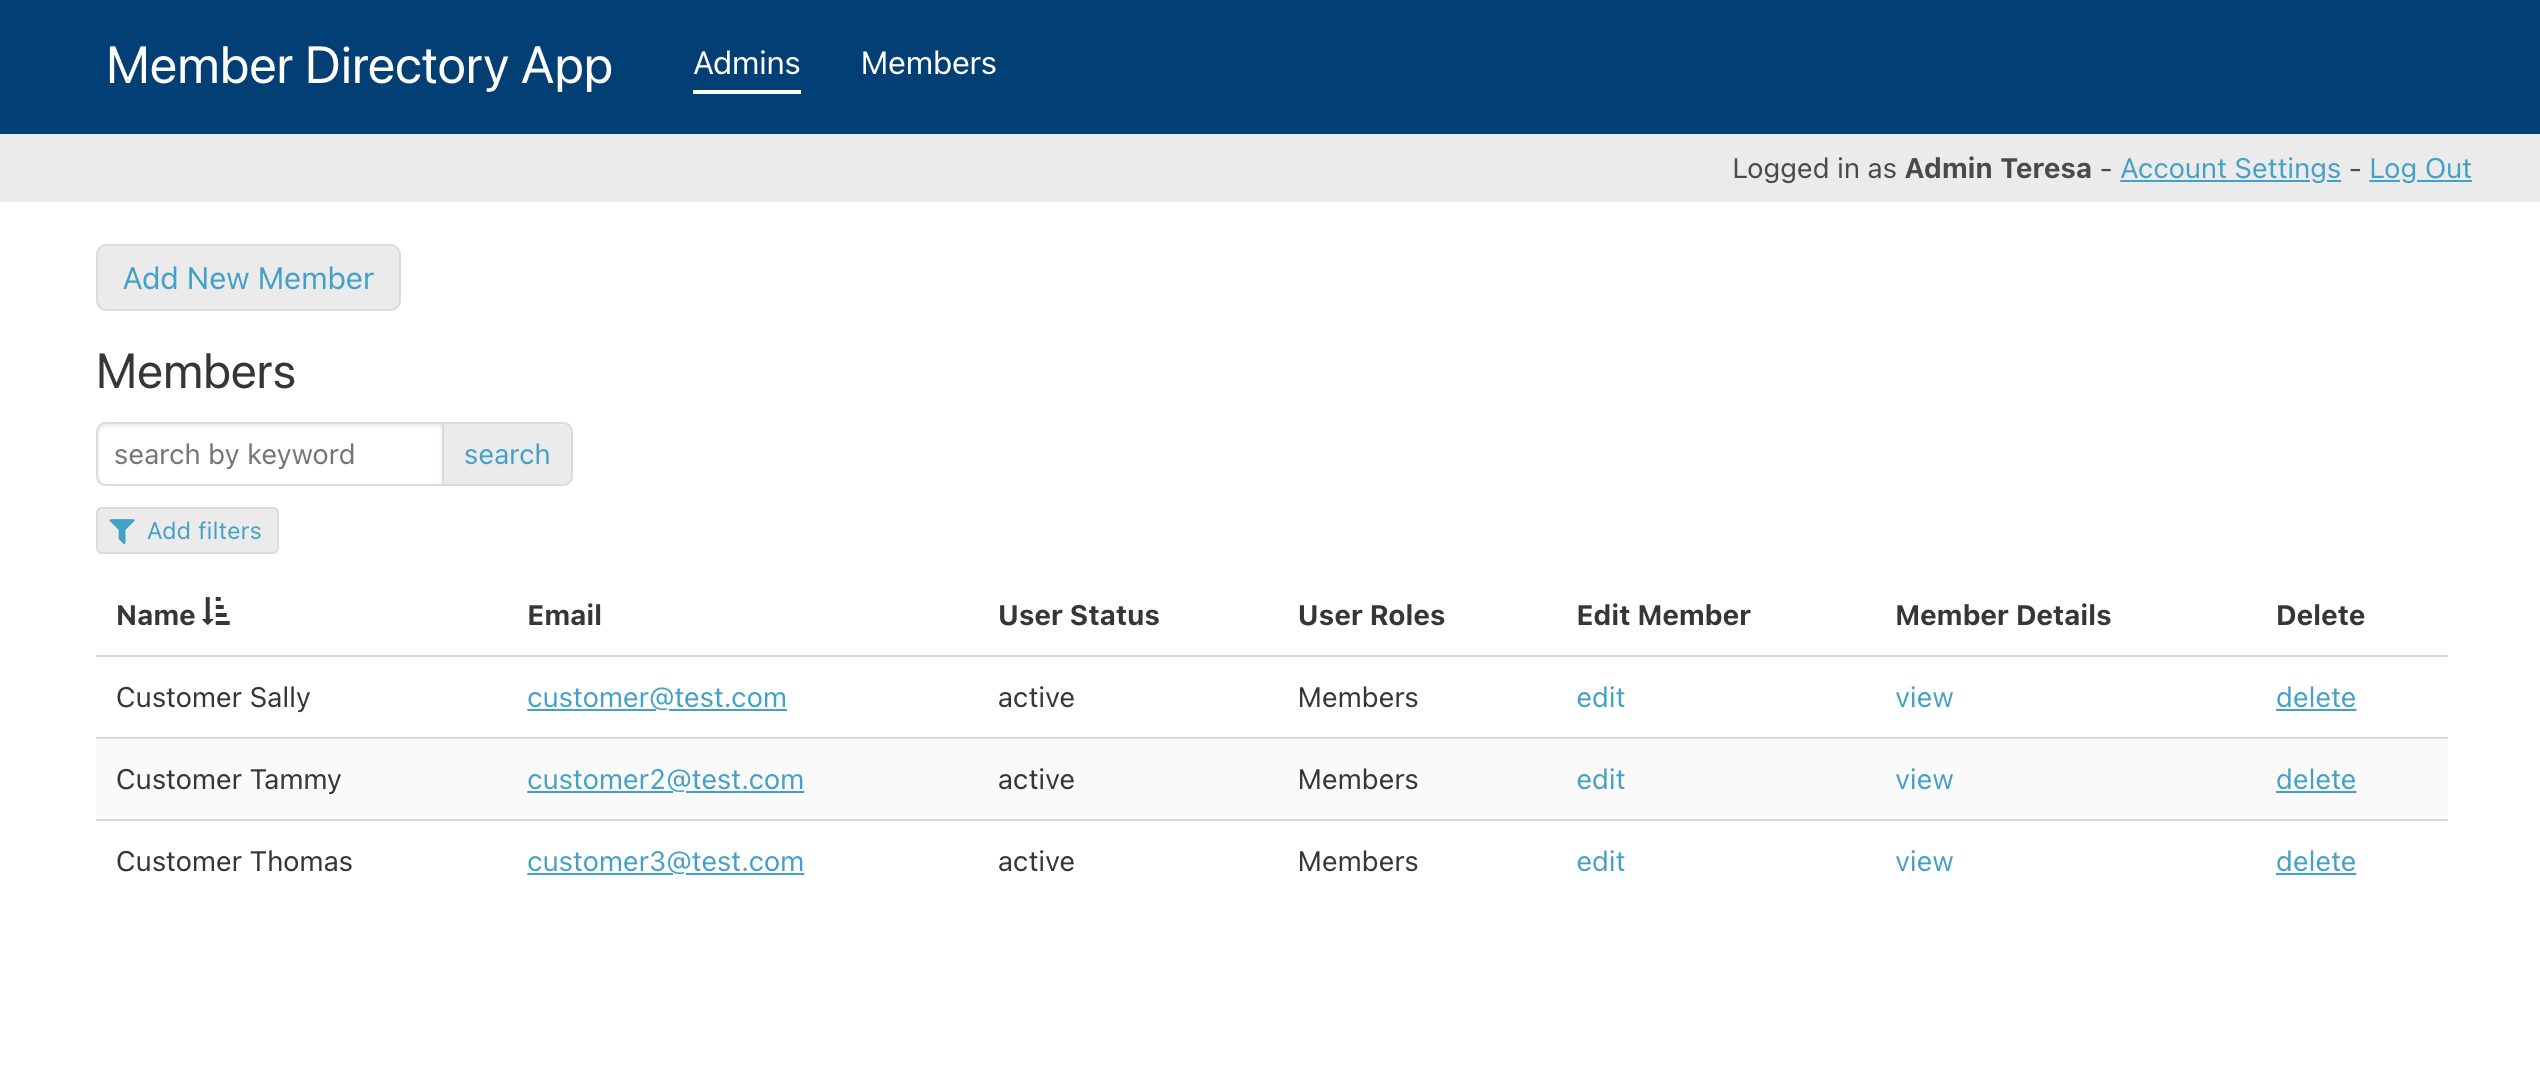
Members will have the capability to access a grid that displays detailed information about each member. Additionally, they will be able to click on a link to view more extensive details about each individual member.
Admins, on the other hand, will have the authority to view, edit, and delete member information.
Optional Features
-
Give users the ability to log in, view their own page, and access their own records by Showing Records Connected to the Logged-in User.
-
Add Single Sign-On (SSO) authentication to your app.
-
Enable E-commerce to accept membership payments.
-
Add a report that tracks how many new Members are added or registered each month.