Use Case
If you desire a simplified way to update a field to a custom value with just one click, this use case is for you. By implementing this functionality, users can swiftly make updates without the risk of inputting incorrect information.
Here are a few instances where you might find this functionality useful:
-
A button that approves a project or event
-
A link that updates the status of a contact in a sales pipeline
-
A link that marks an invoice as paid
To do this, we'll first use a form view with a record action to set the value but remove all field inputs, and we'll also use action links in a view to showcase an additional setup to accomplish our goal.
Requirements
Steps
In this example, you will learn how to create a button and link that can be used to approve a Project.
1. Create a Project Table
In the Data section of the Builder, we will first create a table to store our Projects.
For this example, you'll need at least one field for the Project's name, but you can feel free to include any other fields you'd like:
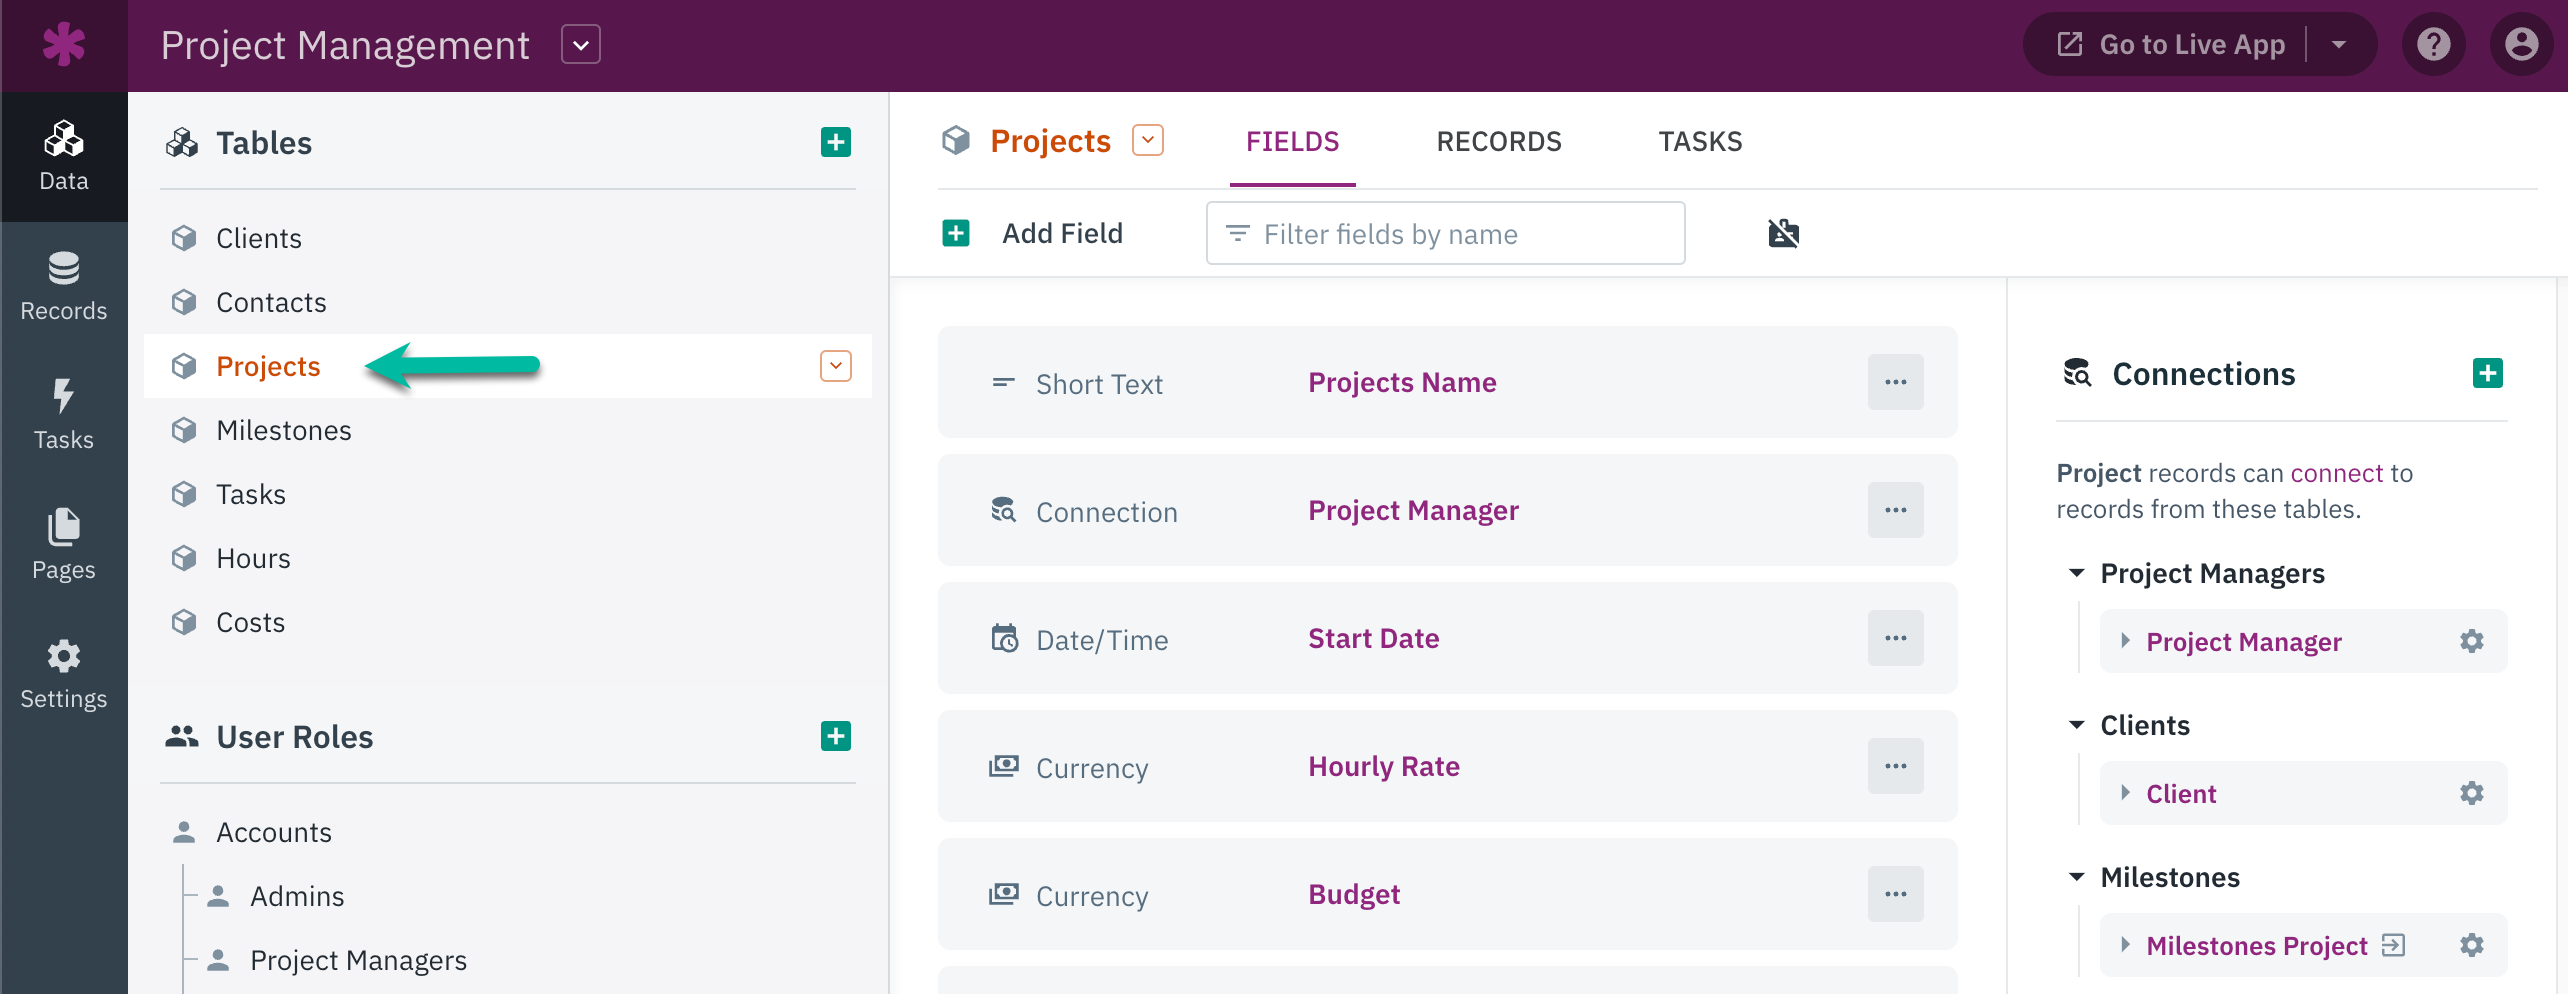
2. Add a Status Field
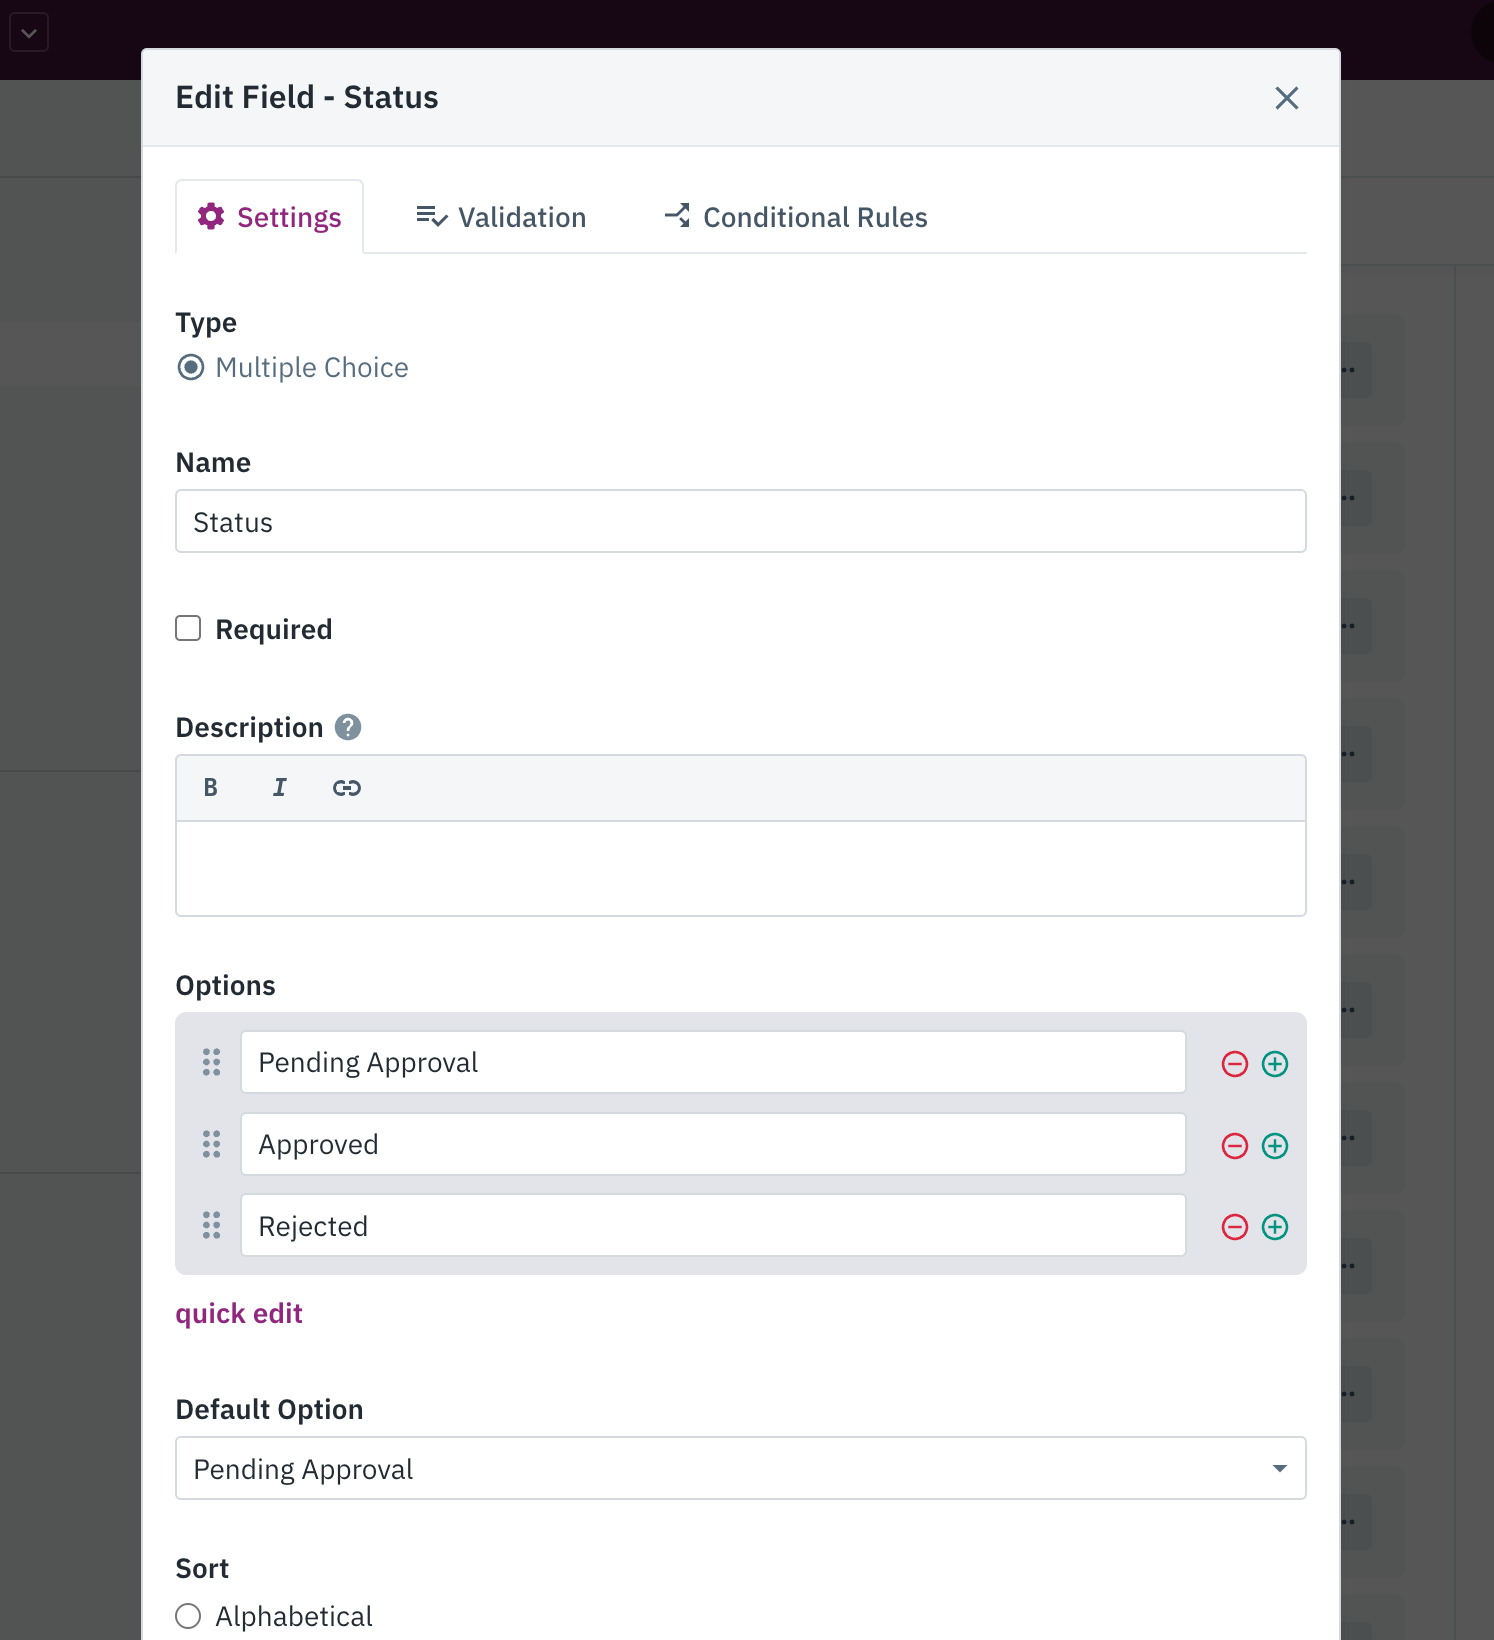
In the Projects table, we can add a multiple-choice field and name it "Status." This field will track whether a Project has been approved or not.
We can include the following options:
-
Pending Approval
-
Approved
-
Rejected
Next, we'll set the Default Option to "Pending Approval" in the field's settings so that all new Projects created are automatically set to that status upon record creation:
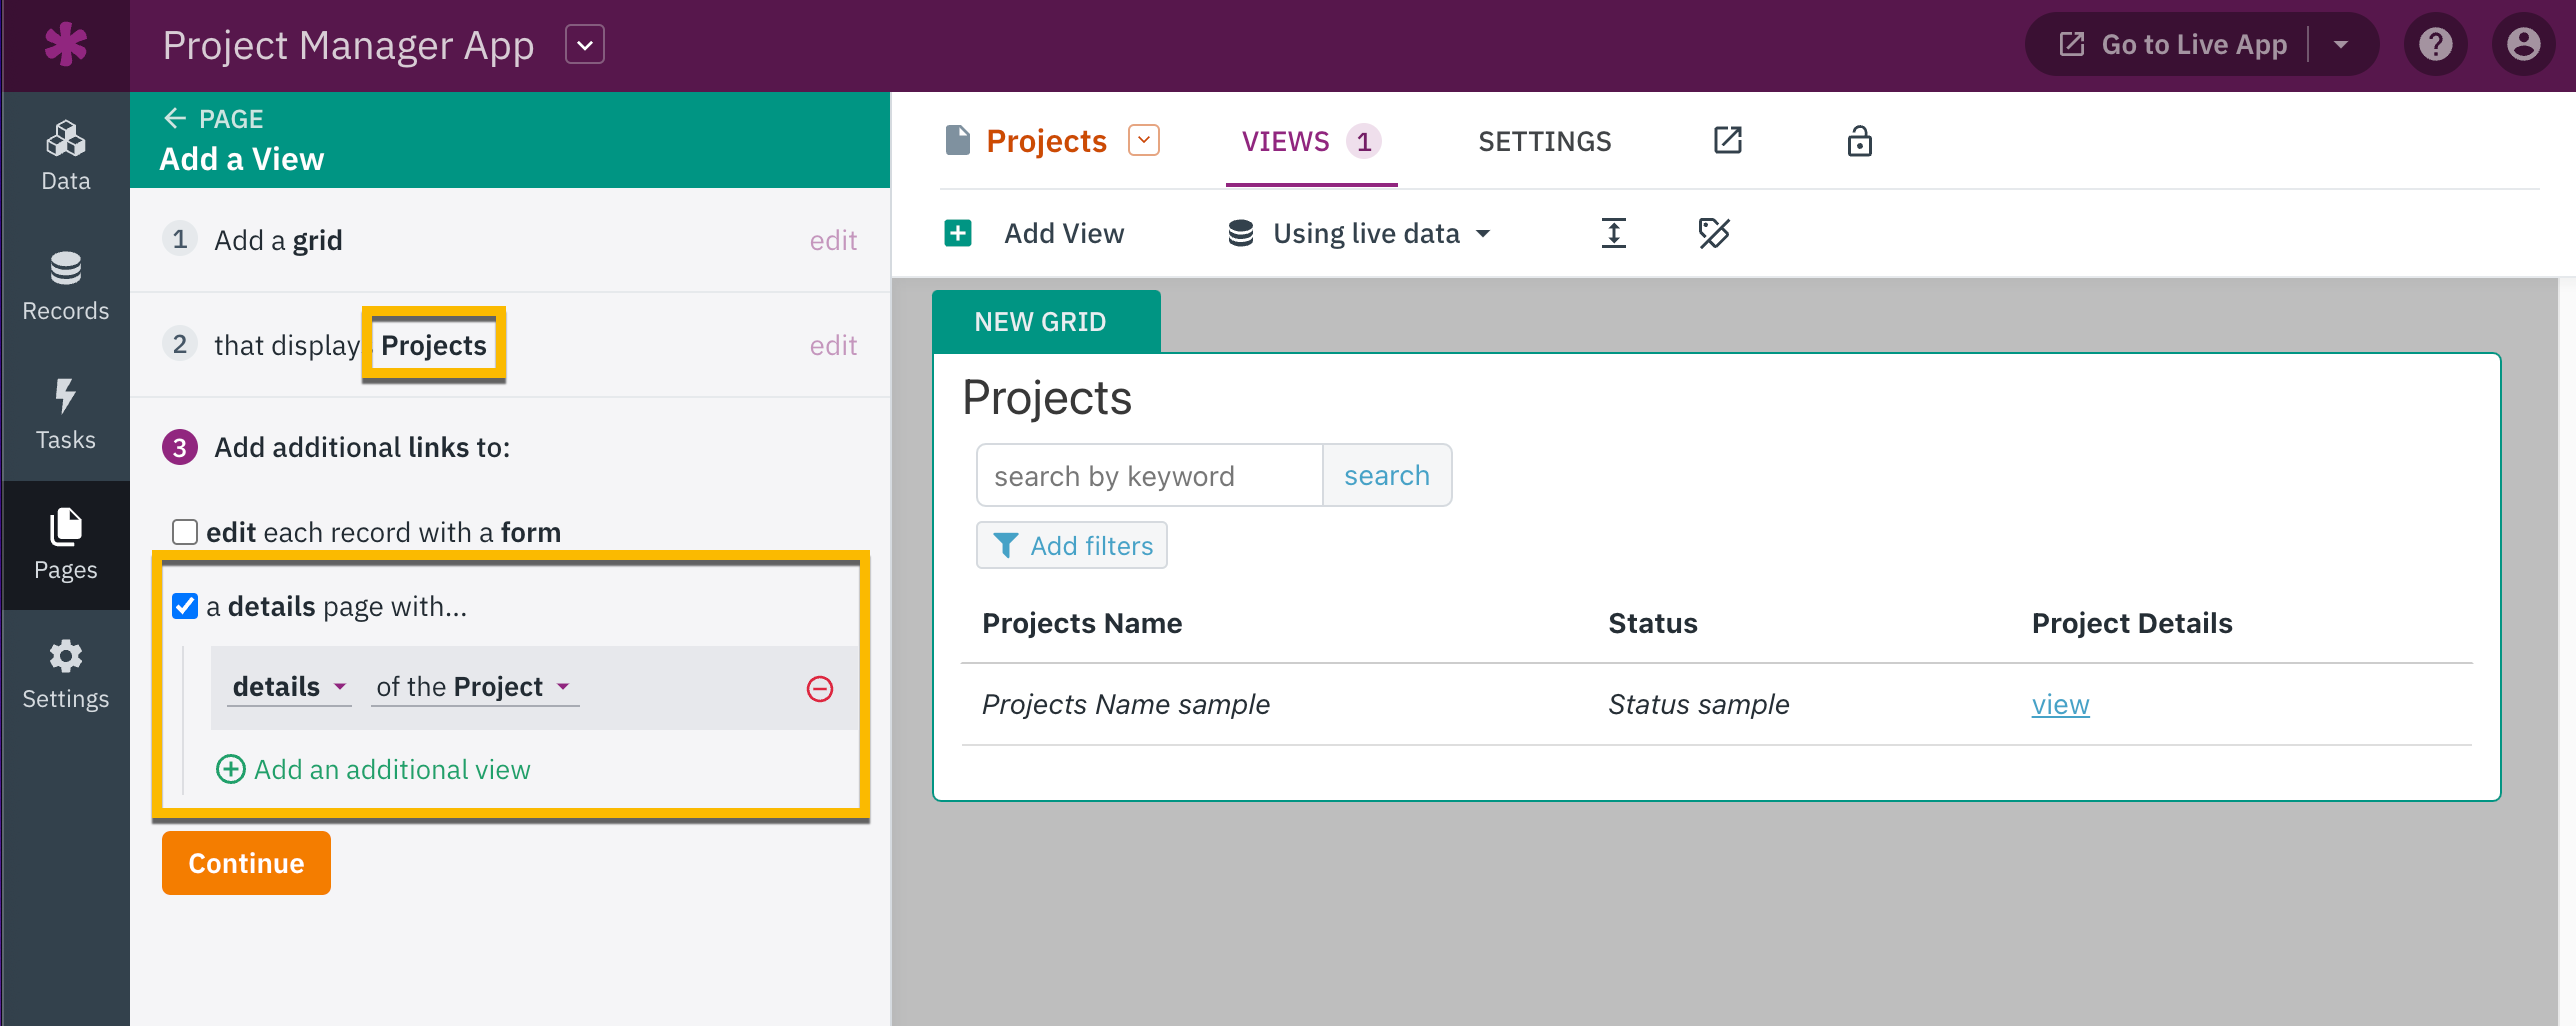
3. Create a Projects Page and a Grid View
In the Pages section of the Builder, we'll now create a page with the following:
- Use the Projects table as the data source.
- Add a grid view and a link to view more details for each Project.
- Name the page "Projects".
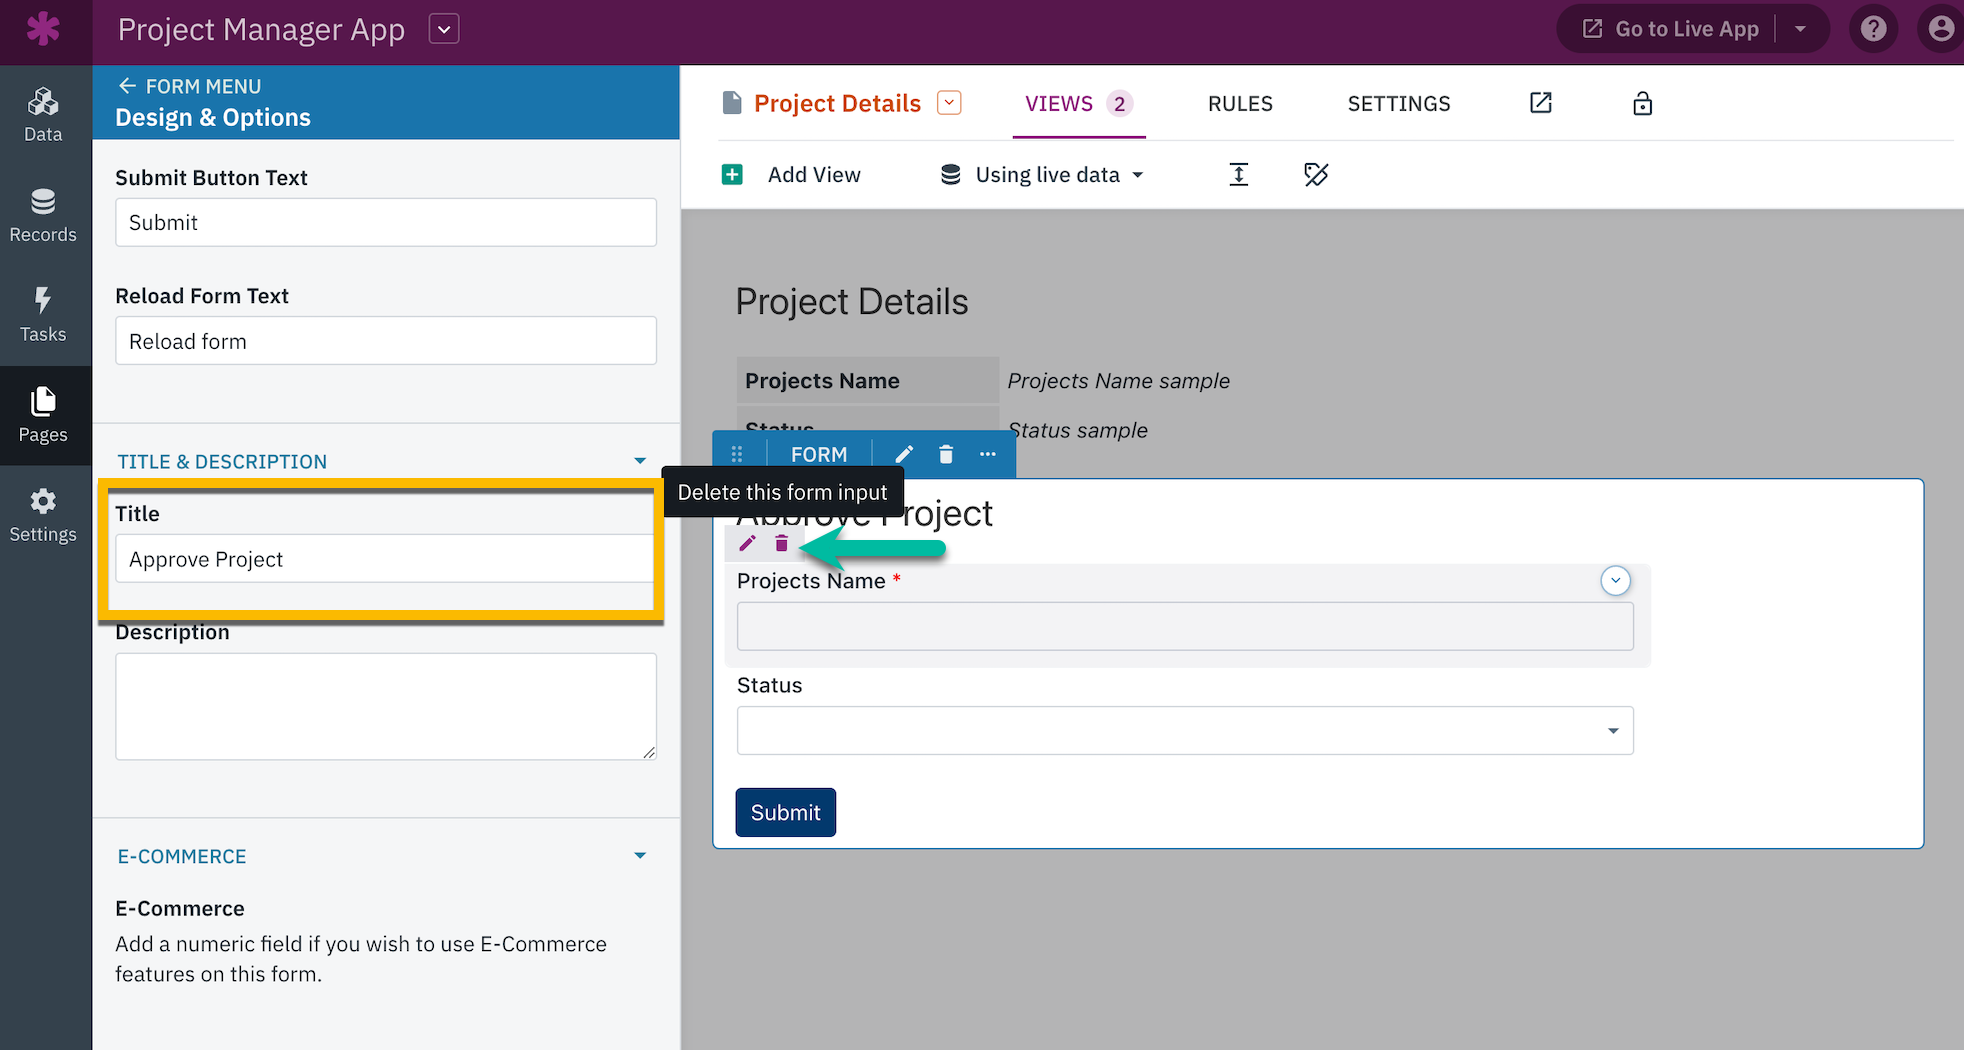
4. Add the Button to Update the Record in a Form View
Next, we'll create the button or link to update the record's value.
- In the Project Details page we created via the link in the Grid view, we'll add a new form view for editing that page's Project.
- Select to edit the new form view to access the settings.
- From the settings section of the view editor, we'll rename the view to "Approve Project".
- Remove all fields from the form by clicking on the trashcan icon for each of the field inputs.
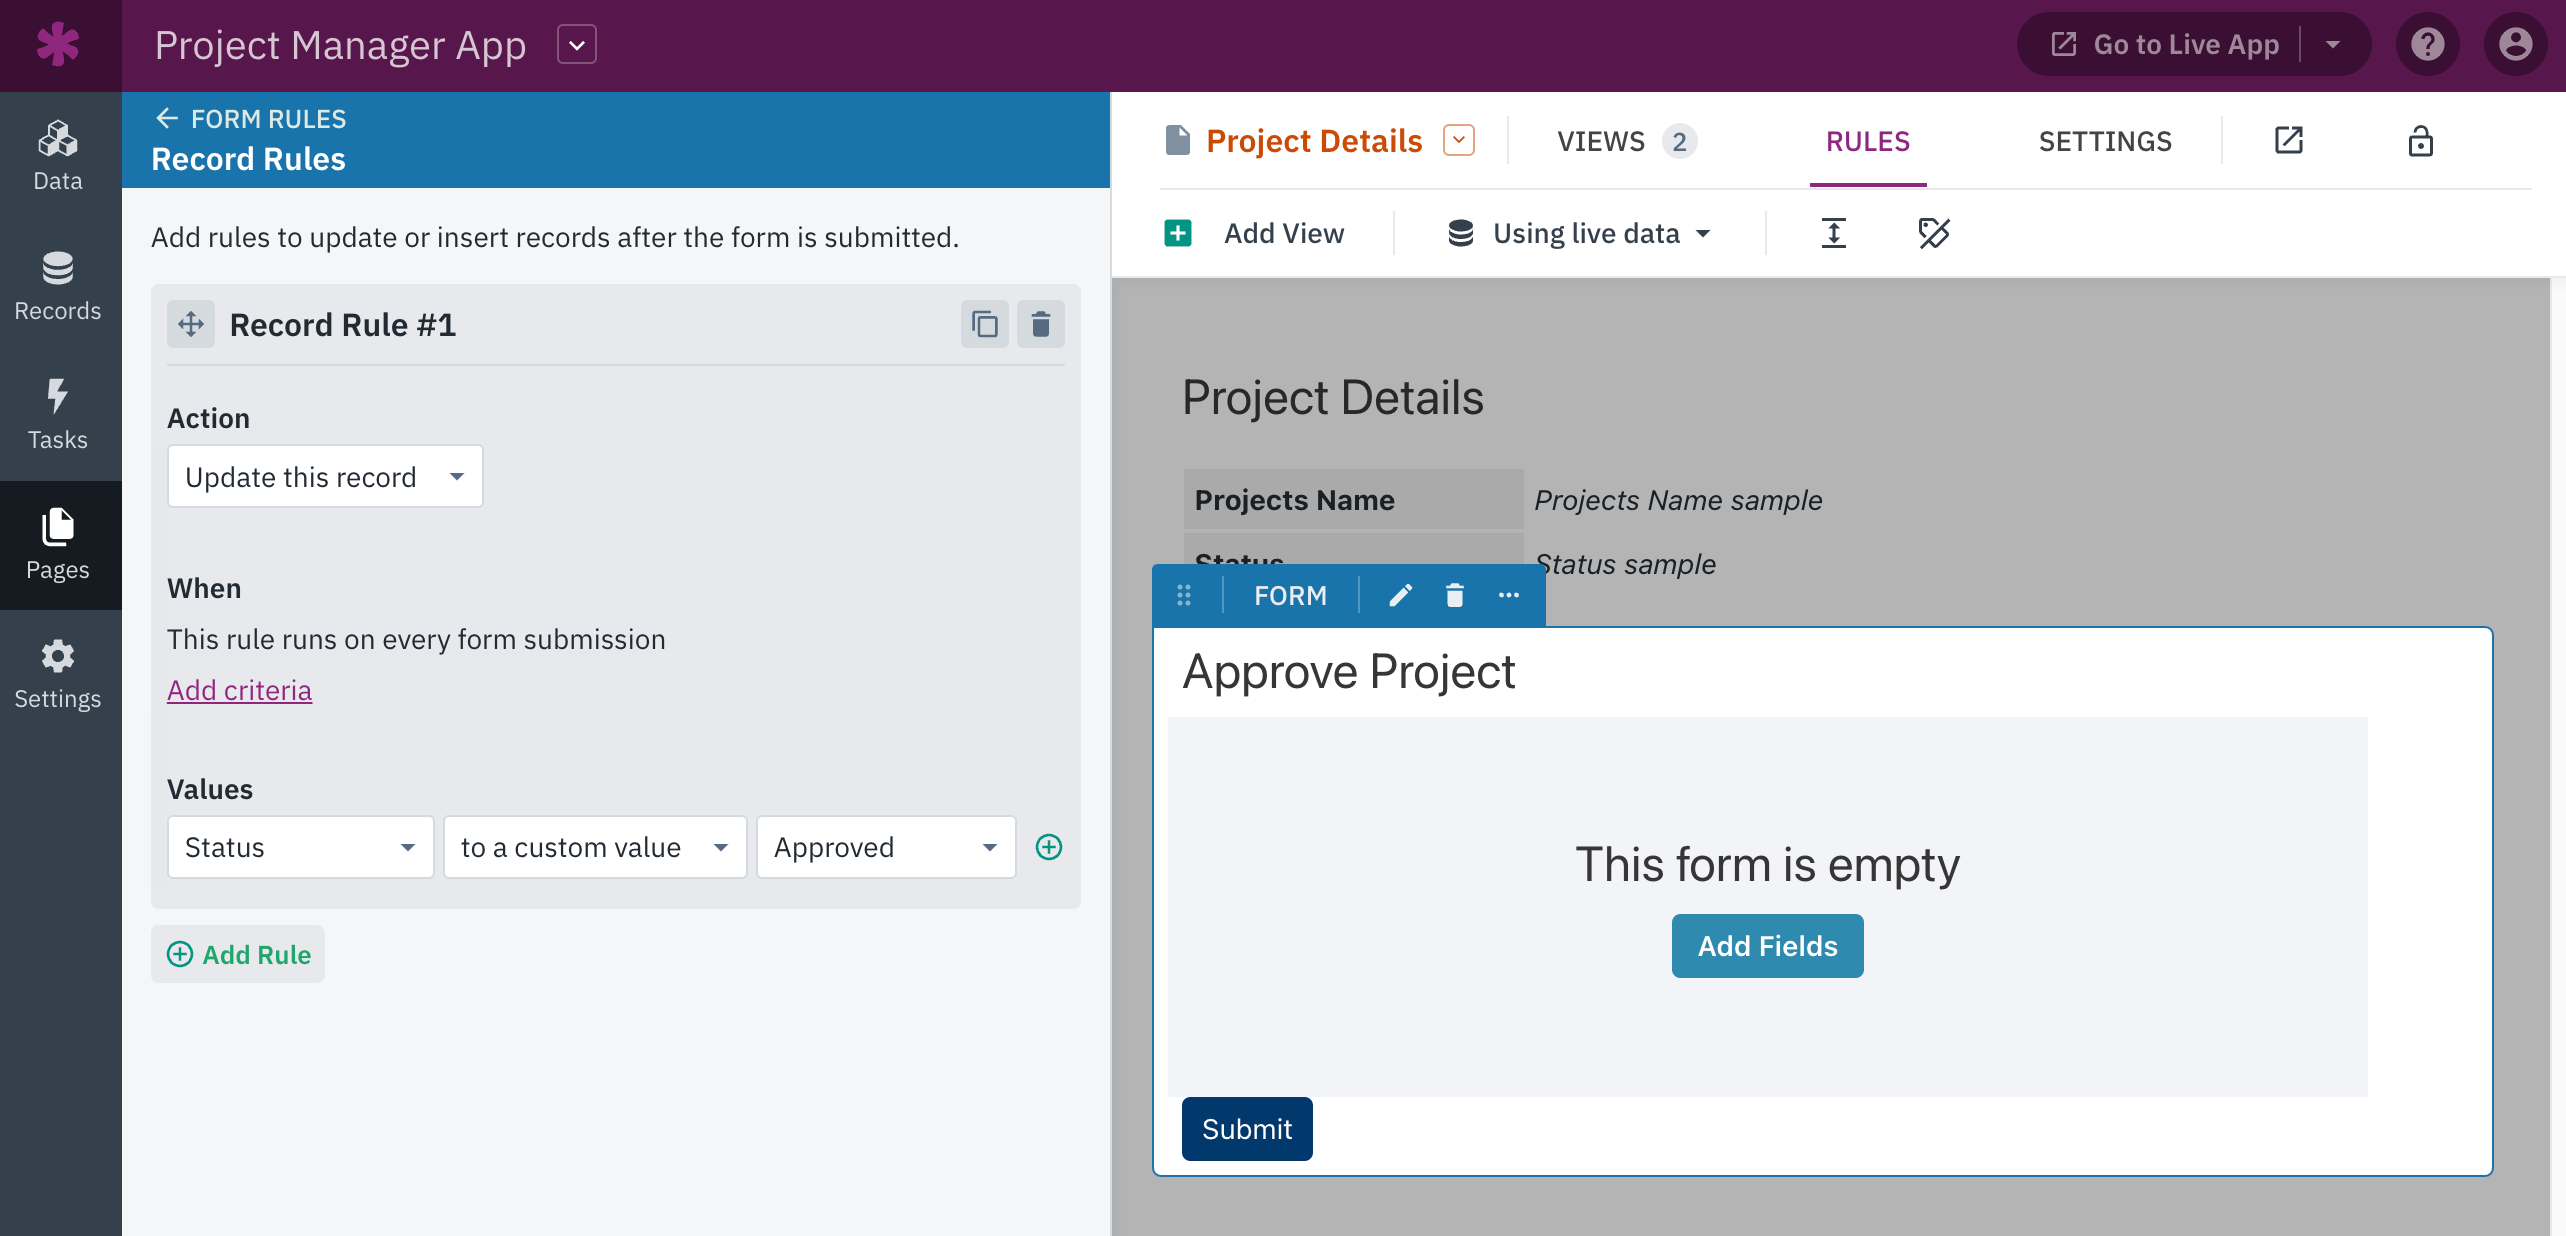
5. Add a Record Action
Now, we'll add the record rule to the form view that we created in the step above.
- From the view's editor, select "Rules". Then, we'll select "Record Actions".
- Select to add a record action and set up the rule as follows:
-
Action: Update this record (the default option)
-
When: Every form submission (the default option)
-
Values: Set "Status" to a custom value "Approved"
-
Tip: You can learn more about using and managing record actions here.
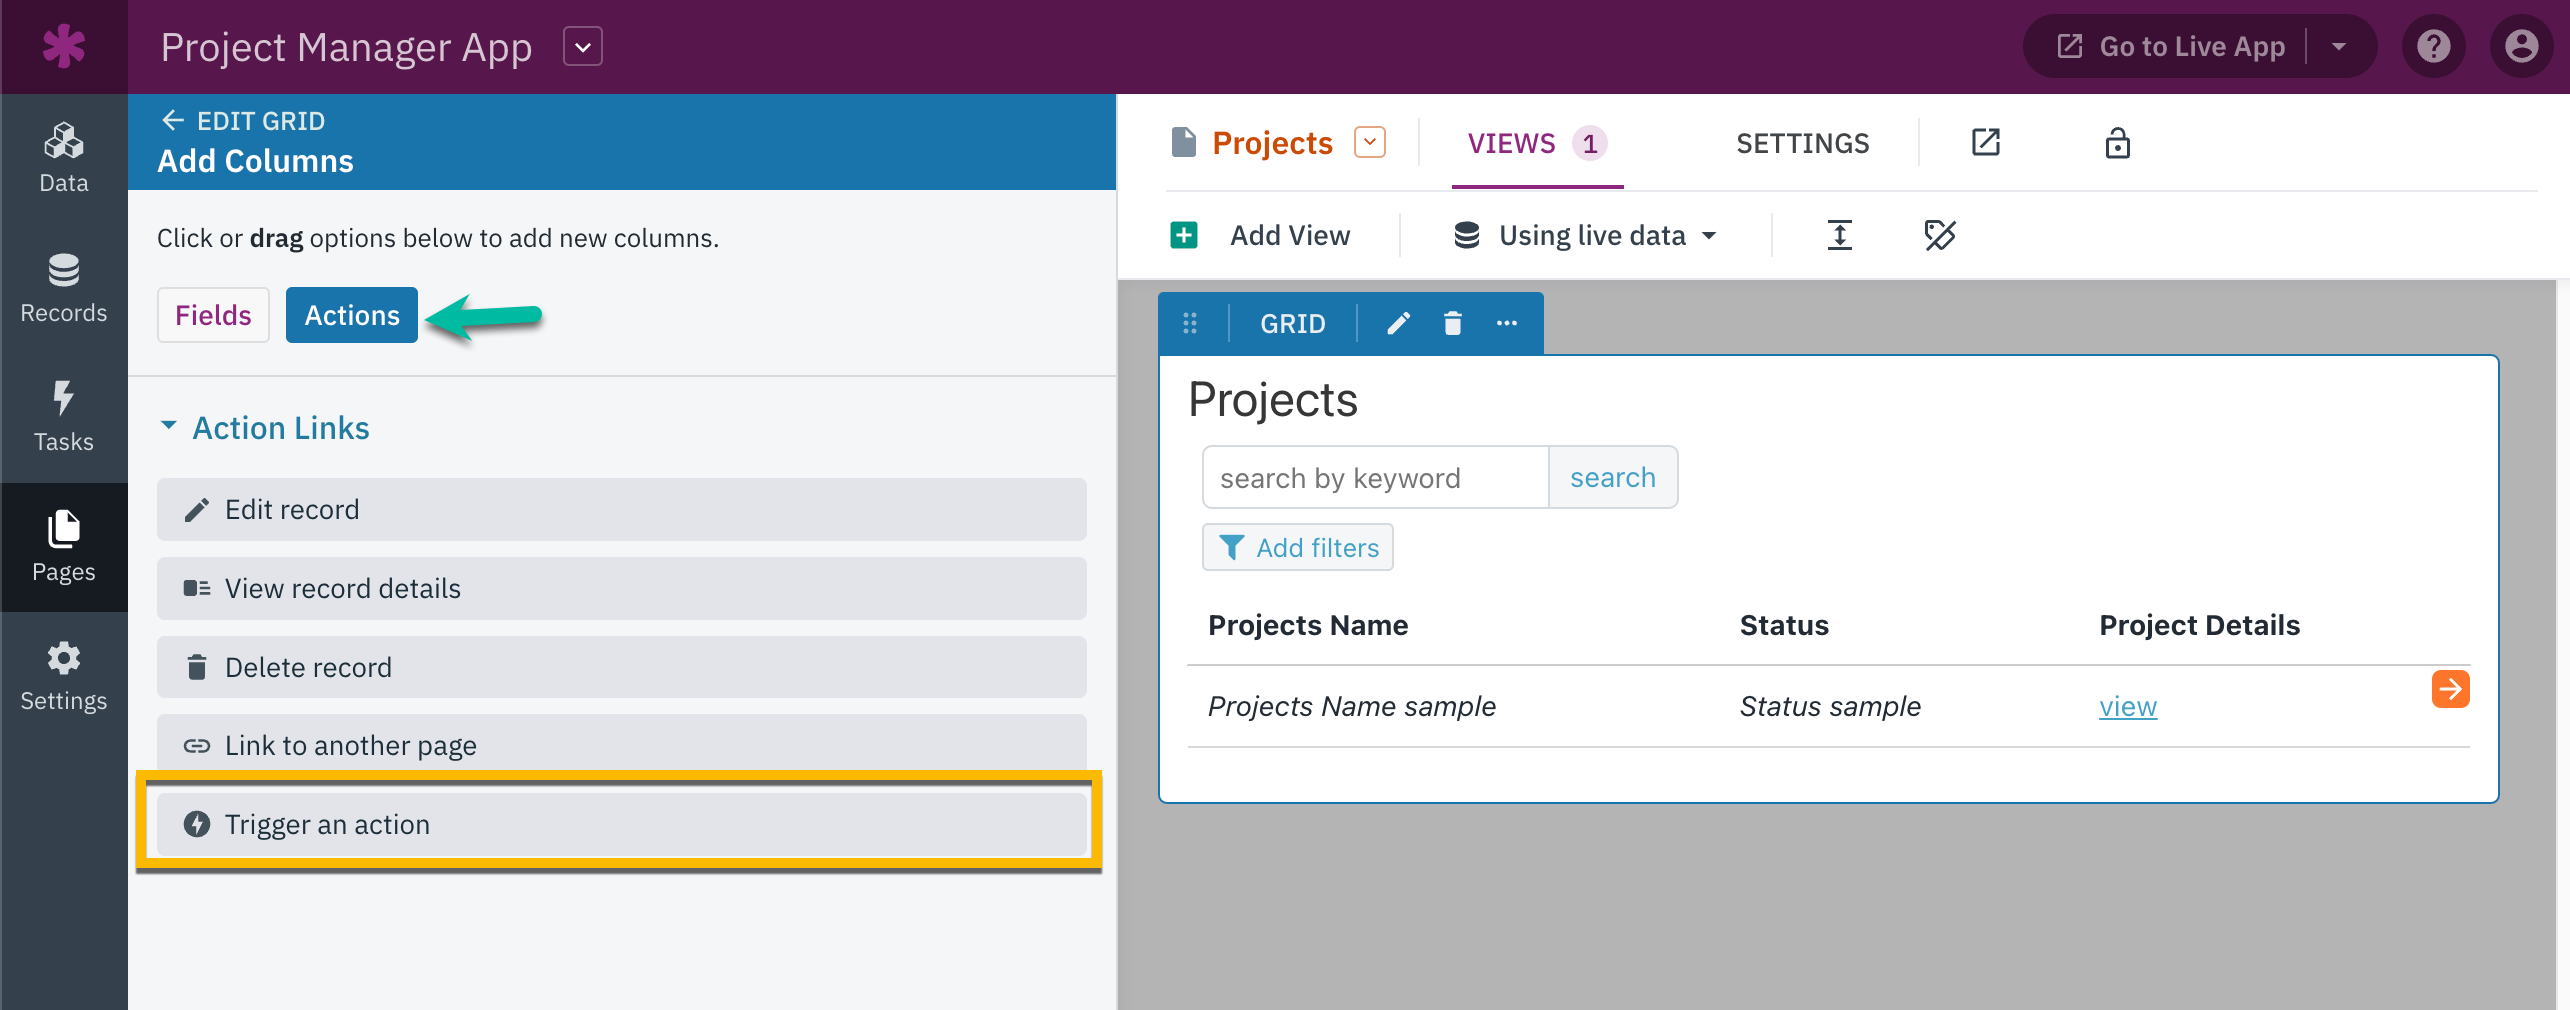
6. Link: Update the Record with Action Links
Additionally, action links can be utilized to incorporate a link into views that will initiate an action. In this particular scenario, the desired action is to approve the Project record.
For the grid view in our app displaying Project records, we'll open the view editor and select "Add Columns" and then "Actions".
There, you can choose to add a link to "Trigger an action":
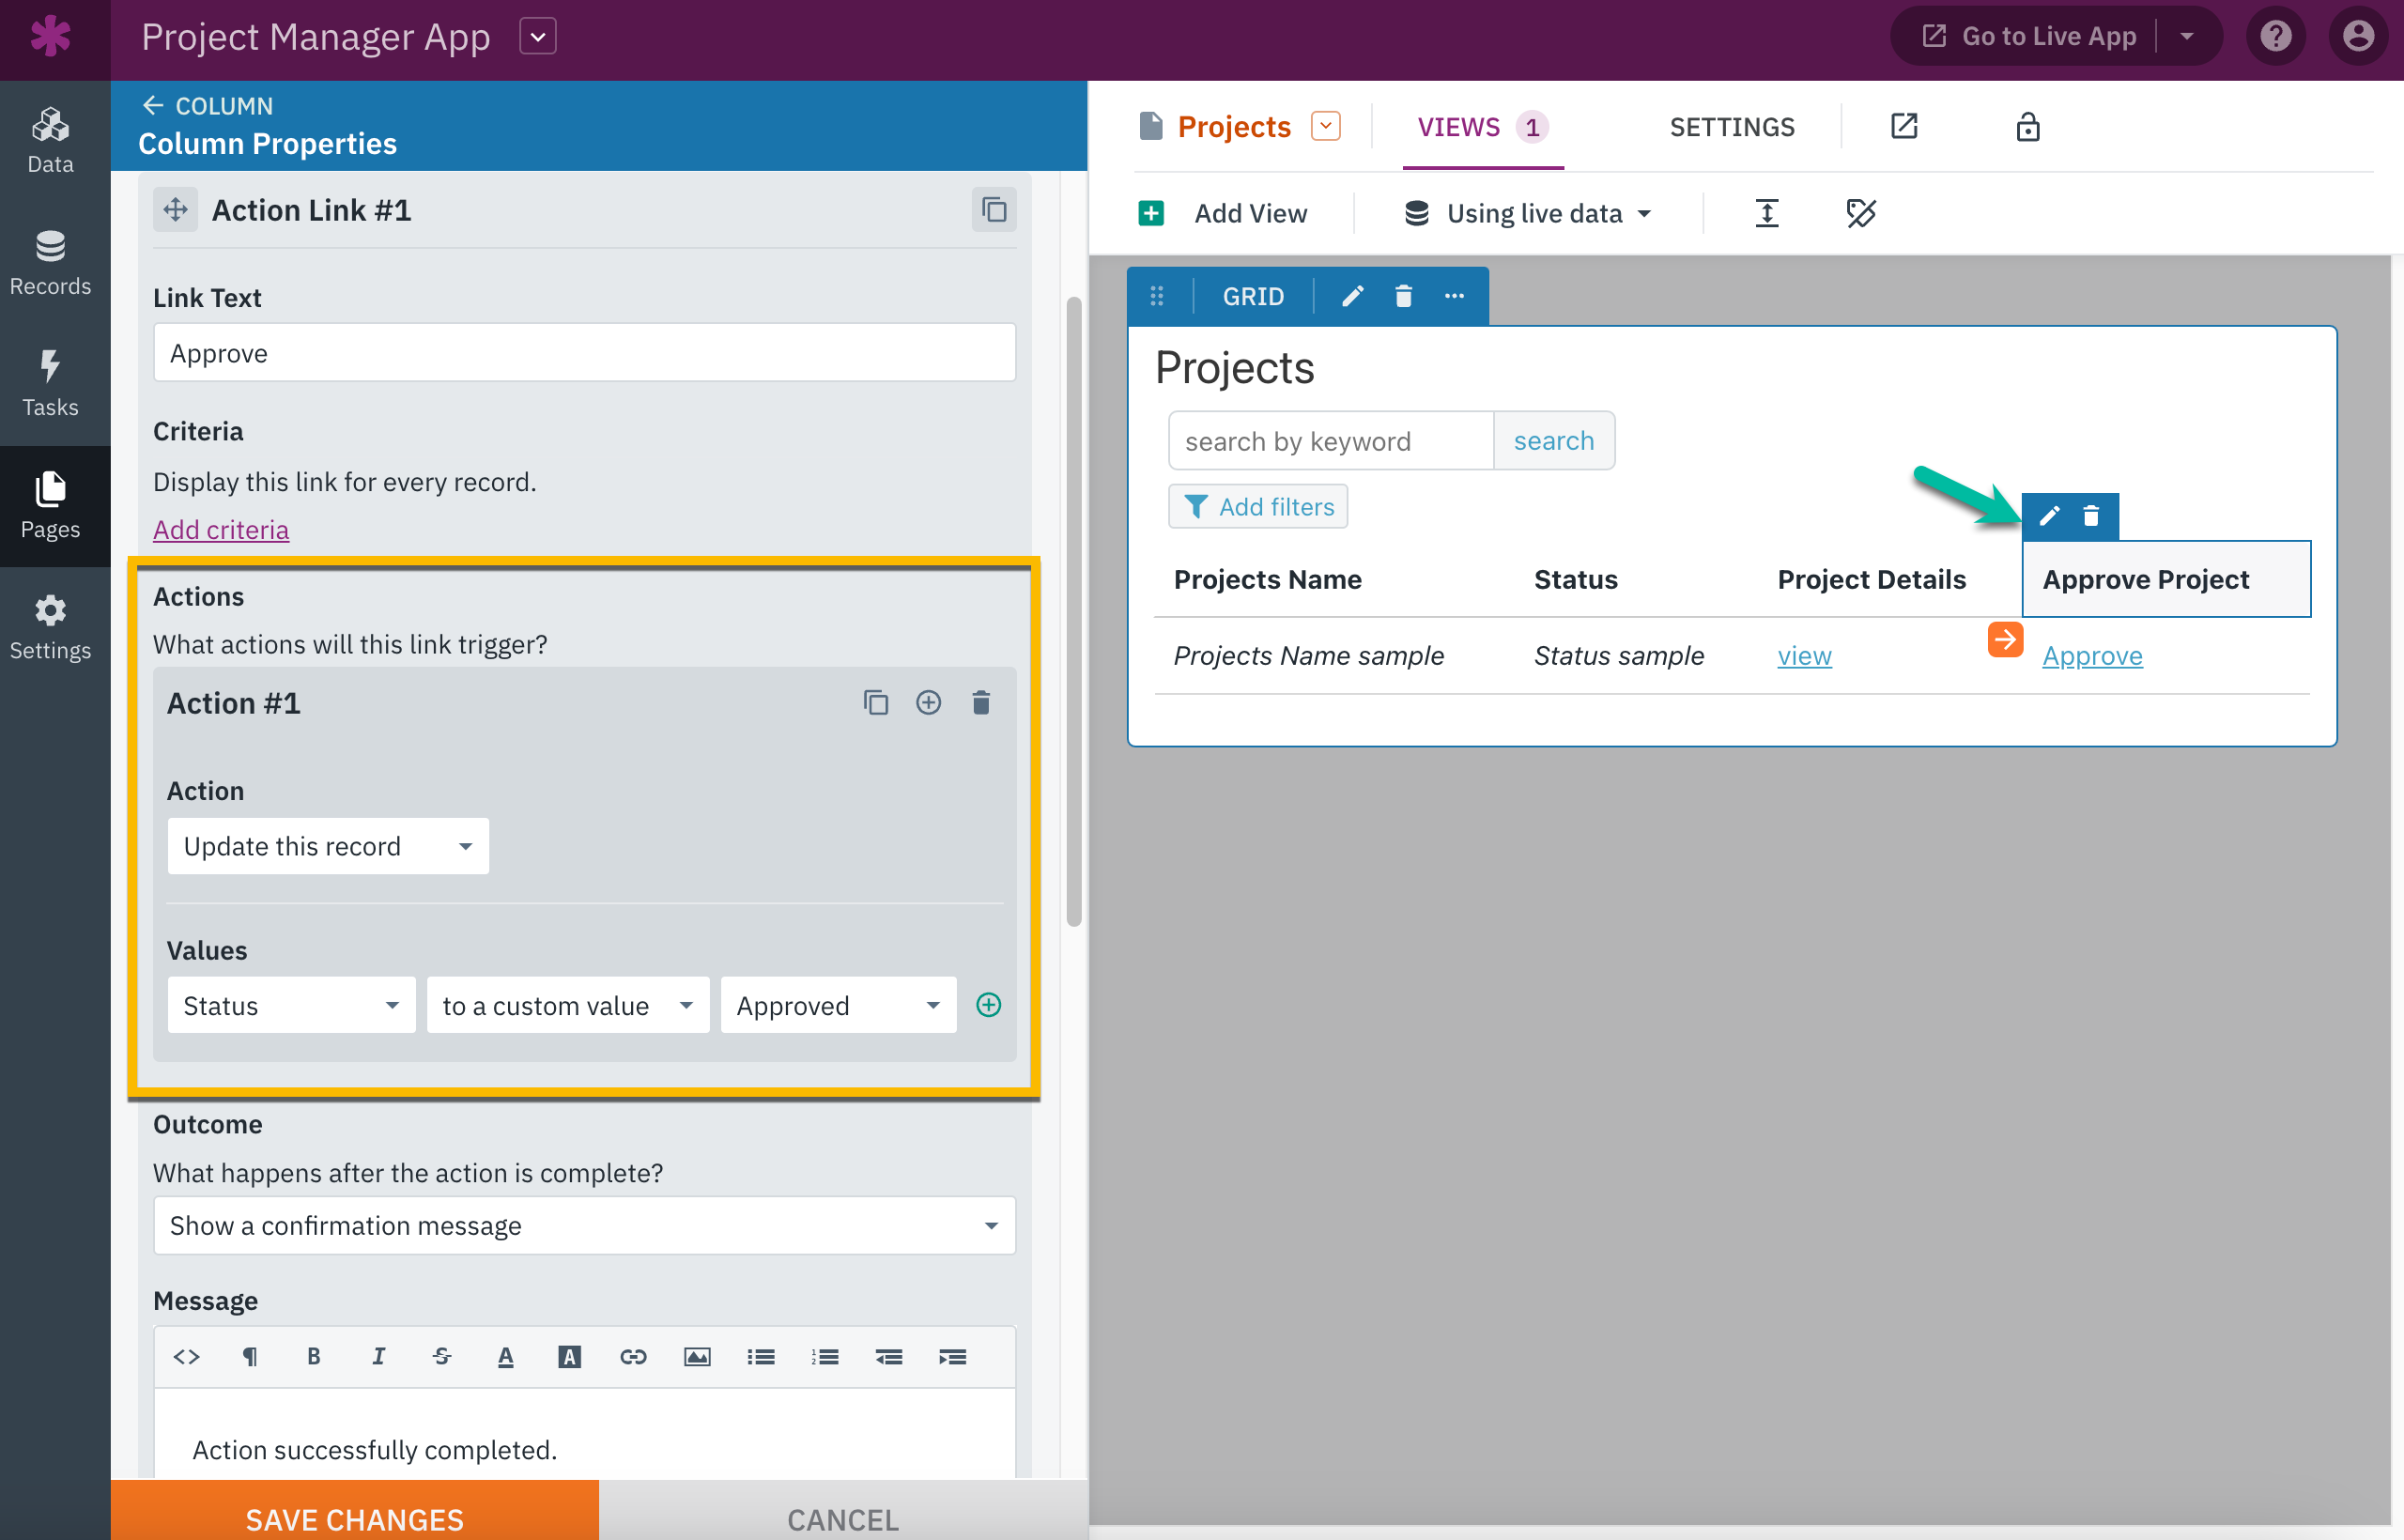
Once your action link is added, you can then define what action your trigger will execute. In this case, we want to set the status field to "Approved".
Doing this will add a new column to your grid with the link to approve the record:
Tip: You can learn more about using and managing action links here.
In the Live App, users of your app can then select the "Approve" link to trigger the particular record's Status field's value to update to "Approved". Users will have the ability to approve projects either from the Projects grid or after reviewing the project's details through the form created in step 4.
Congratulations! You have successfully completed setting up this workflow. Well done! 🚀