Use Case
In addition to roles for Customers, Sales Reps, and others, many applications can also greatly benefit from incorporating an "Admin" role.
This role is different than a shared builder in the Knack Builder. This user role is specifically designed for administrators to have unrestricted access to all records within the live application.
As the Admin, it is necessary to have access to Leads, Orders, Sales Reps, and other records within the application.
Requirements
You will need to have user logins enabled to allow for multiple user roles.
Tip: Learn more about security settings available with user logins to help ensure the security of your Live App pages.
Adding a User Role for Admins
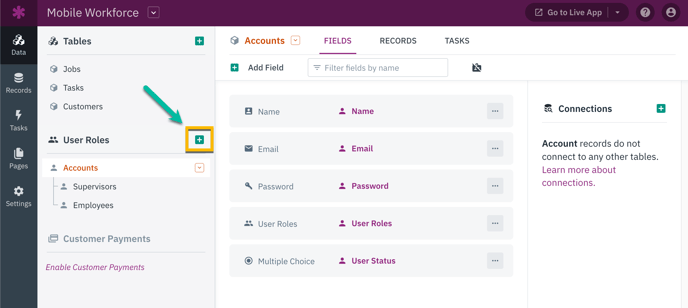
To include a user role for Admin users, simply click on the green "+" button located beside the User Roles option. This action will prompt you to assign a name to the new user role.
In this particular case, it is recommended to use "Admin" as the name.
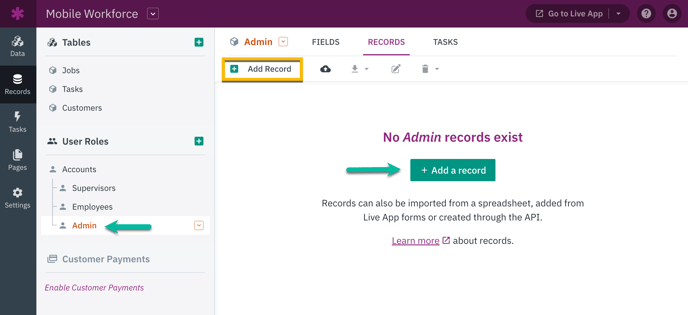
In the Records section of the Builder for the newly created Admin role, click the “Add Record” button to add a new Admin user record.
Creating a Login Page for Admins
Once you have successfully created the Admin user role and added an Admin user record, the next step is to incorporate a new page specifically for Admin users to access the Live App.
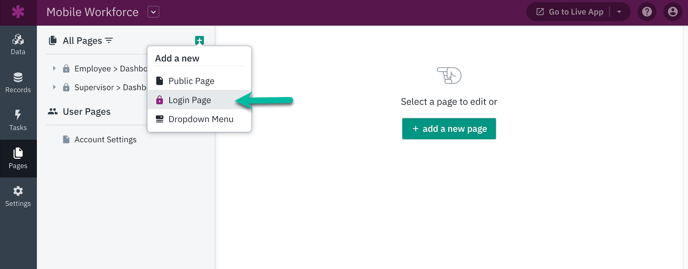
In the Pages section of the Builder, click the green "+" button and select "Login Page".
Afterwards, choose the "Limit permissions to specific user roles" option and select the role of "Admin":

Next, you will be prompted to name your page and add your first view to the page. As the goal is to provide Admin users with complete access to all records, you have the flexibility to add any view type displaying any records you prefer.
Tip: You can learn more on adding and managing pages here.
Adding Views to the Page
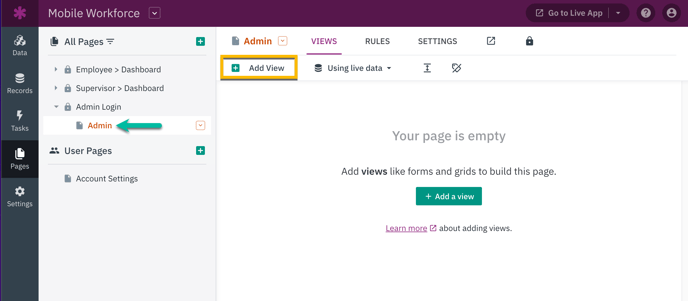
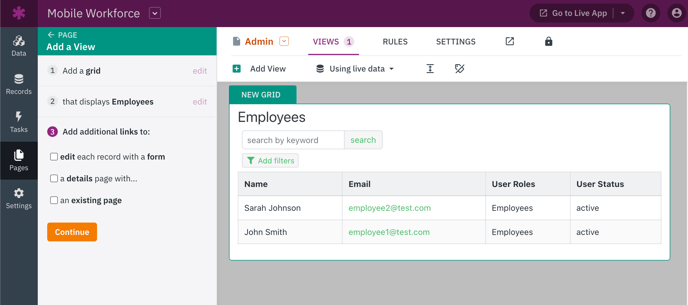
After adding the Admin page to your app, you have the flexibility to add views displaying any records of your choice. To do this, navigate to the Pages section of your app and click on the "Add View" button located in the top menu.
You will be prompted to select the type of view and specify which records to display. In this example, we will add a grid view that shows all the records of the employees.
Login and Test
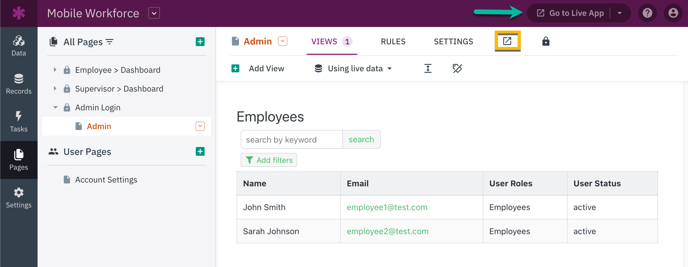
After successfully setting up your Admin page, you can now open it in the Live App. Simply click on the "Go to Live App" button located in the top right corner to test your app.
If you have multiple pages, you may need to select the Admin page from the drop-down menu.
Login using the email and password associated with your test Admin user to access and view the added views on your Admin page.
This completes the process of successfully setting up a workflow for Admin users to have unrestricted access to all records within the live application.
Notes
Managing Users From the Admin Page
An added benefit of creating an Admin page is the ability to directly manage users within the Live App, eliminating the need to access the Builder.
To effectively manage users within the Live App, it is essential to incorporate a view that displays records for your users. Similar to adding views that showcase regular table records, you can seamlessly add views that showcase user records in the same manner.
As an example, we have included a grid view that showcases Employee records. By enabling inline editing, the Admin user can easily log in and update each Employee user record, such as changing the User Status to active.
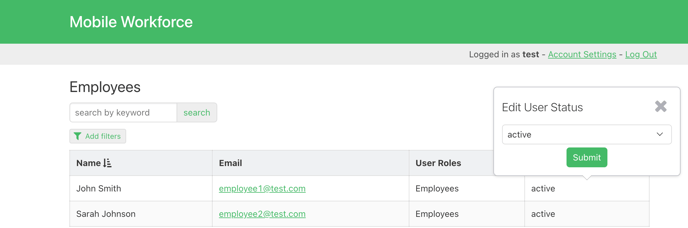
Tip: To learn more about inlined editing with a grid view as seen in the image above, see our article here.