Use Case
Imagine you have a system where users can be assigned to individual records. These assigned records can then be made visible only to the specific user.
This can be useful in various situations, such as task management. For instance, supervisors can assign tasks to employees, ensuring that each employee only sees and acts upon their assigned tasks.
Users can also be assigned to user roles. Those roles can then be used to specify what information and functionality users have access to.
Requirements
To implement this workflow into your app, you must activate users and configure user settings for page logins and user roles.
If this your first time creating an app, you'll need to know some basics about adding tables, fields, pages, and views. You can start by learning from our Builder Basics section of our Knowledge Base.
Other good resources can be found in our About Your Database and Working With Pages articles.
Steps
In this article, we'll walk you through the steps of creating a task management workflow. You'll learn how to create a table to store tasks, define user roles, connect tasks to employees, and create specific pages for staff and employees.
We'll also show you how to customize the interface to make task assignment and completion easier for both staff and employees.
Let's get started!
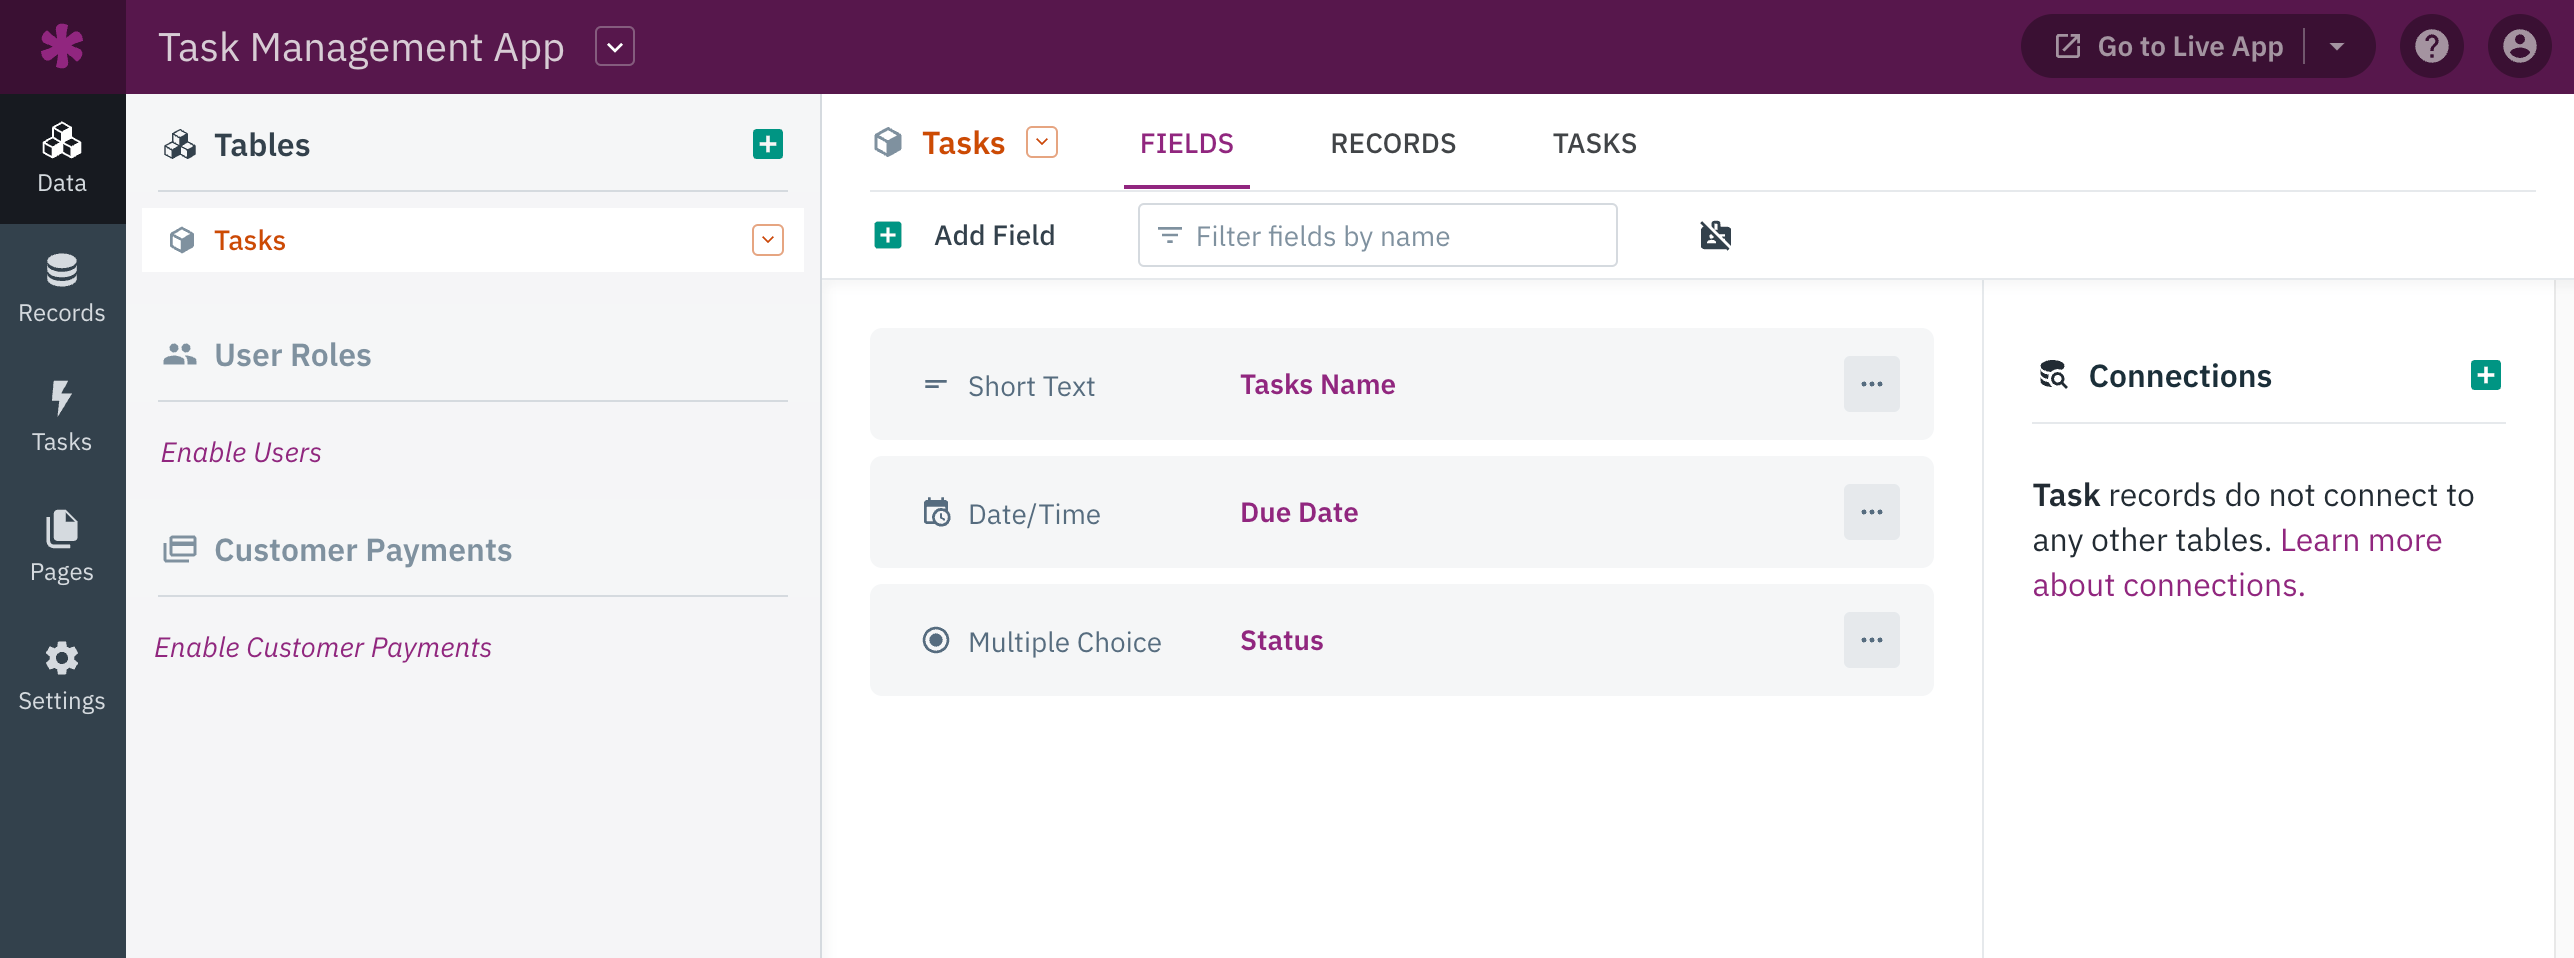
1. Create a Tasks Table
In the Data section of the Builder, we'll create a table to store all of our tasks.
For this example, we'll need the following fields:
- The default "Task Name" field (which is automatically added)
- A Date/Time field named "Due Date"
- A Multiple Choice field named "Status" with the following options:
- In Progress (We'll make this the default option.)
- Completed
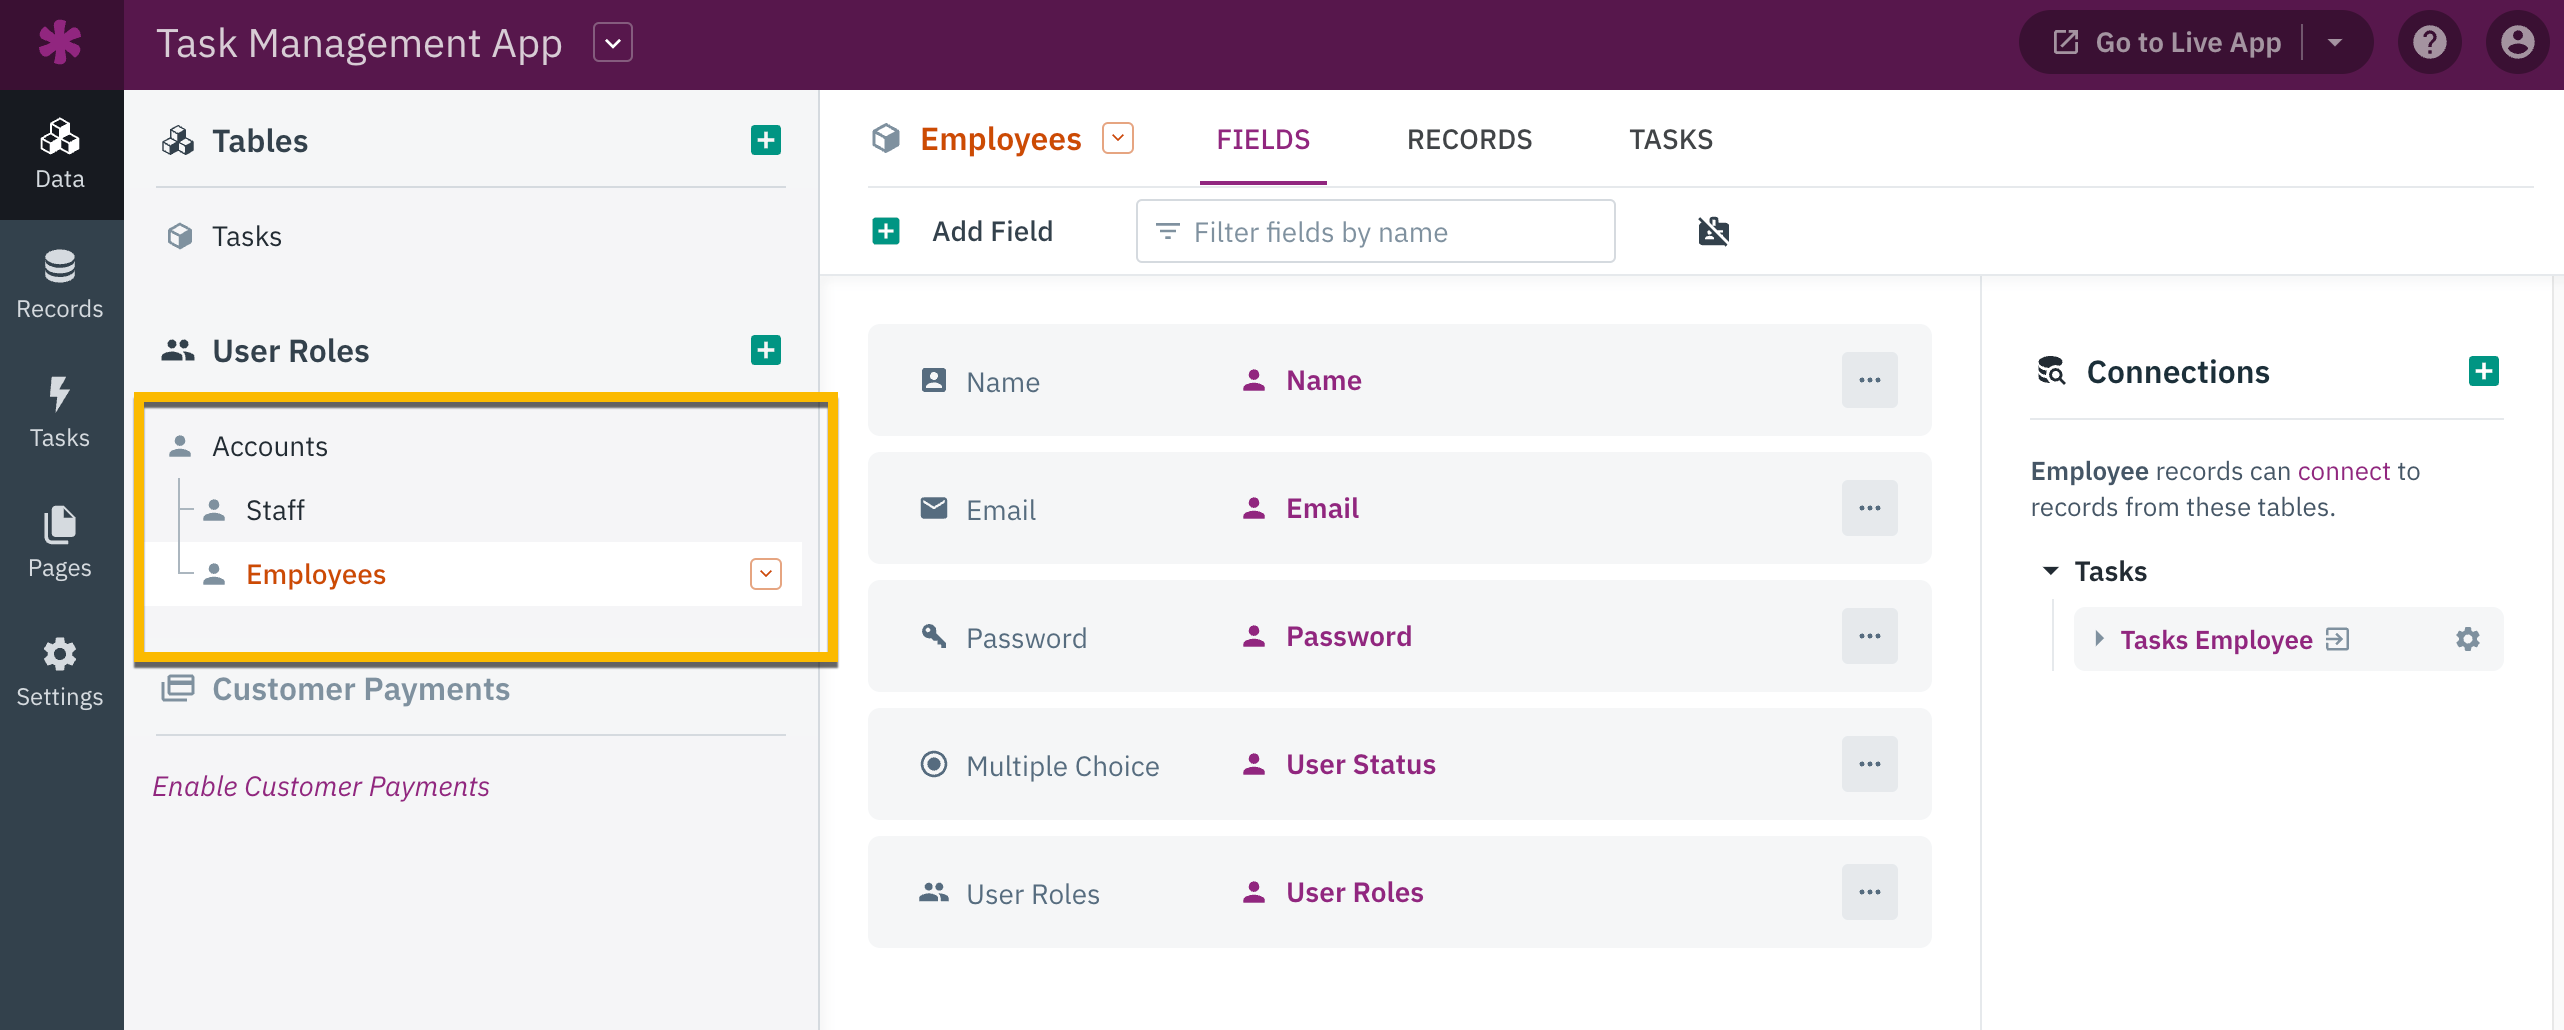
2. Create the User Roles
In the Data section of the Builder, we'll create two user roles:
- Staff
- Employees
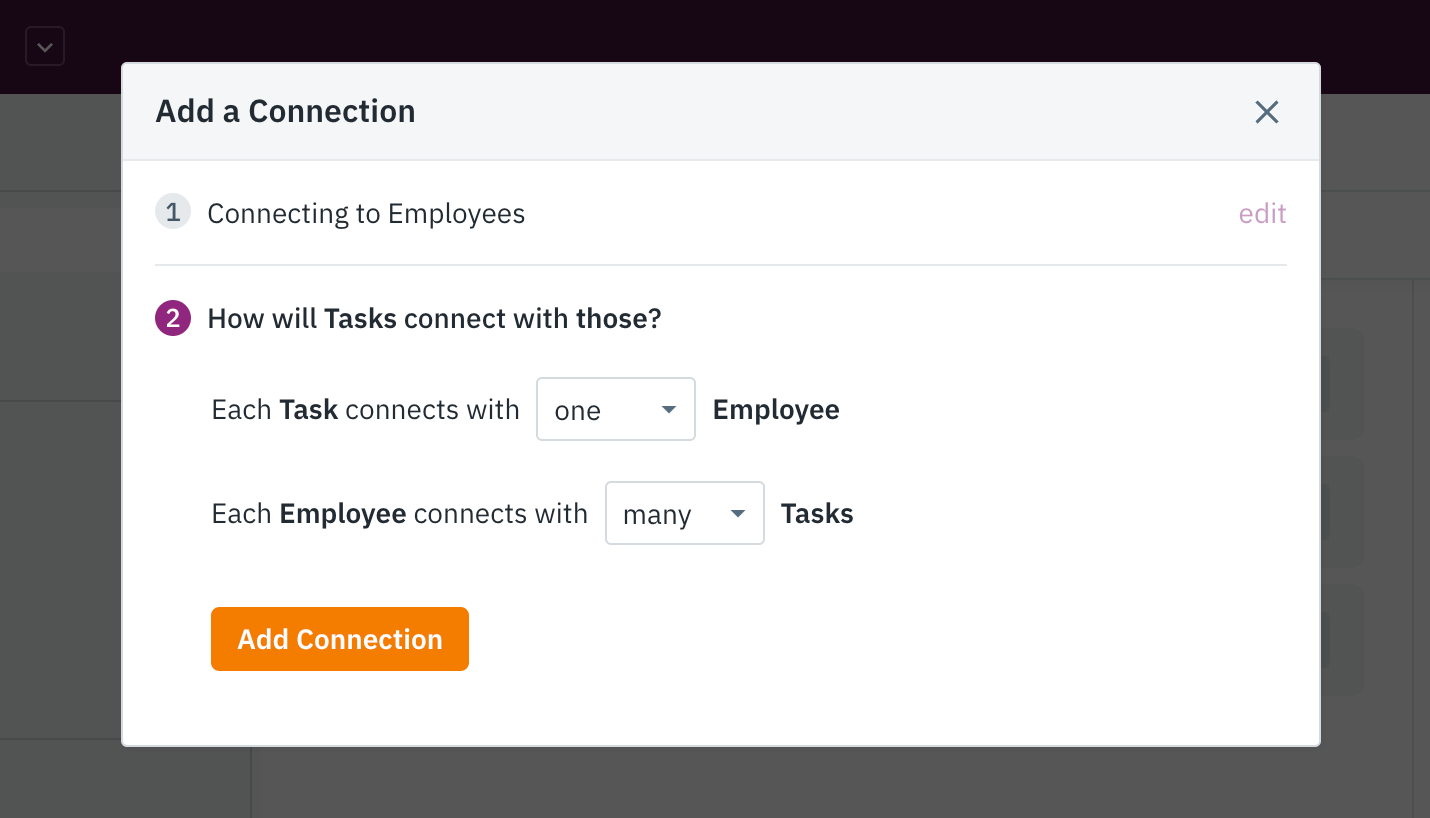
3. Connect Tasks to Employees
Next, we'll select our Tasks table and add a connection to the Employees user role:
- A one-to-many connection field to the Employees table named "Employee"
- This connection field will enable us to assign each task to one employee and assign multiple tasks to each employee as well.
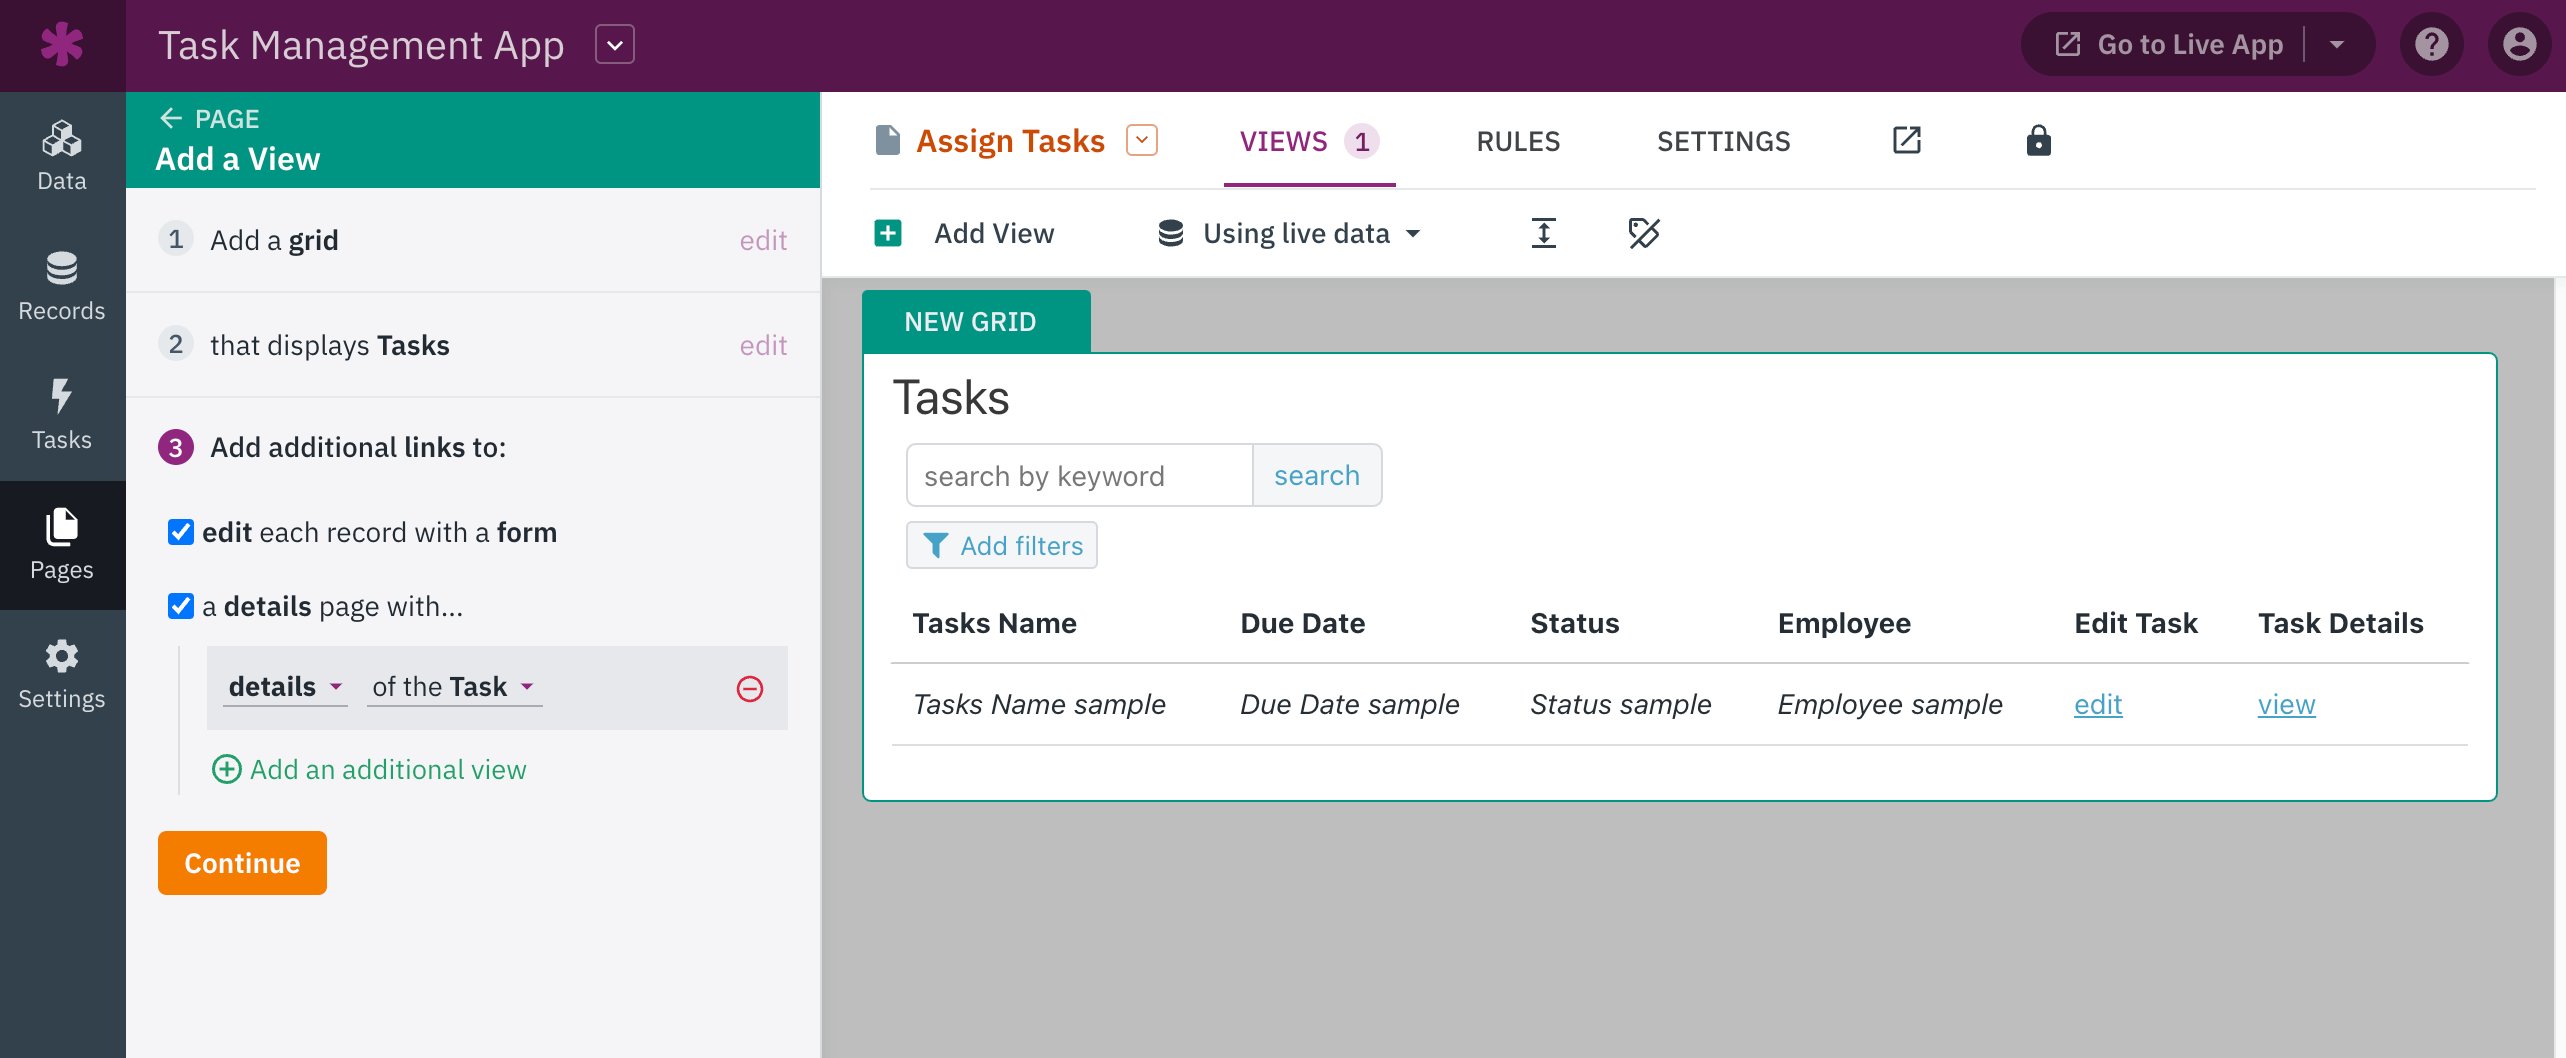
4. Create a Staff Page
In the Builder's Pages section, the next step is to create a new page with restricted access for Staff users only. Then, we'll add a Grid view for the Tasks table's records with the following:
We'll name this page "Assign Tasks":
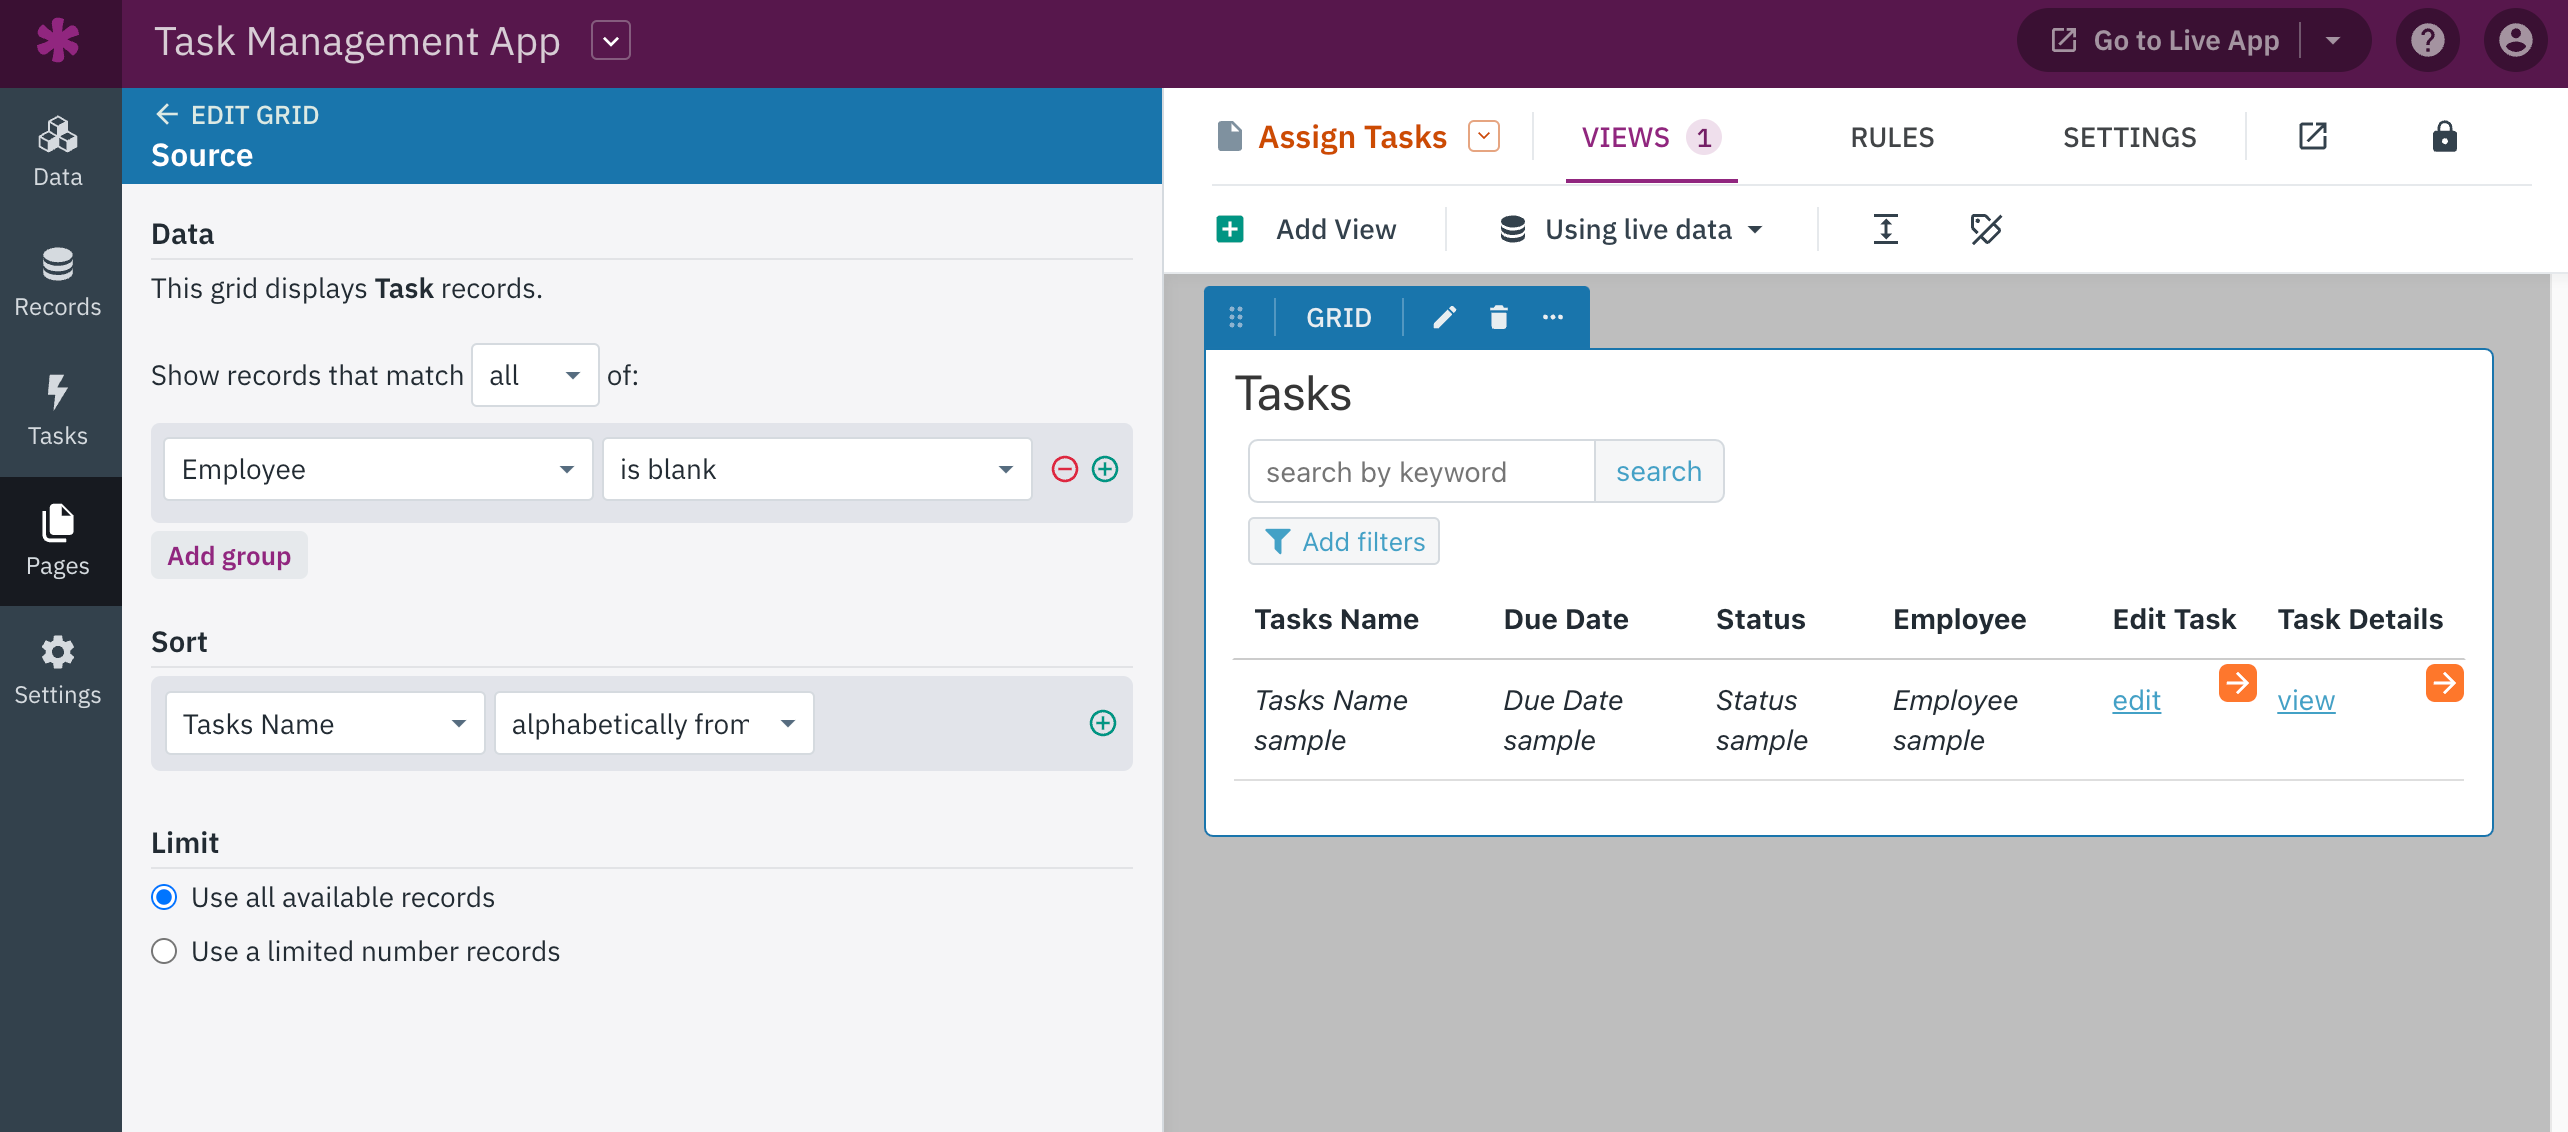
5. Display Only Unassigned Tasks
In order to make it easy for Staff users to assign tasks, we're going to make some changes to help with that. Since the Assign Tasks page is for assigning tasks, we're going to display only tasks that are unassigned.
- Select the Tasks grid view on your new Staff "Assign Tasks" page to open the view editor.
- Go to the Source section of the grid settings.
- Add a rule for only displaying tasks that don't have an Employee connected (assigned):
- Filter: "Employee" is blank
6. Rename Edit Tasks Link
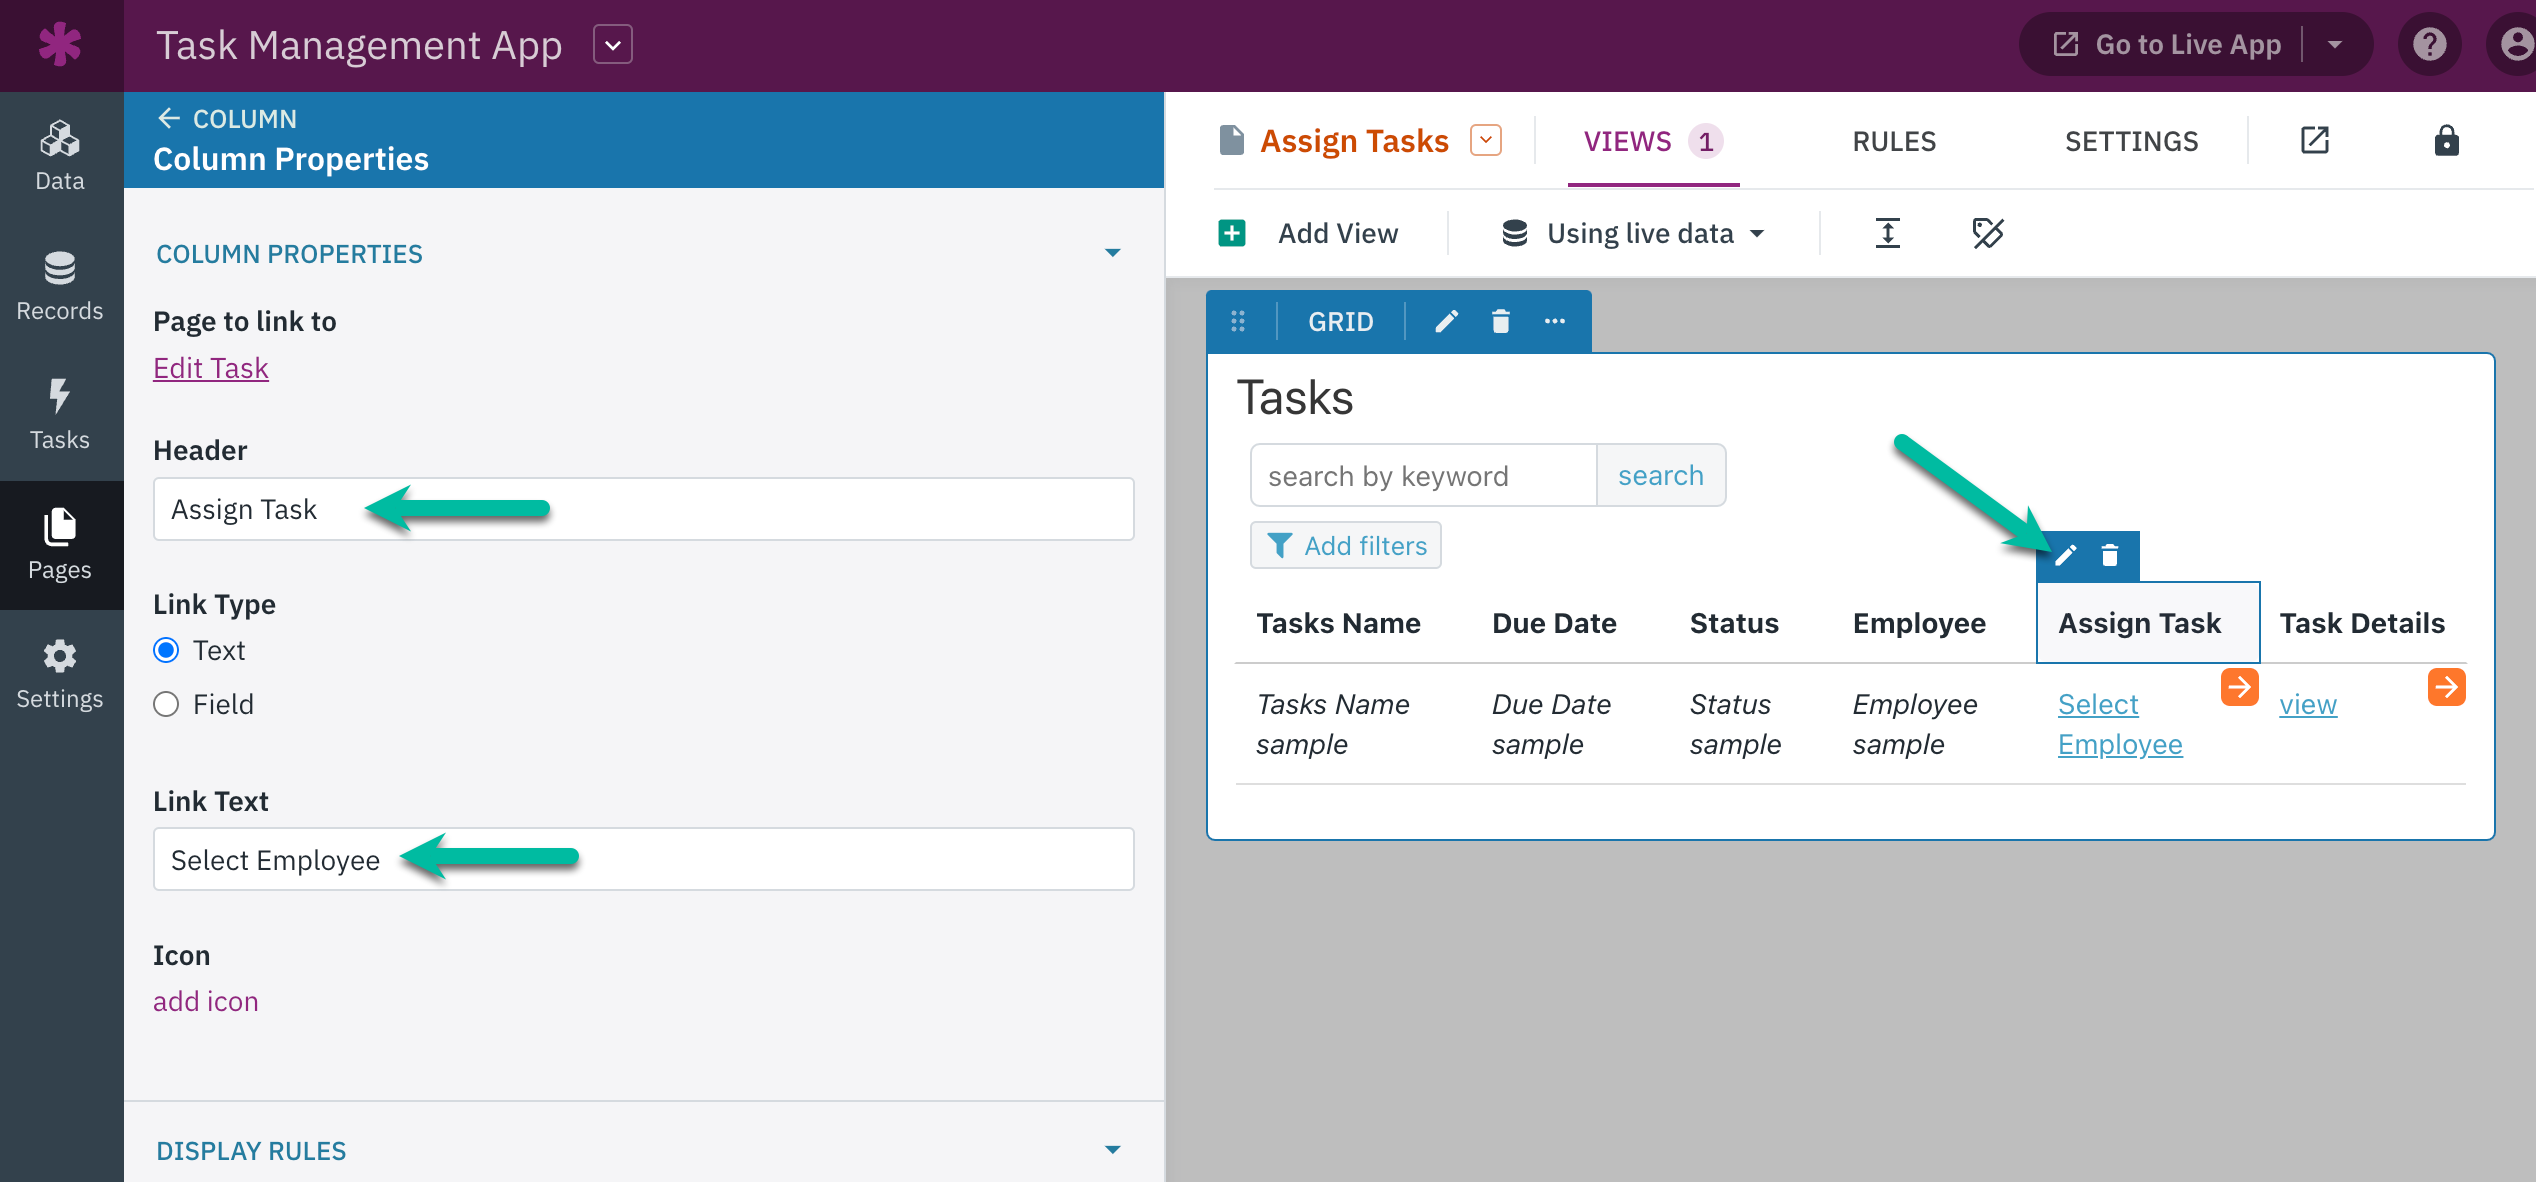
On the Assign Tasks page, our Tasks grid currently has a column called "Edit Task" with a link to the form for editing the task. We want to make it clear where Staff users need to click to assign a task.
To make it clear for Staff users, we're going to rename the Edit Tasks column:
- Select the Tasks grid view to edit it.
- Hover over the Edit Task column and click the pen icon to edit the column and view the column properties.
- Rename the Column Header to "Assign Task" and the Link Text to "Select Employee":
7. Prepare Form to Assign Tasks
The form on the Edit Task page currently includes all fields in the Tasks table. However, we only want Staff to assign employees to a task in that form so we're going to update the form and remove all fields that are not needed.
- On the Edit Task page, select the form view to edit it.
- Change the title of the form to "Assign Task" from the Settings section.
- Remove all fields except the Employee field input by hovering over the field inputs and clicking the trashcan icon:

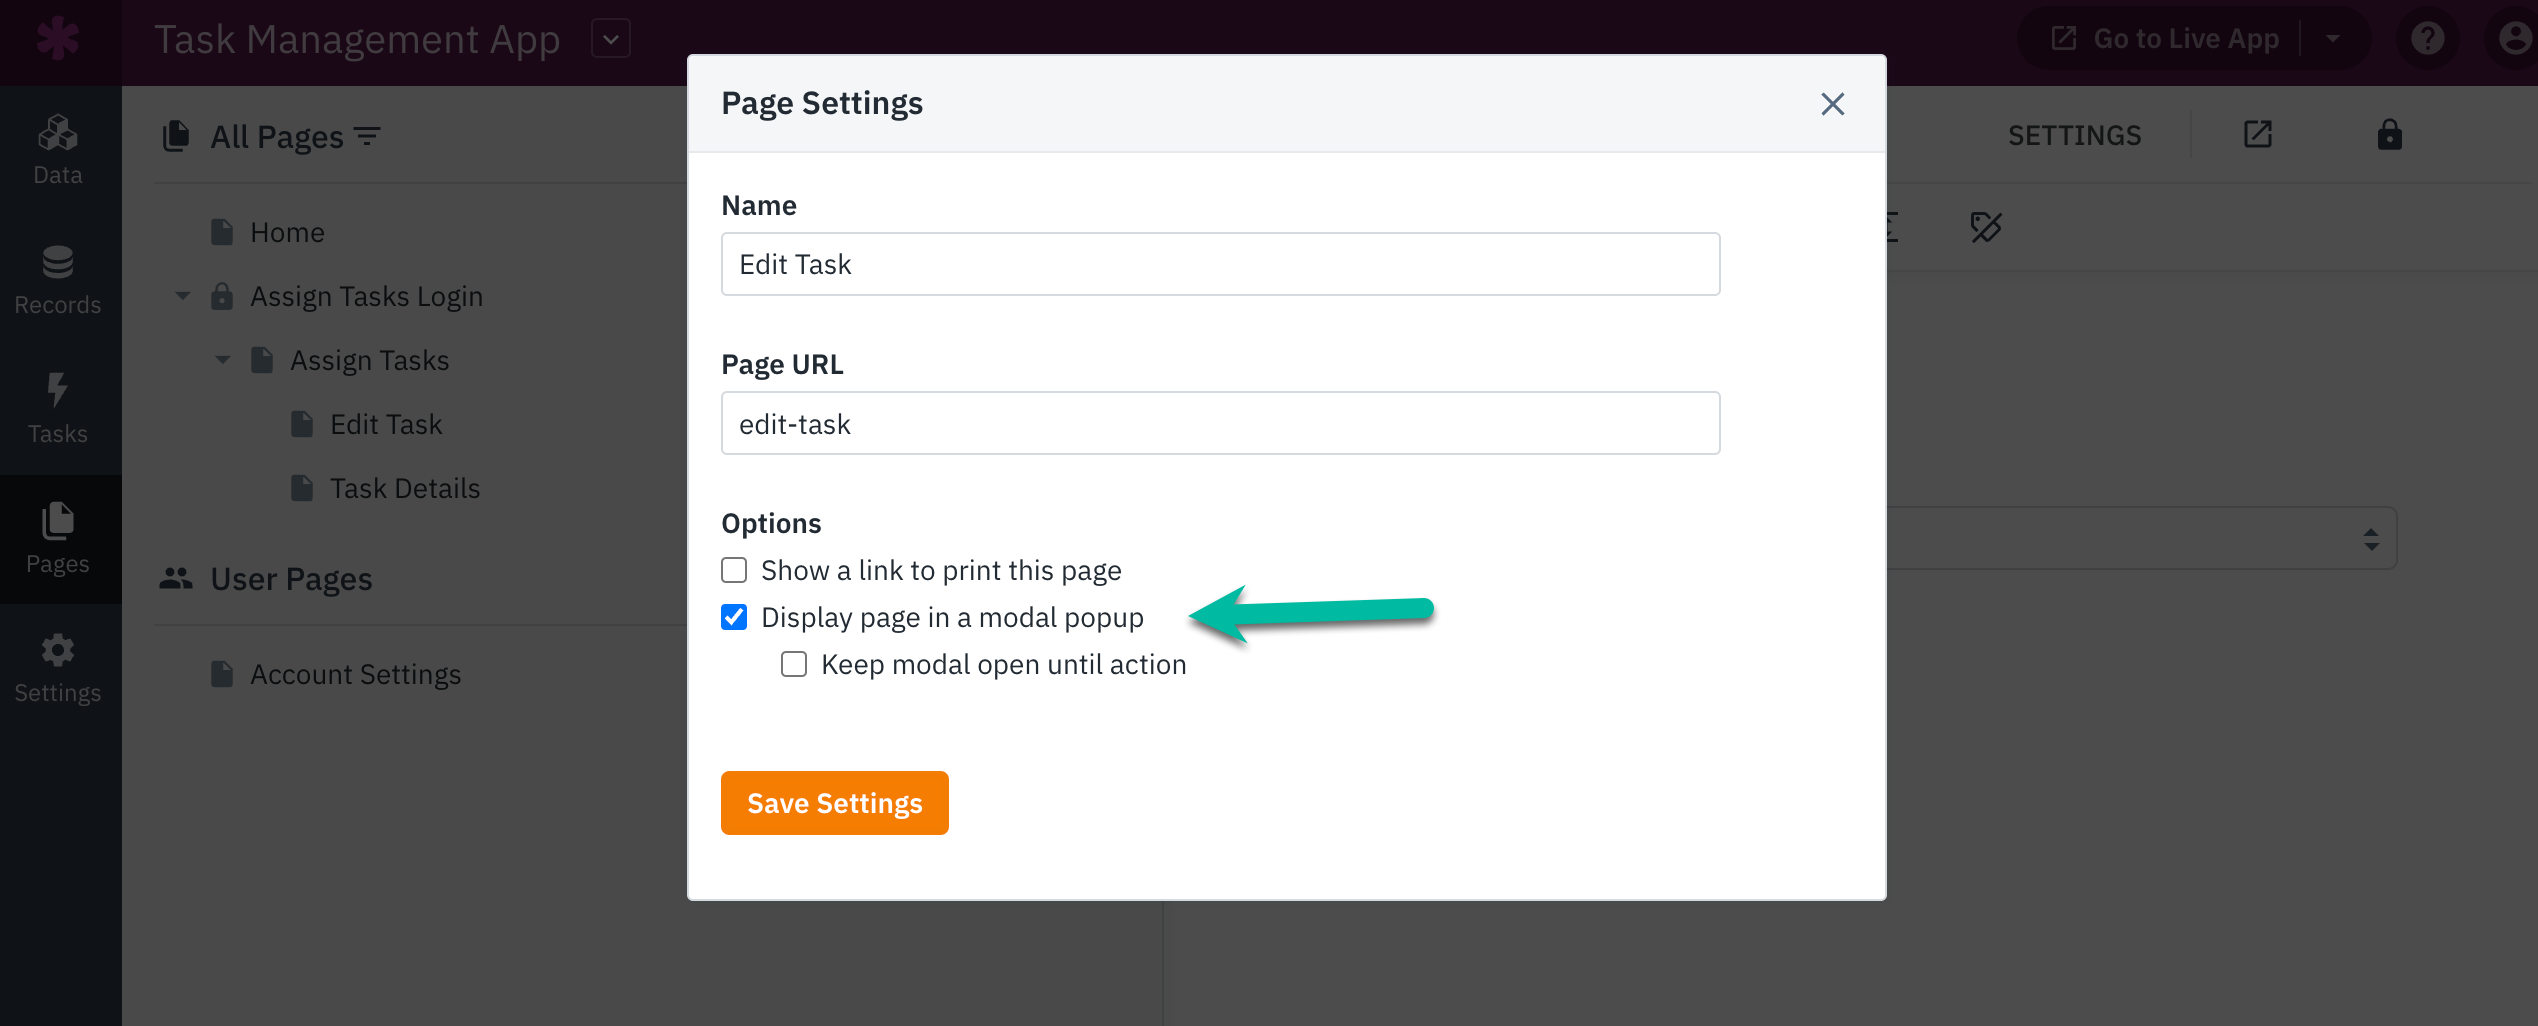
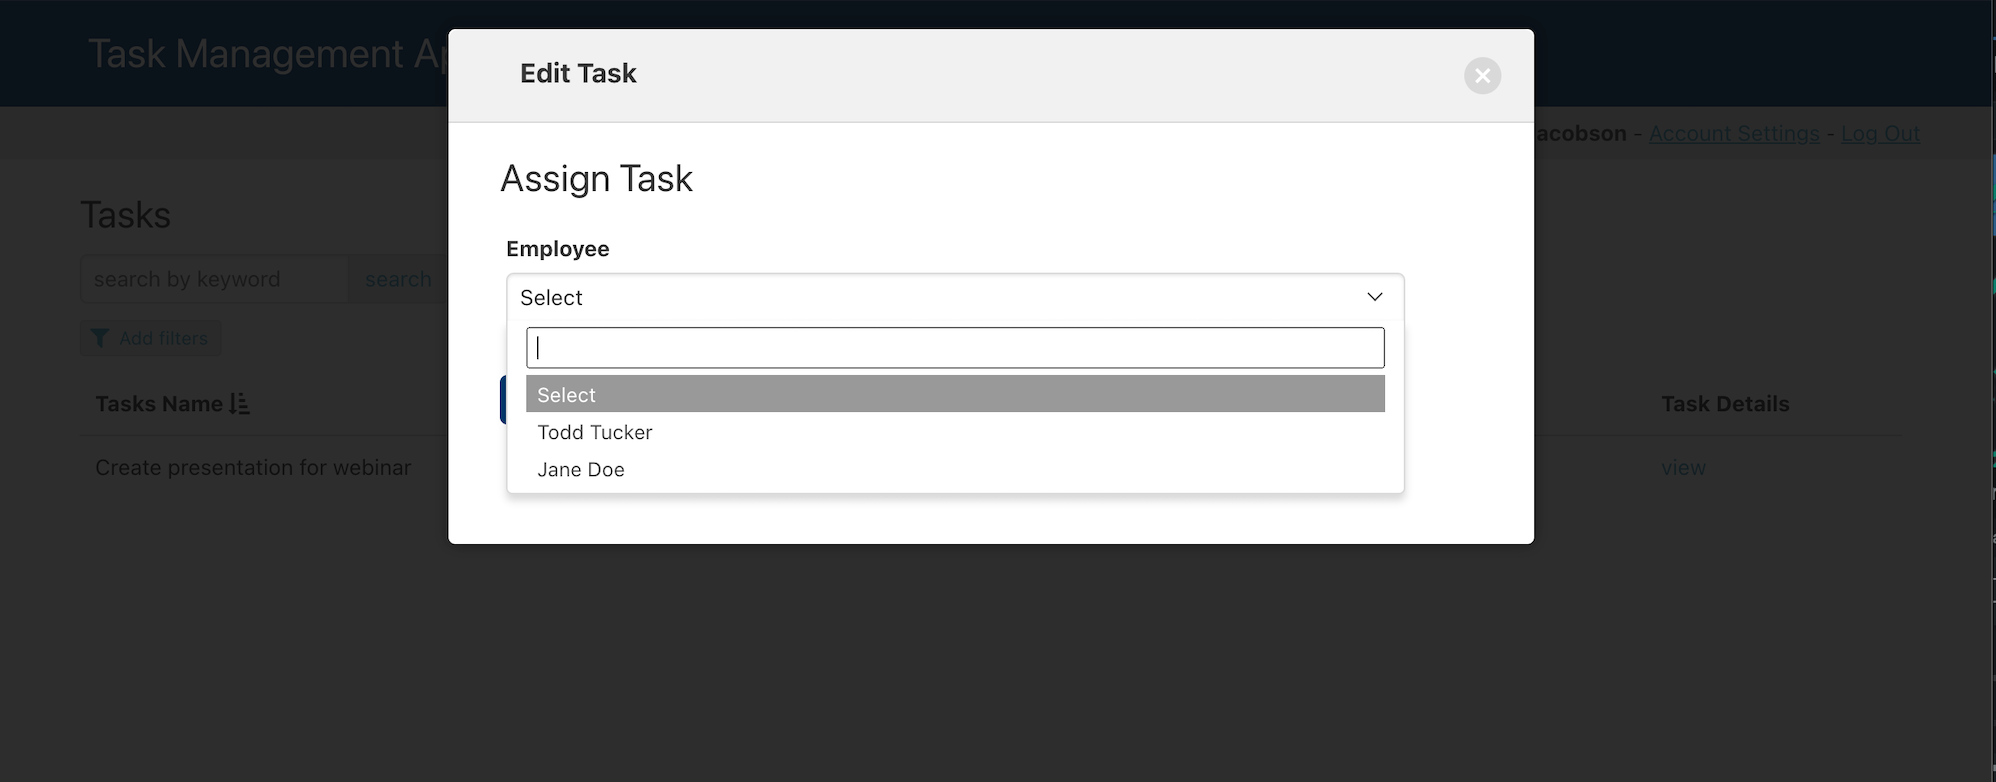
8. Make Form Appear in Modal Pop Up
To access the form for assigning a task, users are currently redirected to the Edit Task page with the form. This redirection may cause inefficiencies when users need to assign multiple tasks, as they have to navigate back and forth between pages.
Instead, we can have the form appear in a modal pop-up on the Assign Tasks page.
- On the Edit Task page, we'll go to the page's Settings via the down arrow icon next to the page's name.
- Then, we'll check the box next to "Display page in a modal popup":
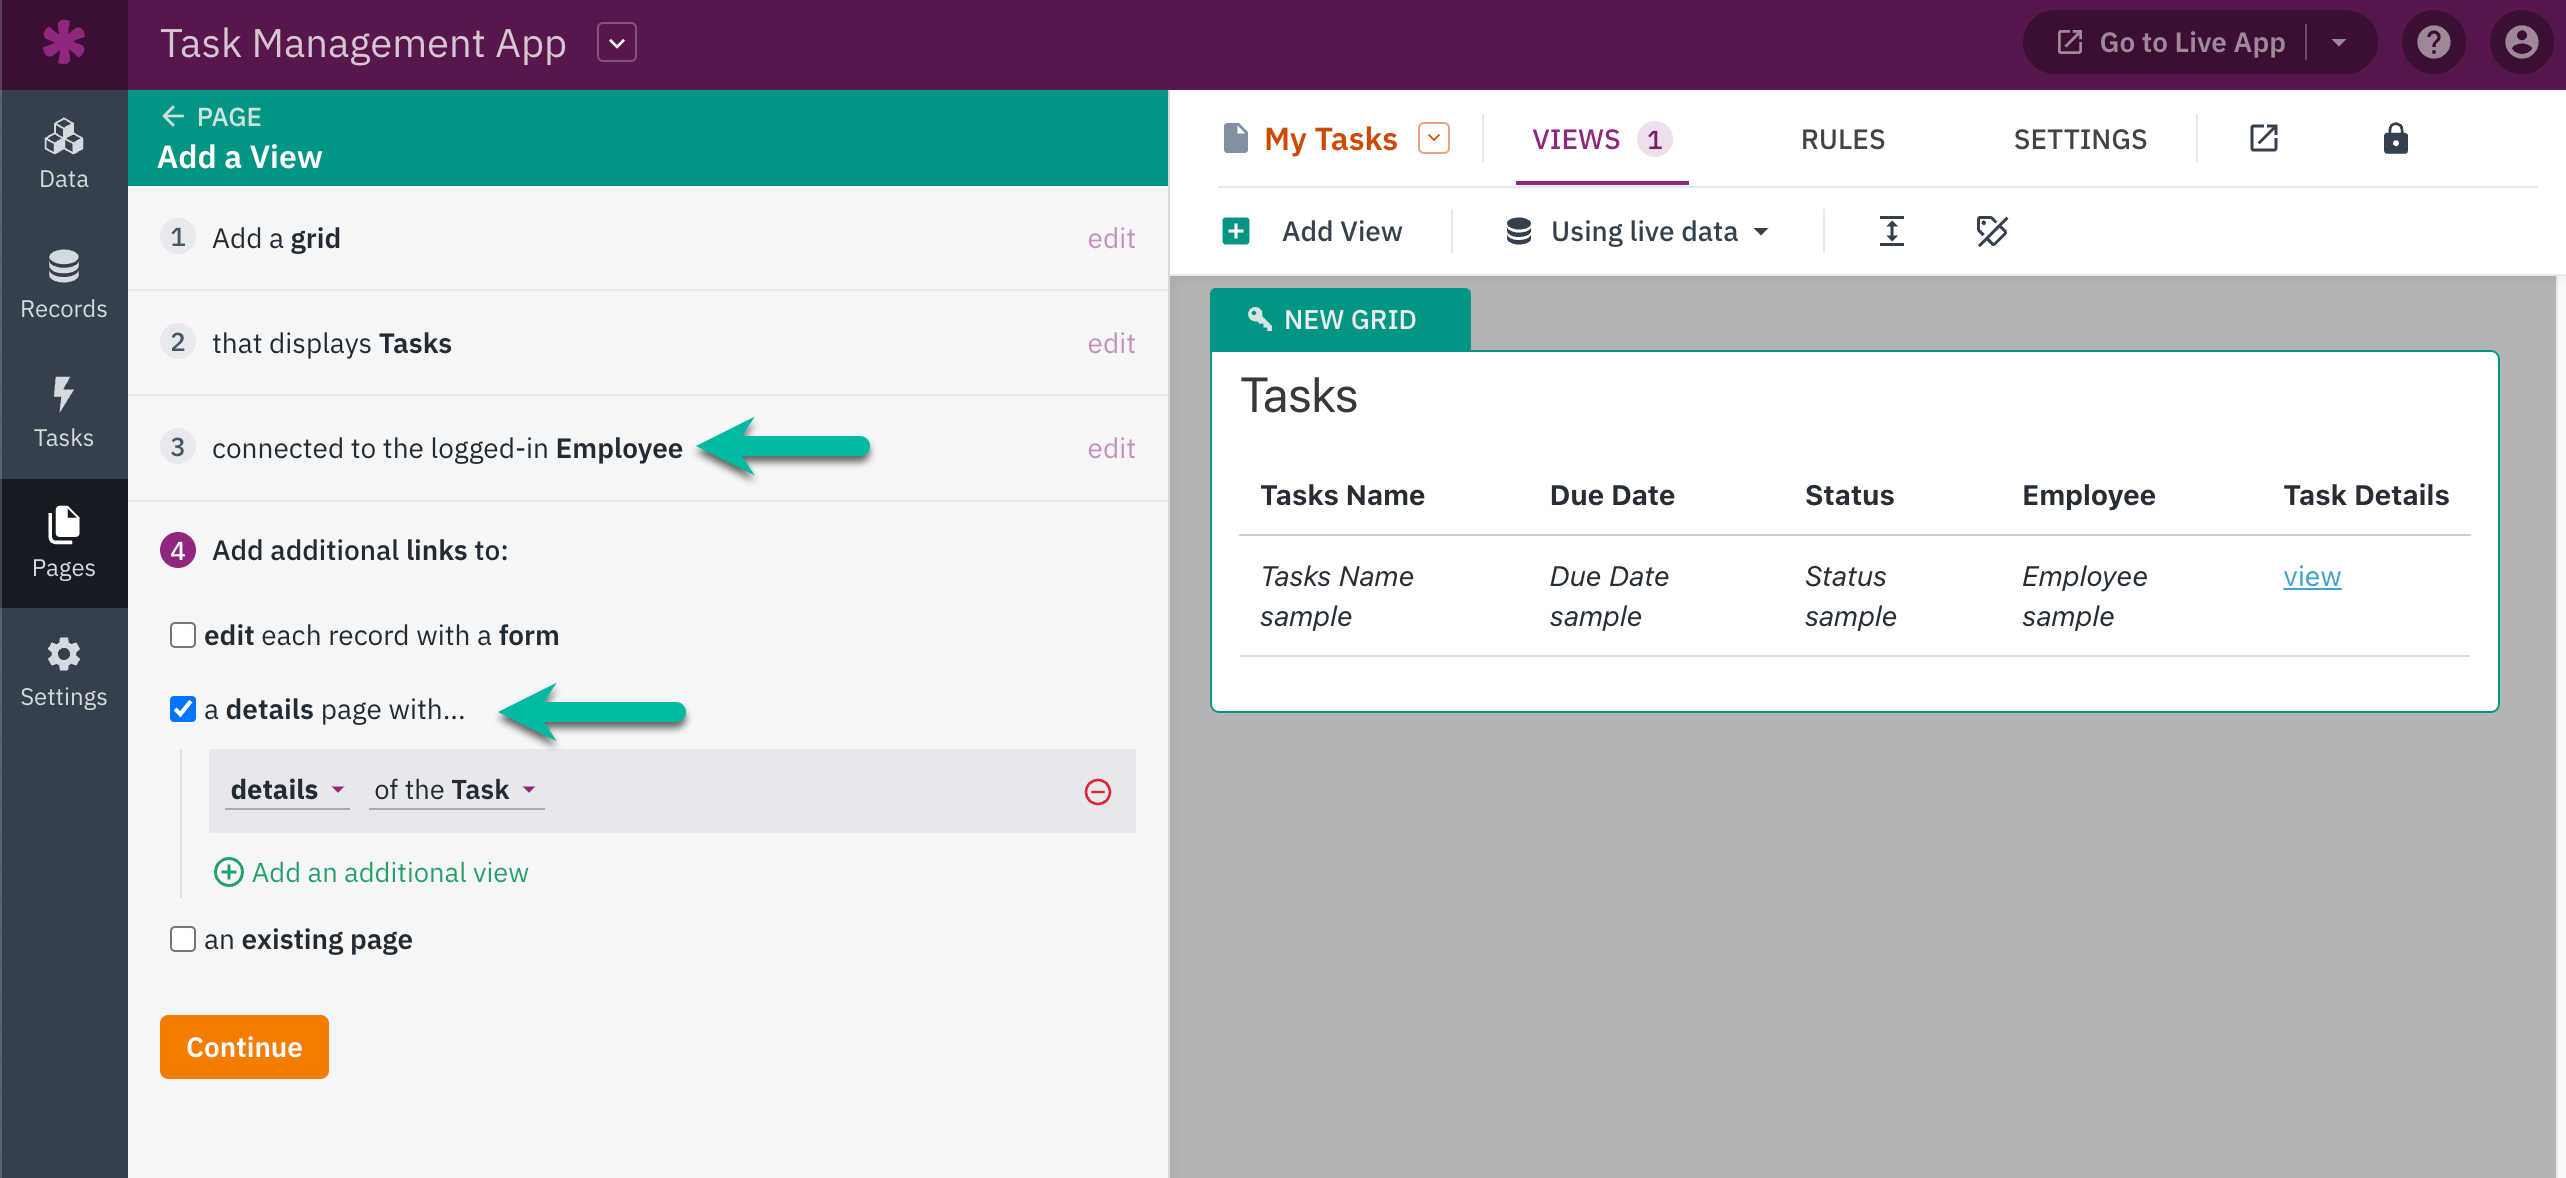
9. Create an Employees Page
In the Pages section of the Builder, we'll create a new Employees page. On this page, we'll require a login and restrict access to the Employee user role. Then, we'll need to add a grid view with the data source of Tasks connected to the logged-in Employee.
We'll name the page "My Tasks":
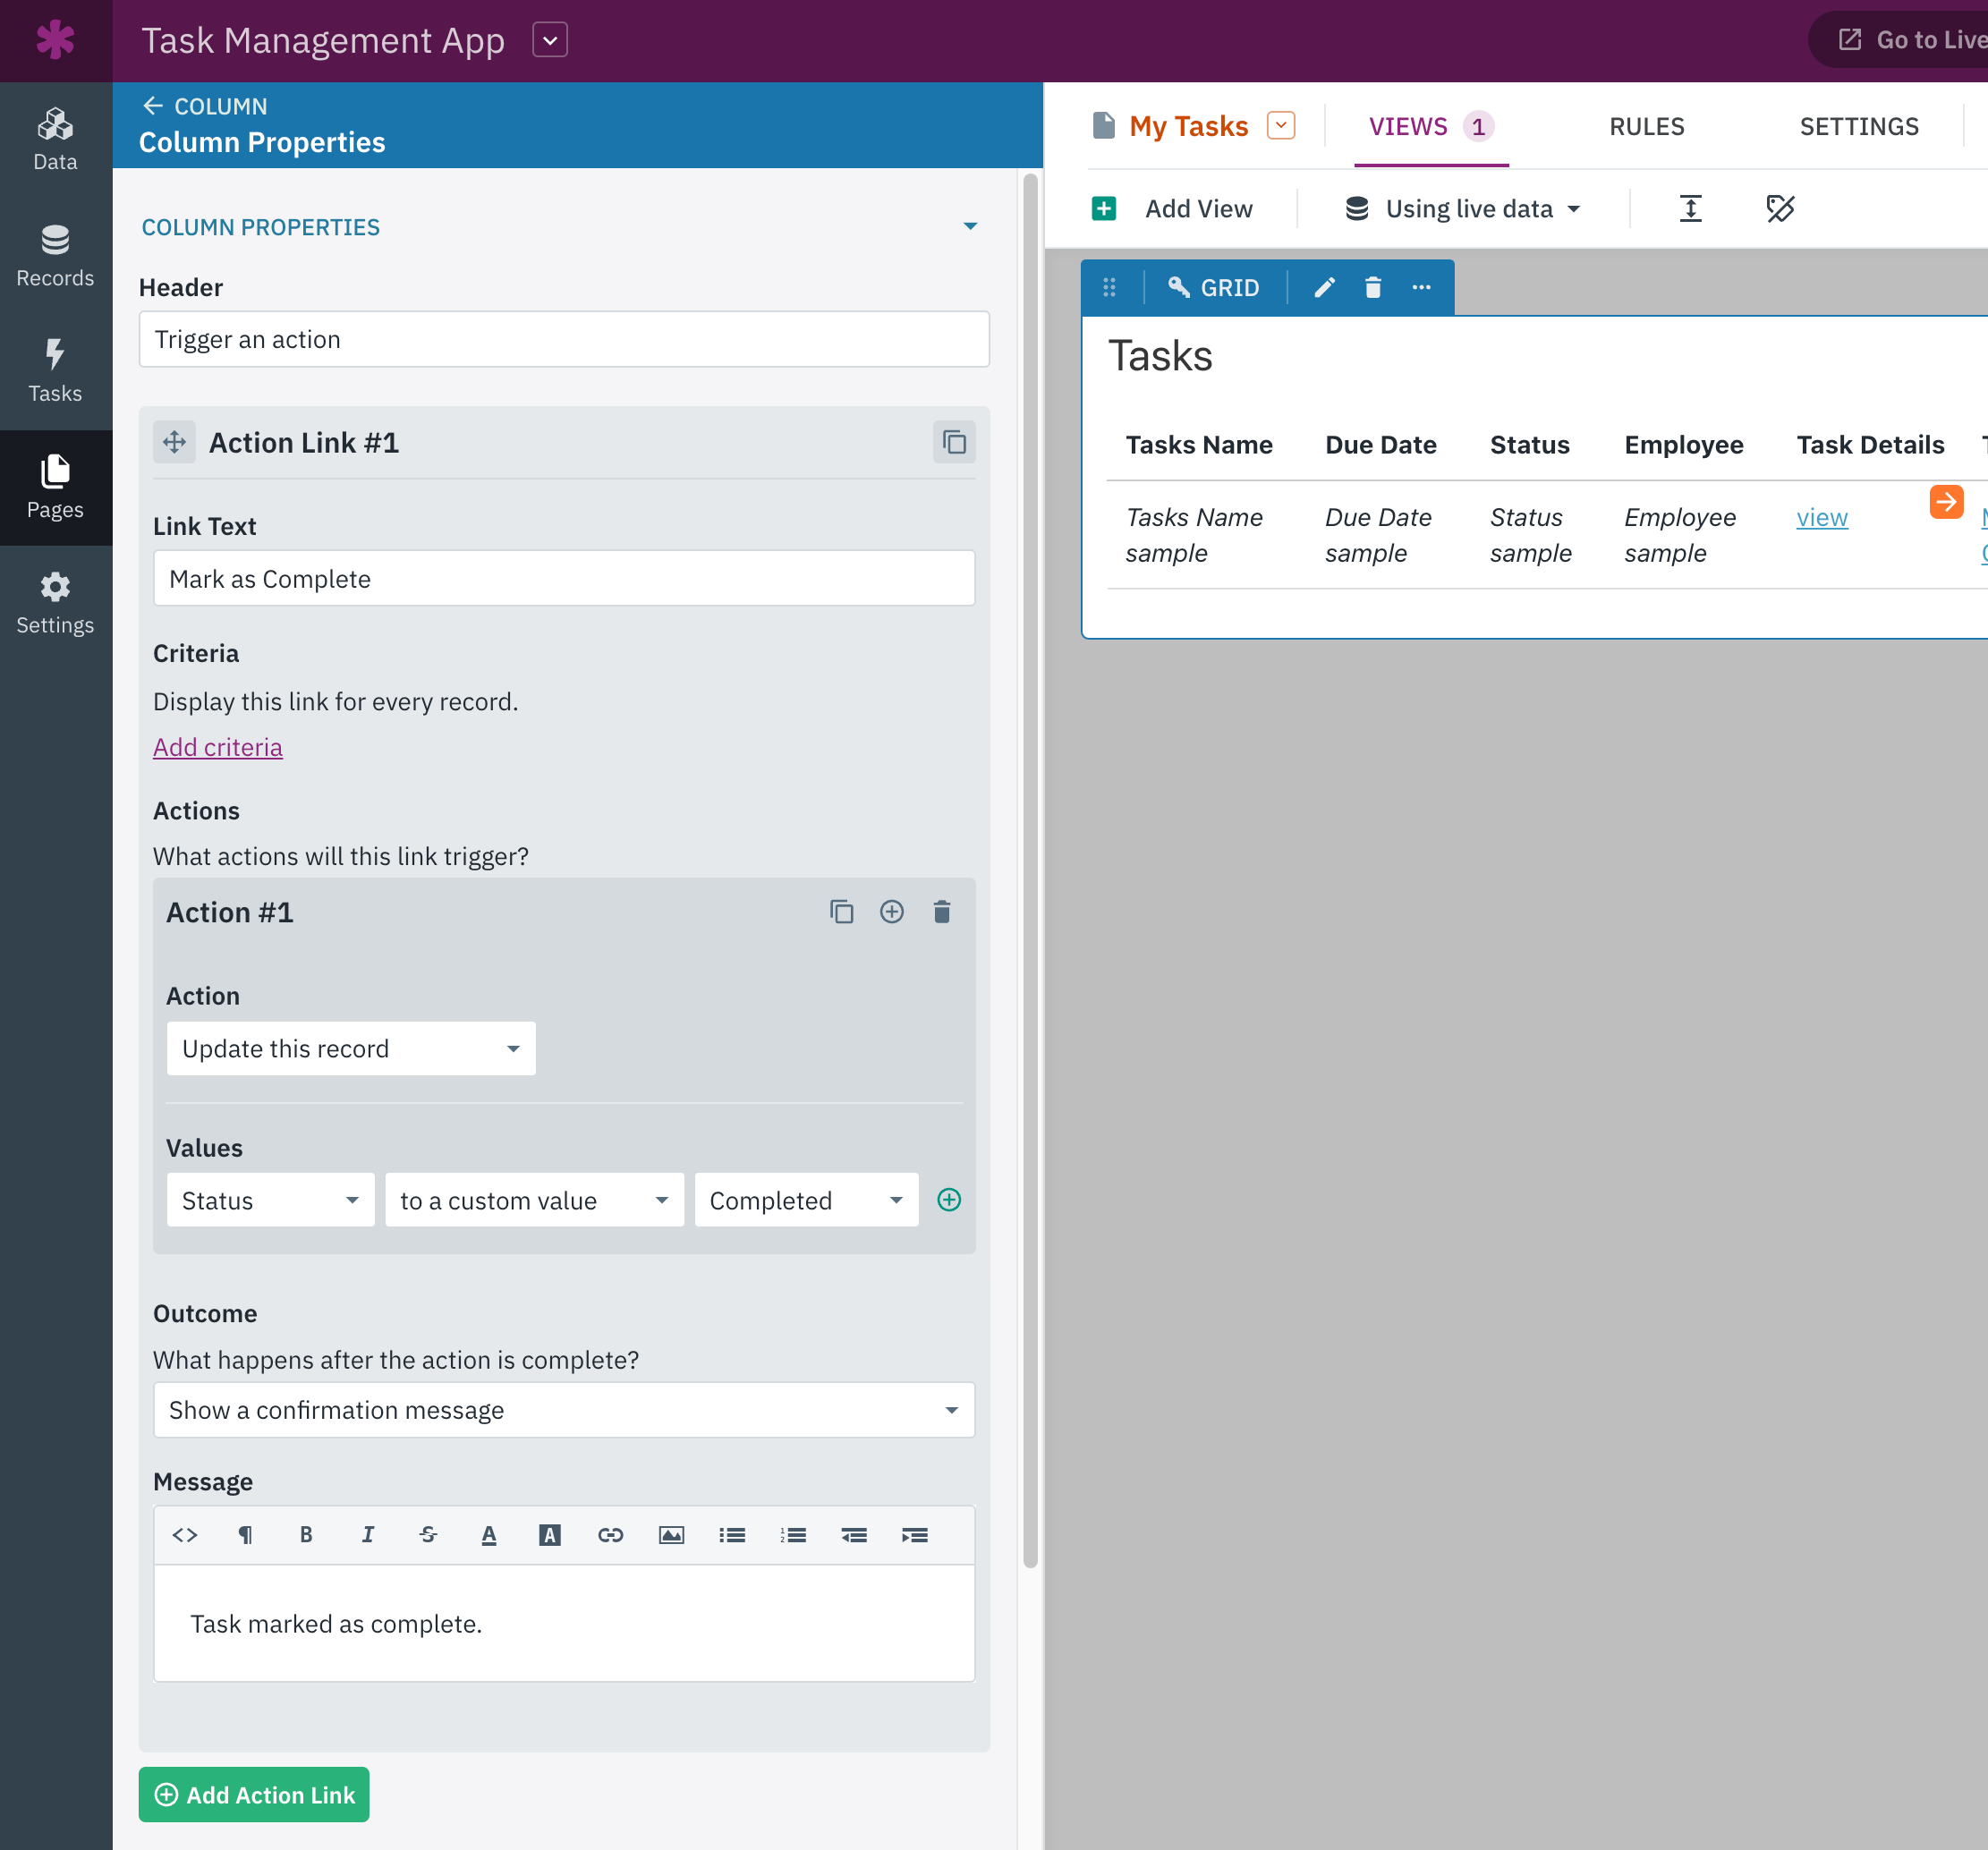
10. Add Action Link to Mark Tasks as Complete
Next, we will implement some enhancements to simplify the process of marking tasks as complete for Employee users.
On the My Tasks page, we'll add a new action link to the Tasks grid. We want to use this action link to allow Employees to mark a task as complete.
- Select the Tasks grid view and go into the view editor.
- In the Add Columns section of the grid settings, select "Actions".
- Add a link to "Trigger an action".
- Set up the action link with the following settings:
- Link Text: Mark as Complete
- Criteria: Display this link for every record (default)
- Action: Update this record
- Values: Status - to a custom value - Completed
- Outcome: Show a confirmation message: "Task marked complete"
Your Results
Here's an example of how your Live App will appear after Task records and Account records have been added in the Data section of the Builder:
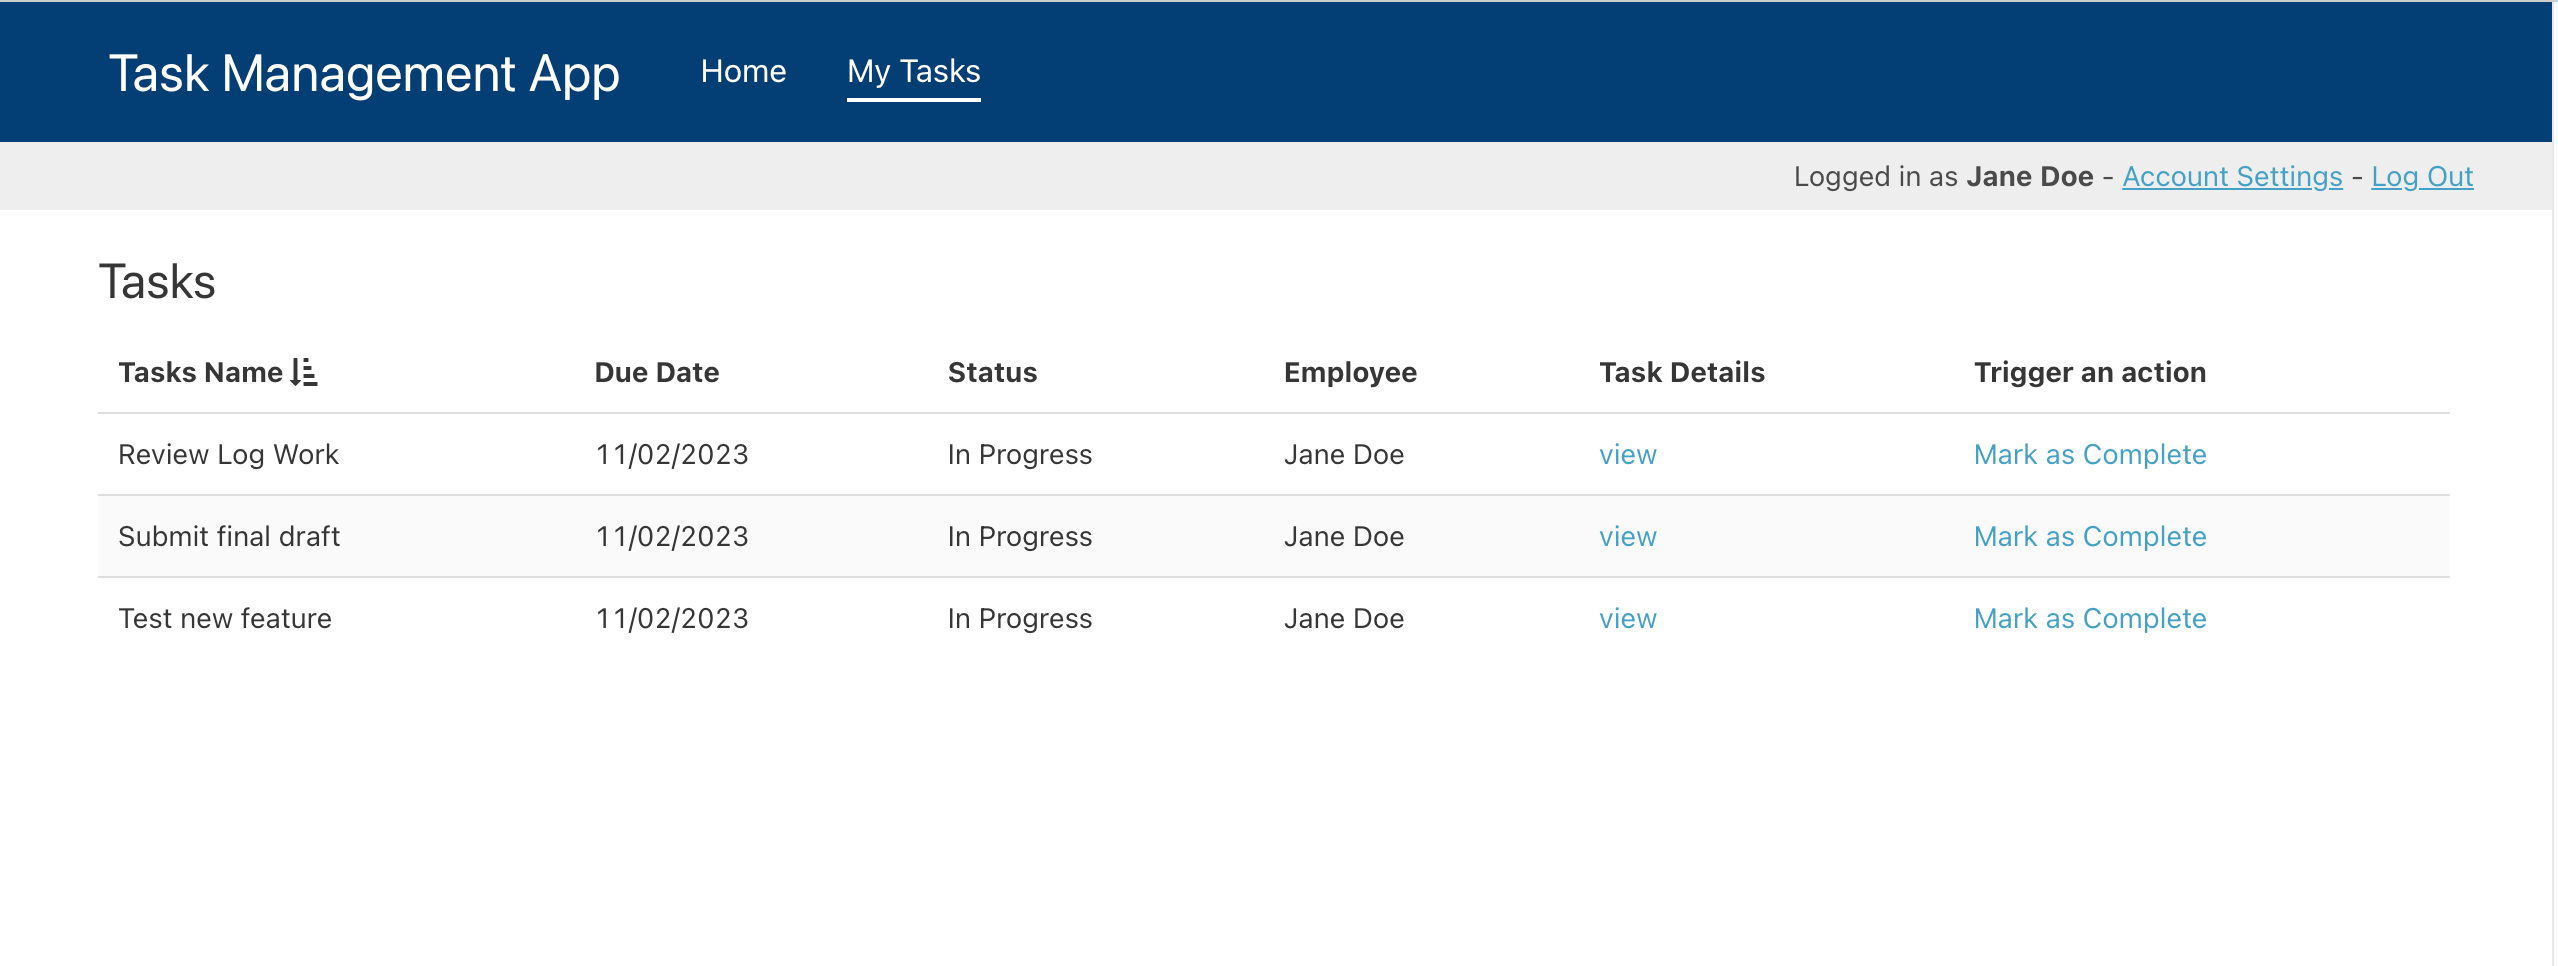
And that concludes the setup process for this workflow example!
Tip: To design and customize the look and feel of your Live App, you can learn more here in our Live App Design article.