This article covers the following topics:
Use Case
You can add notifications and reminders to your application to automatically keep users informed of any updates. Customized emails can be sent at various stages of the workflow process.
A common example is sending a customer an email notification to let them know they need to pay an invoice.
Requirements
For the reminder emails set up in this guide, you will need access to scheduled tasks. They are available for users on the Pro plan and above. You will not have access to scheduled tasks while on a trial.
If this is your first time creating an app, you will need to know some basics about adding tables, fields, pages, and views. You may also want to check out About Your Database and Working With Pages for additional information.
Steps
In this example, we will be creating an email notification for customers with new invoices and an email reminder for customers with overdue invoices.
1. Create a "Customers" Table
After activating users in your app, in the Data section of the Builder, create a user role table to store your customers.
For this example, you'll need the following fields:
-
The default "Name" person field (automatically added)
-
An email field named "Email" (automatically added)
/Add%20Notification%20and%20Reminder%20Emails%20to%20Your%20App/notifcations1.gif?hsLang=en)
2. Create an "Invoices" Table
Next, we'll create a table to store your invoice records.
For this example, we'll need to add the following fields:
-
An auto-increment field named "Invoice #"
-
A date/time field named "Invoice Date"
-
A currency field named "Amount"
-
A multiple-choice field named "Status" with the following options:
-
Unpaid (Make this the default option.)
-
Paid
-
-
An equation field named "Days Unpaid" with the following equation and settings:
-
Equation Type: Date
-
Date Type: days
-
Result Type: Number
-
Equation Editor:
currentTime() - {Invoice Date} -
Rounding: Round Down
-
-
A one-to-many connection field to the Customers table called "Customer"
-
The connection will allow you to link each Invoice to one Customer and to link each Customer to multiple Invoices.
-
/Add%20Notification%20and%20Reminder%20Emails%20to%20Your%20App/notifications2.png?hsLang=en)
3. Create an "Invoices" Page
In the Pages section of the Builder, we'll create a new page and name it "Invoices".
Then, we'll create the following views on the page:
-
A menu linked to a page with a form to add new invoice records
-
A grid to display the Invoices table's records
/Add%20Notification%20and%20Reminder%20Emails%20to%20Your%20App/notifications3.png?hsLang=en)
Note: The example used in this article is following a similar build as the Customer Payment Portal template app. Feel free to utilize the template app to follow along with these steps.
4. Create an Email Notification for New Invoices
Now that we have a form for creating new invoices, we can set up the form to send invoice notifications to customers through the form's Emails section.
-
Head over to the "Add Invoice" page with the form view.
-
Select the "Add Invoice" form view to edit it.
-
Select "Emails" from the menu.
-
Select the "Add Rule" button.
-
Then, set up your email notification using the following settings:
-
Action: Send a custom email
-
When: Every form submission (the default)
-
Email to send:
-
From: Specify the name you wish to display as the sender of the email
-
Email: Email address you would like to have your emails sent from
-
Recipients: To: > email field > "Customers (Customer) > Email"
-
Subject: Input the custom subject line you want the customer to see
-
-
Message: Input the custom message you want the customer to receive. You'll be able to include fields from the Invoice table in your message.
-
/Add%20Notification%20and%20Reminder%20Emails%20to%20Your%20App/notificaitons4.png?width=688&height=725&name=notificaitons4.png)
Tip: For more details on setting up a form email rule, check out the Sending Emails article.
5. Create a Task for Unpaid Invoice Reminders
You can also send unpaid invoice reminders to customers using a scheduled task. In this example, we'll be sending the reminder a week after the invoice is sent.
-
Head over to the Tasks section of the Builder and select the Invoices table.
-
Select the "Add a Task" button.
-
On the Tasks tab, use the following settings:
-
-
Task Name: "Unpaid Invoice Reminder"
-
Schedule: Daily
-
Next Run Date: Select tomorrow's date and the time when you want the email to be sent.
-
Status: On - this task is running
-
Note: If you want a chance to test the email before sending them out, then you can set the Status to "Off - this task is paused". To test them, you can select the "Run" tab in the task, and then select "Run this task" to do a one time manual run.
/Add%20Notification%20and%20Reminder%20Emails%20to%20Your%20App/notifications6.png?hsLang=en)
-
On the Action tab, use the following settings:
-
Action: Send a custom email
-
When:
-
Days Unpaid is 7
-
Status is Unpaid
-
-
-
Send: To: > email field > "Customers (Customer) > Email"
-
Subject: Input the custom subject line you want the customer to see.
-
Message: Input the custom message you want the customer to receive. You can include fields from the Invoice table in your message.
/Add%20Notification%20and%20Reminder%20Emails%20to%20Your%20App/notifications5.png?hsLang=en)
Tip: For more details on setting up a scheduled task email, check out the Sending Emails article.
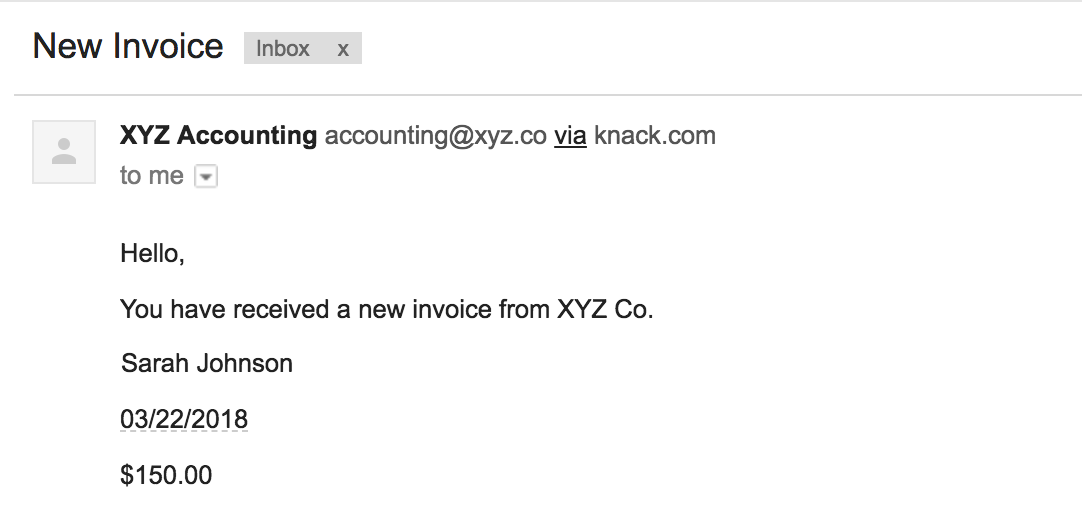
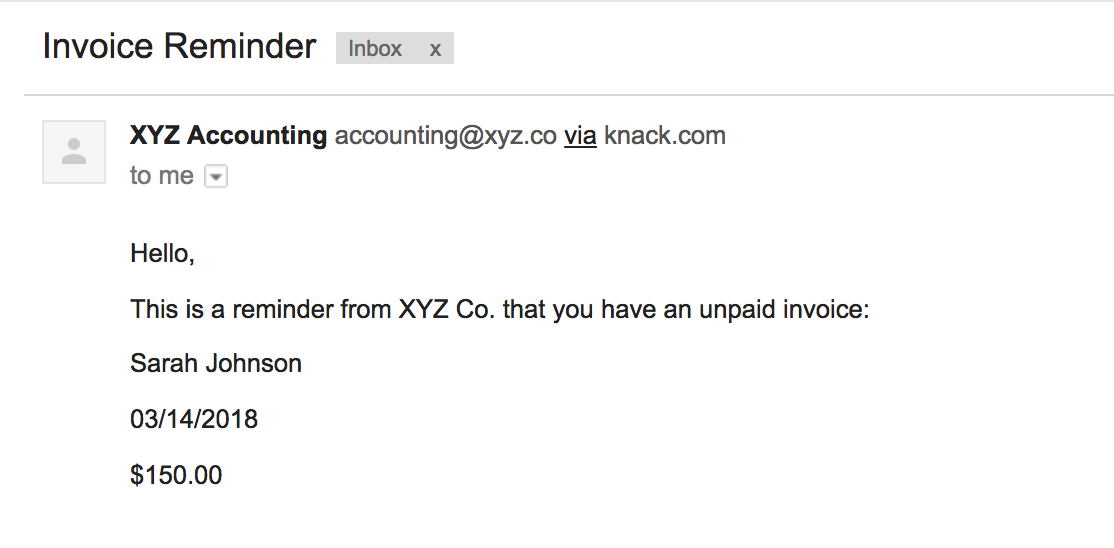
Your Results 🚀
And that's it! Here's how the email notifications and reminders you send will look like:
New Invoice Notification:
Unpaid Invoice Reminder:
Extend This Workflow
-
Include a link in the email that lets customers pay for their invoices.
-
Use page rules to provide reminders for logged-in users
-
Use scheduled tasks to automatically send new invoices at the beginning of a new month