About Payment Method Views
This article provides an overview of Knack's payment method view type for E-commerce.
This article covers the following topics:
What are payment method views?
Knack's payment method view is a type of E-commerce view. While payment views allow you to accept a payment from someone, payment method views allow you to store, update, or remove a specific user’s payment method.
The payment method can then be used to facilitate future payments, whether it’s the user paying themselves or an account administrator charging the user on their behalf.
Note: Payment method views synchronize the payment information with your Stripe payment processor, ensuring that the credit card details remain secure and inaccessible within Knack.
Managing Payment Method Views
Adding Payment Method Views
Note: First, you must enable E-commerce features for your app. You can learn how to enable E-commerce here.
Payment method views can be added in two different places:
-
In a login-protected starting page. A starting page is a top-level page within your app.
-
In a child page that has access to a specific user record
To add your first payment method view, locate the "E-Commerce" option in the view menu and select the “Payment Method” view type:
After selecting the view type, then you will be guided through a series of options to customize the payment method view. First, you can select your payment processor and fill out your credentials:
Tip: You can learn more about E-Commerce and Stripe in our article here.
Afterward, you can choose the account/user record to which the payment method should be associated with. This could be the currently logged-in user or someone else for whom you need to update their payment information:
The final step is to review the view’s summary to confirm everything was selected properly, and to select the "Add Payment Method View" button:
Editing Payment Method Views
To access the payment method view settings, click the pen icon when hovering over the payment view. This will open the view settings in the toolbox to the left:
Deleting Payment Method Views
You can delete your payment method view at any time by clicking the trashcan icon when hovering over the payment view:
Note: Deleting a payment method view will not delete any payment information stored in your Stripe account.
Payment Method View Settings
Payment method views have settings similar to payment views and allow you to change the behavior and looks of your view. Now, let's delve into each of these settings and understand their implications.
Settings
The "Settings" section contains basic settings about how the view will behave, for example, the payment action, processors, and the fields and currency being used:
The Change Action button will lead you to a modal pop-up where you can choose the payment processor to be used. It also gives you the option to enable test mode for the payment method view while building your application:
/About%20Payment%20Method%20Views/paymentmethod8.png?width=688&height=221&name=paymentmethod8.png)
After selecting the "Next" button, you will then have the option to select the where the payment method will be saved for which user:
Lastly, you can view the Summary of the changed action selection after selecting the "Next" button again. This will allow you to select "Stage Changes" and save your updated settings:
-
Payment Processors: This section is where you will select the payment processor that your payment method form will use.
-
Test Mode: You have the option to use payment processors in Test Mode. Stripe will store test customers in a specific section, so please remember to disable test mode if you plan to store real customer information.
Note: Since E-commerce is only available on Pro plans and above, Starter plans will always have Test Mode enabled.
-
Currency: In this section, you have the option to select the currency for your form.
-
Submit Payment Button Text: Here, you have the ability to customize the text that appears on the form's submit button.
-
Update Billing Button Text: This is where you can customize the text to guide users on updating their stored card information.
-
Remove Card Button Text: This is where you can customize the text used to guide users in removing their stored card information.
Emails
In the Emails settings section, you can customize the emails that are sent after the payment information has been successfully submitted:
Note: The submitted payment method details are not available to be displayed in an email. To learn more about emailing your users, see our Sending Emails and our Emails & Notifications articles.
Actions
Payment actions work exactly like record actions in a form view. An excellent use case for a payment method action is to update a field in the user's record, allowing you to easily identify who has not yet updated their payment information.
To add a payment action, simply click on the "Add Action" button located in either the "Submit Actions" or "Record Actions" tab. From there, you can set your desired criteria for the action:
Submit Actions
Submit actions allow you to determine where to direct the user after the payment method form is submitted:
Tip: To learn more about submit actions, see our article here.
Record Actions
Record actions allow you to update or insert records after the payment method is successfully submitted:
Tip: To learn more about using record actions, see our article here.
Using Payment Method Views in Your App
Now that you have successfully configured your payment method view, let's explore how it functions:
Storing Payment Methods
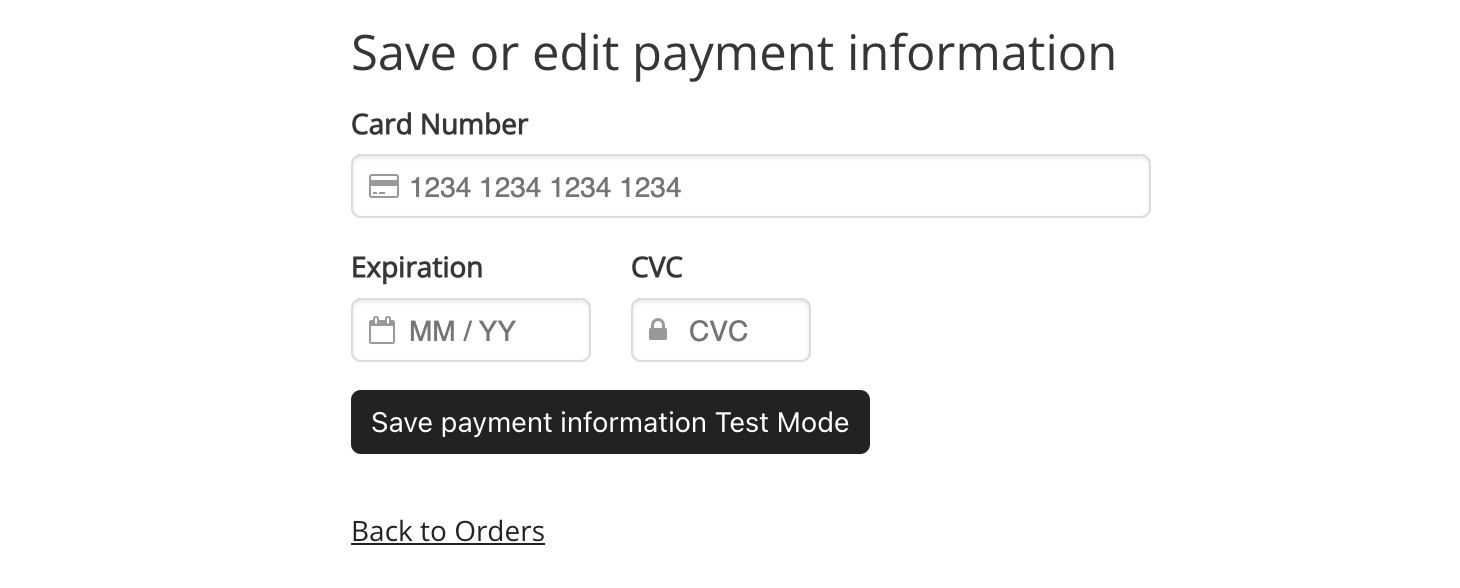
If the user has not previously stored their payment method, the payment method view will present the credit card form:
When this form is submitted, a Stripe customer will be created in Stripe, and a payment method record will be added to the "Payment Methods" data table found in the Data section of the Builder.
Note: Saving payment methods is only possible if the page requires a login. Learn more about logins and registrations here in our article.
You can then use the "Payment Method ID" field value to locate the payment method in your Stripe Dashboard.
Tip: To learn more about payment method records, see our article here.
Updating Payment Information
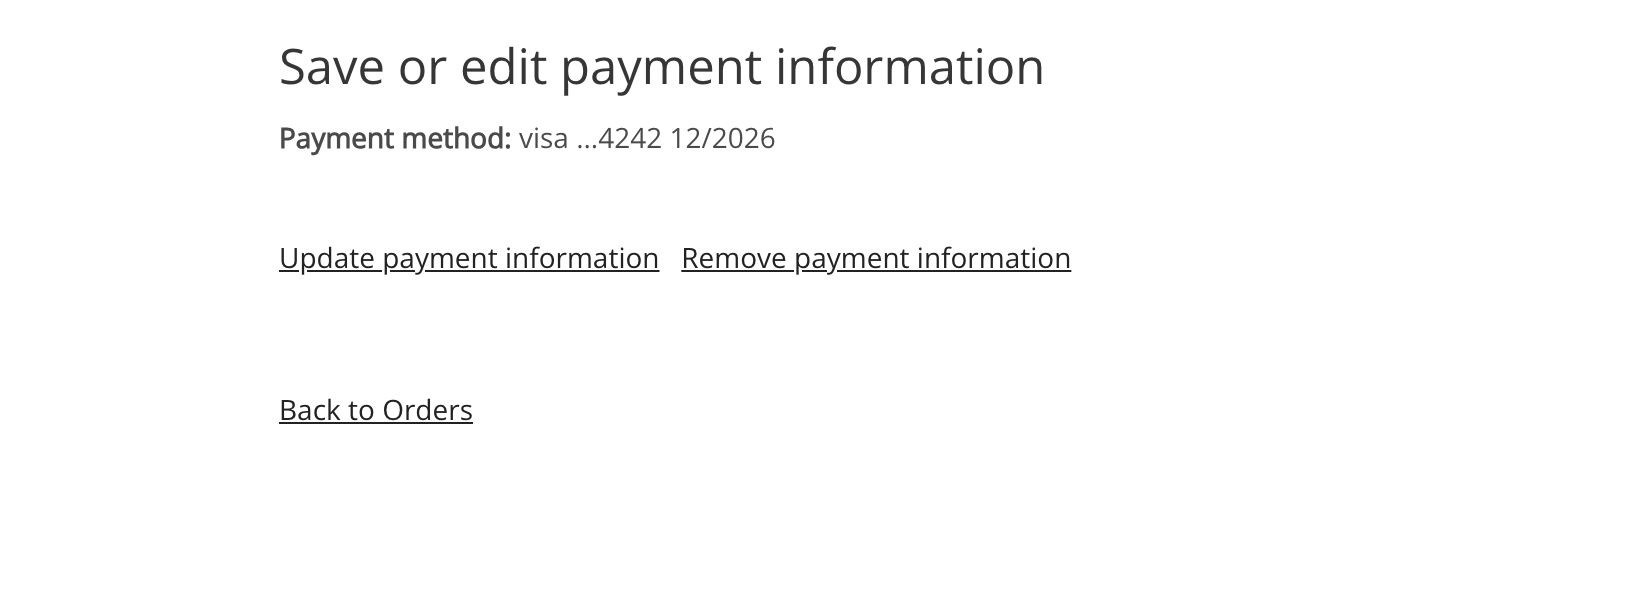
If the user has stored their payment method already, they’ll see a link where they can choose to update or remove their existing payment method:
If the user chooses to update the payment method, they’ll have access to a credit card form:
Removing Payment Information
Using the same link as shared above, if a user selects the "Remove Payment Information" button, they’ll be redirected to the original payment method view with the credit card form:
How To Guides:
/About%20Payment%20Method%20Views/paymentmethod1.png?width=688&height=304&name=paymentmethod1.png)
/About%20Payment%20Method%20Views/paymentmethod2.png?width=688&height=438&name=paymentmethod2.png)
/About%20Payment%20Method%20Views/paymentmethod3.png?width=688&height=395&name=paymentmethod3.png)
/About%20Payment%20Method%20Views/paymentmethod4.png?width=688&height=513&name=paymentmethod4.png)
/About%20Payment%20Method%20Views/paymentmethod5.png?width=688&height=426&name=paymentmethod5.png)
/About%20Payment%20Method%20Views/paymentmethod6.png?width=688&height=426&name=paymentmethod6.png)
/About%20Payment%20Method%20Views/paymentmethod7.png?width=688&height=431&name=paymentmethod7.png)
/About%20Payment%20Method%20Views/paymentmethod9.png?width=688&height=230&name=paymentmethod9.png)
/About%20Payment%20Method%20Views/paymentmethod10.png?width=688&height=255&name=paymentmethod10.png)
/About%20Payment%20Method%20Views/paymentmethod11.png?width=688&height=427&name=paymentmethod11.png)
/About%20Payment%20Method%20Views/paymentmethod12.png?width=688&height=518&name=paymentmethod12.png)
/About%20Payment%20Method%20Views/paymentmethod13.png?width=688&height=426&name=paymentmethod13.png)
/About%20Payment%20Method%20Views/paymentmethod14.png?width=688&height=433&name=paymentmethod14.png)

/About%20Payment%20Method%20Views/paymentmethod18.png?width=688&height=388&name=paymentmethod18.png)
