In the upcoming sections, we will discuss the key workflows and functionalities that you should keep in mind when organizing your data into tables.
The special tables covered in this guide are:
-
Category Tables: The records in this type of table represent categories used in other tables.
-
Attachment Tables: Attach multiple files to a project or assign multiple contacts to a company.
-
Connector Tables: Associate different tables with contextual data, like the quantity of a product in an order’s line item.
-
Movement Tables: Track the movement or transfer of people or goods, such as employees being transferred to a different office.
-
Transitional Tables: These tables are not static. As an order moves through the ordering workflow it shifts from a quote to an order.
Note: This is a companion article to our How to Plan Your Tables guide.
Category Tables
Category tables will allow you to create a more dynamic multiple choice type field in one table by connecting it to another table. The records from that connected table become your dropdown options.
When you add the connection field, the records of the category table appear as the choices.
Category tables are utilized when there is a need to:
-
Create dynamic drop-downs in forms: For example, when preparing a construction estimate, narrow down the product selection by first selecting a product type - lumber, fasteners, paint, etc.
-
“Drill down” into different subsets of data: For example, students can click on different programs to see the classes offered.
-
Use the same set of options across multiple tables: For example, the department category is used for both "employees" and "managers" user roles.
-
Give users the option to edit the categories: Live App users cannot edit multiple choice field options, but they would be able to edit category options. (i.e. when you want your admin to be able to add new product categories).
-
Perform exportable calculations on the categories: (i.e. calculate the number of orders at each stage: quote, in production, delivered, invoice.)
-
Enable group-based access levels or multi-tenancy: (i.e. location managers can only see and edit the inventory at their location.)
Our Product Catalog sample app is a good example of when you’ll need a category table to allow your users to “drill down” through the categories in the Live App.
On the first page, your user can view the categories of products. In this case, it’s pet products.
Then, your user selects a category to see the products in that category. If you select the Toys category, you will see our toy products: a chew toy, a rope toy, a frisbee, and so on.
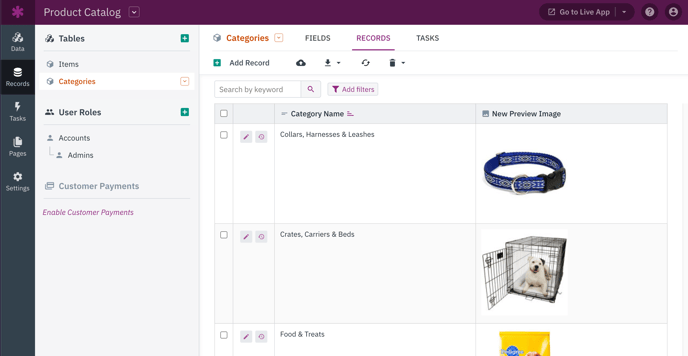
In Knack, these categories are split into their own separate table.
In the Product Catalog demo app, we have tables for Products and Categories. The Category table has only one short text field: Category Name.
Each category record represents a category, so in this app, our category records are: Toys, Grooming, Food & Treats, etc.
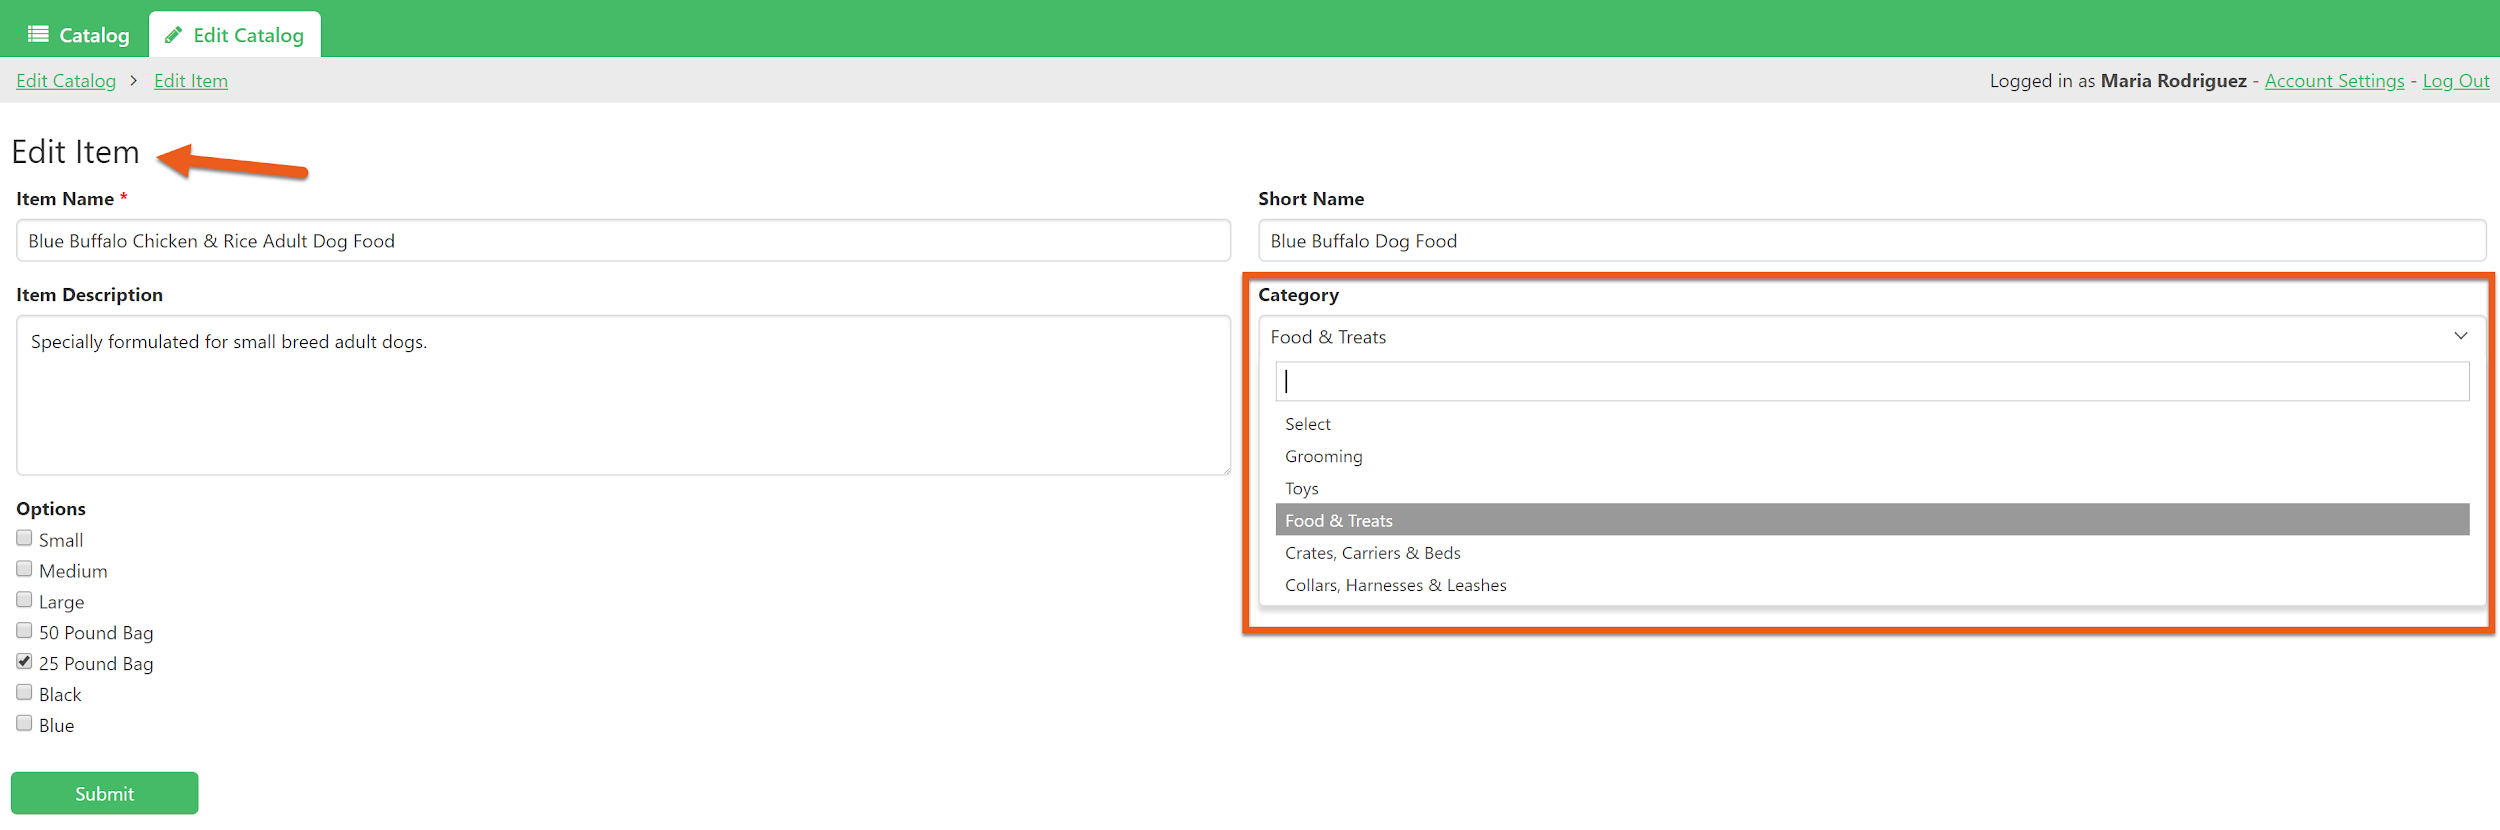
When your Products table connects to your Category table, you’ll have a connection field from which you can select a category for each product in your catalog.

The connection field acts like a dropdown, allowing you to select a category for each product. This determines which products are displayed when a category is selected in the Live App.
Learn More:
Attachment Tables
There are situations where it is beneficial to provide users with the ability to add varying amounts of data to a specific record.
For instance, our Real Estate Listings sample app offers the flexibility to cater to a customized number of photos for each Listing. Each listing can have as few as one or two photos or as many as 20 photos.
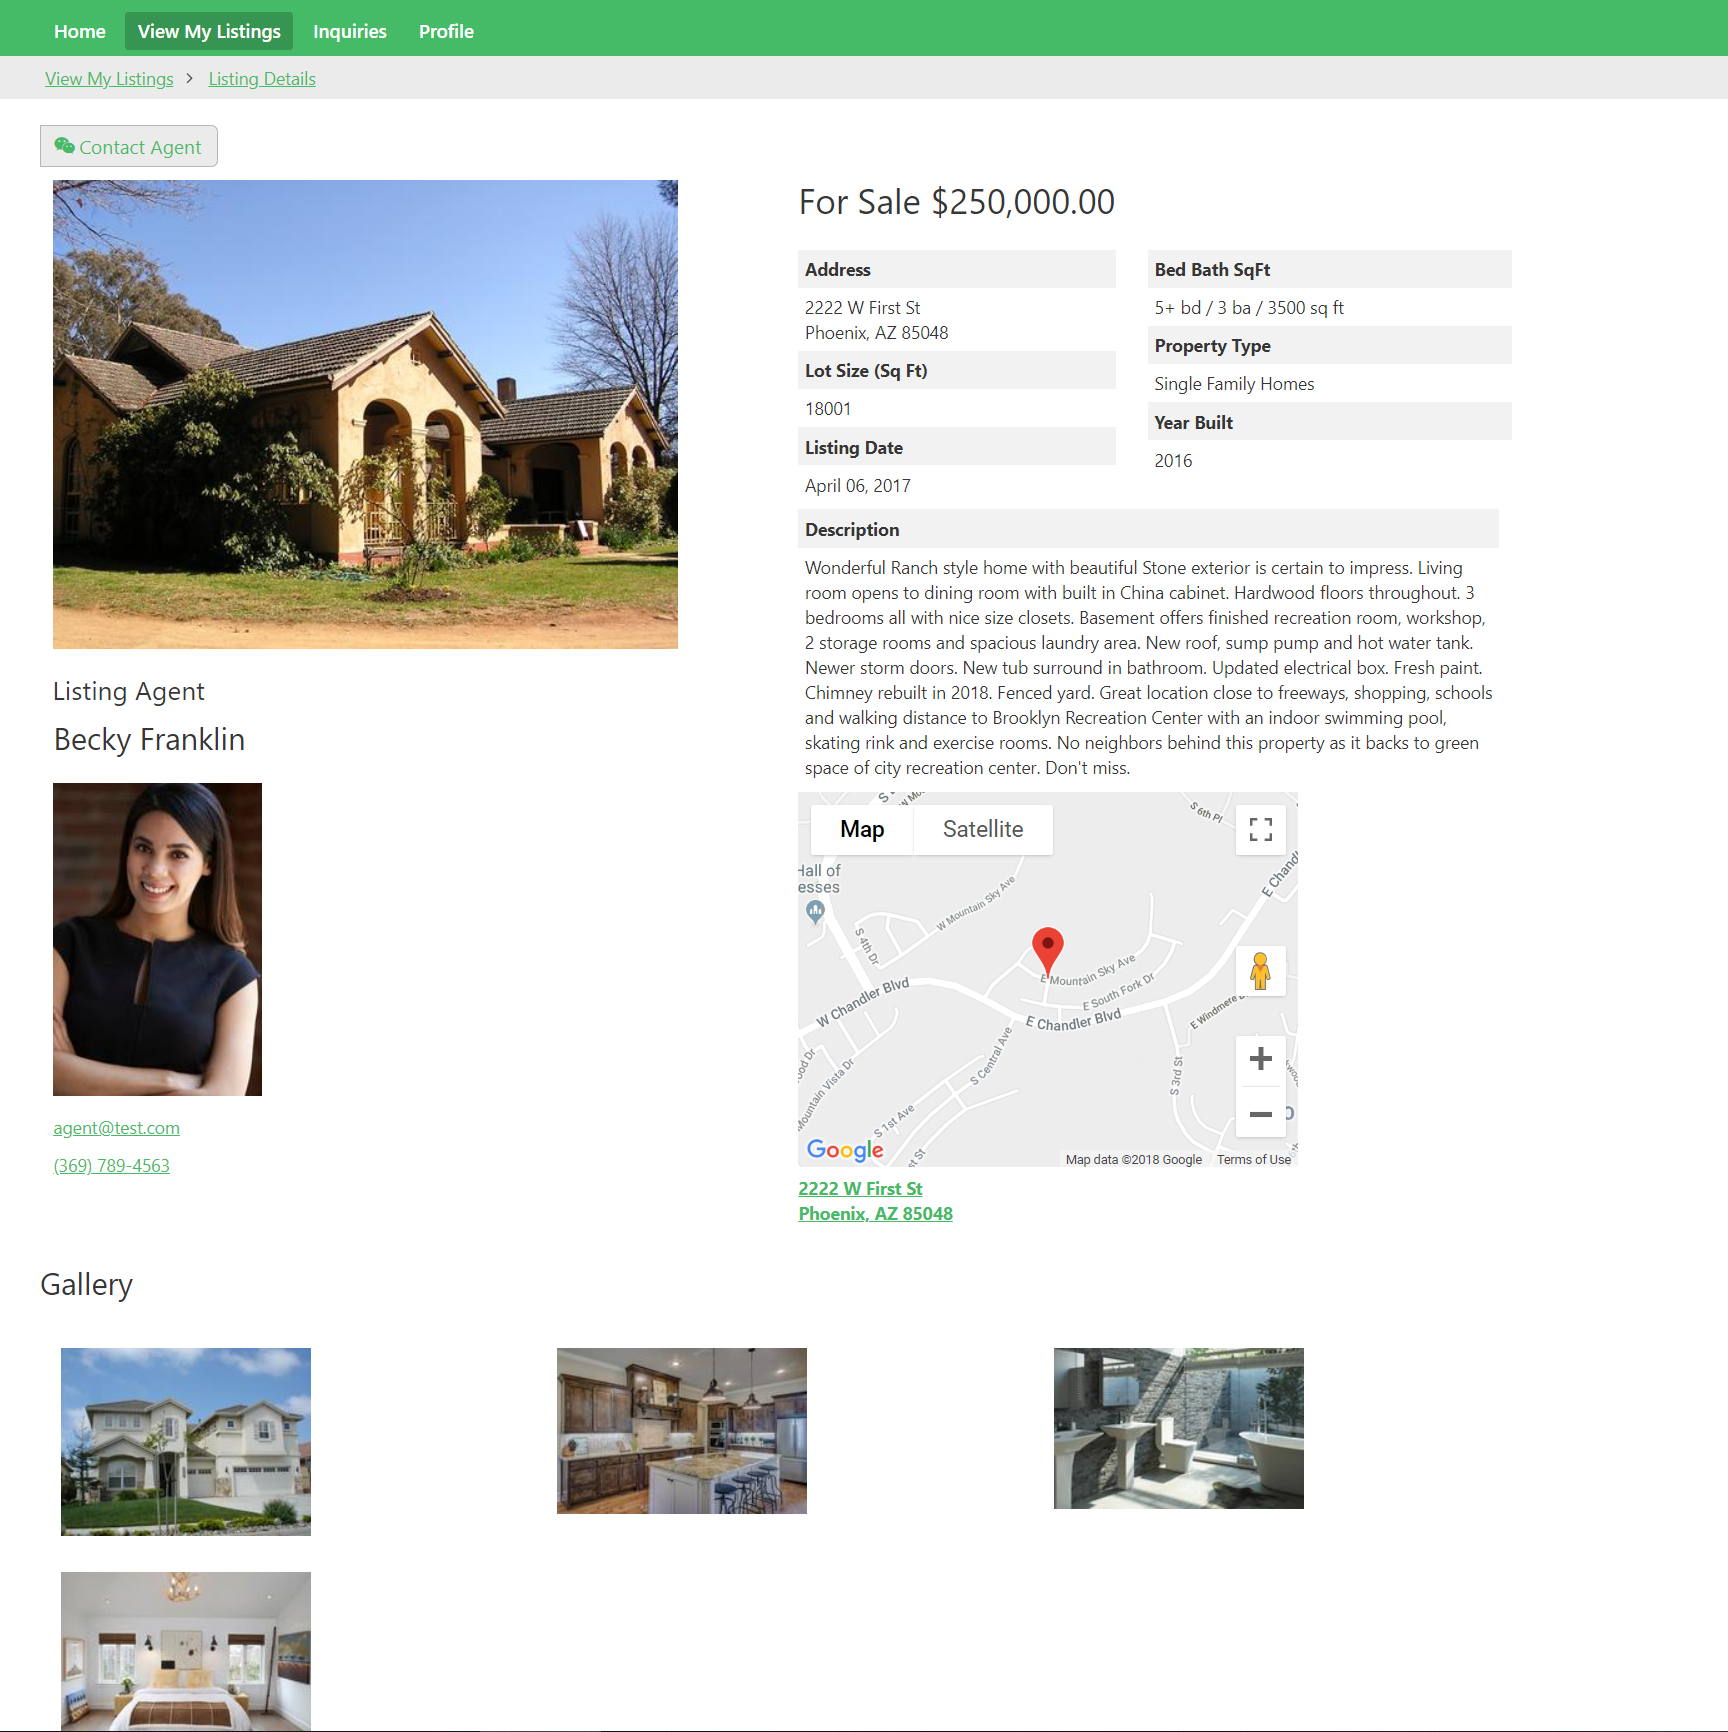
It is not recommended to add 1, 2, or 20 image fields to your Listings table. This approach may result in some Listings having numerous empty fields, while others may not have enough fields to accommodate all their images.
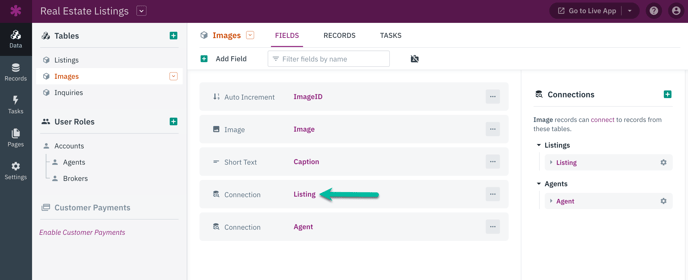
Instead, you can create an independent table named "Images" and establish a connection with your Listings table. This will enable you to have the flexibility of adding as many photos as required for each product.
Here are some additional scenarios where you might want to include one or multiple data types in a record:
-
A job applicant has many previous jobs
-
A project has many files
-
A company has many contacts
In these scenarios, we need two tables:
-
Applicants and Employment History
-
Projects and Files
-
Companies and Contacts
Attachment tables provide the capability to perform calculations on aggregate data. For instance, you can utilize a count formula in the Real Estate Listings table to determine the total number of photos for each listing.
Connector Tables
Certain tables are designed to connect and provide additional contextual data between different types of data.
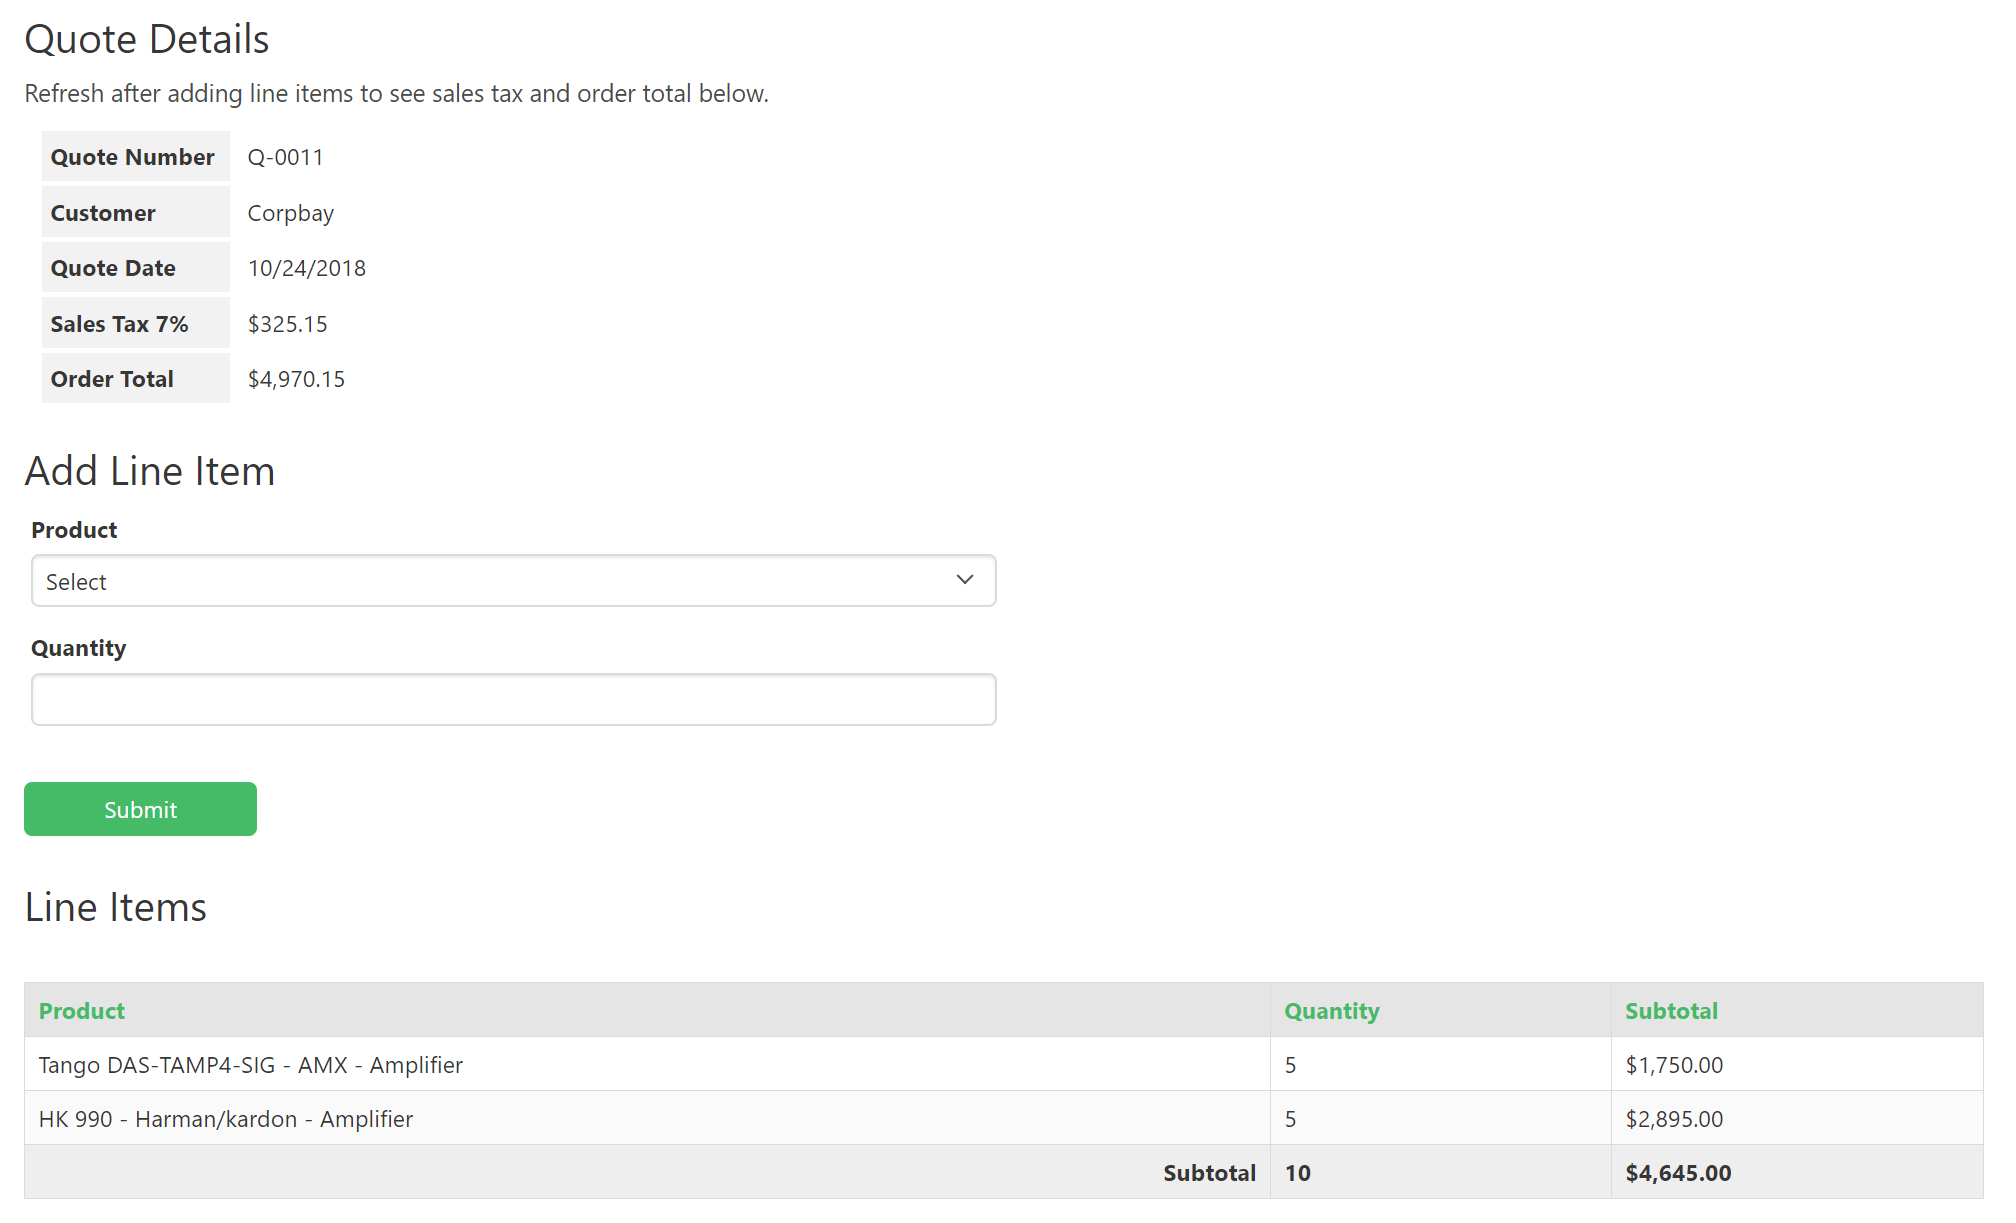
As an example, let's consider an ordering app where you need to add products to an order. If you directly connect the Products and Orders tables, you won't have the ability to specify the quantity of each product.
To overcome this limitation, we introduce another table called "Line Items". This additional table provides you with enhanced flexibility, allowing you to:
- Specify the quantity of each product you want to add to an order.
- Calculate subtotals for each product included in an order.
- Perform order-level calculations such as determining the total order value and the number of products per order.
Tip: You can see what it looks like to use connector tables in our Quotes and Invoices sample app.
The Warehouse Manager sample app also demonstrates the effective use of a connector table. In this app, we have dedicated tables for Warehouses and Products.
The primary goal is to track the quantity of products available at each location. However, it's important to note that this data alone does not provide specific identification for either the Warehouses or the Products.
It's important to note that each table only contains identifying data. The number of products stored in a location does not define the location itself, and a single product type can exist in multiple locations.
To accurately track the quantity of each product at different locations, we utilize the Warehouse Inventory table. This table establishes a connection between the Locations and Products tables, providing real-time information on the amount of a specific product available at a particular location.
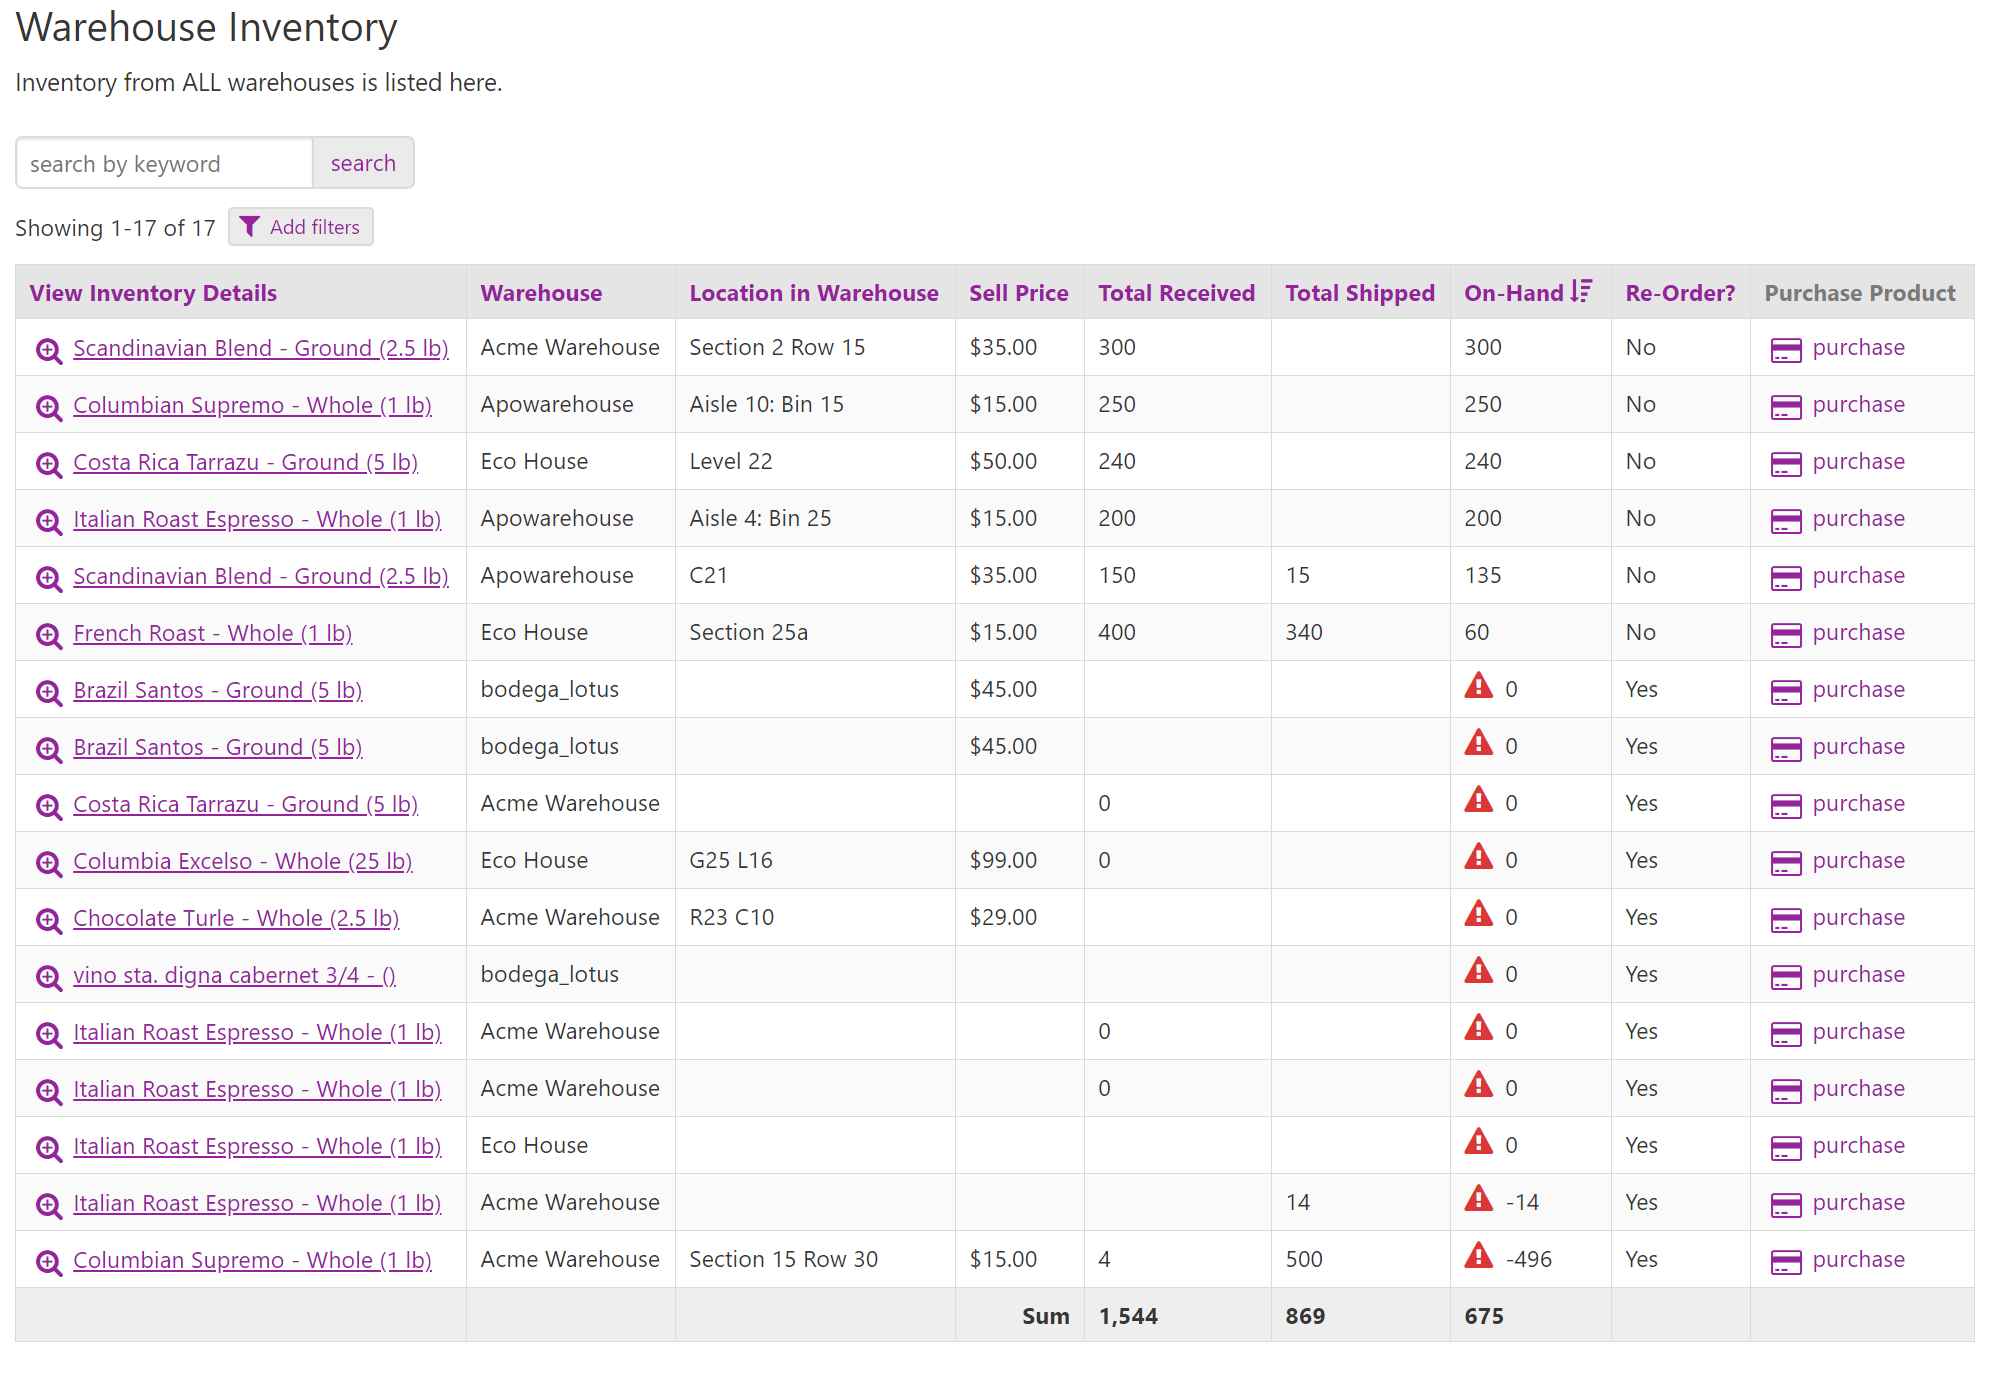
The Warehouse Inventory table provides us with precise information on the quantity of each Product available in every Warehouse.
It also provides the capability to store additional pertinent data concerning that relationship, such as the precise location of the Product within the Warehouse. This is achieved through the utilization of a movement table called Stock Transfers.
Refer to the next section for further details.
Learn More:
Movement Tables
In certain cases, tables are used to track the movement of items, such as products between warehouses. In these situations, our goal is not only to monitor the current location of the product but also to maintain a record of its movement history.
Movement tables serve a similar purpose to connector tables, as they allow you to track additional data such as the product and quantity. However, what sets movement tables apart is that they also include information about the origin and destination of the movement.
For instance, if your organization possesses several warehouses and you wish to monitor the movement of your products between different warehouses, it becomes imperative to employ a Stock Transfer table. This table facilitates the tracking of crucial data points related to the movement, including:
-
Origin
-
Destination
-
The product being moved
-
The quantity of the product being moved

By utilizing this table to track movement, we gain the ability to employ formulas and equations for real-time calculation of the current stock in each location. Without a movement table, such comprehensive tracking would not be feasible.
Other examples of movement:
-
An employee being transferred to another team or office
-
A truck being moved from one construction site to another
-
Whether a book or piece of equipment may be in stock
Transitional Tables
In certain scenarios, there may be data that appears to necessitate division into separate tables, but the task of transferring connected data proves to be a challenge.
For instance, when developing an ordering application, it might be tempting to create separate tables for Orders and Invoices. However, it is crucial to consider the shared data between these tables - the Line Items.
The Line Items represent the products that are added when a quote is generated. Ensuring a seamless connection between a Quote's line items and the subsequent invoice is of utmost importance.
In Knack, there is currently no automated process to transfer a Quote's line items to the subsequent invoice. Therefore, it is more convenient to utilize a single Quotes table in this particular scenario.
The Quotes table includes a multiple choice field that allows you to select the status of a quote, invoice, or paid.
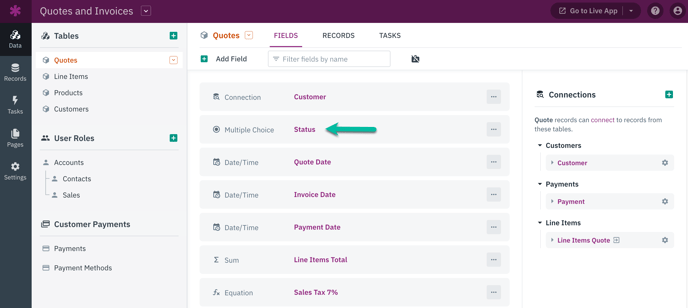
When a new order is created, it initially enters the quote stage. Once the customer accepts the quote, you can simply update the stage to invoice and add the line items accordingly.
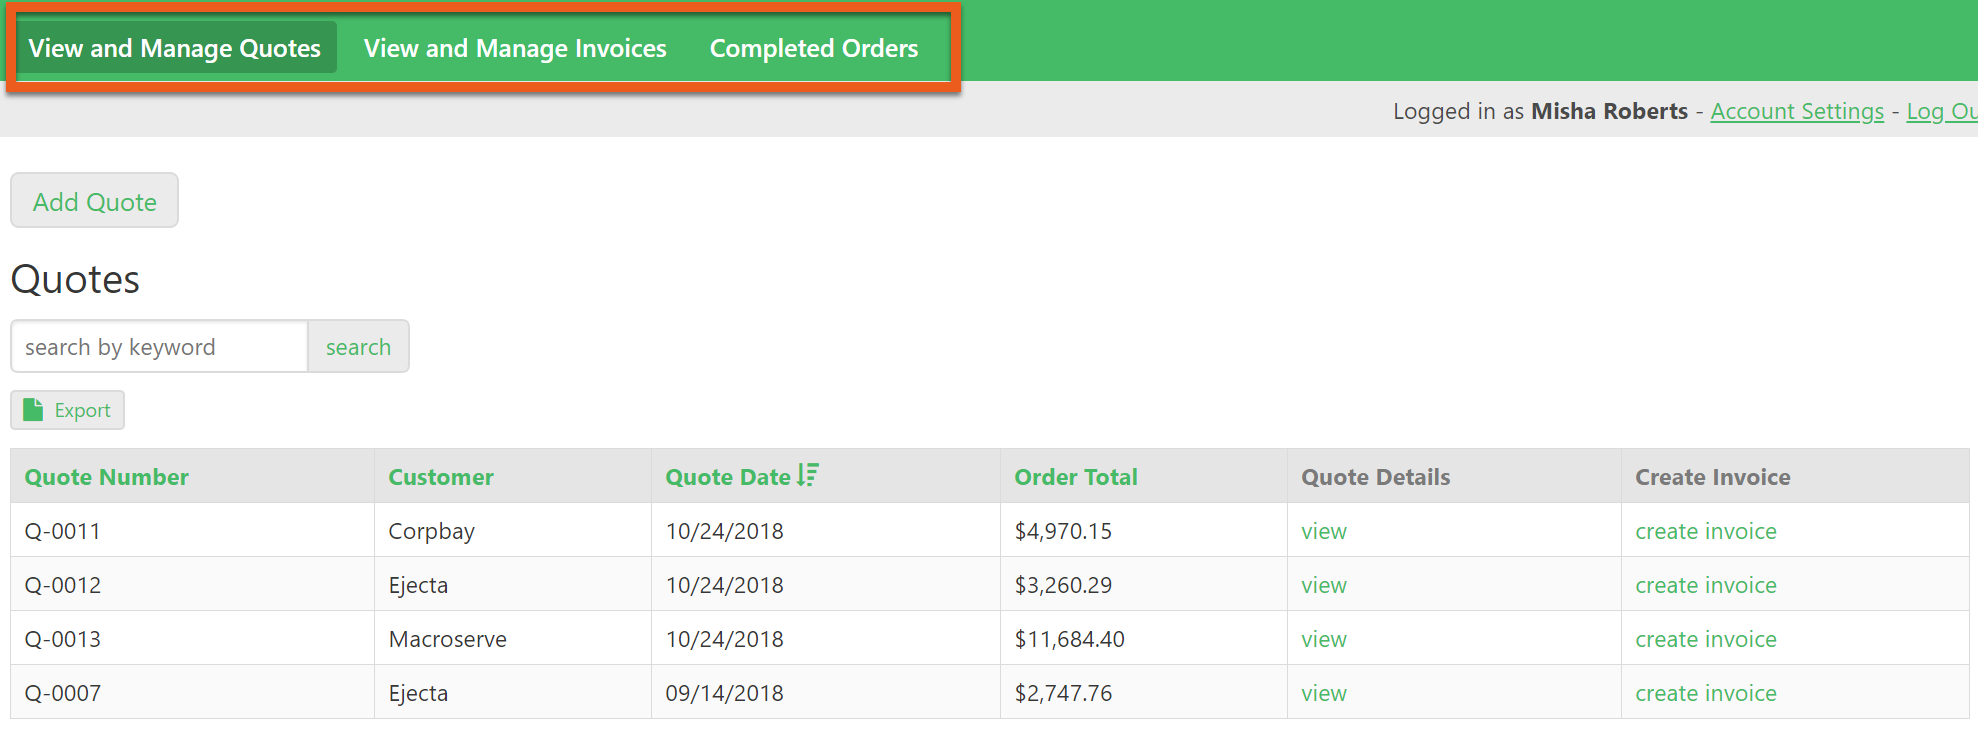
Utilizing the data source of your views, it is possible to create various views that showcase the "Quotes" records that correspond to the three distinct stages: Quote, Invoice, and Paid.
Another scenario where a transitional table can be useful is in an applicant portal. For example, if you require prospective students to submit applications with essays or other supporting documentation, you may want that supporting documentation to automatically transfer to the student's account once they are accepted and enrolled.
To manage student applications, you have the option to create a "Students" user role with a status field that includes different stages such as Applicant, Rejected, Accepted, and Enrolled.
Learn More: