About Your Live App
This article will provide you with an understanding of the fundamentals of utilizing pages and views to create your Live App.
Users will engage with your Knack application through the Live app. Consider the Live App as a website specifically crafted for users to interact with the data you provide them.
In the Pages section of the Knack Builder, you can add visual elements, known as views, that allow your live app to seamlessly interact with your records. Here is an illustration of a Live App page from the Inventory Manager sample app featuring a grid view:
What exactly are views?
Views are organized into pages. Users will start on a designated start page and can easily navigate to other pages to access different views.
Each page can contain one or more views.
A view is a visual element that allows users to interact with the data in your database. These views encompass:
-
Forms to add and update records
-
Grids, Lists, Maps, and Calendars to display multiple records
-
Searches to find specific records
-
Details to view the details of a single record
-
Reports to view summaries and calculations of multiple records
-
Menus to link to other pages
-
Rich Text views are utilized to showcase static content within your interface, such as images and formatted text.
About Pages
Your application begins with a single "Home" page, but you have the flexibility to incorporate multiple pages into your Knack app. To incorporate additional pages into your live app, simply click on the "+" button located to the right of the "All Pages" section in the left column:
/About%20Your%20Live%20App/liveapp2.png?width=688&height=354&name=liveapp2.png)
To get a preview of your live app pages, simply click on the dropdown arrow next to "Using live data" and choose between live data or sample data:
You can also view your pages in your live app by clicking on the "Go to Live App" button or by clicking the Preview button below:
After you've added a new page, you can start adding views to enhance your pages.
Tip: To learn more information on adding and editing pages in your app, see our Working With Pages article.
About Views
The interface starts with a blank start page, which serves as the initial view for users.
In order for users to access and view data in your app, it is necessary to add views to your app pages. As an example, the page below includes two grids, one for viewing Contacts, and another for viewing Proposal Stages:
To begin adding views to a page, simply click on the "Add View" button located in the top menu to add your first view.
Upon clicking the "Add View" button, you will have the option to select a view type from the menu on the left side of the page.
Once you have decided on the type of view you want to add to your live app page, you will be prompted to select the table that the view will be associated with. (Please note that this does not apply to Menu views and Rich Text views.)
After you've added the view, you will be directed to the view's settings where you can customize it according to your preferences.
Tip: To learn more information on adding and editing views, see our About Views article.
Menus and Links
Once you have added pages and views to your Knack app, it's important to provide your users with easy ways to navigate between different app pages. Menus and links provide a convenient way for users to move between various pages in your app.
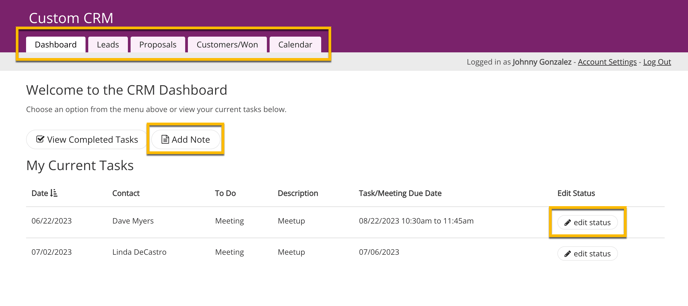
It is crucial to grasp the concept of menus and links in order to effectively construct a multi-page app. Below, we have highlighted a page menu at the top, a menu view above the grid view, and action links to edit the status of the records:
-
The top of the page features a menu called the page menu. This menu displays a link to each parent page, such as your "Dashboard" page.
-
Above the grid, you'll find a convenient link labeled "Add Note." This link represents a menu view that connects to a child page.
-
Within the grid, there is an action link field labeled "edit status". By clicking on these links, users will be directed to a child page that provides additional information about a specific company record.
-
This feature is particularly beneficial if you prefer not to display every field as a grid column or if you want to showcase records connected to the company.
-
Tip: To learn about different page types, see this article here.
Adding User Logins
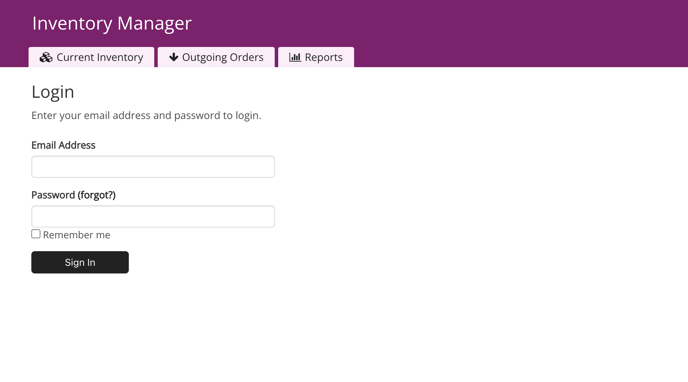
If you want to manage access to your app pages, you might consider adding user logins. If User Logins are enabled, you can easily add logins to your app.
Simply click on the down arrow button next to your page's name and choose "Require Login" from the dropdown menu.
As a result, users will be required to log in before accessing any page.
Tip: To learn more information on logins and registrations, see our Logins and Registrations article.
More Options
Showing Connected Records
With Knack, it's a breeze to connect records. For instance, you can effortlessly configure your database so that each Contact record is linked to a corresponding Company record.
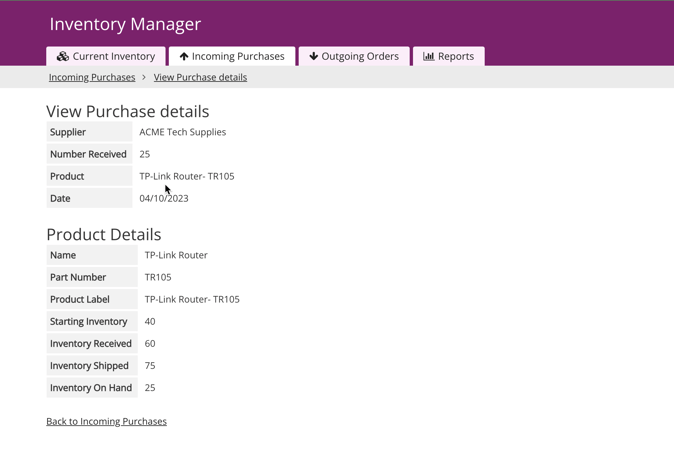
After connecting your records, it becomes easy to showcase them in your pages and views. For example, you might want to display all the Products that are associated with a particular Purchase:
Simply click on the "Add View" button on any details or edit page in the Builder, and Knack will provide you with options to display the connected records:
You can easily display the connected records with a view as Knack recognizes the connection between Purchases and Products in the Inventory Manager sample app.
Tip: To learn more about displaying connected records, see our Combining Fields from Connected Records in Views article.
Live App Design
You can also customize the look and feel of your Live app using Knack's live app design settings when visiting the app's settings:
Tip: To learn more about utilizing the live app design options, see our article here.
/About%20Your%20Live%20App/liveapp1.png?width=688&height=432&name=liveapp1.png)
/About%20Your%20Live%20App/liveapp3.png?width=688&height=325&name=liveapp3.png)
/About%20Your%20Live%20App/liveapp4.png?width=688&height=311&name=liveapp4.png)
/About%20Your%20Live%20App/liveapp5.png?width=688&height=481&name=liveapp5.png)
/About%20Your%20Live%20App/liveapp6.png?width=688&height=405&name=liveapp6.png)
/About%20Your%20Live%20App/liveapp7.png?width=688&height=289&name=liveapp7.png)
/About%20Your%20Live%20App/liveapp8.png?width=688&height=313&name=liveapp8.png)

/About%20Your%20Live%20App/liveapp10.png?width=688&height=352&name=liveapp10.png)


/About%20Your%20Live%20App/liveapp13.png?width=688&height=449&name=liveapp13.png)
/About%20Your%20Live%20App/liveapp14.png?width=688&height=352&name=liveapp14.png)