This article covers the following topics:
To ensure a smooth start with your app, it's important to have a clear grasp of how the Knack Dashboard and Builder function. This article will provide you with all the essential information you need to know before diving into your app.
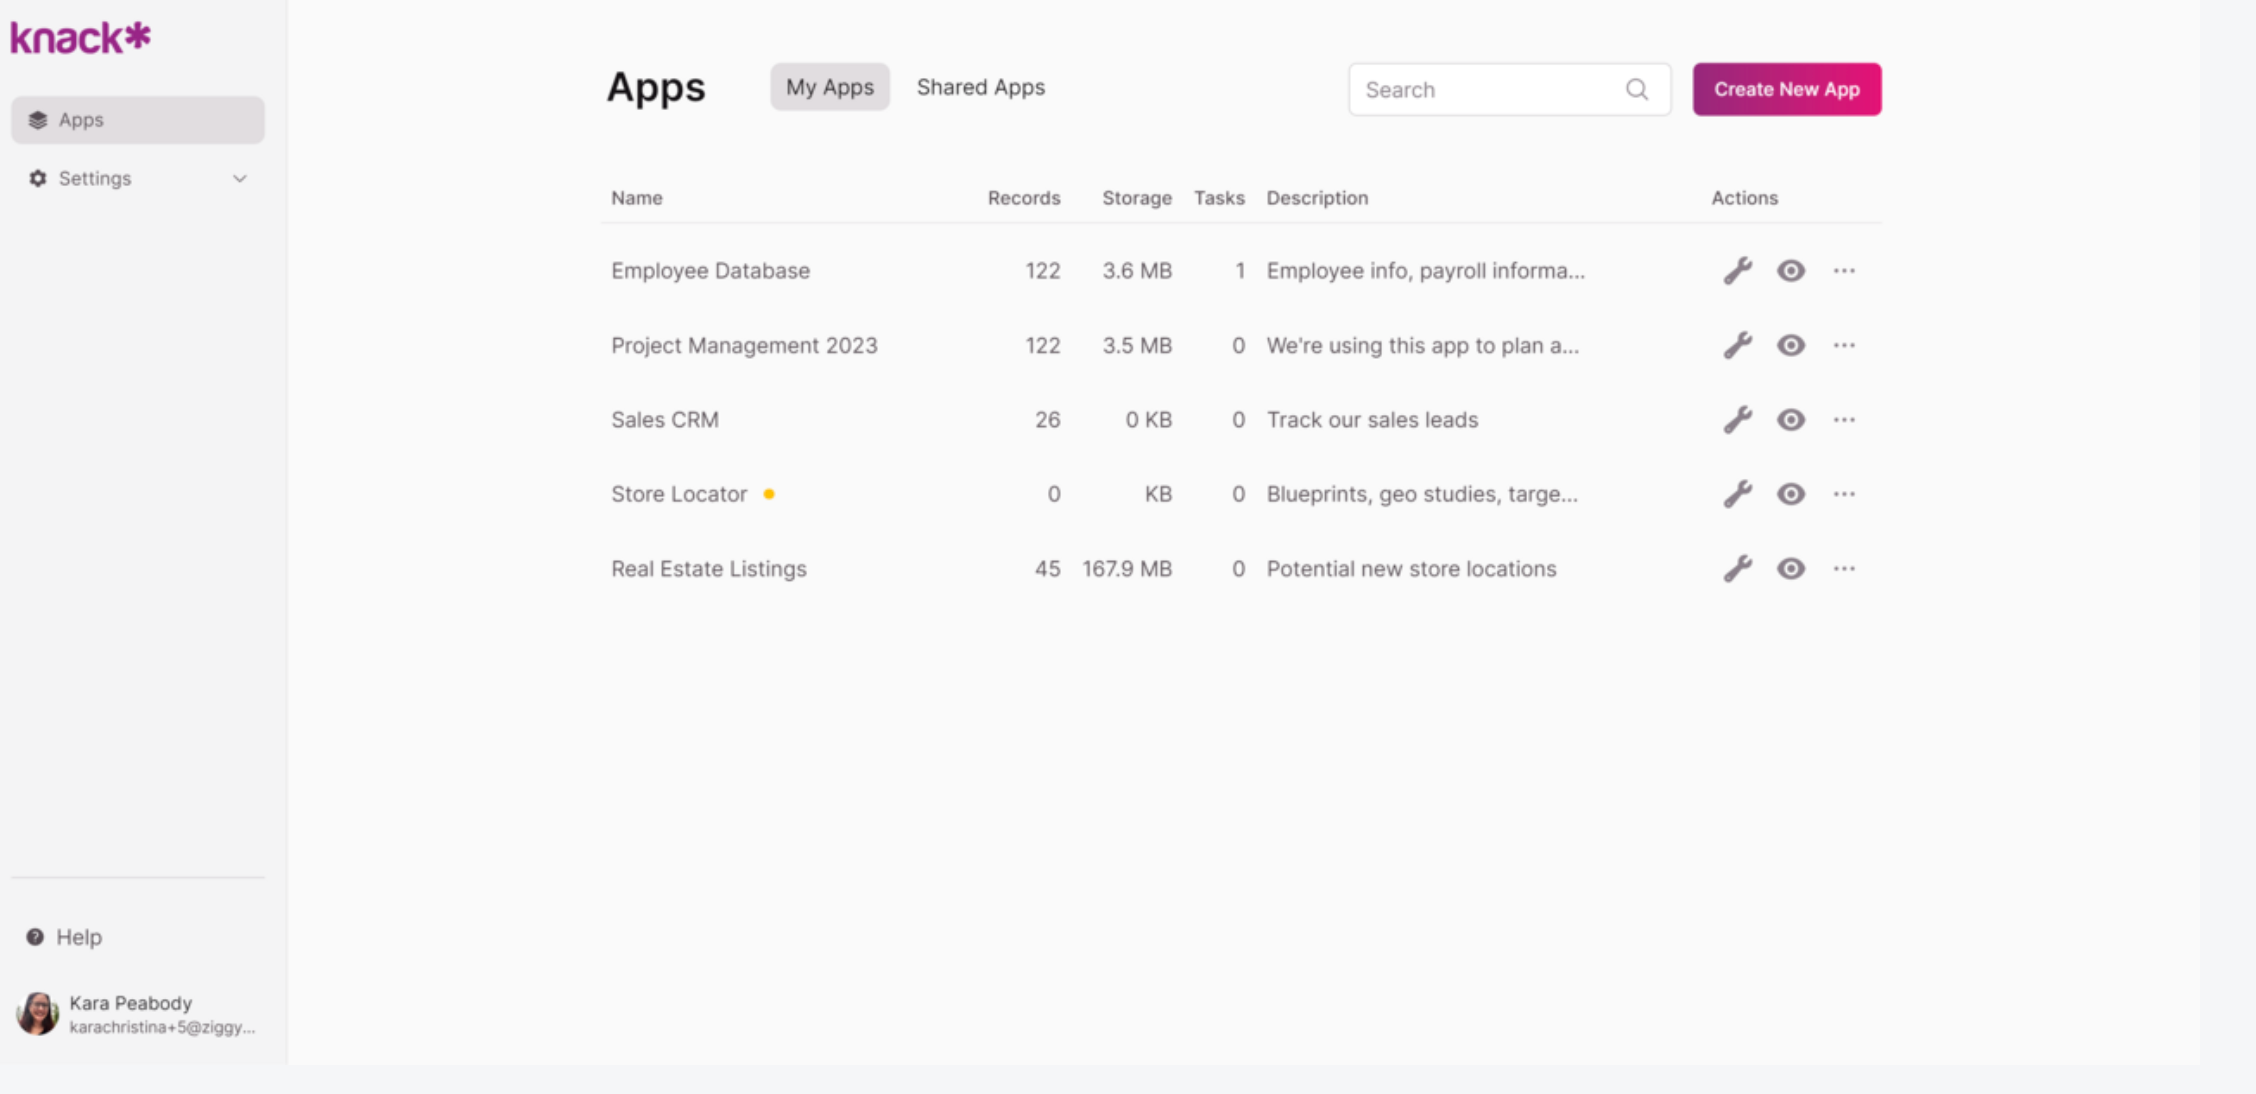
The Knack Dashboard
The Dashboard serves as the central hub for your Knack experience. It acts as your Knack home page, giving you the ability to effortlessly create new apps, manage app settings, and easily share apps with other builders.
In the Apps tab, you have the ability to view and manage your current apps, as well as add new apps and access apps that have been shared with you. Additionally, you will find a comprehensive overview of your plan usage.
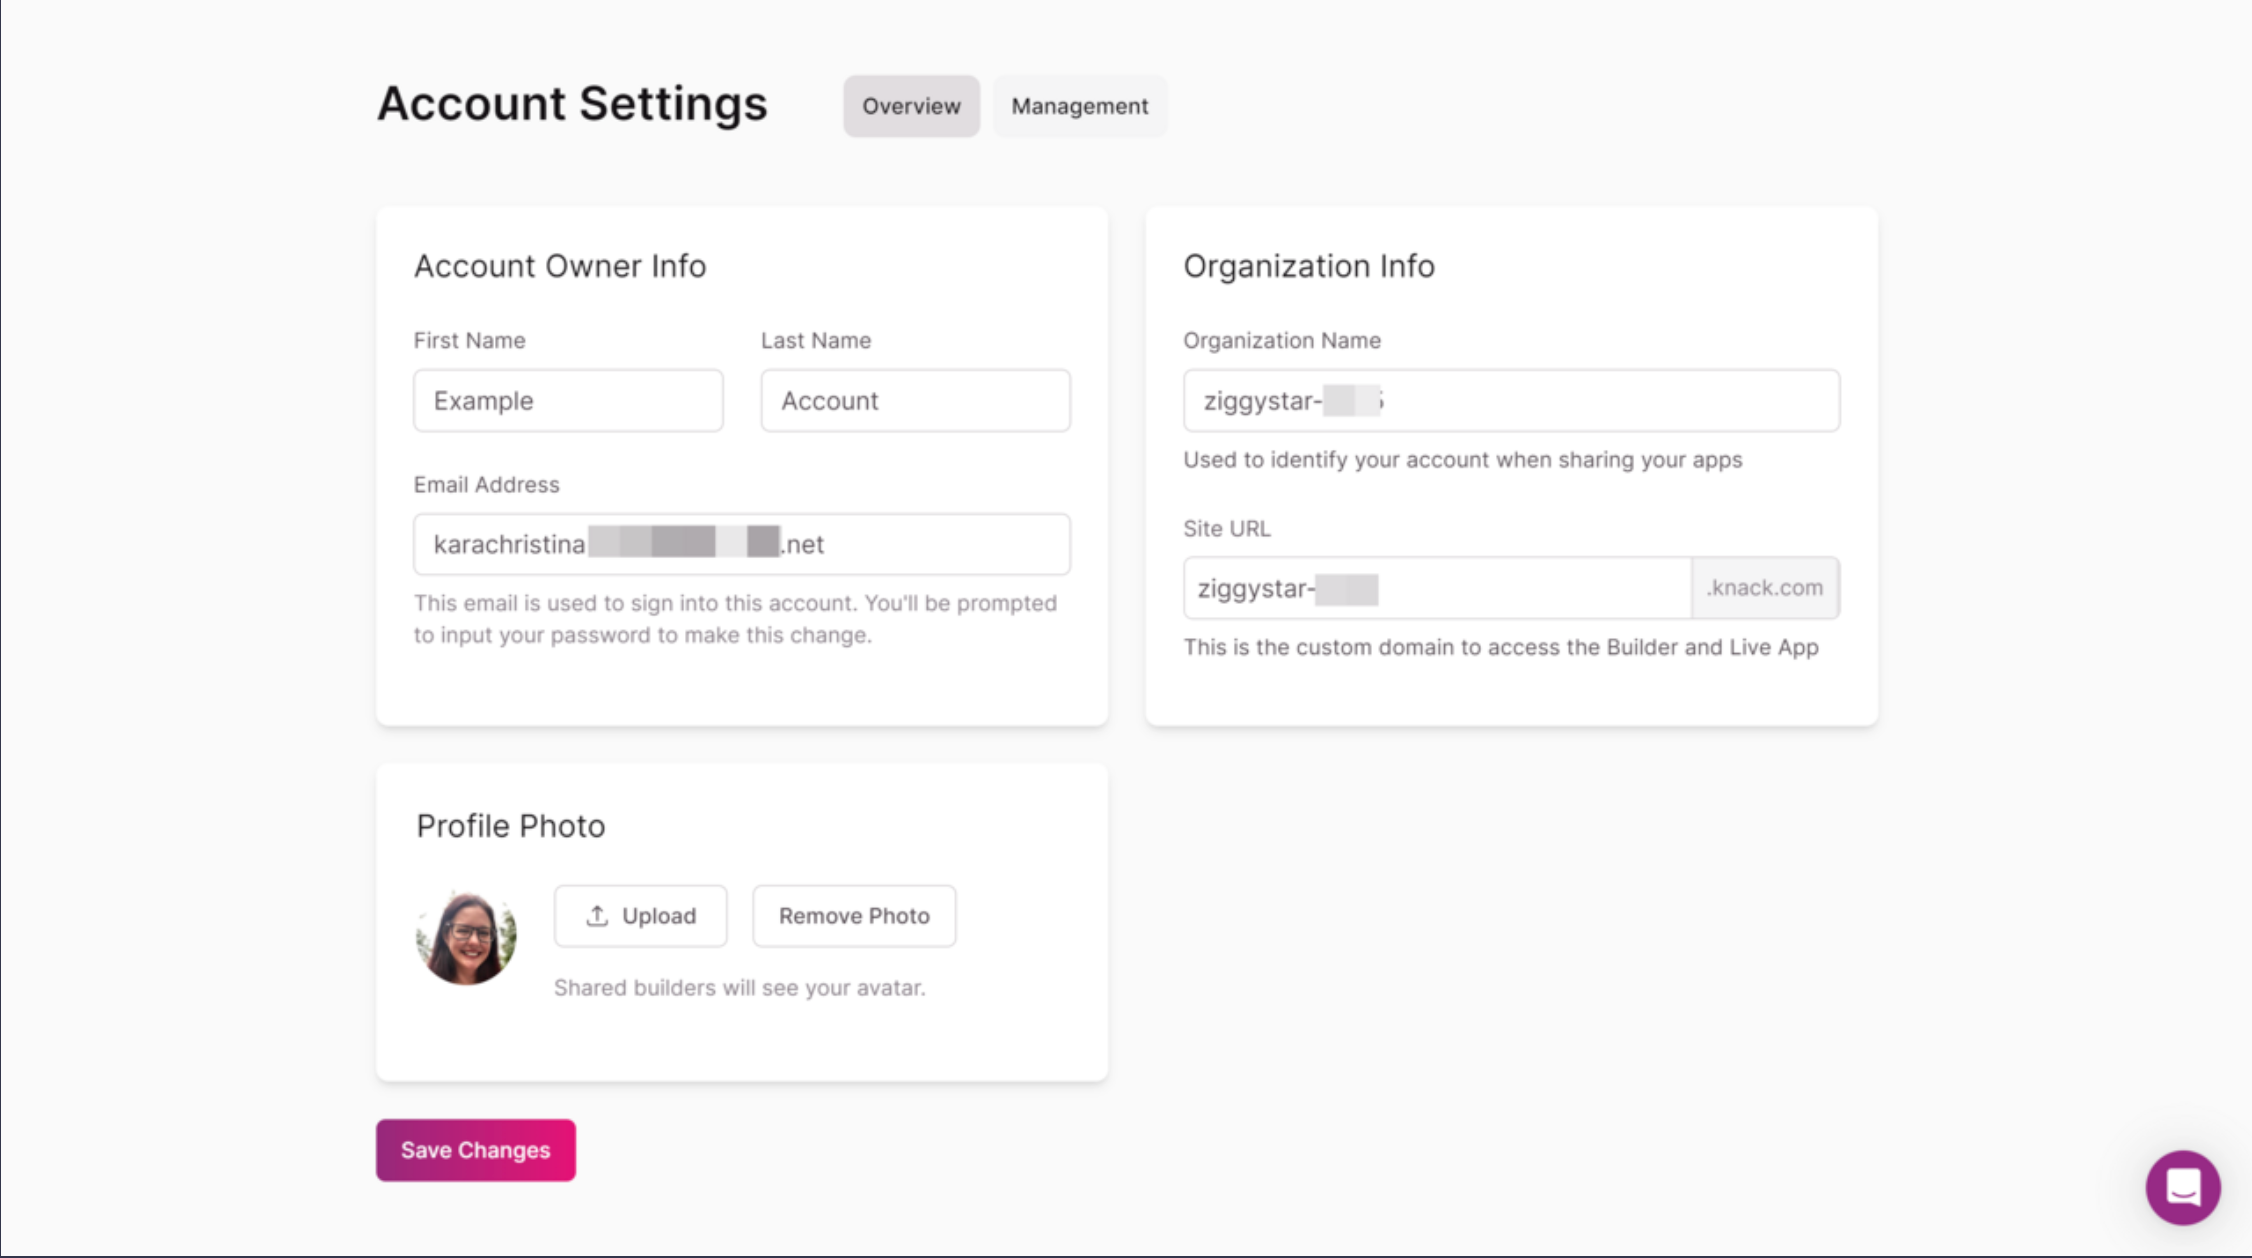
Account Settings
In the Account Settings tab, you have the option to customize your account name and URL in the "Overview" section. This will be reflected in the URLs of all your apps that are not embedded.
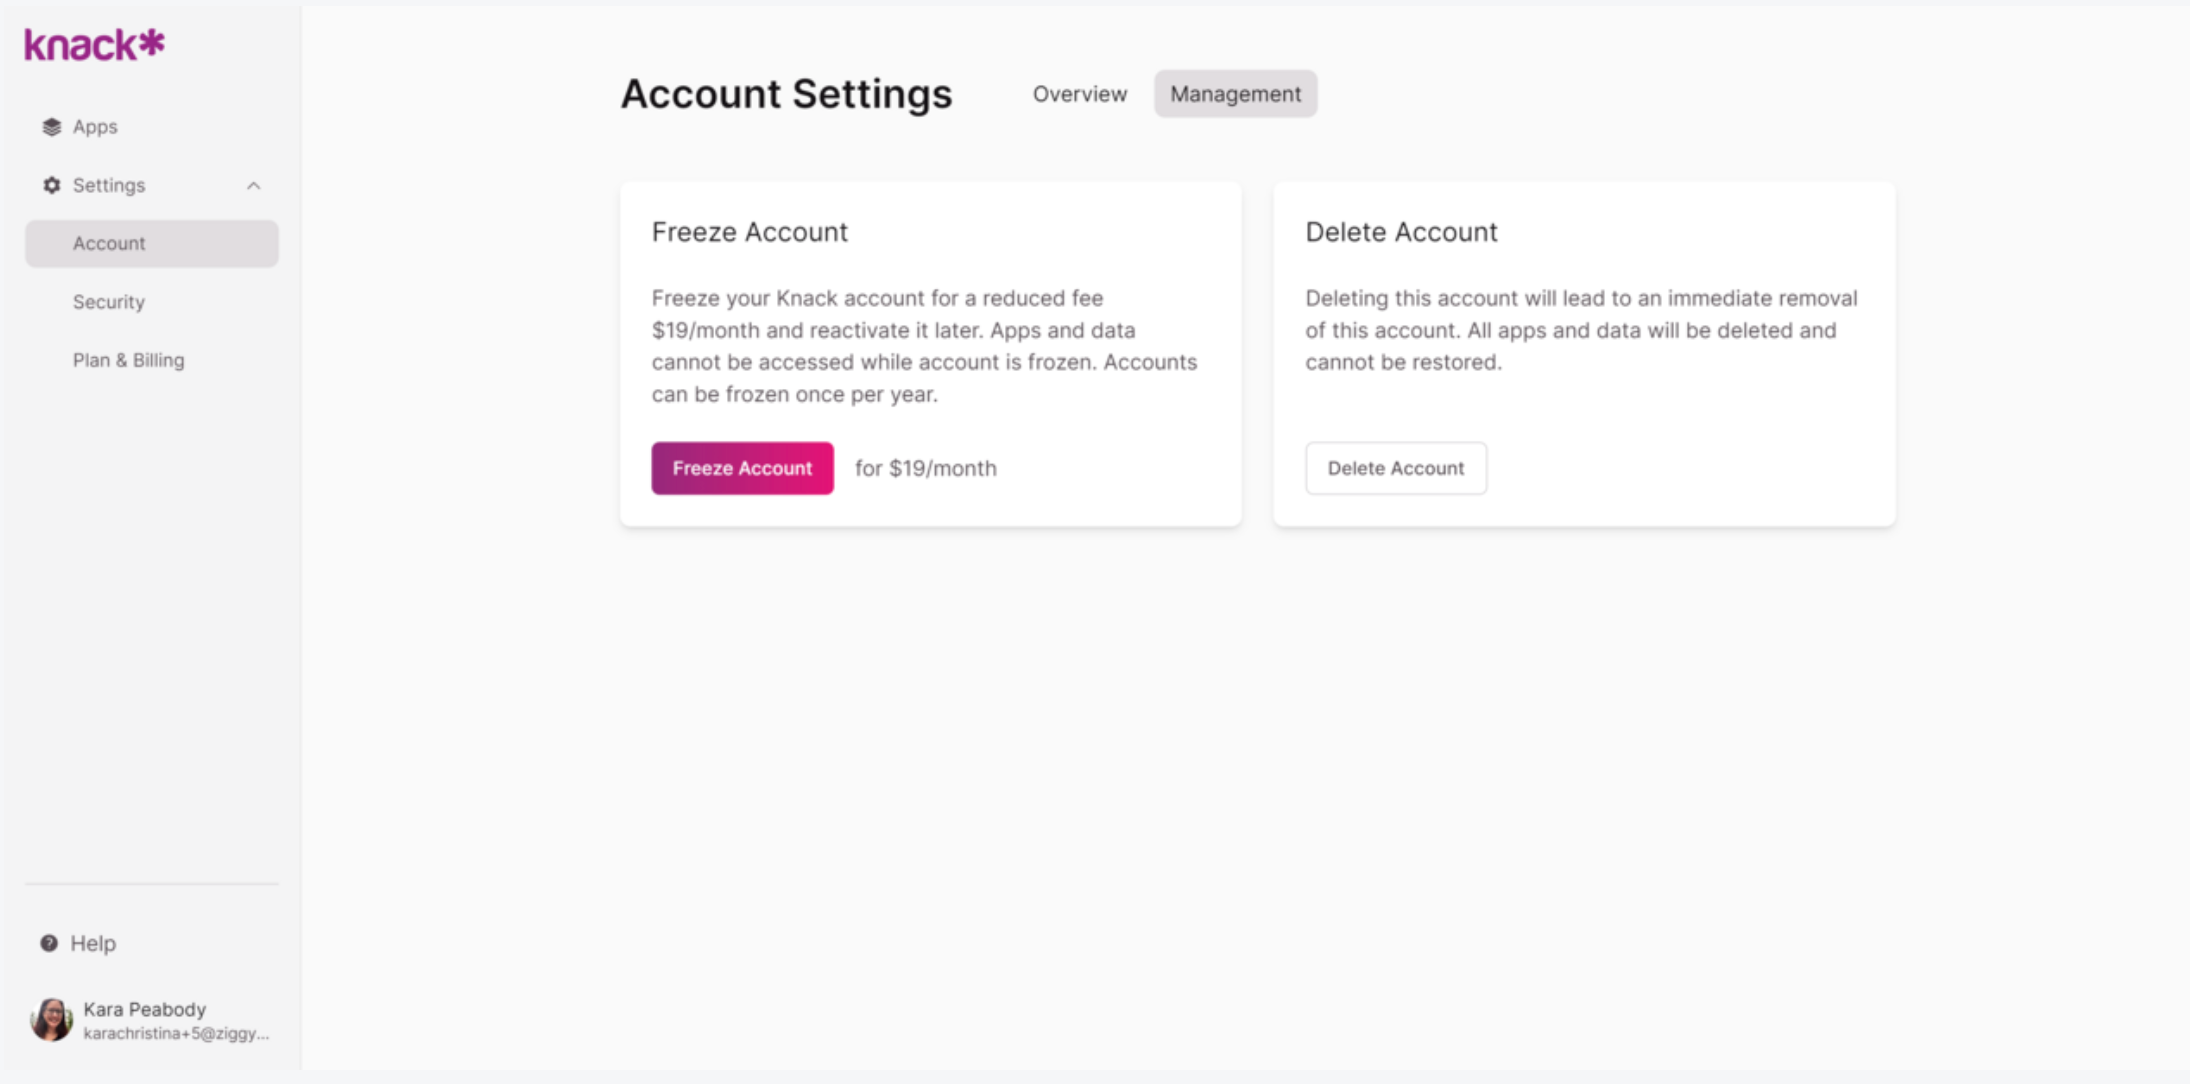
Additionally, you can temporarily freeze or delete your account from the Accounts section once you access the "Management" tab.
Plan & Billing
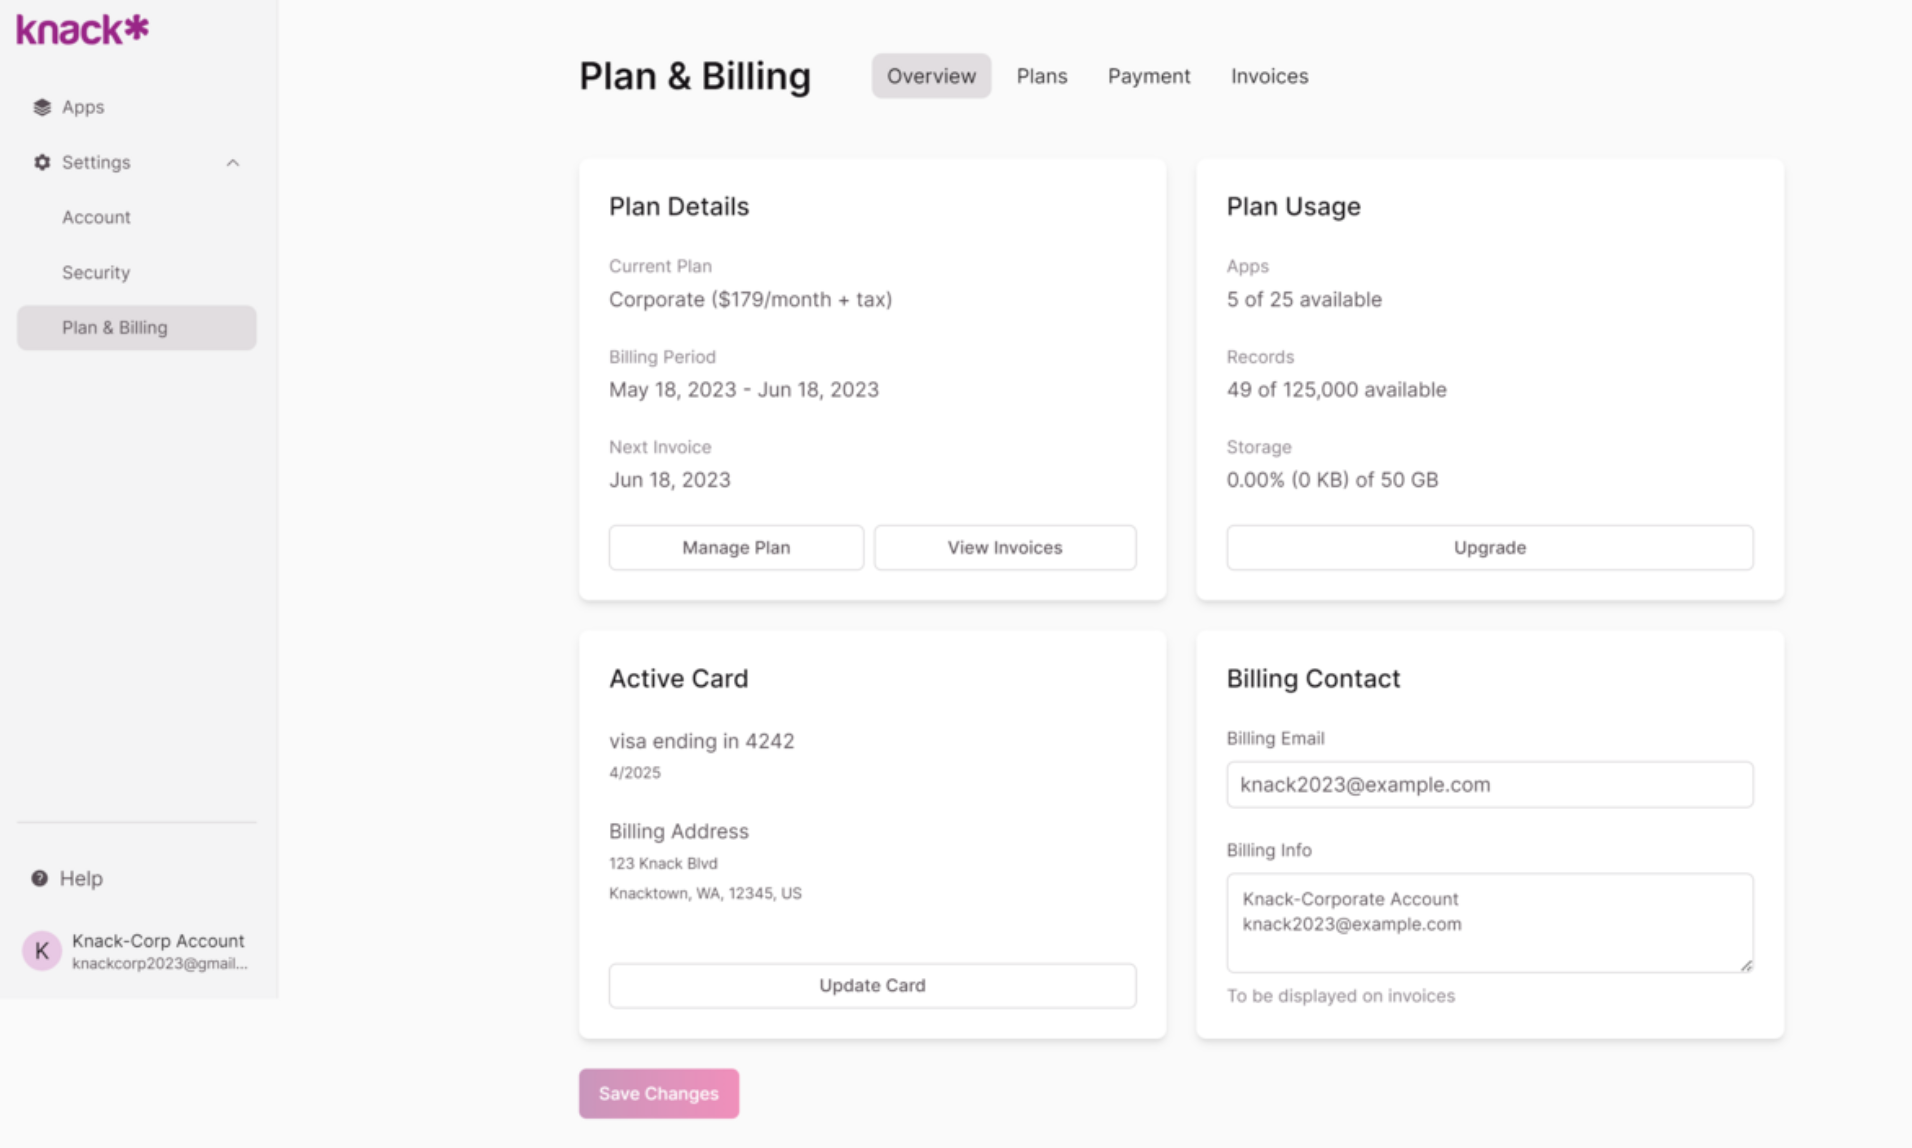
Lastly, the Plan & Billing tab provides you with the ability to effortlessly handle your Knack billing details. From this tab, you can easily update payment information, access past invoices, manage your plan, edit your billing contact information, and view your plan usage.
/The%20Knack%20Dashboard%20and%20Builder/dashboard%26builder5.png?hsLang=en)
You also have the option to access the Knack Dashboard by simply clicking on the Knack logo next to the name of your app.
/The%20Knack%20Dashboard%20and%20Builder/dashbboard%26builder6.png?hsLang=en)
The Knack Builder
The Builder is the central hub where you can find all the tools and features necessary to create the Live App experience that you envision. Whether you're starting a new app or working on an existing one, the Builder is where you'll design your database and build your pages to bring your app to life.
/The%20Knack%20Dashboard%20and%20Builder/dashbboard%26builder.png?hsLang=en)
The Data section in your Builder is where you construct the structure of your app and determine how your app's data will be organized. This is achieved through the use of tables, user roles, and connections.
In Knack, data is organized into groups known as tables. Imagine a table as a spreadsheet or a database table. Your app's tables are conveniently listed on the left-hand side of the data section.
Each table consists of multiple fields that define specific attributes of the table, much like columns in a spreadsheet. Knack offers a variety of field types that can be added based on the type of data you are managing.
Knack apps also provide the capability to create user roles, which allow you to define groups of users who can access your app. User roles function in a similar way to tables with fields.
/The%20Knack%20Dashboard%20and%20Builder/dashboard%26builder7.png?hsLang=en)
-
Tables: The tables are conveniently listed on the left side. To view, edit, or add new fields, simply click on a table.
-
You can edit the settings, copy or delete a table by clicking the drop down arrow next to the table name. If you want to add a new table, simply click the "+" button.
-
-
User Roles: All the user roles for your app are conveniently listed in this section. You can easily add or edit fields for user roles, just as you do with tables.
-
It's important to note that user roles have several fields that are essential and cannot be deleted, including Name, Email, Password, User Status, and User Roles.
-
-
Payments: If you choose to enable e-commerce on your app, you will have access to payment tables where you can easily view and manage all payments made within your app.
-
Fields: On the right side of the Builder, you will find a list of all the fields for the selected table or user role.
-
To edit a field, simply click on the field box or click the "..." more icon to reveal additional options. If you want to add a new field, just click the "+ Add Field" button located in the top menu.
-
Records
You can easily access and manage all the records for each table and user role in the Records section of your Builder. Whether you want to add records directly or use forms in your Live App, this section provides you with the necessary tools to handle your data efficiently.
To access the records in a table, simply navigate to the Records section of the Builder and choose one of the tables or user roles.
/The%20Knack%20Dashboard%20and%20Builder/dashboard%26builder8.png?hsLang=en)
-
To manually add records, simply click on the "Add Record" button.
-
At the top of the page, you'll find a toolbar that offers various options for managing your records. These options include importing or exporting records, running a batch update, or deleting records.
-
To make changes to a record, simply click on the field you want to edit.
Tip: To learn more about working with the Data and Records section of the Builder, see our article here.
Pages
The Pages section of the Builder is where you have the opportunity to design and customize the visual elements of your app. This is where you have the power to determine how your data will be showcased and organized in your Live App.
To achieve this, you have the ability to incorporate a variety of views into your app, including forms, grids, lists, and calendars.
Pages & Views
Each page in your app consists of views that determine how your data is presented and controlled by your users. These views are designed to seamlessly integrate with the app's structure and data that you have defined in the Data and Records section of your Builder.
Different types of views are available, such as:
-
Forms to add or edit records
-
Grids, lists, and calendars to display multiple records
-
Searches to find specific records
-
Details to view a specific record
-
Reports to view summaries and calculations of multiple records
-
Payment Method and Payment views to allow users to submit payments/update their payment method.
In the Pages section, you will find a comprehensive list of all your pages displayed in a page tree on the left side, along with a preview of your selected page on the right. As you continue building your pages, the preview will automatically update to show you the most recent changes you have made.
/The%20Knack%20Dashboard%20and%20Builder/dashboard%26builder9.png?hsLang=en)
-
The list of pages is conveniently located on the left side and displayed in a hierarchical structure. You can easily select and expand starting pages to reveal the connected child pages.
-
To add a new page, simply click on the "+" button to the right of "All Pages".
-
-
Select a specific page to preview how it will appear in your Live App. In the above example image, the page has a Grid view showing Service records in the Customer Payment Portal app.
To modify a view in the page preview, simply hover over it and you'll have options to move, copy, edit, or delete the view. When you choose to edit the view, the toolbox will appear on the left side of the Builder, providing you with the necessary view settings.
An important aspect to consider is that each view corresponds to fields from one of your tables. For instance, you have the ability to manage and customize which fields from the Customers table are displayed as fields in the Details view.
/The%20Knack%20Dashboard%20and%20Builder/dashboard%26builder10.png?hsLang=en)
Each view works with records from a specific table. When you add a new view, you can choose which table you want that view to work with.
/The%20Knack%20Dashboard%20and%20Builder/dashboard%26builder11.png?hsLang=en)
Tip: See the following articles to learn more on working with pages and your Live App.
Tasks
The Tasks section in the Builder allows you to effortlessly add and manage scheduled tasks for your tables and user roles. These scheduled tasks can automate record updates, insert connected records, or send custom emails based on specific pre-defined criteria at a set schedule of daily, weekly, or monthly intervals.
Note: Tasks can be accessed with a Pro plan or higher. They are automatically enabled when you upgrade to a plan that includes Tasks.
For more information, please visit our pricing page.
/The%20Knack%20Dashboard%20and%20Builder/dashboard%26builder12.png?hsLang=en)
To access or add a task, simply select a table or user role from the right side of the Builder. Any existing tasks will be displayed on the right side of the Builder.
To add a new task, click on the "Tasks" button in the top navigation and then select "Add Task".
Tip: Learn more on using tasks with your app here.
Settings
The Settings section of your Knack Builder is where you can configure settings that are specific to the app you are currently working on. Here, you have the ability to manage basic settings such as the App Name and URL, as well as incorporate custom code into your app.
/The%20Knack%20Dashboard%20and%20Builder/dashboard%26builder13.png?hsLang=en)
-
App Settings: In the App Settings section, you have the ability to manage important details such as the name of your app, as well as security settings, view configurations, and map provider options.
-
Live App Design: The Live App section provides you with a range of options to personalize the appearance and user experience of your app. You can easily customize design settings for buttons, page layout, text, and headers to create a unique and visually appealing app.
-
User Logins: In the User Logins section, you have the capability to enable user access and logins for your app, and also to effectively manage the security settings for your Live App.
-
E-Commerce: The E-Commerce section provides you with the capability to activate e-commerce and effectively handle payment processors, enabling you to securely process payments within your Live App.
-
API & Code: In the API & Code section, you have the ability to incorporate custom JavaScript and CSS into your app. Additionally, this section provides you with access to your App ID and API key.
-
Embed: In this section, you have the ability to generate embed codes that allow you to seamlessly integrate your app into an external web page.